


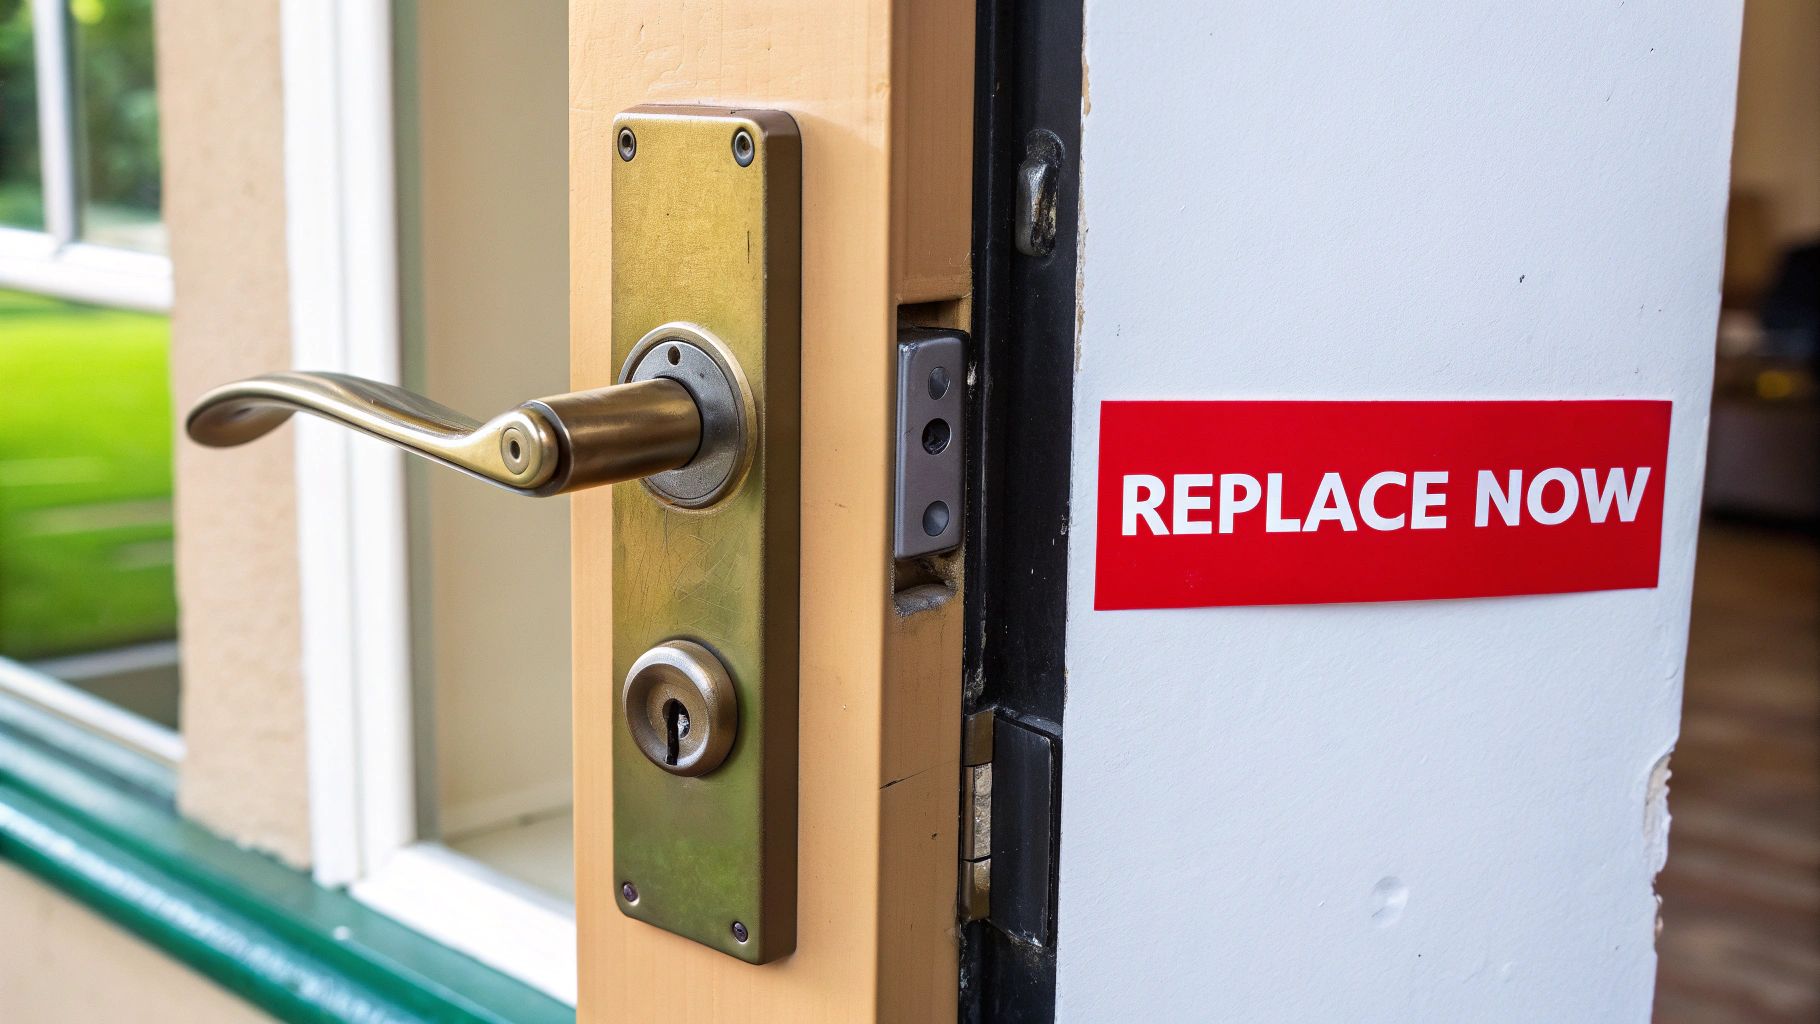
It’s easy to ignore a finicky door handle until it breaks completely, usually at the worst possible moment. But recognizing the early warning signs of wear can save you a lot of frustration. A handle that sags, feels loose, or has a sticky latch isn't just an inconvenience—it's a clear signal that the internal parts are on their way out, which could affect your home’s security and your daily routine.
Knowing When to Replace Your Door Handle
Before you grab your screwdriver, it's worth taking a moment to figure out why you're swapping the handle. Are you fixing something that’s broken, or are you just ready for an aesthetic change? Pinpointing your motivation will help you pick the right replacement hardware and tackle the job with a clear purpose.
Common Signs of a Failing Handle
Door handles rarely give up without a fight. The signs of failure are usually gradual, starting small and getting worse over time. Be on the lookout for these classic red flags:
- Excessive Looseness or Wobbling: If the handle jiggles more than it should, it often means the internal spring is worn out or the mounting screws have worked themselves loose.
- A Sticking Latch: The latch is supposed to glide in and out effortlessly. When it starts getting stuck or doesn't spring back into place, the mechanism is failing.
- Visible Rust or Corrosion: This is a big one for exterior handles. Once rust sets in, it’s only a matter of time before the internal mechanics seize up.
- The Handle Droops: A sagging lever is the tell-tale sign of a broken return spring. It’s lost its tension and can no longer hold the handle in the proper horizontal position.
A wobbly handle isn't just a nuisance; it's a potential weak point. For exterior doors, a compromised handle can make a lock easier to bypass, turning a small annoyance into a security risk.
Function vs. Style
Of course, sometimes a handle works just fine, but it’s simply time for a change. Upgrading hardware is a huge part of home improvement. In fact, a 2023 study found that nearly 79% of homeowners now tackle multiple DIY projects each year, and swapping out door handles is one of the quickest ways to make a big impact.
Think about these common reasons for an upgrade:
- Improving Security: Changing the locks is one of the first things you should do when moving into a new place. It's a simple step for total peace of mind.
- Boosting Durability: Let's be honest, builder-grade handles can feel cheap. Upgrading to solid metal hardware in high-traffic areas is a smart investment, especially if you have kids.
- Updating Aesthetics: Dated, shiny brass handles can make a room feel stuck in the past. Switching to a modern matte black or a classic brushed nickel can instantly refresh your home's entire look.
If you enjoy working on your home, you might find inspiration in other useful DIY how-to guides as well. Whether you’re fixing a problem or just elevating your home's style, knowing your "why" will make sure you get the perfect hardware for the job.
Choosing the Right Handle and Tools for the Job
Before you even think about unscrewing the old handle, let’s talk about prep work. Getting your gear in order first is the difference between a quick, satisfying fix and a frustrating afternoon of hunting for tools. This is your game plan for a smooth, professional-quality installation.
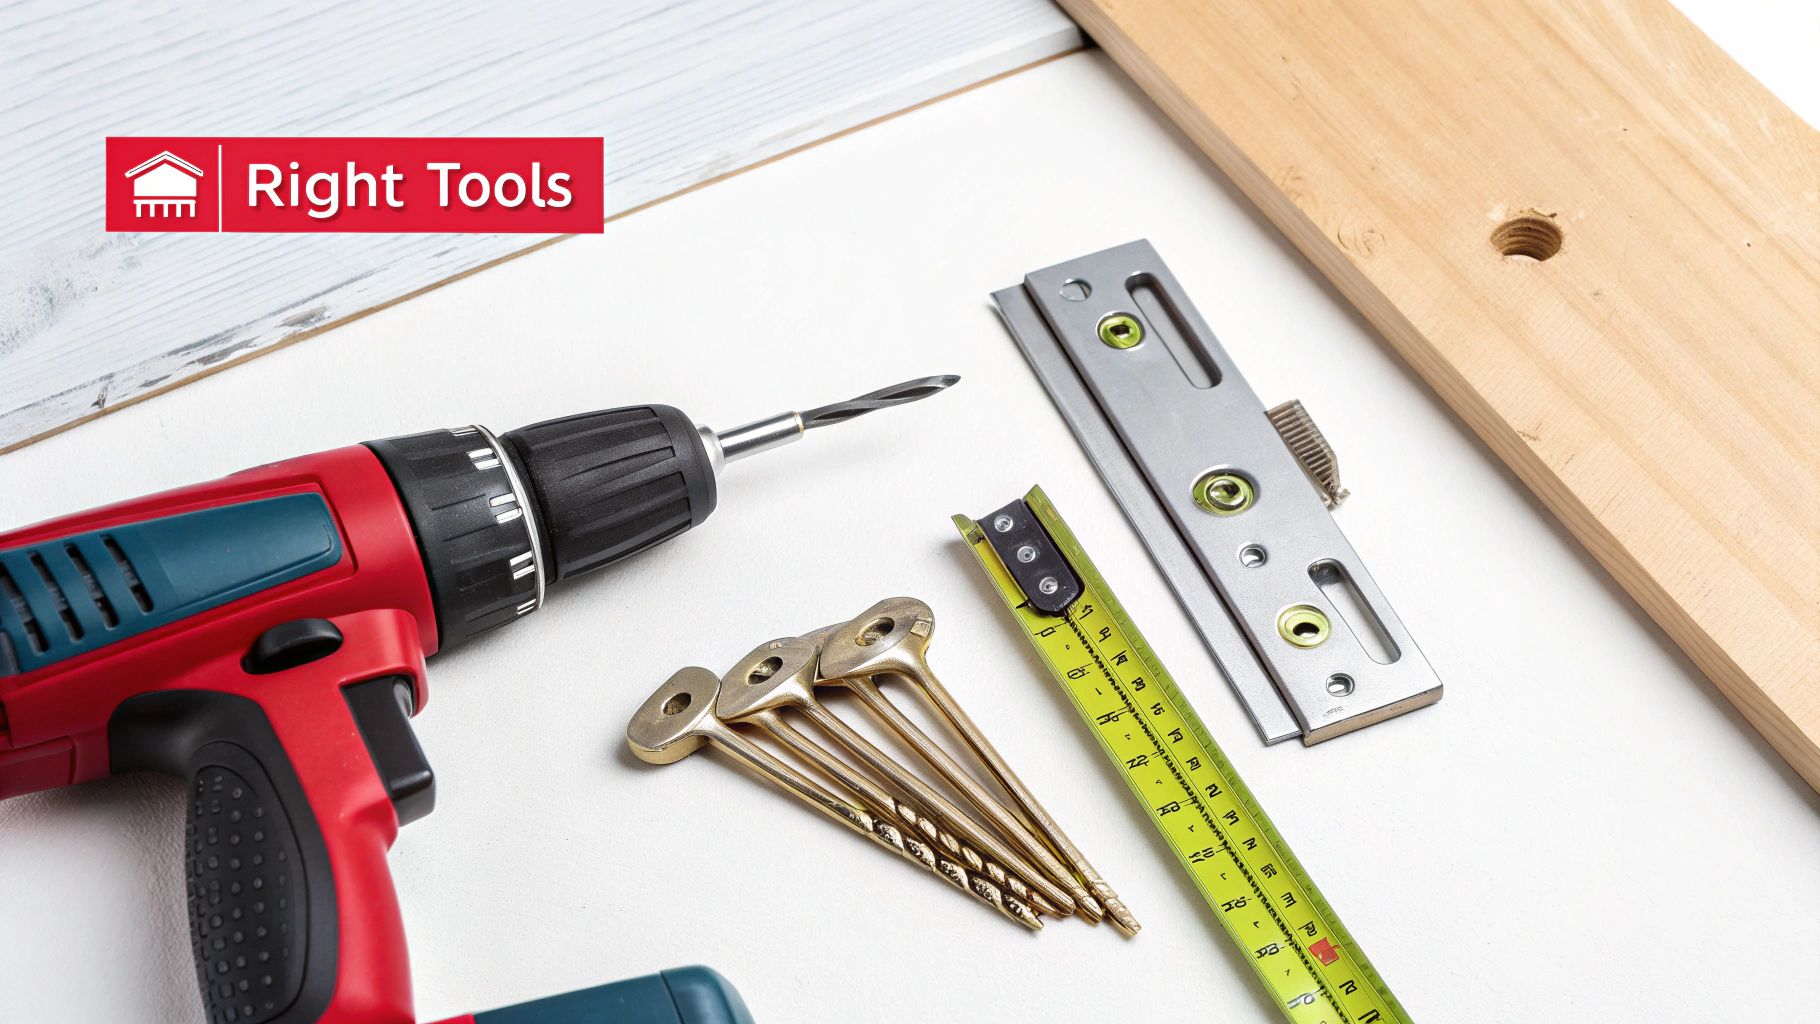
Your Toolkit: Keep It Simple
You don't need a professional-grade toolbox for this job. Most door handle swaps are surprisingly straightforward and only require a few key items.
Having the right tools ready to go makes the entire process so much smoother. Here’s a quick checklist of what you should have on hand before you start.
Essential Toolkit for Door Handle Replacement
| Tool | Primary Use | Why It's Important |
|---|---|---|
| Phillips Head Screwdriver | Removing old screws & installing new ones | This is your main tool. A comfortable grip and a magnetic tip will be your best friends. |
| Tape Measure | Checking backset and cross-bore | Guarantees your new handle will actually fit, preventing a return trip to the store. |
| Flashlight or Headlamp | Illuminating the work area | Hallways can be dim, and you need to see inside the door's latch mechanism clearly. |
With these few things, you're pretty much set. It’s about having the right tools, not all the tools.
Selecting the Perfect Replacement Handle
Choosing a new handle isn't just about aesthetics. To make sure you buy the right one the first time, you need to grab two critical measurements from your existing door. Trust me, this saves a massive headache later.
First, find the backset. This is simply the distance from the edge of the door to the very center of the handle's main hole. Most residential doors will have one of two sizes: 2-3/8 inches or 2-3/4 inches.
Next, measure the cross-bore, which is the diameter of that large hole the handle assembly goes through. The industry standard is 2-1/8 inches. Getting these measurements right is non-negotiable for finding a handle that will fit.
I can't stress this enough: taking 60 seconds to measure the backset and cross-bore can save you hours. Nothing stops a project dead in its tracks faster than a part that doesn't fit. Always measure twice, buy once.
Match the Handle to Its Purpose
Where is this handle going? The answer dictates the type you need, as they aren't all built the same.
- Passage Handles: Think closets and hallways. These are your basic, non-locking handles with a simple latch. No privacy, no fuss.
- Privacy Handles: These are for your bedrooms and bathrooms. They have a simple lock on the inside—usually a push-button or a small turn-snib—to prevent someone from walking in. No key needed.
- Keyed Entry Handles: Reserved for exterior doors. These are your security workhorses, with a key on the outside and a lockable turn-button on the inside.
Beyond function, think about durability, especially for a door that gets a lot of use. Investing in hardware with solid metal components is always a smart move. After all, a handle that feels flimsy probably won't last. Parts from T1A Auto, for instance, are engineered for longevity. You can dig deeper into why that matters in our guide to the benefits of choosing metal door handles. A well-made handle doesn't just look better; it stands up to years of daily use.
Removing Your Old Door Handle Like a Pro
Alright, you've got your tools laid out—now for the fun part. Getting the old handle off is pretty straightforward, but a little patience here goes a long way in preventing any dings or scratches on your door. The main trick is figuring out whether your handle’s screws are out in the open or playing hide-and-seek.
First, take a look at the interior side of the door handle. Many standard handles, particularly older ones, have two visible screws that hold the whole thing together. If you spot them, you're just a few twists of the screwdriver away from getting it off.
Locating and Removing the Mounting Screws
If you don't see any screws, you're likely dealing with a handle that has concealed mounting hardware. No sweat—this just adds one quick step. Check for a tiny slot or hole on the neck of the interior handle, right where the knob or lever meets the round base plate (that's called the rose).
- Find the Detent: Peek inside that little slot, and you'll find a small spring-loaded pin, often called a "detent."
- Press and Release: Grab a small flathead screwdriver or an awl and press down firmly on this pin.
- Slide It Off: While keeping the pin pressed in, you should be able to pull the handle knob or lever straight off. It'll slide away from the door, revealing the mounting screws that were hidden underneath.
Once those screws are exposed, use your Phillips head screwdriver to back them out by turning counter-clockwise. When you're on the last screw, make sure you have a hand on both the inside and outside handles. You don't want them clattering to the floor and leaving a mark.
Detaching the Latch Assembly
With the handles off, the last piece to remove is the latch mechanism—the part that sticks out from the edge of the door. You’ll see it’s held in place by a small rectangular latch plate secured by two more screws.
Go ahead and remove those two screws. The entire latch assembly should now be loose enough to slide out from the side of the door. If it feels a bit stuck, it might just be some old paint holding it in. A gentle wiggle back and forth is usually all it takes to free it up.
Pro Tip: Before you even touch a screw, put a strip of painter's tape along the door's edge and around the handle's base. It's a cheap, easy way to prevent an "oops" moment with a slipped screwdriver from chipping your paint or scratching the wood.
It's also a good habit to keep all the old parts together in a small bag or tray as you work. This keeps your space clean and lets you reference the old hardware if you run into a snag. This is especially helpful if you're tackling a bigger job, like when you need to replace an entire interior door handle mechanism.
This simple home upgrade is part of a huge trend. The global door handle market is projected to be worth around USD 12.27 billion in 2025, which just shows how many people are investing in their homes for both looks and security. This growth is all about homeowners and businesses taking on renovation projects. To dig into the numbers, you can read the full research about door handle market trends.
Now, with the old hardware out of the way, you have a clean slate for your brand-new T1A Auto handle.
Putting It All Back Together: Installing the New Handle
With the old, tired hardware out of the way, you’re ready for the best part: installing your new handle and making that door functional and stylish again. A clean installation is more than just about aesthetics; it’s about making sure the mechanism works smoothly for the long haul. Let's walk through getting the latch orientation right and finding that perfect screw tension.
Getting the New Latch Assembly in Position
First up is the new latch assembly—that's the mechanism that slides into the edge of the door. Before you even think about putting it in, take a good look at the latch bolt itself, the curved metal piece that does all the work.
You'll notice one side of the bolt is flat, and the other is angled. Here's a pro tip that saves a lot of headaches: the angled side must always face the direction the door closes. This is what allows the door to glide smoothly against the strike plate and click shut. If you put it in backward, the door simply won't close. It's a surprisingly common mistake.
Once you’ve got it oriented correctly, slide the new latch assembly into the hole on the edge of the door. Secure it with the two screws that came in your kit.
This whole process is really just the reverse of what you did to take the old one off.
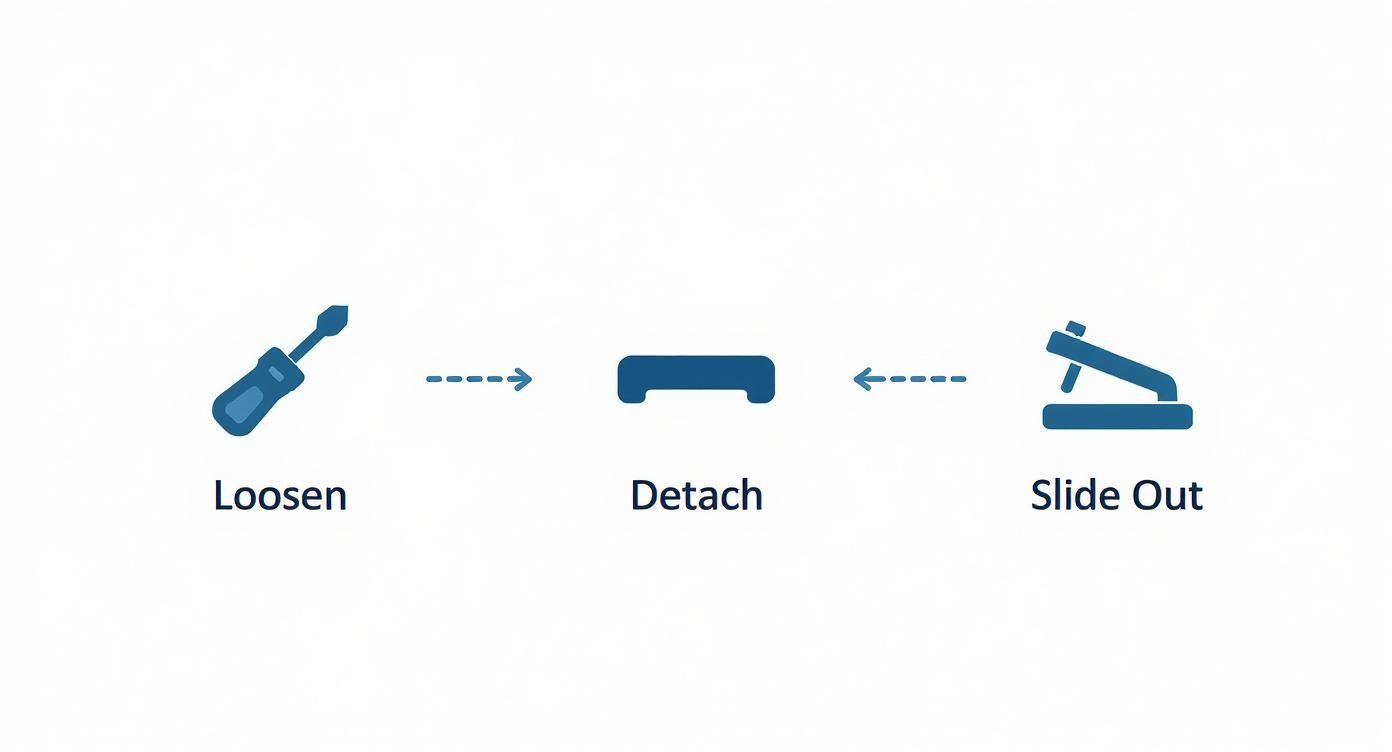
As the graphic shows, removal is about pulling out screws, the handle, and then the latch. To install, you just reverse those steps: slide in the latch, attach the handle, and secure the screws.
Aligning and Attaching the Handles
Alright, grab your new handle pieces. Most sets these days come with an exterior handle that has a long metal bar (called the spindle) and screw posts already attached, plus a separate interior handle.
Start by sliding the exterior handle through the big hole from the outside of the door. You’ll want to make sure the spindle and those screw posts pass cleanly through the corresponding slots in the latch mechanism you just installed.
Now, take the interior handle and fit it over the spindle and posts from the other side. The two halves should sit snugly against the door. Once they’re in place, you can thread in the long mounting screws.
A Quick Word on Tightening: It’s really tempting to crank down on those screws with all your might, but don't do it. Over-tightening can actually warp the door's surface or bind up the handle’s internal parts, making it stiff or difficult to turn. The goal here is snug, not strained.
Tighten each screw a little at a time, going back and forth between them to apply even pressure. As soon as the handle bases are flush with the door and there’s no more wobble, you're done. Stop right there.
It’s projects like this that are fueling a massive market. The global door and window handles market was valued at an impressive USD 14.02 billion in 2023 and is expected to grow to USD 17.70 billion by 2029. That growth shows just how many people are upgrading their homes for better security and a fresh look. You can discover more insights about the door handle market on Arizton.com.
Installing the Strike Plate and Giving It a Final Test
The last piece of the puzzle is the new strike plate—the little metal plate that goes on the door jamb. Just unscrew the old one and put the new one from your kit in its place. Make sure it lines up perfectly with the latch bolt.
With everything assembled, it’s time for a quick function check.
- Turn the Handles: Work both the inside and outside handles a few times. They should feel smooth, with no sticking or grinding.
- Test the Latch: The latch bolt should retract all the way when you turn the handle and snap back out when you let go.
- Check the Lock: If your new handle has a lock, test it now. Make sure it engages and disengages properly.
- Close the Door: This is the moment of truth. Gently close the door. It should click shut easily, without you having to force or slam it.
If it all works like a charm, congratulations! You just replaced a door handle and gave your entryway a great-looking, functional upgrade.
Troubleshooting Common Installation Problems
Even the most straightforward DIY job can hit a snag. When you're in the middle of figuring out how to replace a door handle, running into a small problem can feel like a major roadblock. Don't sweat it—most of these issues are pretty common and usually have a simple solution.
The Latch Won't Retract Smoothly
One of the most frequent hangups I see is a latch that feels stiff or gritty. You turn the handle, but the latch bolt either sticks or only moves part of the way. Nine times out of ten, this means something in the mechanism is in a bind.
The number one culprit? Overtightened screws. It's an easy mistake to make. Cranking down on the mounting screws can actually warp the handle's housing just enough to pinch the internal parts. The fix is refreshingly simple: just back off each screw by about a quarter-turn and try the handle again. You might have to do a little back-and-forth, but keep adjusting until the action feels right.
A correctly installed handle should feel effortless. If you have to force it, something is misaligned or too tight. Backing off the screws is the first and most effective step in troubleshooting this issue.
If that doesn't do the trick, the problem might be inside the tubular latch itself. Take the handle back off and see if you can easily press the latch bolt in with your finger. If it still sticks, you might have a faulty latch mechanism on your hands.
The Handle Feels Wobbly After Installation
Nothing feels cheaper or less secure than a wobbly handle. If your brand-new T1A Auto handle has some play in it after you’ve tightened everything down, there are a couple of likely suspects.
- Uneven Screw Pressure: Make sure you tightened the mounting screws alternately, kind of like you would with lug nuts on a car wheel. This ensures the base seats evenly and doesn't get pulled crooked.
- Worn Out Bore Hole: On an older door, the main hole (the cross-bore) can get worn out and become a little oversized over the years. This can keep the new handle from getting a solid grip. A quick and dirty fix that works surprisingly well is to wrap a layer or two of electrical tape around the handle's housing to create a tighter, more secure fit.
Keep in mind, this is a separate problem from a sagging door, which is often a structural issue. If the whole door is out of alignment, you might need to learn how to replace a door hinge to get things squared up again.
Misaligned Strike Plate
This one is common: the door closes, but you don't get that satisfying "click" of the latch engaging. This means the latch bolt isn't lining up perfectly with the hole in the strike plate on the door jamb. You can often fix this without having to move the plate itself.
First, check the door hinges and tighten them up. A loose hinge is a classic cause of door misalignment. If the hinges are solid, your next move is to grab a metal file. Gently file the opening on the strike plate, enlarging it just a little in the direction the latch needs to go. You’d be surprised how often a tiny adjustment of just a millimeter or two is all it takes to get it perfect.
Got a Few More Questions?
Even after you've tightened the last screw and stepped back to admire your work, a few questions might pop into your head. That's totally normal. Every car, and every repair, has its own little quirks. Let's run through a few common head-scratchers people run into.
Why Does My New Handle Feel Stiff?
If the new handle feels stiff or sticky, it's almost always a sign that something is in a bind. The number one culprit? Over-tightening the mounting screws or bolts. It’s tempting to really crank them down, but doing so can warp the handle's housing just enough to pinch the internal mechanism.
The fix is usually simple. Just back off each of the main screws by a quarter-turn and test the handle again. You might need to make a few tiny adjustments to find that sweet spot where it feels smooth and effortless. If that doesn't solve it, double-check that the connecting rods aren't caught on anything inside the door panel.
Can I Just Replace the Handle and Not the Latch?
Technically, you often can. If your old latch mechanism inside the door is still working perfectly and the new handle connects to it without issue, you might be tempted to just swap the handle itself.
I'd advise against it, though. Your new T1A handle kit comes with a latch that’s specifically designed to work with its mechanism and spring tension. Using the old latch can create a weird, wobbly feel, cause compatibility problems down the road, or just lead to premature wear on your brand-new handle.
For the best performance and a part that will last, always install the complete set that comes in the box. This ensures all the components are perfectly matched to work together seamlessly from day one.
What if the New Handle Doesn't Cover the Old Paint Outline?
Ah, the classic problem. This happens a lot when you're replacing a handle that had a larger base or a different footprint. You install the slick new hardware, and bam—there’s an ugly, faded outline of the old handle on your door.
Unfortunately, the only real fix here is some touch-up work. The best way to handle this is before you install the new handle. Carefully clean the area, maybe give it a light sanding, and apply some touch-up paint. Taking that extra 15 minutes makes all the difference for a clean, professional-looking job.
Ready to get this project done with parts you can actually trust? T1A Auto offers premium, durable door handles engineered for a perfect fit and built to last.
Shop our full collection of guaranteed-fit door handles today!