


So, you think you need to change an ignition coil. Before you start pulling parts, you've got to be sure the coil is actually the culprit behind your car trouble. The classic signs are all there: a blinking check engine light, a rough idle, or an engine that stumbles and misfires. You might even notice you're visiting the gas station a little more often than usual.
These are the tell-tale signs that a coil isn't producing the juice needed for a strong spark.
Is It Time to Change Your Ignition Coil

One of the biggest mistakes I see people make is jumping the gun and replacing parts without a solid diagnosis. It's an easy way to waste both time and money. While a flashing check engine light is an urgent warning, many of the early signs are much more subtle.
You might feel a slight hesitation when you merge onto the highway or a weird, shaky vibration when you're stopped at a light. These aren't just personality quirks your car is developing—they're often the first whispers of a part starting to go bad.
The ignition coil has a straightforward but crucial job. It takes the battery's low 12-volt charge and amps it up into the thousands of volts required to jump the spark plug gap. Without that powerful spark, the air-fuel mixture in the cylinders won't ignite correctly, and that's when you start feeling those performance problems.
To help you pinpoint the issue, here’s a quick rundown of what a failing ignition coil often looks and feels like from behind the wheel.
Common Symptoms of a Failing Ignition Coil
This table breaks down the common signs that your ignition coil might be on its way out.
| Symptom | What It Feels Like From the Driver's Seat | Potential Cause |
|---|---|---|
| Engine Misfires | The car stumbles, shakes, or jerks, especially during acceleration. | The coil isn't sending enough voltage to the spark plug, causing incomplete combustion in one or more cylinders. |
| Rough Idle | The engine vibrates or runs unevenly when you're stopped at a traffic light. | An inconsistent spark from a weak coil makes it hard for the engine to maintain a smooth, steady speed at rest. |
| Check Engine Light | A solid or, more seriously, a flashing warning light appears on your dashboard. | The car's computer (ECU) has detected a misfire or an electrical fault in the ignition circuit and logged a trouble code. |
| Poor Fuel Economy | You notice you're filling up the gas tank more frequently than usual. | Unburned fuel is being wasted due to inefficient combustion, forcing the engine to use more gas to produce the same power. |
| Reduced Power | The car feels sluggish and slow to respond when you press the accelerator. | With one or more cylinders not firing properly, the engine simply can't produce its full horsepower. |
| Stalling | The engine cuts out unexpectedly, either while driving or at a stop. | A severely failing coil may cut out entirely, causing the engine to lose power and shut down completely. |
Keep in mind that these symptoms can sometimes point to other issues, but if you're experiencing a combination of them, the ignition coil is a prime suspect.
Differentiating Coil Failure From Spark Plug Issues
Here’s where things get tricky. A bad ignition coil and a worn-out spark plug can cause nearly identical symptoms, from misfires to lousy acceleration. So, how do you tell them apart before you start spending money on parts?
- Consistency is Key: A single bad coil usually affects just one cylinder, creating a very rhythmic stumble you can often feel. Worn-out spark plugs, on the other hand, might cause more random or widespread misfires across multiple cylinders.
- Let the Codes Guide You: Your best friend in this situation is an OBD-II scanner. Specific codes like P0351 or P0352 point directly to a problem in the ignition coil's circuit for a particular cylinder. A more generic misfire code like P0300 is less specific and could mean anything from plugs to fuel injectors.
- A Quick Visual Check: It’s not always a sure thing, but it’s worth a look. Pop the hood and inspect the coil pack. Are there any visible cracks in the housing, burn marks, or signs of melting? That’s a dead giveaway. A bad spark plug will show its wear on the electrode tip inside the cylinder, so you have to pull it to check.
Here's a critical piece of advice: Never ignore a misfire. Driving with a bad coil allows unburned fuel to get dumped into the exhaust, which can quickly destroy your expensive catalytic converter. What starts as a simple coil replacement can turn into a four-figure repair bill.
The Growing Importance of Ignition Coils
The health of your ignition system is more important now than ever before. Modern engines are designed for maximum efficiency, and that puts a lot more demand on components like ignition coils.
It’s no surprise that the global ignition coil market was valued at a massive USD 15.45 billion in 2024 and is expected to climb to nearly USD 20 billion by 2030. This growth shows just how essential these parts are to the millions of cars on the road. You can explore more about the ignition coil market trends to see how vital this component is.
Bottom line: Ignoring the warning signs is a gamble that can lead to much bigger, more expensive problems down the road.
Gathering the Right Tools and Parts for the Job
Nothing kills the momentum of a simple car repair faster than an unplanned trip to the auto parts store. To get this ignition coil swap done right, a little prep work goes a long way. Think of it as setting up your workspace—having everything within arm's reach makes the whole process smoother and much less frustrating.
You really don't need a massive professional toolbox for this. Just a handful of the right tools will get you through it.
Your Essential Tool and Part Checklist
Let's start with the tools. The absolute must-haves are a decent socket set, a ratchet, and an extension. That extension is your best friend here, since ignition coils often live in some pretty tight spaces. You'll also need a torque wrench. A lot of people just guess when tightening bolts, but that's a recipe for disaster. Over-tighten and you can crack the new coil's housing; under-tighten and vibrations could cause it to fail prematurely.
Also, do yourself a favor and pick up a small tube of dielectric grease. This stuff is a game-changer. A little bit inside the new coil's boot protects the connection from moisture and corrosion, preventing a whole host of headaches later on.
Here’s a quick list to have on hand before you pop the hood:
- Socket Set with Extension: You'll need this to get the bolts off the old coil. The most common sizes are 8mm or 10mm, but double-check your vehicle's specs just in case.
- Torque Wrench: This is for tightening the new coil's bolts to the exact spec required by the manufacturer. No guesswork.
- Dielectric Grease: A pro tip for ensuring a solid, long-lasting electrical connection.
- The Correct Replacement Coil: This seems obvious, but make sure you have the right part for your specific engine before you start.
Choosing the Right Ignition Coil
Now, let's talk about the most important piece of the puzzle—the new ignition coil. You'll face the classic choice: go with an OEM (Original Equipment Manufacturer) part or an aftermarket one? OEM parts are the exact same ones your car came with from the factory. They guarantee a perfect fit and performance, but you'll definitely pay a premium for them.
An aftermarket coil can be a fantastic, budget-friendly alternative, especially if you're working on an older vehicle. The key is to choose a reputable brand known for quality. Poorly made aftermarket parts can fail prematurely, putting you right back where you started.
Figuring out which one is right for your car and your wallet is a big part of the job. To help you make the best call, you can learn more about the differences between OEM and aftermarket parts in our detailed guide. This will help you select a part that not only fits perfectly but also delivers the reliability you need for the long haul.
The Step-by-Step Guide to Replacing an Ignition Coil
Alright, you've got your tools and the right replacement part. Now for the main event: swapping out that old ignition coil. This job is pretty straightforward, but the devil is in the details. If you take your time and follow a logical order, you can get a professional-quality repair done right in your own garage.
First things first: safety. Before you even think about touching a bolt, make sure the engine is completely cool. Trust me, trying to work on a hot engine is a quick way to get a nasty burn.
Next up, and this is an absolute must, disconnect the negative terminal on your car battery. Grab a socket wrench, loosen the nut on the black (-) terminal, and just slide the cable off. This simple step eliminates any risk of electric shock and protects all the sensitive electronics in your car from getting fried by an accidental short.
Finding and Getting to the Ignition Coils
With the battery disconnected, it's time to locate the coils. Most modern cars use a coil-on-plug (COP) setup, which means you'll find the coils mounted right on top of the engine's valve cover—one for each spark plug. They typically look like little black or gray blocks with a wire harness plugging into them. On some V6 or V8 engines, you might have to pop off a plastic engine cover to get a clear view.
If you're working on an older vehicle, you might be looking for a single coil pack. This is one unit that houses all the coils together, sending spark through thick wires to each cylinder. The process is much the same, but you’ll be replacing the whole pack instead of just one coil.
This infographic breaks down the three must-have items for this job.
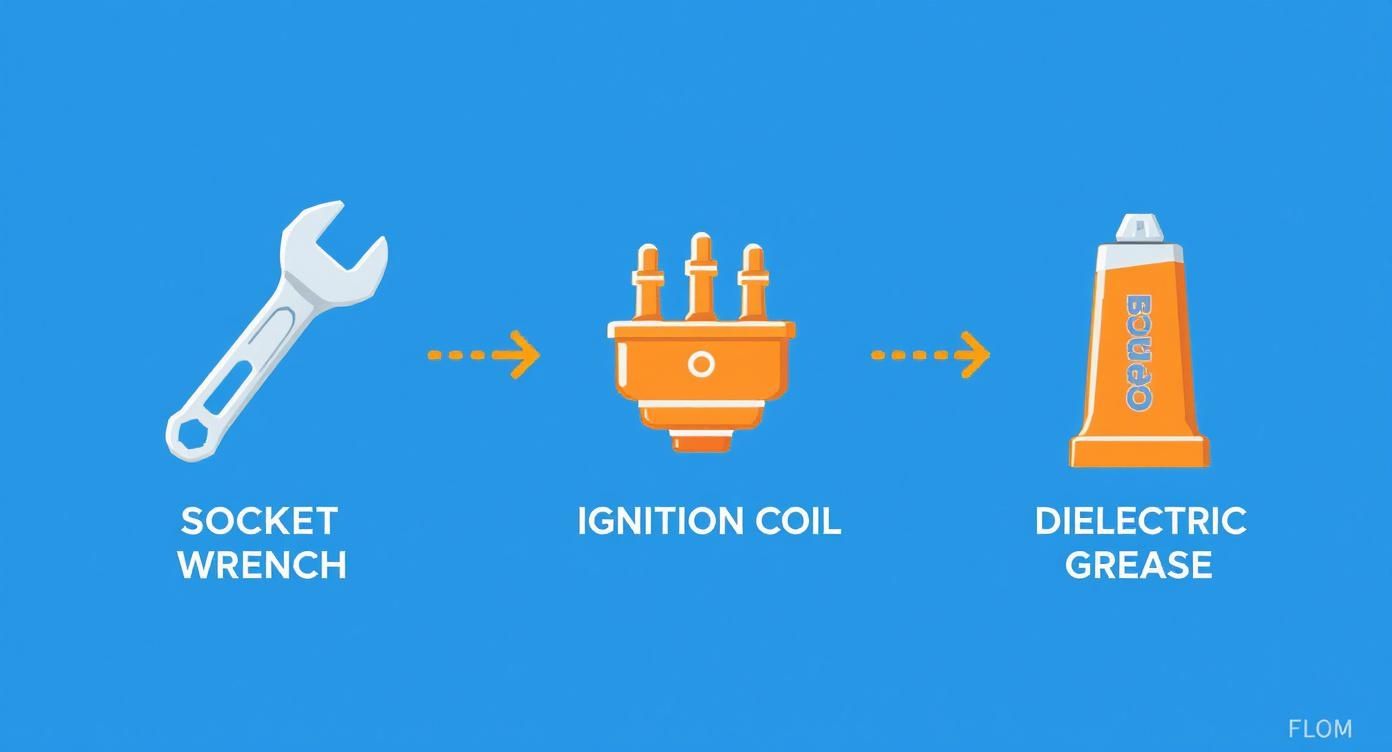
Having these on hand before you start means you won't have to stop midway through to hunt for something.
Taking Out the Old Ignition Coil
Once you’ve pinpointed the bad coil, it's time for removal. The first step is to unplug the electrical connector. You’ll usually find a small plastic tab you need to press or lift to release the plug. Go easy here—these little plastic clips get brittle with age and can snap off if you force them.
Connector off? Good. Now use your socket wrench, typically with an 8mm or 10mm socket, to remove the single bolt holding the coil down. Put that bolt somewhere safe so it doesn't roll away. The coil should now be loose. Give it a gentle twist and pull it straight up out of the spark plug well. Sometimes the rubber boot creates a bit of suction, so a firm, steady pull is what you need.
Pro Tip: Before you pop the new coil in, grab a flashlight and peek down into the spark plug well. See any oil pooled at the bottom? That’s a tell-tale sign of a leaky valve cover gasket. That oil will ruin your new coil in no time, so it's a repair you'll want to get on your to-do list.
Putting the New Coil in Correctly
Proper installation is what makes this a long-term fix instead of a temporary patch. Start by prepping the new coil. Squeeze a small dab of dielectric grease on the inside of the boot—the part that slips over the spark plug. This simple step keeps moisture out and helps ensure a perfect electrical connection.
Now, carefully guide the new coil down into the spark plug well, making sure it lines up with the mounting hole. Push down firmly until you feel it "seat" onto the spark plug. Thread the bolt back in by hand first to make sure you don't cross-thread it.
This next part is crucial. Grab your torque wrench and tighten that bolt to the manufacturer's spec, which is usually a light 5-7 ft-lbs. If you overtighten, you can easily crack the coil's plastic housing. If it's too loose, engine vibrations can damage it over time.
Finally, plug the electrical connector back in until you hear and feel a solid "click." That click is your confirmation that it's locked securely in place. Reconnect the negative battery terminal, and you're done with the physical install. It’s a common repair, and the growing automotive ignition coil market—valued between USD 8.4 billion and USD 10.24 billion in 2025—highlights just how essential these parts are. You can read more about the ignition coil market's projected growth on Future Market Insights.
Common Mistakes and Pro Tips for a Smooth Repair
Even a job that seems simple on the surface can go sideways if you fall into one of the usual traps. The best way to guarantee success when you change an ignition coil is to learn from the mistakes plenty of people have made before you. This kind of insider knowledge is what turns a potentially frustrating afternoon into a genuinely satisfying repair.
One of the most common blunders I see is over-tightening the mounting bolt. It’s easy to think that tighter is better, but the plastic housing on these coils can be surprisingly brittle. A heavy hand is all it takes to crack the new part, which means you'll be doing this job all over again way too soon. The only right way to do it is with a torque wrench set to the manufacturer's exact spec.
Another classic mistake is fighting with the electrical connectors. After years of heat cycles under the hood, those little plastic tabs get fragile. If a connector doesn't want to budge, don't just pull harder. Grab a small flathead screwdriver and gently press the release tab while you wiggle the plug free. A little patience here can save you from a much bigger headache involving wiring repairs.
Insider Tricks for a Flawless Installation
Moving beyond just avoiding mistakes, a few professional tricks can make the whole process go smoother and ensure your repair lasts. These are the little details that really separate a DIY job from a professional one.
- Label Everything: If you're tackling more than one coil, don't rely on memory. A roll of masking tape and a marker are your best friends. A quick label like "Cylinder 1" on both the connector and the old coil makes reassembly foolproof.
- Don't Skip the Grease: That little packet of dielectric grease isn't optional. A small dab inside the coil boot is crucial. It keeps moisture out, prevents corrosion, and helps create a perfect, long-lasting connection with the spark plug.
- Clean the Area First: Before you even think about pulling the old coil out, take a moment to clean up. Use some compressed air or a shop rag to clear any dirt or leaves from around the base. This simple step keeps debris from falling into the spark plug well, which could cause serious engine damage.
Pro Tip: The quality of your repair really comes down to these small, careful steps. Rushing the job or skipping something like dielectric grease might save you a minute now, but it often leads to repeat failures and more work down the road.
Confirming Your Work Is Done Right
Okay, the new coil is in. Don't just slam the hood and call it a day. The final, and most important, step is to make sure the repair actually worked.
Once the battery is reconnected, start the engine and just let it idle. You should notice a significant difference—it should run much smoother than it did before.
If you have an OBD-II scanner, now's the time to plug it in. Go ahead and clear the old diagnostic trouble codes from the computer. After that, take the car for a short test drive. If the engine runs smoothly and the check engine light stays off, you can officially say your mission to change an ignition coil was a success. Choosing the best aftermarket auto parts from the start is the best way to make sure all your hard work pays off for thousands of miles.
So, You've Replaced the Ignition Coil... Now What?
https://www.youtube.com/embed/Nyp7LGG4B2A
Alright, you’ve put in the work. The last bolt is tight, your hands are clean (mostly), and you’re ready for that satisfying, smooth engine purr. But you turn the key, and... sputtering. Or worse, that stubborn check engine light glares back at you, completely unfazed by your efforts.
It’s a frustrating moment every DIYer has faced, but don't throw in the towel and call a tow truck just yet. More often than not, a problem that sticks around after swapping an ignition coil is due to a simple oversight, not some new, catastrophic failure. The trick is to backtrack and check your work.
Start with the most common culprit: the electrical connection. When you plugged the wire harness into the new coil, did you hear and feel a solid, satisfying "click"? That little sound is everything. A loose connection is hands-down the number one reason a brand-new coil doesn't fix the original misfire.
Digging a Little Deeper: Common Post-Replacement Problems
If that connector is snug and secure, it's time to broaden your search. A new ignition coil can't solve an issue that wasn't its fault to begin with. You need to think about the other players in the ignition system.
Here are the usual suspects to investigate:
- Tired Spark Plugs: Putting a powerful new coil in a cylinder with an old, worn-out spark plug is like pairing a world-class sprinter with worn-out shoes. If the plug is fouled, corroded, or the gap has burned too wide, you'll still get a misfire.
- Bad Spark Plug Wires: For vehicles with coil packs and wires, the wire itself is a common point of failure. It's the bridge that carries the spark to the plug. Look closely for any cracks, brittle insulation, or burn marks.
- Old Trouble Codes: Your car's computer doesn't automatically know you fixed the problem. It often holds onto the old fault codes, keeping that check engine light illuminated. You'll need to clear the codes with an OBD-II scanner to give it a clean slate.
The key thing to remember is that a misfire code points you to a specific cylinder, not a specific part. The ignition coil is a frequent cause, but it's just one piece of the puzzle. When a new coil doesn’t do the trick, the problem is almost always the spark plug or the connection between them.
The ignition system is a massive part of the auto industry for a reason. In 2020 alone, the global trade for ignition coils and related parts topped USD 1.5 billion. That number highlights just how vital—and how frequently replaced—these components are. You can read more about the global trade of ignition coils to see how technology continues to shape this market.
Finally, don’t discount the possibility that you simply got a bad part. It's rare, especially with reputable brands, but a defective-on-arrival coil isn't unheard of. If you've triple-checked your connections, inspected the spark plug, and cleared the codes, it might be time to exchange the coil for a new one.
A Few Lingering Questions About Ignition Coils
Alright, you've swapped out the coil, and the engine is running smoothly again. Nice work! Still, you might have a few questions rolling around in your head about the job. Let's tackle some of the most common ones that pop up after an ignition coil replacement so you can feel totally confident in the repair you just did.
The big one I always hear is: "Should I replace just the one bad coil or do them all?" It's a great question. If your car is on the newer side with lower mileage and this is the first coil that's ever given you trouble, just replacing the single faulty one is perfectly fine. It's practical, saves you some cash, and there's no real reason to throw out perfectly good parts.
But, if your odometer is creeping up past 100,000 miles, the story changes. Ignition coils are wear items, just like brake pads or tires. They've all been working under the same conditions for the same amount of time, so when one goes, the others are often not far behind. In this case, swapping them all out at once is a smart preventative move. It saves you the headache of having to do the same job again in a few months.
How Much Does an Ignition Coil Replacement Cost?
The cost to change an ignition coil can be all over the map, but the best part about doing it yourself is that you completely eliminate labor costs. Your main expense is the part itself.
For a single aftermarket coil, you're typically looking at anywhere from $25 to $75. If you walk into a dealership for an OEM part, expect that price to jump significantly, sometimes even doubling.
Here’s a rough idea of what to expect for parts:
- Single Aftermarket Coil: $25 - $75
- Set of Four Coils: $80 - $200
- Set of Six Coils: $120 - $300
Of course, if you're working on a high-performance or specialty engine, the coils will likely be more expensive. A great way to save money without sacrificing quality is to find the best online auto parts retailer. You can often get parts that meet or exceed OEM specs for a fraction of the price.
Can I Drive with a Bad Ignition Coil?
Look, technically, the car might still run with one bad coil, but I'm going to tell you right now: don't do it. Driving with a misfiring cylinder is asking for a world of hurt and a much bigger repair bill. A misfire puts a ton of stress on your engine's internals and, even worse, it sends raw, unburned fuel straight into your exhaust system.
That unburned fuel will absolutely cook your catalytic converter in no time. A new "cat" is a notoriously expensive repair, often running well over $1,000. Trust me, the convenience of getting a few more miles down the road is not worth a four-figure repair.
What Is the Lifespan of an Ignition Coil?
Most modern ignition coils are tough and designed to last. It’s not uncommon to see them go for 100,000 miles or more without a single hiccup.
However, a few things can definitely shorten their life. The biggest culprits are extreme engine heat, oil leaks from a failing valve cover gasket that soak the coil boots, and old, worn-out spark plugs. Bad plugs increase the resistance in the system, forcing the coil to work much harder to create a spark, which leads to it burning out way ahead of schedule.
And hey, if you're thinking about sharing your repair skills with the world, a well-shot video is a fantastic way to do it. If you need some inspiration for making your own guide, you can find some great Top How-to Video Ideas to get the creative juices flowing.
At T1A Auto, we specialize in premium aftermarket parts engineered for durability and a perfect fit, so you can tackle your next repair with confidence. Find the right ignition coil for your vehicle today at https://t1aauto.com.
