


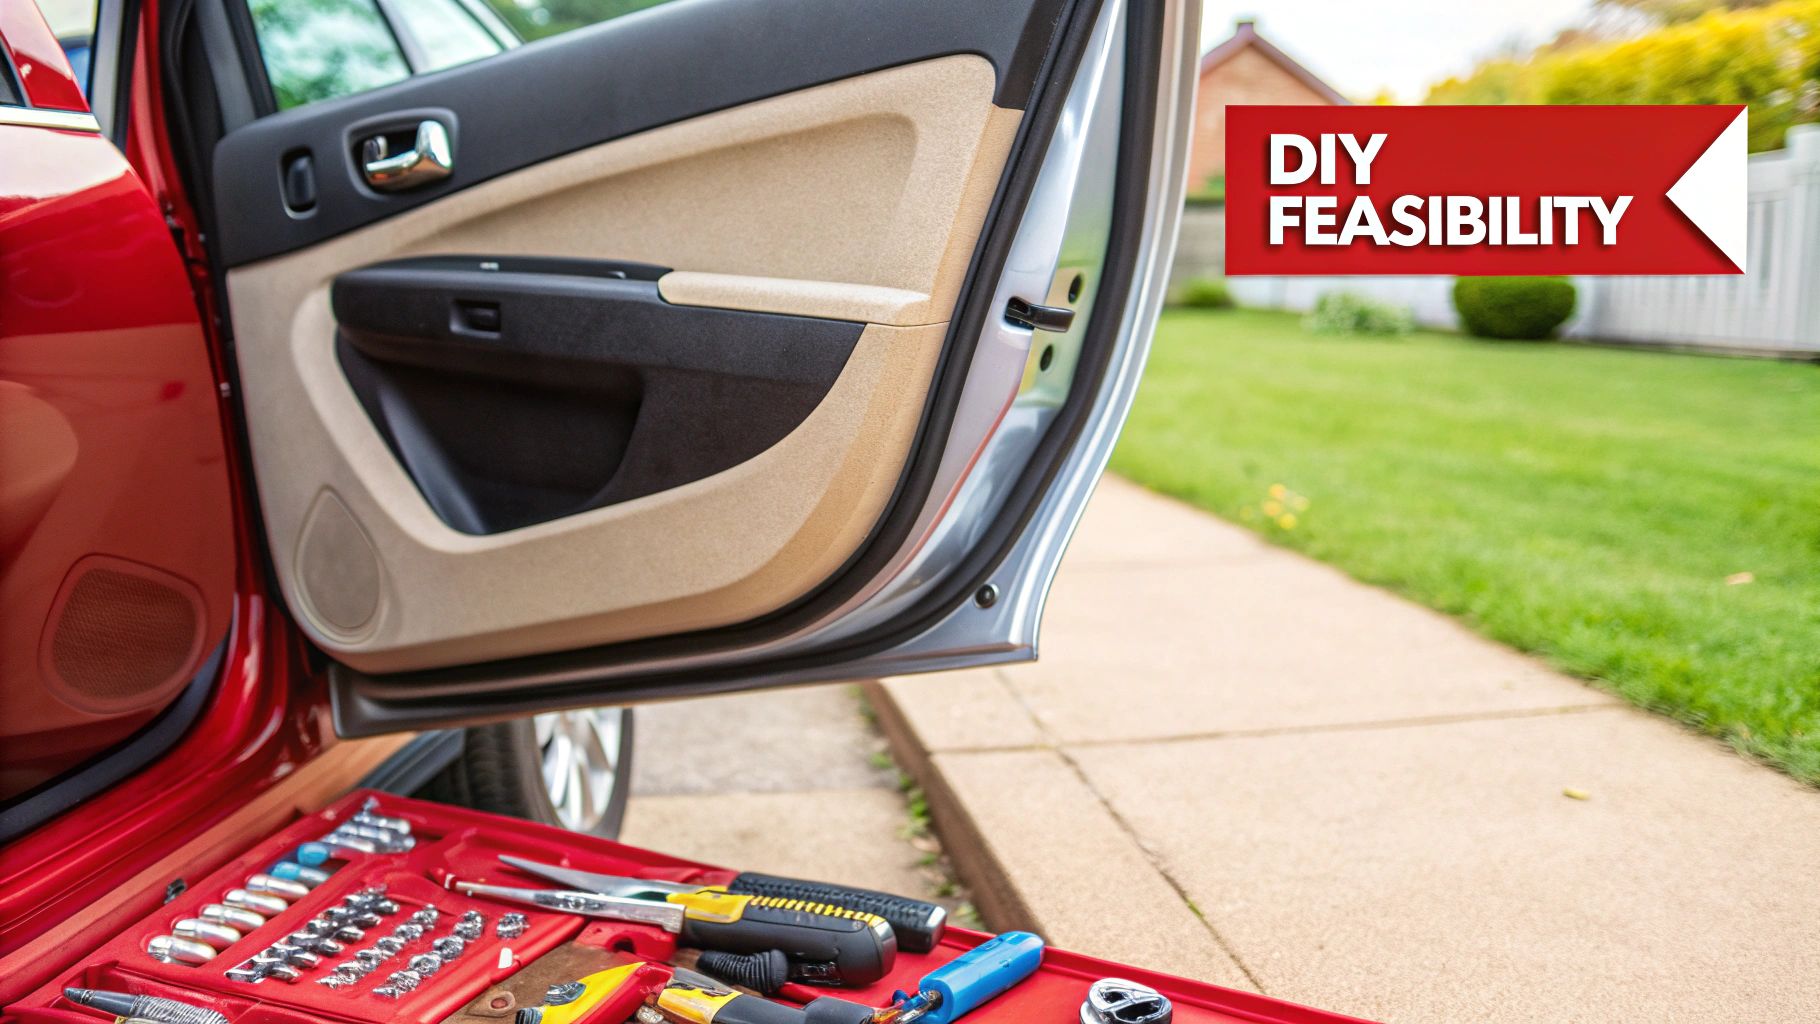
When a car door handle snaps off in your hand, your first thought might be an expensive trip to the mechanic. But for many vehicles, replacing a door handle is a totally doable DIY project. It's mostly about removing the interior door panel, popping off a few rods or cables, and swapping out the old part. With some basic tools and a couple of hours, you can get it done yourself.
Can You Really Replace a Car Door Handle Yourself?
Before you start unscrewing things, it pays to be honest with yourself about whether this is a job you want to take on. The real answer depends on your car. Changing a simple, purely mechanical handle on an older truck is a whole different ballgame than tackling one on a new SUV that's loaded with tech.
Door handles aren't just simple levers anymore. The global market for them was valued at around $4.86 billion in 2024, and that number is only going up. This isn't just because more cars are being made; it's because handles now have integrated sensors, keyless entry systems, and other fancy features. You can see just how much this part of the industry has grown in reports on the automotive door handle market.
Assessing Your DIY Readiness
So what does that mean for you and your broken handle? It means you need to understand what's hiding behind that door panel. In my experience, the biggest headaches don't come from the two or three bolts holding the handle on. They come from everything you have to do to get to them.
Keep these common frustrations in mind:
- Working Blind: You'll spend a lot of time with your hand inside the door shell, trying to feel for clips and bolts you can't see. It's a bit like keyhole surgery.
- Brittle Plastic Clips: The interior door panel is held in place by a series of plastic clips. Over years of heat and cold cycles, they get brittle and love to snap when you try to pry them off.
- A Web of Wires: Modern car doors are command central for windows, locks, speakers, and side mirrors. You'll have to carefully disconnect a bunch of electrical connectors without damaging them.
My rule of thumb is to check your patience level before you check your toolbox. If the idea of spending ten minutes fishing a dropped nut from the bottom of the door with a magnet makes you want to throw a wrench, this might not be the job for you.
When to Call a Professional
Even with the best intentions, some jobs are better left to the pros. If your handle has touch sensors for keyless entry or is tied into a sophisticated anti-theft system, the risk of causing a very expensive electrical problem goes way up.
The same goes for high-end luxury cars where everything is more complex. And if the door itself is bent or damaged from a collision, a new handle might not even solve the problem. Sometimes, the smartest move a DIYer can make is knowing when to step back and call for backup.
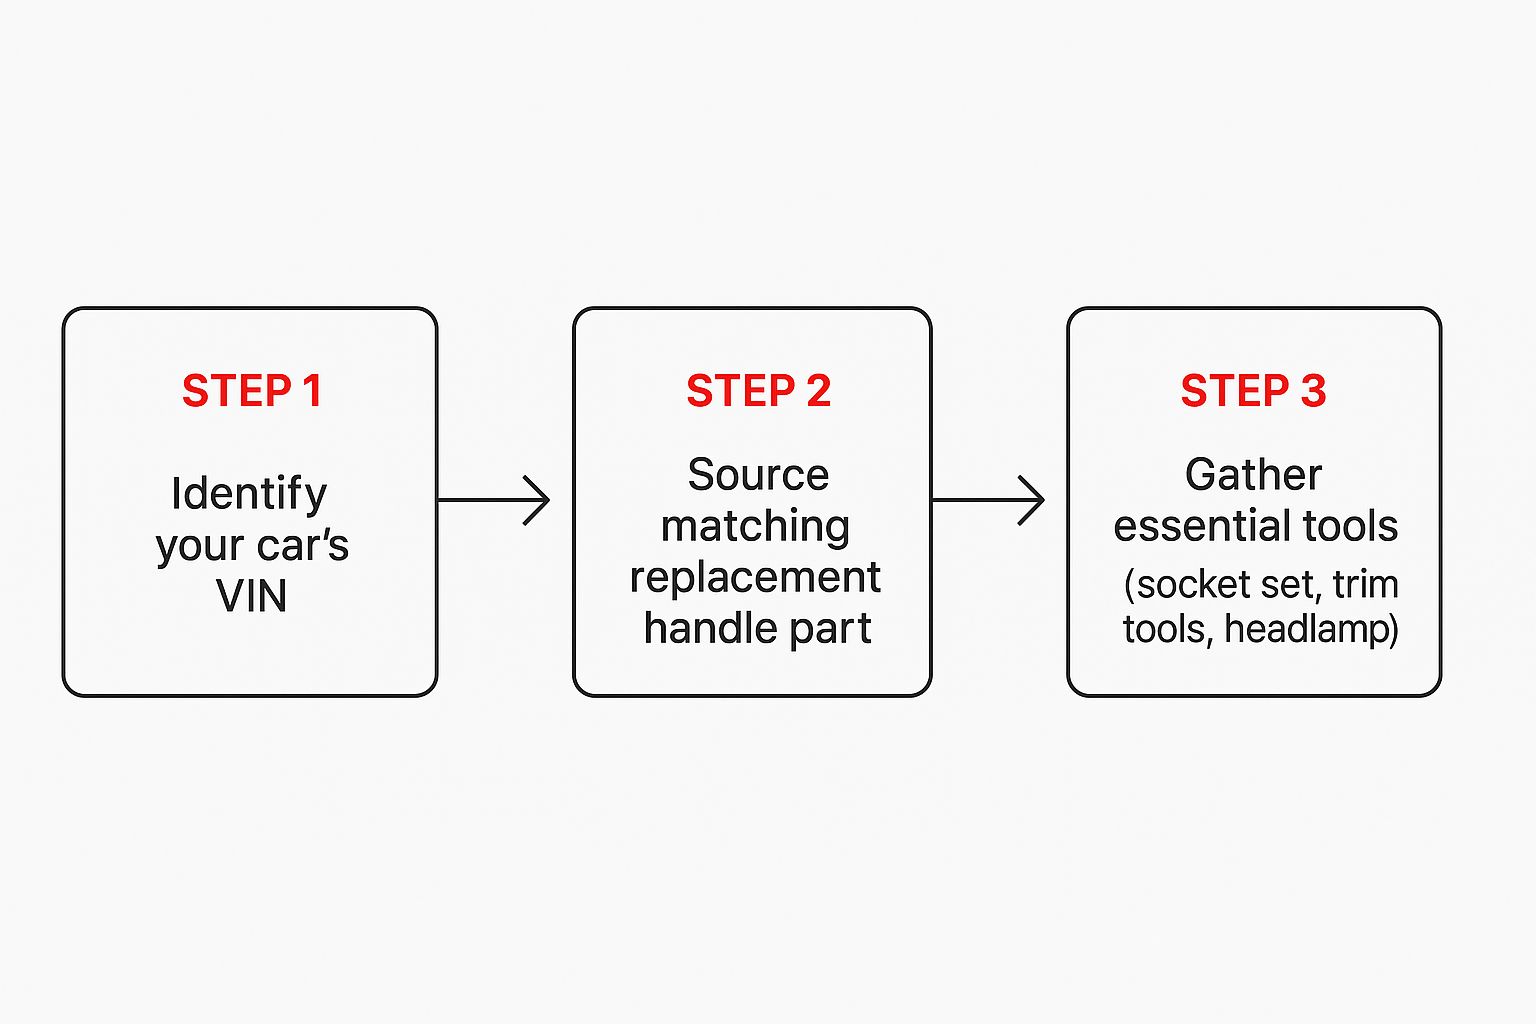
Getting Your Tools and the Right Part Ready
There’s nothing worse than getting halfway through a car repair only to realize you don't have the right tool. It’s a surefire way to turn a straightforward job into an all-day headache. So, before you even think about touching the car, let's get your gear in order. At a minimum, you’ll need a basic socket set and both Phillips and flathead screwdrivers.
But if you want to do this job like a pro and avoid unnecessary damage, a couple of specialized tools are worth their weight in gold.
First up: a set of plastic trim removal tools. Seriously, don't try to use a screwdriver to pry off your door panel. You will scratch the plastic, damage the paint, or snap the little clips that hold it on. These inexpensive tools are specifically designed to pop panels off without leaving a mark.
Another lifesaver is a magnetic pickup tool. Trust me, you're going to drop a tiny nut or bolt down into the black hole of the door cavity. It’s almost a rite of passage. This little tool will save you a world of pain. A good headlamp is also a smart move, since it gets pretty dark and cramped inside a door panel.
To make things crystal clear, here’s a quick rundown of the essentials.
Essential Toolkit for Door Handle Replacement
| Tool | Primary Use | Pro Tip |
|---|---|---|
| Socket Set | Removing bolts securing the door handle and panel. | Keep a small extension handy; some bolts are recessed. |
| Screwdrivers | Removing screws from the door panel, armrest, and handle assembly. | A multi-bit driver saves space and time. |
| Trim Removal Tools | Safely prying off the interior door panel without causing damage. | Start at a bottom corner and work your way around gently. |
| Magnetic Pickup Tool | Retrieving dropped metal nuts, bolts, or screws from inside the door. | A flexible-shaft version is even better for tight spots. |
| Headlamp | Illuminating the dark interior of the door cavity. | Hands-free lighting is a game-changer for this kind of work. |
| Needle-Nose Pliers | Disconnecting and reconnecting linkage rods and electrical connectors. | Perfect for manipulating small clips and retainers. |
Having these on your workbench before you start is the first step to a smooth and successful repair.
Finding the Perfect Replacement Part
Now for the most critical part of the prep work: getting the right replacement handle. Ordering the wrong one is a surprisingly common mistake that stops a project dead in its tracks. The most reliable way to guarantee you get an exact match is to use your car's Vehicle Identification Number (VIN).
That 17-digit code is your car’s unique fingerprint. It tells a supplier everything they need to know—make, model, year, and even the specific trim level. When you shop with your VIN, you completely remove the guesswork. This is hugely important on modern cars, where a handle for a base model looks similar but won't fit a higher trim with keyless entry sensors.
Using a quality supplier like T1A Auto ensures you get a part that’s built for a guaranteed fit. If you're weighing your options, it's helpful to understand the key differences between OEM vs aftermarket parts to make the best decision for your vehicle and budget.
This simple workflow will help you get it right the first time.
Following this process keeps you from taking your door apart only to find you’ve got the wrong component sitting there. The automotive door handle market is constantly evolving, with a projected CAGR of 4.2%, driven by new safety features and materials. This means more variety and complexity than ever before, making that VIN check even more crucial.
Pro Tip: Before you click "buy," snap a quick photo of your broken handle while it's still on the door. Comparing your picture to the product images online is a great final check to make sure you're ordering the correct piece for the right door (front driver's side is different from the rear passenger's side!).
Getting the Old Handle Out: A Step-by-Step Guide
Alright, with your new T1A Auto handle ready and your tools laid out, it's time to dive in. The key here is patience. We're going to take things apart methodically to make sure the only thing you're replacing today is the handle itself.
First thing's first: disconnect the negative battery terminal. I can't stress this enough. It's a simple step that prevents any electrical mishaps, like shorting out a component or, worse, deploying an airbag. Just do it—it takes 30 seconds and could save you a massive headache.
Peeling Back the Layers to Get Inside
The biggest hurdle between you and the broken handle is the interior door panel. Getting this off without snapping any of the old, brittle plastic clips is probably the most delicate part of the whole operation.
Start by hunting for hidden screws. Car manufacturers love to tuck them away in inconspicuous places. Check these common spots:
- Down inside the pocket for the interior door handle.
- At the very bottom of the armrest or door pull cup.
- Behind little plastic covers that you can gently pry off with a small screwdriver.
Once you’re sure all the screws are out, reach for your plastic trim removal tool. Start at one of the bottom corners and gently work the tool between the panel and the metal door frame. Pry carefully until you feel that first satisfying pop of a clip letting go. Keep working your way around the edges, releasing each clip one by one.
For a more in-depth look at this process, we have a complete guide on how to remove a car door panel that can be a real help.
After all the clips are free, you'll need to lift the panel straight up and off the door, as it usually hooks over the top lip by the window. Don't yank it away just yet, though!
Navigating the Wires and Linkages
You'll now be looking at a network of wires and rods connected to the back of the panel. This is where that headlamp you grabbed earlier really shines. Take your time and carefully disconnect the electrical plugs for your power windows, locks, and mirrors. Most have a little locking tab you'll need to press before they'll release.
Next, you'll see a sheet of plastic film, the vapor barrier, stuck to the door with a goopy black adhesive. You don’t have to rip the whole thing off. Just carefully peel back one section enough to give yourself a clear line of sight and access to the back of the exterior handle.
You should now be able to see the guts of the door handle mechanism—a couple of metal rods or cables hooking into the handle and lock assembly.
My Go-To Pro Tip: Before you unhook a single thing, grab your phone and snap a few clear pictures from different angles. Having a photo of how everything is supposed to be routed is an absolute lifesaver when you're putting it all back together.
Those rods are typically held on by small plastic retainer clips. They often swing open like a little gate. Use your needle-nose pliers or a flathead screwdriver to gently flip the clip open, and the rod should slide right out.
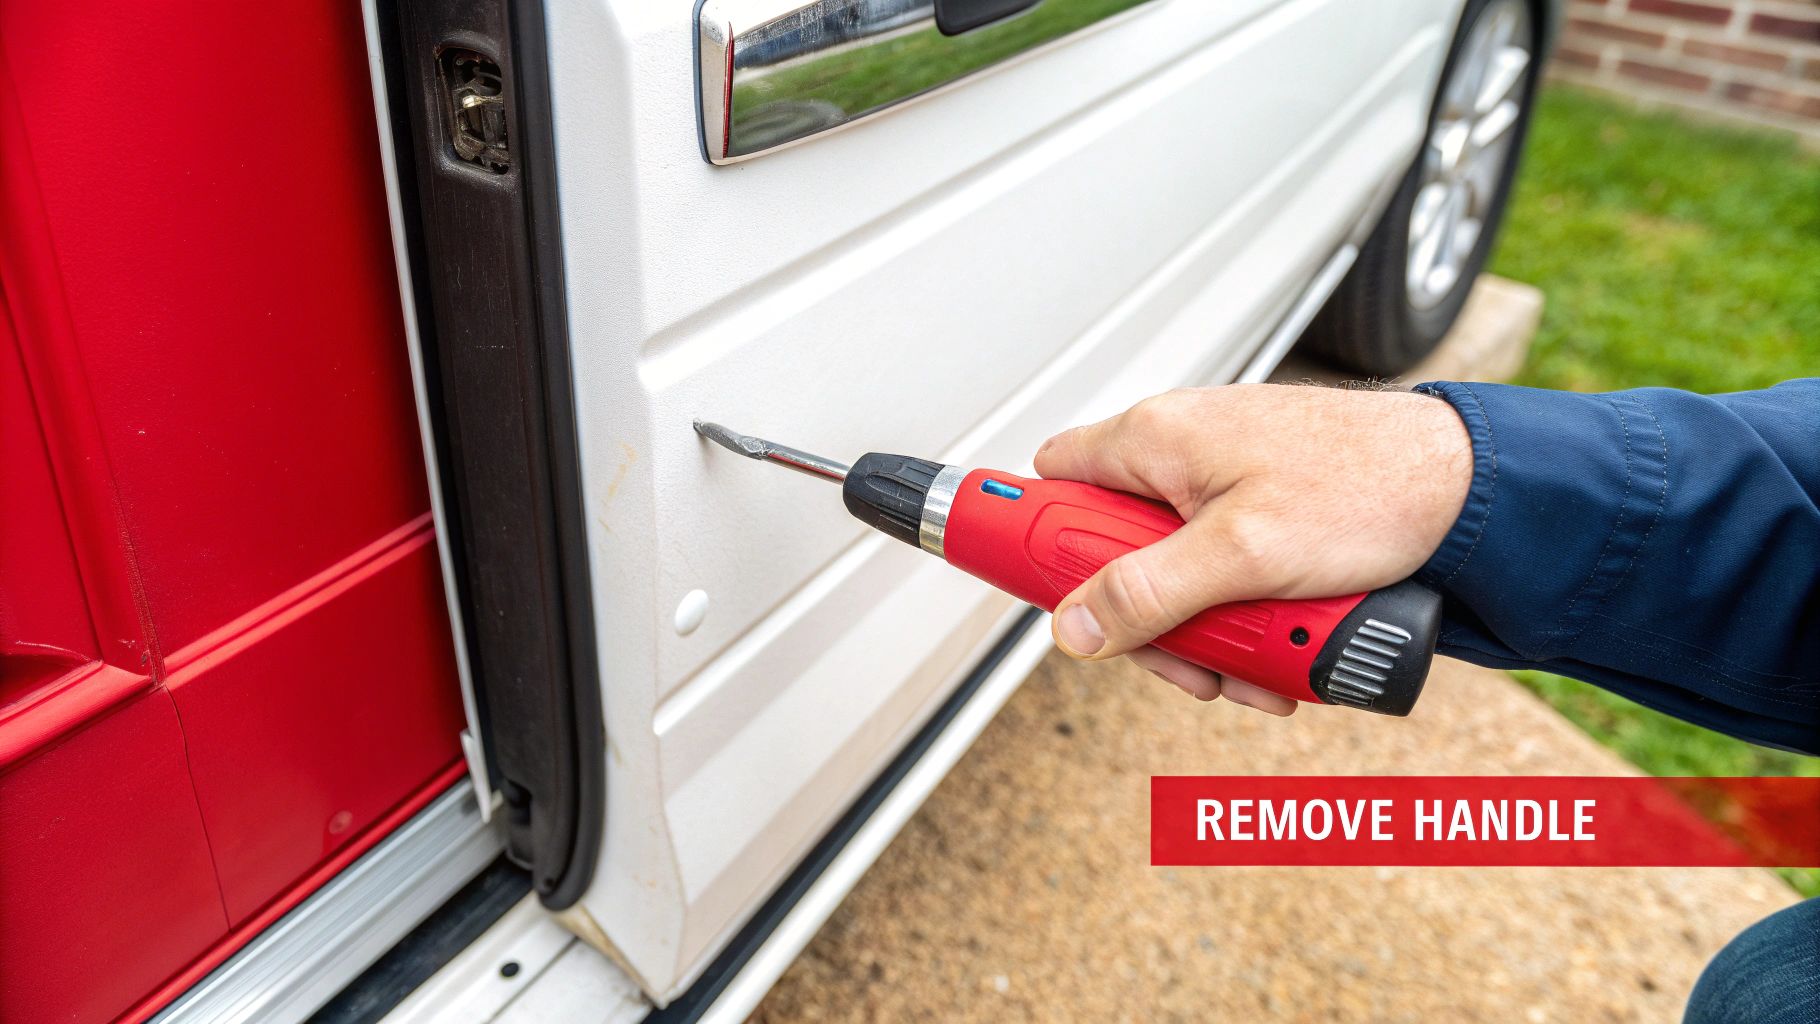
Unbolting the Old Handle
You’re in the home stretch now. The handle itself is usually held in place by two or three bolts, which are almost always 10mm. Grab your socket wrench, add an extension if needed, and carefully loosen them.
This is where that magnetic pickup tool proves its worth. I guarantee that if you don't have one, you'll drop at least one bolt down into the bottom of the door cavity. It happens to everyone.
With the last bolt out, the old handle will feel loose. From the outside of the door, give it a little wiggle to work it free from its mounting hole. And there you have it—the broken part is out, and you’re halfway home.
Installing the New Door Handle Correctly
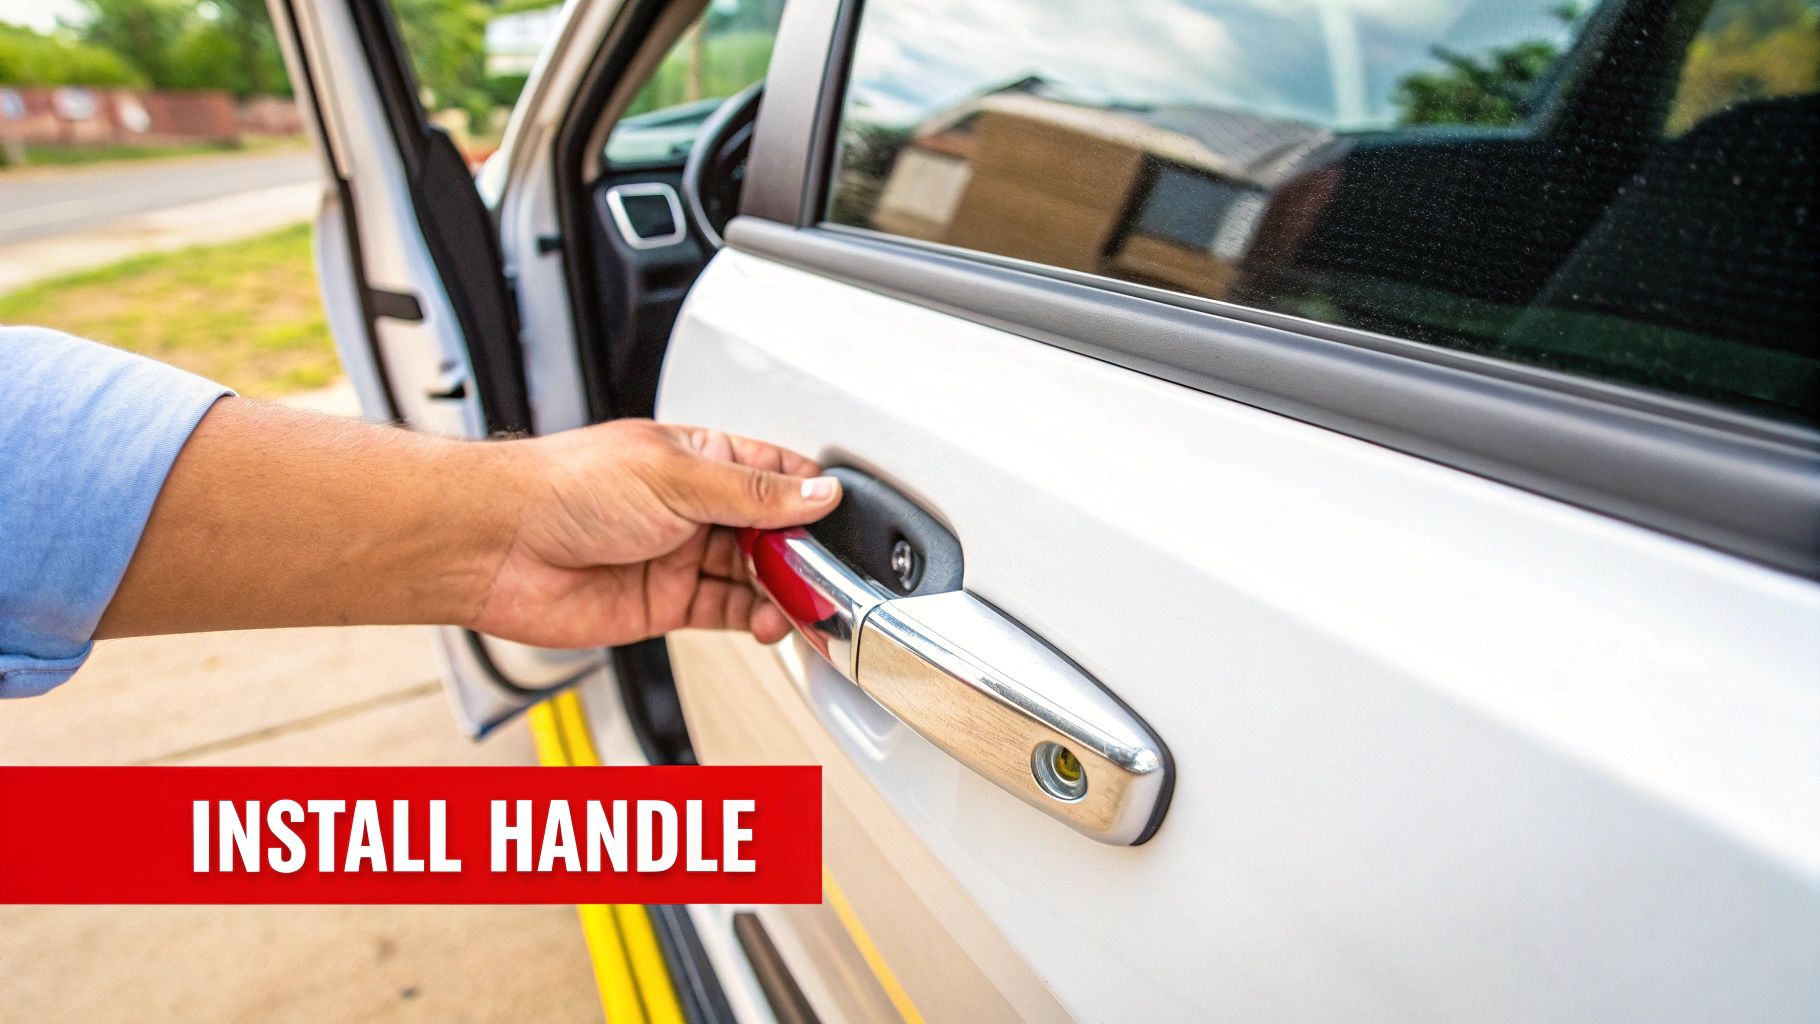
With the old handle out of the way, you're on to the satisfying part. This is where your careful prep work really pays off. The goal is to get this new T1A Auto handle seated so perfectly it looks like it came straight from the factory.
Begin by guiding the new handle into its slot from the outside of the door. You should feel it settle into place without much fuss. Working from the inside, start threading the mounting bolts by hand. This is a crucial little step that helps you avoid cross-threading, which is a massive headache to fix later.
Once they're hand-tight, grab your socket wrench and snug them down. You want to be firm here, but don't go crazy and over-torque them. The handle should sit completely flush against the door's sheet metal, leaving no gaps.
Connecting the Rods and Wires
Time to hook everything back up. This is precisely why you took those photos earlier—they're your road map for getting the lock and latch rods routed correctly.
Gently guide each rod back into its designated hole on the new handle's mechanism. After the rod is seated, swing the plastic retainer clip over and press it shut. You’re listening for a distinct "snap". That click is your confirmation that the rod is locked in and won't pop out down the road.
If your handle has an electrical connector for something like keyless entry, plug it back in now. These plugs are keyed to fit only one way, so never force them. A firm push should result in another solid click, telling you the connection is secure.
Crucial Pre-Flight Check: I've seen it a hundred times—people button everything up only to find the handle doesn't work. Always test everything while you still have access. This one-minute check can save you from repeating the entire job.
The All-Important Function Test
Before you even touch that interior door panel, run through this checklist. Seriously, don't skip a single step.
- Outside Handle: With the door open, pull the exterior handle. Does the latch release smoothly? Try it a few times.
- Inside Handle: Now, pull the interior handle. Does it open the door just as easily, without any snagging or hesitation?
- Mechanical Lock: If you have a key cylinder, stick the key in and turn it both ways. Make sure it locks and unlocks cleanly.
- Power Locks: Grab your key fob and hit the lock and unlock buttons. Do the same with the power lock switch inside the car. Listen for the actuator and verify it's working as expected.
If anything feels off, now is the time to fix it. Usually, the culprit is a linkage rod that isn't seated quite right or is catching on something. Double-check that all your connections are solid and the rods have a clear path to move.
Once you’ve confirmed everything is working flawlessly, you can start reassembling. Carefully stick the vapor barrier back on, ensuring a good seal all the way around to keep moisture out. Then, plug in any electrical harnesses on the back of the door panel for your windows and mirrors.
Finally, hang the panel on the top lip of the door frame. Work your way around the perimeter, giving it a firm pop with the heel of your hand to snap the clips back into their holes. Reinstall the last few screws, and that's it—you're done. Congratulations on learning how to replace car door handle yourself
Troubleshooting Common Installation Hiccups
https://www.youtube.com/embed/h2nueuFlQys
So you've installed the new handle, but something's not quite right. Don't worry, it happens to all of us. Even seasoned pros hit a snag now and then. Before you get frustrated, let's walk through the most common issues that pop up after an installation. Most of the time, it’s a quick and simple fix.
You pull the handle, but it feels wobbly or doesn’t snap back into place like it should. That’s a classic sign of a mounting hardware issue.
Or maybe the door clicks but doesn’t actually latch shut. That almost always points to an adjustment issue with the latch rod. Let's get these sorted out.
What to Do If the Handle Feels Loose
If your new handle feels sloppy, the very first thing to check is the mounting bolts. Pop that door panel off again and get a wrench on the bolts holding the handle to the door frame. Make sure they are snug and secure. It's easy for them to back off a little while you're wiggling everything else into place.
Are the bolts tight but the handle still feels off? Take a look at the return spring mechanism inside the T1A Auto handle itself. It's rare for a quality part to have an issue here, but it’s worth a quick inspection to make sure nothing was dislodged during installation.
Solving Latch and Lock Problems
When the door refuses to latch or the lock won’t engage, the problem is almost always in the rod connections. These little rods need just the right amount of play to function correctly—too tight or too loose, and things stop working.
Here are the most common scenarios:
- The door won't latch: The rod that connects your new handle to the door latch is probably a bit too tight. This is a super common mistake. It doesn't allow the latch mechanism to fully reset after you pull the handle. Just pop the clip open and give the rod a tiny bit of slack.
- The power locks are dead: The culprit here is usually an electrical connector that didn't get seated all the way. Go back and give each plug a firm push to make sure you hear and feel it click into place.
- The key won't turn in the lock: The rod running from the key cylinder to the main lock mechanism is likely in a bind. Check to see if it's being pinched or bent out of its natural path by another part inside the door.
A sticky lock mechanism can sometimes be mistaken for a handle problem. If the lock itself feels jammed, there might be an internal issue. We've put together a guide on what to do if you have a stuck car door lock that dives deeper into those specific fixes.
Below is a quick-reference table to help you diagnose and fix these common hiccups on the fly.
Troubleshooting Common Installation Problems
| Problem | Likely Cause | Solution |
|---|---|---|
| Handle is loose or wobbly | Mounting bolts are not fully tightened. | Access the back of the handle and snug up the mounting bolts. |
| Door won't latch shut | The latch rod is adjusted too tightly. | Open the clip holding the latch rod and introduce a small amount of slack. |
| Power locks don't work | The electrical connector is loose or unplugged. | Re-check all electrical connections and ensure they are securely seated. |
| Key won't turn the lock | The key cylinder rod is pinched or misaligned. | Ensure the rod has a clear path and is not caught on any other components. |
Taking a patient, methodical approach to troubleshooting can save you a ton of headaches. Just re-check your connections, fine-tune the rod adjustments, and you'll have that door working perfectly in no time.
Your Top Door Handle Questions, Answered
Even with the best guide in hand, a few questions always come up before you start unscrewing that first bolt. Getting those answers sorted out beforehand can be the difference between a smooth project and a frustrating afternoon. We've been there, so we’ve put together the most common questions we hear to help you get started with confidence.
Let's dive right into the one everyone asks first.
How Long Will This Actually Take?
If this is your first time replacing a door handle, give yourself a solid 2-3 hour window. A seasoned pro might get it done in less than an hour, but you’re not trying to set any land speed records.
The time it takes can really depend on your car's make and model. Some door panels are engineered to pop right off, while others feel like they were designed by a puzzle master. The key is to not rush it. Trying to go too fast is the number one way to break a fragile plastic clip or scratch your paint. A little patience now will save you a much bigger headache later.
Do I Really Need to Disconnect the Battery?
We get this one a lot, and the answer is a firm yes.
It might seem like a hassle, but disconnecting the battery is a crucial safety step. Your door panel is packed with wires for your power windows, locks, speakers, and maybe even side-impact airbags. One accidental short-circuit could damage an expensive computer or, worse, deploy an airbag. It's a simple precaution that you shouldn't skip.
Common Questions About Parts and Procedures
A couple of other common scenarios can throw a wrench in your plans if you're not prepared. Here's how to handle them.
-
Can I just replace the outside handle without touching the inside one?
Absolutely. The interior and exterior handles are completely separate components. You can swap out a broken exterior handle without ever needing to mess with the one inside. Just make sure you order the correct part for the specific door, like the "front driver's side" or "rear passenger's side." -
My new handle has an extra plug on it. What gives?
This is a classic sign that you've got the wrong part. It usually means the handle is for a higher trim level with features like keyless entry that your car doesn't have. Don't try to make it fit. The best move is to double-check the part number against your car’s VIN and return it for the correct one. This ensures everything works safely and as it should.
Getting these details ironed out before you even pick up a tool makes the whole process feel much more manageable.
Ready to find the perfect part for your repair? T1A Auto has premium aftermarket door handles designed for a perfect fit and long-term durability. Shop now at t1aauto.com and get your project done right.
