


A tailgate that refuses to latch on a cold morning is more than an annoyance. A rear door that pops open over a pothole, or a front door that needs two slams before the outside handle works, tells you the latch is no longer controlling the door reliably. Adjusting the striker might hide the symptom for a while, but it won't repair a cracked spring anchor, worn pawl, or mounting hole that has started to move.
The right replacement depends on how the failure started. Plastic assemblies often develop play at molded pivots, while iron and stamped-steel parts tend to suffer from corrosion, seized contact surfaces, and elongated mounting holes. This guide connects each symptom to the component behind it, so you can decide whether cleaning, alignment work, a shim, or a complete metal replacement is the sensible repair.
Table of Contents
- When a Door Latch Becomes a Real Problem
- Iron Versus Plastic and How Each Actually Fails
- Diagnosing Your Existing Latch Before You Buy
- Why an Upgraded Metal Latch Is Worth It
- Matching the Right Latch to Your Vehicle
- What CAPA Certification Means for Latch Parts
- Installing an Aftermarket Latch Assembly
- Choosing the Right Latch for Your Situation
When a Door Latch Becomes a Real Problem
A latch doesn't usually fail all at once. The return spring weakens first, so the handle feels slow coming back or stops short of its normal position. Then the pawl no longer holds the striker with the same authority, and the door starts requiring a harder slam. If the mounting screws loosen or the surrounding sheet metal stretches, the entire assembly can shift every time the door closes.
Practical rule: If the latch releases only intermittently, treat it as a safety problem rather than an adjustment problem.
The symptom often points toward the failed part. A handle that moves but doesn't release the door can indicate a corroded bolt, seized linkage, or damaged pivot. A door that won't stay closed suggests a weak spring, cracked plastic anchor, or pawl that isn't reaching its full locking position. A rattle near the latch usually means the housing or its fasteners are moving under load.
Check the striker before ordering parts, but don't assume it's the only cause. A shifted striker can create poor engagement, yet it can't correct an internally worn latch. The door should close smoothly, the bolt should travel fully, and the mechanism should release consistently from every operating handle.
Older iron hardware also shows why repeatable manufacturing matters. Historical iron latch production moved from individually forged components toward standardized cast shapes, a transition described in this history of architectural door hardware. On a vehicle, the same principle applies. Correct geometry and consistent dimensions matter as much as the metal's appearance.
Iron Versus Plastic and How Each Actually Fails
“Metal is stronger” is too broad to guide a repair. The useful question is which material is failing, where the damage appears, and whether the replacement addresses that failure mode.
Plastic latch housings are light and can be perfectly adequate for a lightly used commuter. Their common weakness is the molded spring anchor or pivot boss. Once the hook cracks or the boss wears oval, the handle can feel loose and the pawl may not return completely. Iron and stamped-steel assemblies usually resist that type of breakage, but they aren't immune to service damage. Rust can restrict bolt travel, and repeated movement can enlarge the mounting holes in the latch or the door shell.
Iron vs Plastic Latch Failure Modes
| Failure Mode | Plastic Latch | Iron / Stamped-Steel Latch | Symptom Driver Feels |
|---|---|---|---|
| Spring anchor damage | Molded hook can crack or deform | Coil spring usually remains intact, but corrosion can restrict movement | Handle returns slowly or not at all |
| Pivot wear | Plastic boss can wear oval | Pivot pin or hole can loosen after prolonged use | Handle feels loose, release is inconsistent |
| Corrosion | Usually affects fasteners and linkage | Can seize the bolt, pawl, or striker contact area | Handle pulls, but the door doesn't release |
| Mounting movement | Housing can flex around the screws | Mount holes or surrounding sheet metal can elongate | Rattle, shifting alignment, repeated adjustment |
| Impact or overload | Housing can crack | Casting can crack if forced during removal | Latch binds or won't hold the striker |
A zinc-alloy or forged-steel upgrade can address pivot wear and housing flex when the design includes suitable corrosion protection and a properly hardened pivot. It won't fix a rotten door shell or a striker that has worn into a sharp groove. Match the material choice to the actual damage, not to a product photo.
Diagnosing Your Existing Latch Before You Buy
Start with a flashlight, screwdriver, and penetrating lubricant. Keep your hands clear of the striker while testing, and don't rely on a latch that won't hold the door securely.
- Check bolt projection. Hold the exterior or interior handle in its operating position and observe how far the latch bolt extends from the housing. Compare that travel with the striker depth. A bolt that barely reaches the striker points toward worn internals, a weak spring, or an obstruction inside the mechanism.
- Feel the return spring. Operate the handle through its complete travel. The movement should be smooth, with a firm return and no hang-up halfway through. A mushy return usually indicates spring fatigue, a cracked anchor, or contamination around the pivot.
- Inspect striker alignment. Look for a polished wear path, fresh scratches, or a striker that has shifted inward. A small alignment correction or shim may solve a geometry problem, but it won't cure a sloppy latch pivot.
- Examine the mounting area. Rust bloom around the screws, stripped heads, and oblong holes show that the assembly has been moving under load. Check the door metal as well as the latch itself. A new part can't stay aligned if the structure holding it is compromised.
For a visual reference, use this door latch assembly diagram while identifying the bolt, pawl, spring, and linkage.
Clean and lubricate the latch only when the bolt reaches full travel and the spring still feels firm. Replace it when the pivot is visibly sloppy, the mount holes are stretched, or the casting or housing is cracked, even if the outside of the bolt still looks serviceable.
Why an Upgraded Metal Latch Is Worth It
A metal upgrade makes the strongest case on a vehicle that works hard, sees frequent door cycles, or has already rejected an economy replacement. The purchase price is only one part of the decision. The second repair can also involve repeated trim removal, diagnostic time, lost vehicle use, and another alignment session.
An inexpensive plastic latch can be the rational choice for a lightly used vehicle when the original design has provided reliable service and the surrounding door structure is sound. A metal assembly makes more sense when the failed part shows a cracked spring anchor, worn pivot, or housing flex that the replacement design is meant to eliminate.
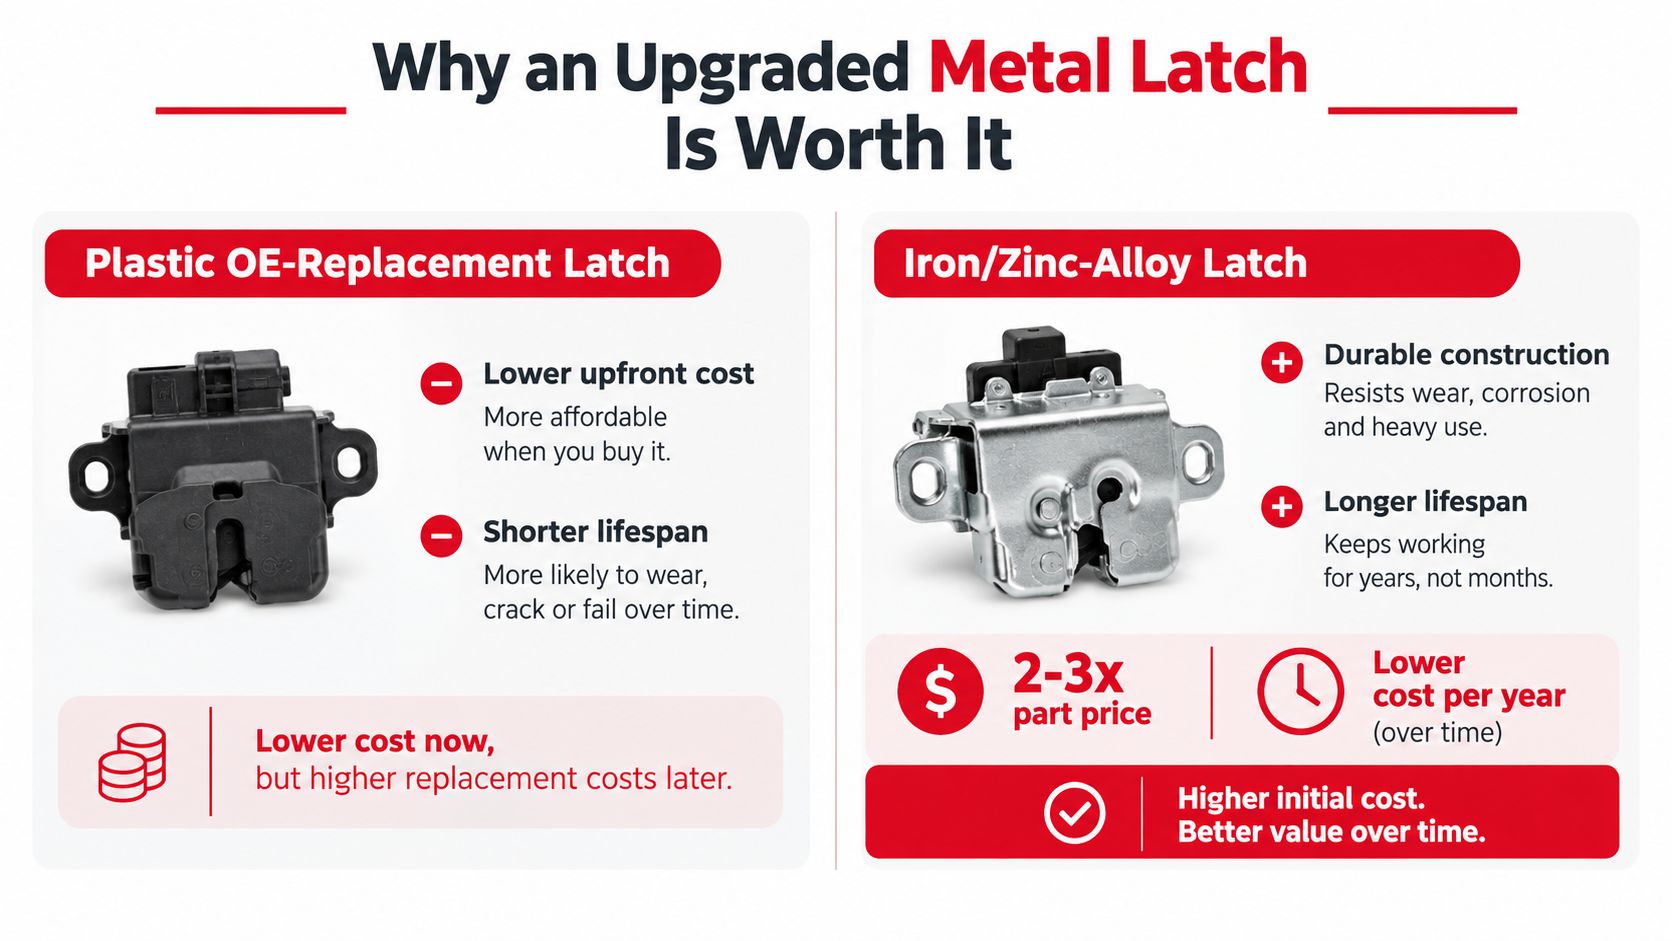
Look for a written warranty, clear material information, replacement hardware that matches the original geometry, and evidence that the manufacturer tests the complete assembly rather than only a decorative component. A strong housing doesn't compensate for a weak spring, poor cable routing, or an inaccurate striker interface.
For high-use applications, cycle testing is meaningful only when the test setup matches the vehicle's door mass, closer force, and hardware configuration. The ANSI/SDI A250.4 endurance guidance distinguishes different endurance levels, while BHMA assembly testing uses its own load and cycle requirements. Don't compare cycle counts as though every test represents the same service condition.
Matching the Right Latch to Your Vehicle
Fitment starts with the complete vehicle description, not a photograph. Search by year, make, model, and submodel, then confirm the door position. Front left, front right, rear left, rear right, and tailgate assemblies frequently use different part numbers, even when the doors share a similar shell.
Check whether the listing includes only the latch or a larger assembly. Some tailgate designs combine the latch with the handle and release cables. Others use a separate cable, lock linkage, or actuator. Buying the wrong configuration can leave you with a part that matches the bolt pattern but can't connect to the vehicle's release system.
Before opening the package, compare these details with the original:
- Mounting pattern: Count the fasteners and compare their spacing and orientation.
- Striker relationship: Confirm that the bolt exits at the same height and angle.
- Linkage direction: Check whether the rods, cables, or electrical connector approach from the same side.
- Lock integration: Driver-side assemblies may include a lock-cylinder linkage that isn't present on the passenger side.
- Tailgate configuration: Verify whether the cable is separate or built into the handle and latch assembly.
Tailgate cable integration is a frequent source of ordering mistakes on popular full-size pickup platforms, including Ford F-Series, Chevrolet Silverado, and Ram trucks. Search for the complete integrated assembly when the cable winds into the latch or handle housing. A part number that looks close isn't enough. Compare the mounting holes, cable ends, connector, and release direction before installation.
What CAPA Certification Means for Latch Parts
CAPA certification can provide useful evidence that an aftermarket part has been evaluated against defined fit, material, and finish requirements. It isn't a universal quality label for every mechanical feature, and it doesn't remove the need to verify vehicle-specific fitment.
For a latch, inspect what the certification or manufacturer documentation covers. A seal may support confidence in dimensional consistency, but it doesn't automatically prove that the spring rate, cable routing, lock linkage, or long-term corrosion protection suits your vehicle. Those details belong to the complete latch assembly and its installation environment.
The absence of CAPA certification doesn't automatically disqualify a metal latch. Mechanical hardware may instead rely on the manufacturer's engineering controls, inspection process, testing records, and warranty. The CAPA certification overview can help explain the program's role, but buyers should still request documentation that relates specifically to the latch assembly.
Use this order of priority:
- Confirm the exact vehicle and door position.
- Match the mounting geometry and linkage arrangement.
- Check documented endurance or cycle testing where available.
- Review material and corrosion-protection details.
- Read the written warranty and return terms.
ANSI and BHMA performance standards separate dimensional compatibility from operational force, strength, security, material behavior, finish durability, and repeated-cycle endurance. That distinction is important. A latch can fit the door and still fail because its operating force rises, its pivot wears, or its housing deforms, as outlined in the ANSI/BHMA door-locking standards.
Installing an Aftermarket Latch Assembly
Most competent DIYers can handle a latch replacement with a screwdriver, trim-clip tool, Torx driver, and careful labeling. Begin by removing the interior door panel, disconnecting the handle linkage or cable, and exposing the latch fasteners. Mark each rod and cable position with tape before removal. That small step prevents a correctly installed latch from being paired with an incorrectly routed release rod.
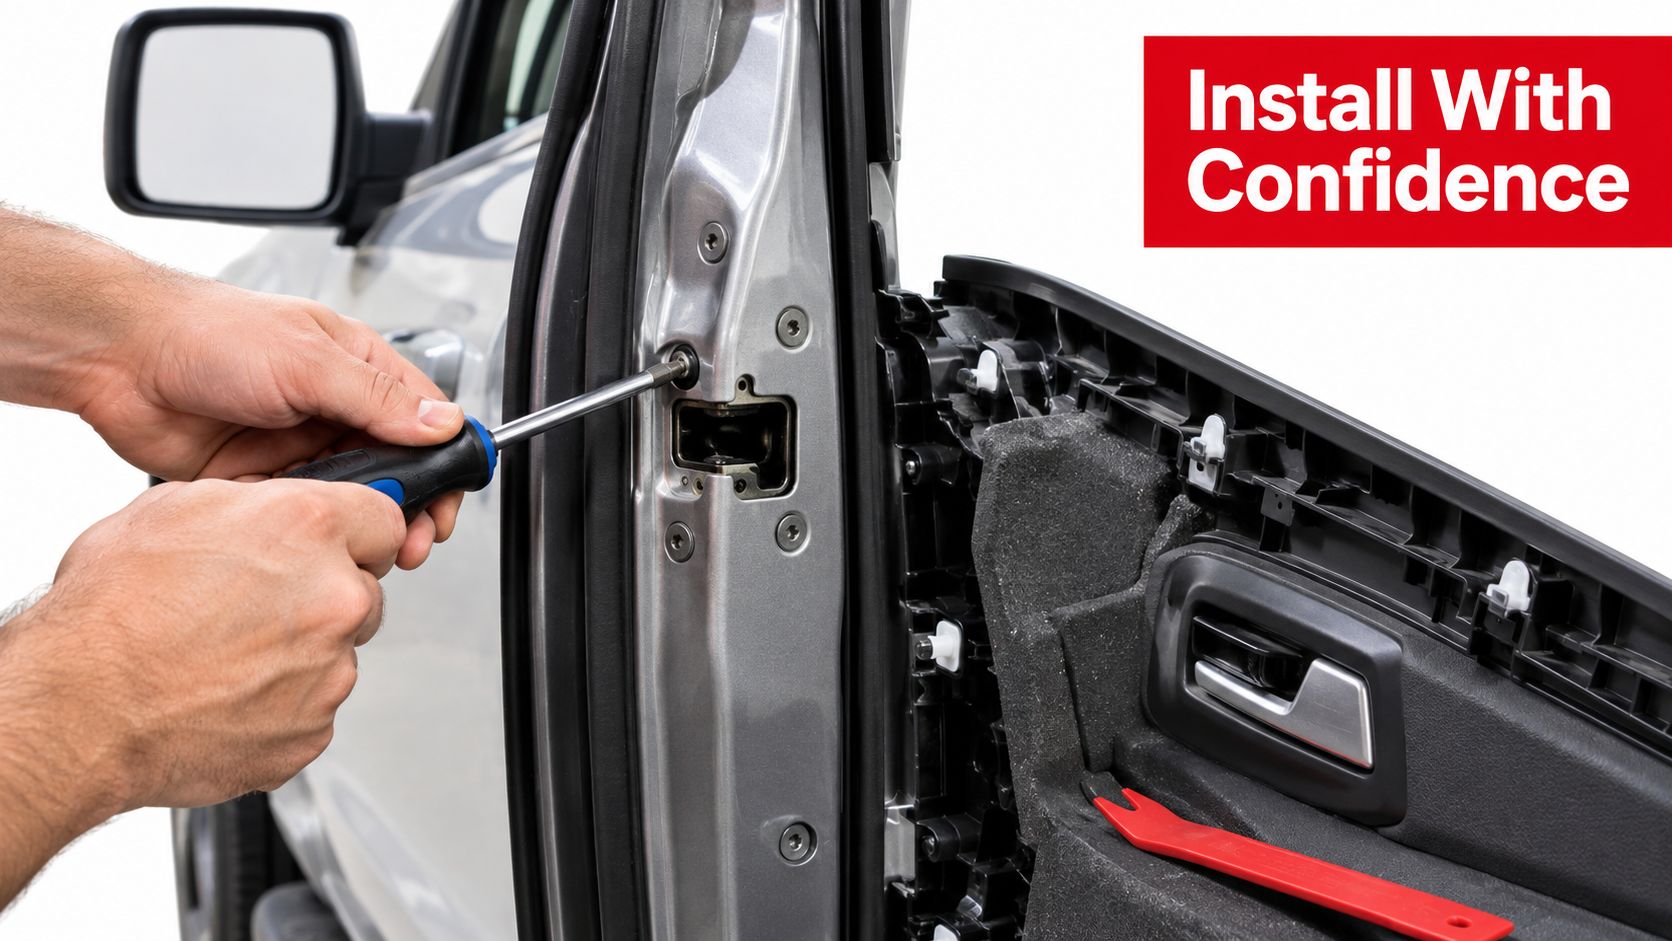
Unbolt the assembly, rotate it through the access opening, and transfer the linkage only if the replacement instructions call for it. Some vehicles use a separate latch and handle. Others package the handle, latch, lock mechanism, and tailgate cable together. Don't force a cable spool or preloaded spring into a housing that wasn't designed for that configuration.
After the replacement is loosely mounted, connect the rods and cables and operate the mechanism by hand. The handle should move through its full range, the latch should release cleanly, and the bolt should re-engage without binding. Tighten the fasteners only after confirming that the assembly sits squarely against the door.
Before reinstalling the trim panel, test the latch with the door open, then engage it against the striker carefully. Keep the door open during the first checks so you can release it without fighting a misadjusted mechanism. These door latch replacement instructions provide another useful reference for the general removal and installation sequence.
For a visual walkthrough, watch the following installation video after reviewing the linkage layout and fastener locations.
If the new latch binds, stop before tightening everything fully. Recheck cable routing, striker position, door sag, and the mounting surface. A replacement can't overcome a bent hinge, distorted door shell, or badly worn striker.
Choosing the Right Latch for Your Situation
A daily-driver commuter with a sound door shell usually doesn't need the heaviest available latch. A quality plastic OEM-style replacement can be sensible when the original failed because of age, contamination, or a single damaged component. Spend more attention on exact fitment and linkage compatibility than on material alone.
A work truck, off-road vehicle, or frequently used fleet unit deserves a more durable approach. Choose iron, zinc-alloy, or stamped-steel hardware when the original failure involved a cracked plastic anchor, loose pivot, or housing flex. Inspect the striker at the same time, because a worn contact surface can damage the new latch and create the same symptom again.
Restoration projects need a different balance. Preserve original geometry where possible, but don't keep a cracked casting or unreliable release mechanism solely because it looks authentic. Period appearance matters, yet the door still has to hold securely, release consistently, and remain usable for the people operating it.
Use this ordering checklist:
- Vehicle identity: Confirm year, make, model, submodel, and door position.
- Assembly contents: Verify whether the handle, lock linkage, actuator, or cable is included.
- Failure match: Choose the material and design that address the actual damaged spring, pivot, housing, or mount.
- Warranty: Read the coverage period and exclusions before treating it as a durability guarantee.
- Striker condition: Replace or repair the mating striker when it has a deep wear groove, corrosion damage, or poor alignment.
Iron door latch hardware is worthwhile when it solves a documented failure mode and fits the vehicle without compromise. Order the correct assembly from T1A Auto, where you can search premium replacement handles, latches, tailgate assemblies, and related hardware by vehicle. Use the fitment details and warranty information to choose a part that fixes the underlying problem instead of repeating the same repair.
