


You slam the tailgate, hear one side click, and feel the other side bounce. It rattles over bumps, the open warning flickers, and you're already pricing a new tailgate hinge lock before you've checked whether the lock is even the problem. That's where most owners waste money. A shifted striker, dry hinge, or pinched seal can imitate a failed lock almost perfectly. Diagnose in order, confirm the exact hinge geometry before you buy, and you'll either fix it with adjustment and lubricant or replace the right part once. I'd start with the cheapest evidence first, not the parts catalog.
Table of Contents
- How to Diagnose a Failing Tailgate Hinge Lock
- Confirm Lock Type and Fitment Before You Buy
- How to Remove and Install a Tailgate Hinge Lock
- Quick Fixes for Common Tailgate Hinge Lock Failures
- Decide Repair or Replacement and Protect the Tailgate
How to Diagnose a Failing Tailgate Hinge Lock
A tailgate that releases on one side, closes hard, or rattles needs a few checks before you buy parts. Park on level ground and support the gate so it cannot drop. The NHTSA service bulletin on tailgate latch diagnosis separates latch failure from alignment and hinge friction. Check in that order.
Run the Five Checks in Order
- Test both latch sides. Operate the handle and check whether each side releases smoothly. If one side stays engaged, inspect that latch and its linkage.
- Inspect for rust and grit. Clean the striker and hinge areas. Check that the weather seal is not pinched against the closing edge; debris or a pinched seal can prevent full engagement.
- Do the chalk test. Mark the striker with chalk, close the gate, then reopen it and inspect the contact mark. An off-center mark calls for alignment correction before any lock is considered.
- Lubricate the pivots. Apply lubricant at the hinge points, then close the gate and listen for friction or rattling. If closure improves, hinge friction was contributing to the problem.
- Adjust last. Move the striker or reset the gap only after confirming the contact pattern. Forcing a misaligned latch can bend the linkage or damage the striker.
Practical rule: Record the symptom, such as one-sided locking, hard closure, rattling, or an open warning, and note which check changes it. That points to the area needing repair.
Powered Tailgates Need a Different Test
For a powered gate, run the staged pre-latch test before making adjustments. From the upper-open position, close the gate and depress the pre-latch with a blunt tool. It should stop immediately. Reopen the gate so the pre-latch resets, close it again, and interrupt it a second time. The power latch should then engage the main latch and return to its normal position. A failure at the first stage points to a defective lock; a failure at the second points to the power-latch system. Keep your hands clear of pinch points.
If a powered tailgate opens unexpectedly while driving, stop using it and check for an open recall. WTNH reported that General Motors recalled 132,037 2024 Chevrolet Silverado HD and GMC Sierra HD pickups in December 2024 because their power-unlatching tailgates could open unexpectedly. For a worn handle linkage on a Silverado or Sierra, choose a replacement by matching the vehicle and handle configuration. Do not rely on the lock name alone.
Confirm Lock Type and Fitment Before You Buy
Two hinges can look identical on a bench and still fit differently on the truck. One restoration forum discussion of reproduction tailgate hinges reports 2.55-inch bolt-hole spacing on an original hinge versus 2.75 inches on a reproduction, with drilling, slotting, welding, or nutsert work possibly required. That gap is small on a tape measure and large on a mounting point.
| Option | How it works | Main weak point | Best fit |
|---|---|---|---|
| Manual key lock | Turns with a key and secures the tailgate hinge | Key management and corrosion around the cylinder | Older work trucks and fleets with few keys |
| Electronic lock | Engages with the vehicle's central locking system | Depends on battery state and wiring | Newer daily drivers locked with the vehicle |
| Replacement hinge insert | Matches the factory mounting points for the listed model | Bolt-hole spacing can differ by model or reproduction | Restoring a worn hinge on the exact truck |
Verify the Geometry, Not the Product Name
The generic label tells you almost nothing. Work through this checklist before ordering:
- Exact model year or VIN: Use the guide to searching parts by VIN number rather than relying on a model name alone.
- Bed length and hinge orientation: Confirm left versus right, and bed-side versus tailgate-side mounting.
- Factory or replacement tailgate: Aftermarket panels can carry different tolerances than the original.
- Bolt-hole spacing: Measure center to center on the old hinge and compare it with the listing.
- Clearance: Check space around the latch, support cable, and any wiring so the new part doesn't foul moving hardware.
- Drilling requirement: Decide up front whether you're willing to modify the mount.
A lock that drops onto the factory points without modification keeps the original mounting strength. Enlarged or slotted holes can weaken that mount and expose bare metal, which then rusts under the hinge. If you're managing mixed-year fleet trucks, that distinction matters on every truck, not just the first one.
Match the OEM part number printed or stamped on the old hinge against the listing before you pay. It's the fastest fit check you have, and it beats any photo comparison.
How to Remove and Install a Tailgate Hinge Lock
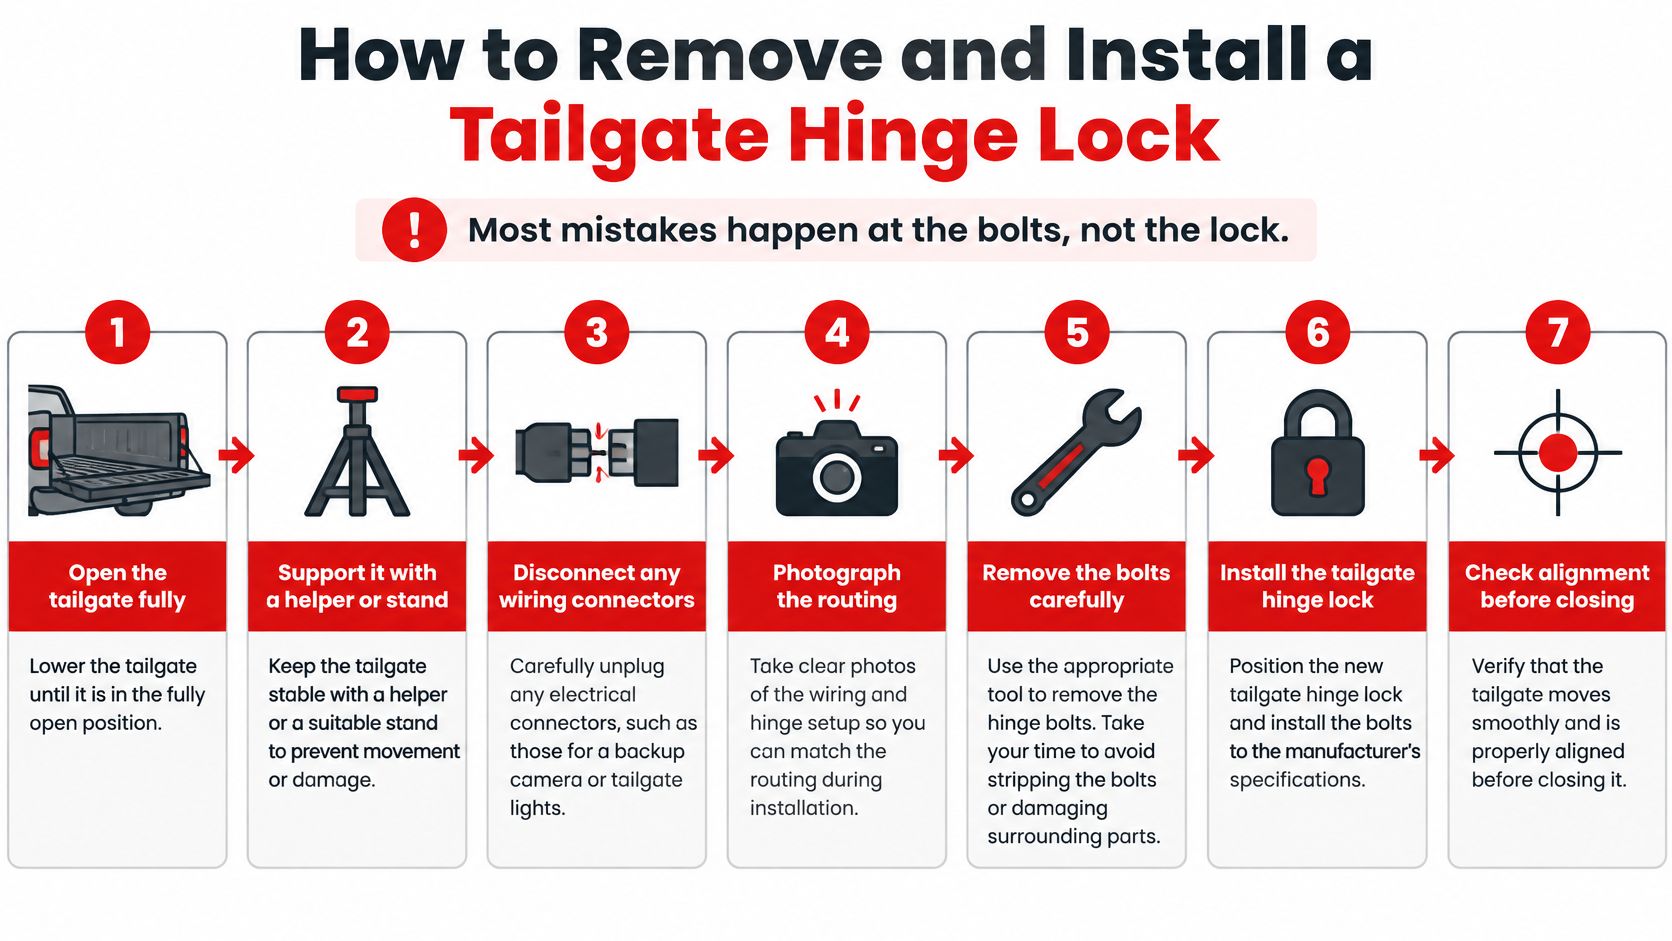
The mistakes that matter happen at the fasteners: cross-threaded nuts, bolts torqued out of sequence, and shims that never make it back into the stack. Any one of them pulls the hinge out of line, and a crooked hinge makes a brand-new lock behave like a failing one. Work slowly, support the gate properly, and keep every shim and clip in the order it came off.
The sequence below covers the full job, from opening the gate to confirming alignment before final closure.
Removal Steps
- Open and support the tailgate. Open it fully and support it with a helper or a stand. Disconnect any wiring connectors and photograph the routing so the reinstall matches exactly.
- Remove the hinge bolts. Keep the gate supported and start with the lower bolts. This order stops the gate's weight shifting onto the remaining fasteners and bending them.
- Lift the component off. Lift the tailgate or old hinge part clear, keeping shims, clips, and washers in the order they came off. Lay them out left to right on a clean surface.
- Prepare the new hinge. Clean the threads, then transfer retaining clips and any nutserts to the new part. Dirty threads give false torque readings and seized bolts later.
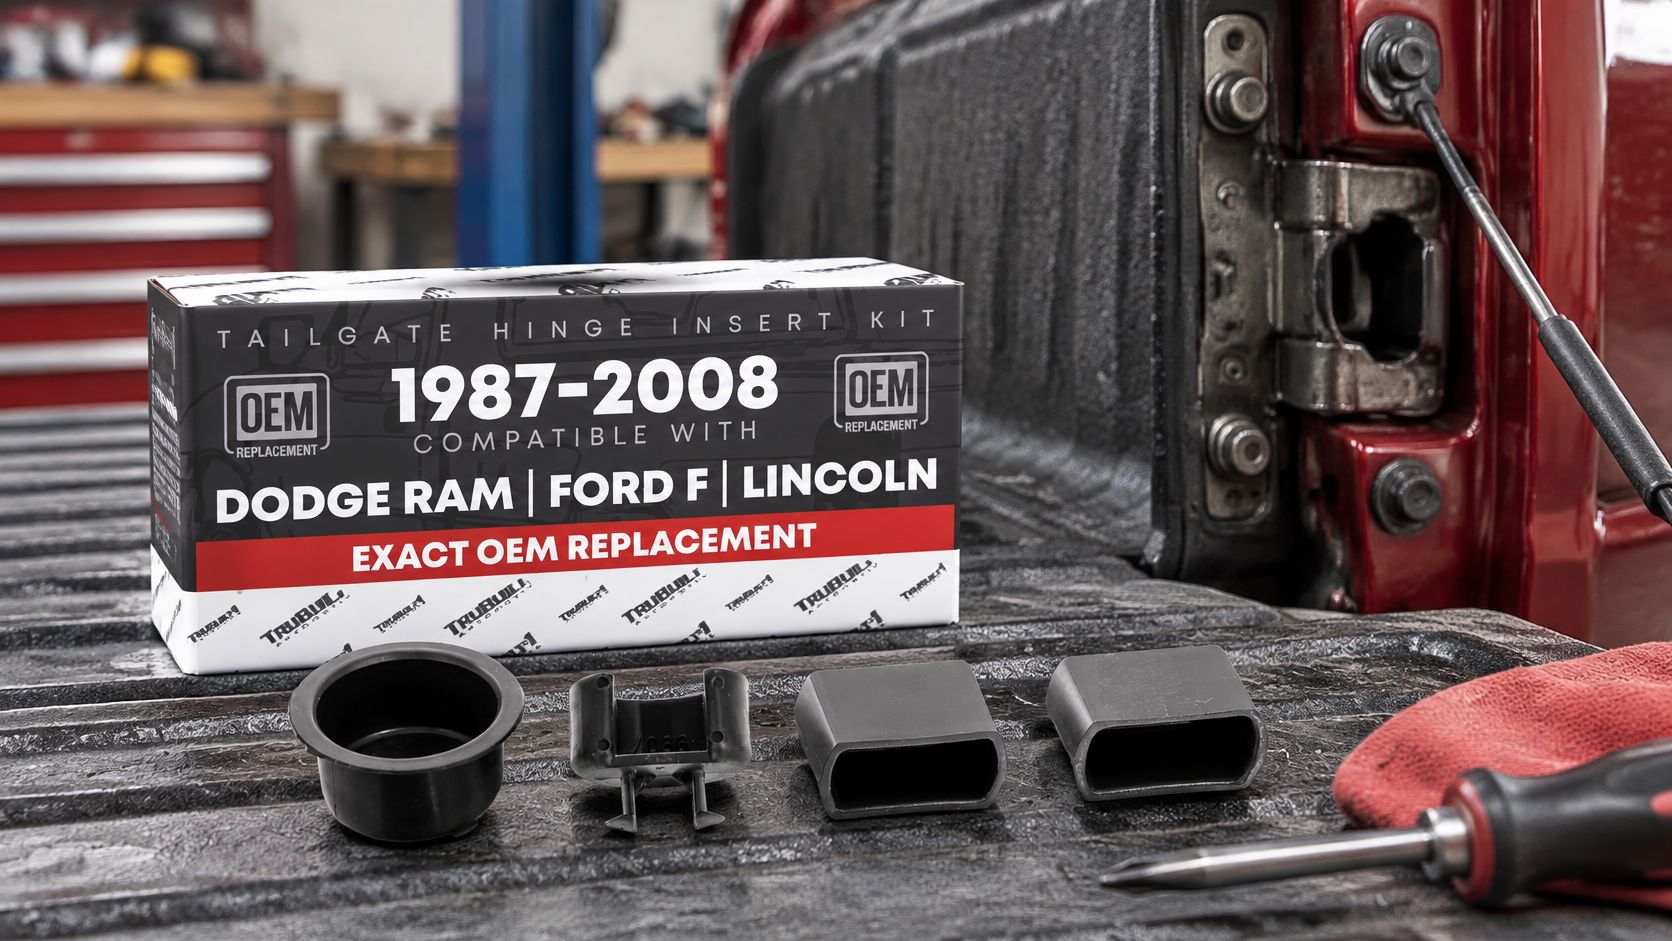
Where the hinge insert itself is worn, a kit such as the Tailgate Hinge Insert Kit, 4-Piece Set, Driver Side and Passenger Side - Compatible with 1987-2008 Dodge Ram - OEM 38641, 55274936AC, E7TZ99430B22A, F6TZ99430B23AA matches OEM numbers 38641, 55274936AC, E7TZ99430B22A, and F6TZ99430B23AA and is listed as compatible with 1987-2008 Dodge Ram. Confirm your exact model and year against that listing, since the kit only helps if the mounting geometry matches.
Installation Steps
- Seat the hinge loosely. Set the new hinge on its mounting points and start every bolt by hand without fully tightening. Check the panel gap and striker contact while you can still shift the part.
- Tighten in sequence. Follow the factory bolt sequence to the specified torque, working across the hinge so the bolts come up together. Reconnect the wiring using your photos.
- Cycle and retest. Turn the lock with the key and, where fitted, test it through the central locking. Repeat the chalk check to confirm centered striker contact.
Watch the fastener and alignment technique in the walkthrough below before you put tools on your own truck.
A bolt that refuses to start by hand is telling you something. Forcing it cross-threads the nut, and you'll feel it bind within the first turn if you're paying attention. Tightening one bolt fully before the others are seated pulls the hinge out of line, and the gate then closes crooked no matter how good the lock is. If a bolt resists, back it out, clean the thread, and start again.
Torque discipline: Snug every bolt first, then torque in sequence, then test closure. Never use final torque to drag a misaligned hinge into place.
Finish with several full open and close cycles, a firm pull test on the closed gate, and a lock test from both sides. Recheck the hinge bolts after the first week of driving, since freshly seated hardware can settle under load and vibration. If the rattle returns after that recheck, worn clips are the likely suspect, and extra torque will only mask the play.
Quick Fixes for Common Tailgate Hinge Lock Failures
One side that won't lock is the complaint that sends owners shopping, yet it often ends with a striker adjustment. Work from the symptom to the likely cause, and try the reversible fix before you order parts. The table separates same-day corrections from jobs that need replacement hardware.
| Symptom | Likely cause | Fix | Time to fix |
|---|---|---|---|
| Lock engages on one side only | Striker shifted or latch linkage worn on that side | Realign striker, then inspect linkage | Same day |
| Tailgate hard to close | Dry hinge pivots or weather seal catching the edge | Lubricate pivots and reposition seal | Same day |
| Rattling when closed | Loose hinge bolts or worn retaining clips | Tighten to specification and replace clips | Same day |
| Tailgate-open warning after closing | Latch not fully seated on the striker | Recheck contact pattern and re-seat latch | Same day |
| Lock turns but tailgate lifts off | Retaining hinge hardware loose or damaged | Replace worn hinge hardware | One to two days including parts |
| Rust at the hinge seat | Corrosion weakening the mounting point | Clean, seal and reinforce before fitting a new lock | About a week with cure time |
What to Check After Each Fix
After realigning a striker, repeat the chalk test and confirm both sides click with equal effort. After lubricating dry pivots, cycle the gate ten times and check that closing effort stays consistent, not just better on the first try. If it stiffens again quickly, the pivot surface itself is worn or corroded, and lubricant is masking the fault.
Rattling deserves a bolt check before anything else. Tighten hinge bolts to specification, then shake the closed gate by hand. Movement that remains usually means worn retaining clips, and replacing them is cheap compared with a lock assembly. For guidance on the latch side of that repair, the tailgate latch replacement guide covers the related hardware.
An open warning after closing means the latch hasn't fully seated, even if the gate looks shut. Push firmly at each corner and watch which side moves. That side needs its contact pattern rechecked, not a harder slam.
Rust at the hinge seat often looks like a lock fault but is really a mounting problem. Clean it back, seal the metal, and let it cure before a new lock goes on, or the new part will loosen in the same weakened seat.
The lift-off symptom is the serious one. If the lock turns yet the tailgate still lifts off its hinge, the retaining hardware isn't holding, and no adjustment fixes worn metal. That's a parts replacement, typically one to two days including ordering. On Ram trucks where the handle's locking mechanism itself has failed, the T1A Tailgate Handle Assembly, Upgraded Metal w/Keyhole - Compatible with 2009-2012 Dodge Ram 1500, 10-12 Dodge Ram 2500, 10-12 Dodge Ram 3500 - OEM 68044904ADA, 68044904AB, 55397292AB, 55397292AA lists compatibility with 2009-2012 Ram 1500 and 2010-2012 Ram 2500 and 3500 models. Start with the reversible fixes, alignment, lubrication, and re-torquing, because you can undo them. Replace hardware only when those checks prove the part itself has failed.
Decide Repair or Replacement and Protect the Tailgate
Repair when the lock engages on both sides once alignment, lubrication, or re-torquing is done. Replace when it still fails on both sides after alignment, the mounting holes have worn oval, or the retaining hardware can't be restored. That one rule keeps you from buying a lock to fix a geometry problem, and from adjusting a lock that's already worn out.
The theft side of the decision is real. The Los Angeles Times report on rising tailgate theft states that reported tailgate-theft claims increased 31% from 2012 to 2013, reaching 1,090 claims in the period discussed by the Insurance Information Institute. The same reporting noted the total was probably understated because insurers did not consistently collect or classify tailgate theft as a separate category. Weak or missing retaining hardware is what makes a gate quick to strip, so a correctly fitted hinge lock earns its place on the truck.
What a Hinge Lock Does and Does Not Do
A tailgate hinge lock slows removal of the tailgate itself, and that's all it does. It won't protect tools or cargo sitting in an open bed, and it isn't a vehicle security system. Real protection layers it with locking the gate, covering the bed, and parking so the rear of the truck is hard to reach. Backing the tailgate against a wall, a post, or a second vehicle removes the swing clearance a thief needs to lift the gate off its hinge.
The lock-type table earlier in this guide already weighs manual key against electronic operation, so match your choice to how the truck is used rather than re-deciding it at the parts counter.
After any collision or loading impact, inspect the hinge before trusting the lock. Check the hinge interfaces and retaining clips for bending, look for latch misalignment, and confirm the gate still sits square on its pivots. A bent hinge defeats a new lock within weeks, because the geometry the lock depends on is already gone. If the hinge itself needs attention, the tailgate hinge replacement guide walks through that job.
Your Order Checklist
- OEM part number from the old hinge or lock, matched against the listing.
- Lock type chosen for how the truck is used, manual or electronic.
- Retaining clips and hardware the old set used, ordered at the same time so the job doesn't stall.
Run the full closure and lock test before the tailgate returns to service. I'd rather spend ten minutes on that checklist than a weekend returning a part that never fit.
When your checks point to a worn hinge, latch, or handle, visit T1A Auto to match the OEM part number against tailgate hinge, latch, cable, and handle components listed for your exact truck. Order the retaining clips and hardware in the same visit, install with the sequence above, and put a tailgate back in service that closes, locks, and stays put.
