


You select Reverse, glance at the screen, and get a black rectangle instead of the driveway. Or your older car has never had a camera, and you're tired of guessing where the bumper ends when a van blocks your view. The immediate question is which camera to buy. The better question is which camera will fit, show useful detail, and work every time you need it.
Choosing an aftermarket backup camera for car or truck use starts with the vehicle's mounting point, wiring and display, not screen size. A sharp-looking picture in a product listing doesn't prove the camera will show the ground behind your bumper or communicate with your factory head unit.
Table of Contents
- OEM-Fit vs Universal Backup Cameras Compared
- Why Rear Visibility Matters on Older Vehicles
- Key Specs to Compare Before You Buy
- How to Confirm Fitment and CAPA Certification
- Wiring, Camera Placement and Connector Types
- Troubleshooting Blank, Frozen or Inverted Images
- Warranty, Maintenance and Long-Term Reliability
- Choose the Right Camera Before You Order
OEM-Fit vs Universal Backup Cameras Compared
Choose an OEM-fit replacement when you're restoring a supported factory system. Choose a universal kit when you're building a camera system the vehicle never had. The difference is how much installation and integration work you must supply.
OEM-fit vs universal backup cameras
| Factor | OEM-fit camera | Universal camera |
|---|---|---|
| Mounting | Uses the original bracket and mounting point | Needs a bracket, adapter plate or drilled hole |
| Connector | Plugs into the factory harness | Often needs cut-and-splice or an adapter |
| Image integration | Displays on the factory screen | May need a separate monitor or interface |
| Install time | Usually shorter | Usually longer because mounting and wiring need additional work |
| Best fit | Replacing a failed or missing factory camera on a supported model | Older or unsupported vehicles with a compatible screen or an added monitor |
| Main risk | Wrong part number or year range | Misaligned angle, poor sealing, wiring errors |
An OEM-fit camera is designed around a specific vehicle configuration. It normally reuses the factory bracket and plug, and a correctly matched replacement usually sends its picture to the original screen without extra hardware. That doesn't mean any camera advertised for the same model will work. Trim, display equipment and production changes still matter.
A universal camera offers more mounting freedom, but the installer must provide the missing pieces. Expect to plan the bracket, camera power, ground, reverse activation and video connection. If the radio has no compatible camera input, adding a monitor or interface becomes part of the job.
Answer these before choosing
A pickup with a failed factory camera is a replacement job, provided its original wiring and display still work. An older truck without a screen is a system installation. Buying a loose camera for that truck leaves most of the job unfinished.
- Existing equipment: Does the vehicle already have a factory camera, a screen, or both?
- Exact replacement: Is an OEM-fit part listed for the precise vehicle and equipment package?
- Electrical work: Are you comfortable testing circuits, making sealed splices and routing a video cable?
Those answers matter more than whether the listing promises a larger picture. If you can't identify the display input or camera supply requirements, resolve that before ordering.
Why Rear Visibility Matters on Older Vehicles
The NHTSA rear-visibility rule announcement established a benchmark covering 10 feet wide by 20 feet long directly behind nearly all new passenger vehicles, pickups, vans and buses weighing less than 10,000 pounds, with full applicability to vehicles manufactured on or after May 1, 2018.
Consider an older pickup parked nose-in beside a tall hedge. The mirrors show the lane, but the tailgate hides the ground where someone could approach. A camera gives the driver another sightline, much as a periscope reveals what a peephole cannot.
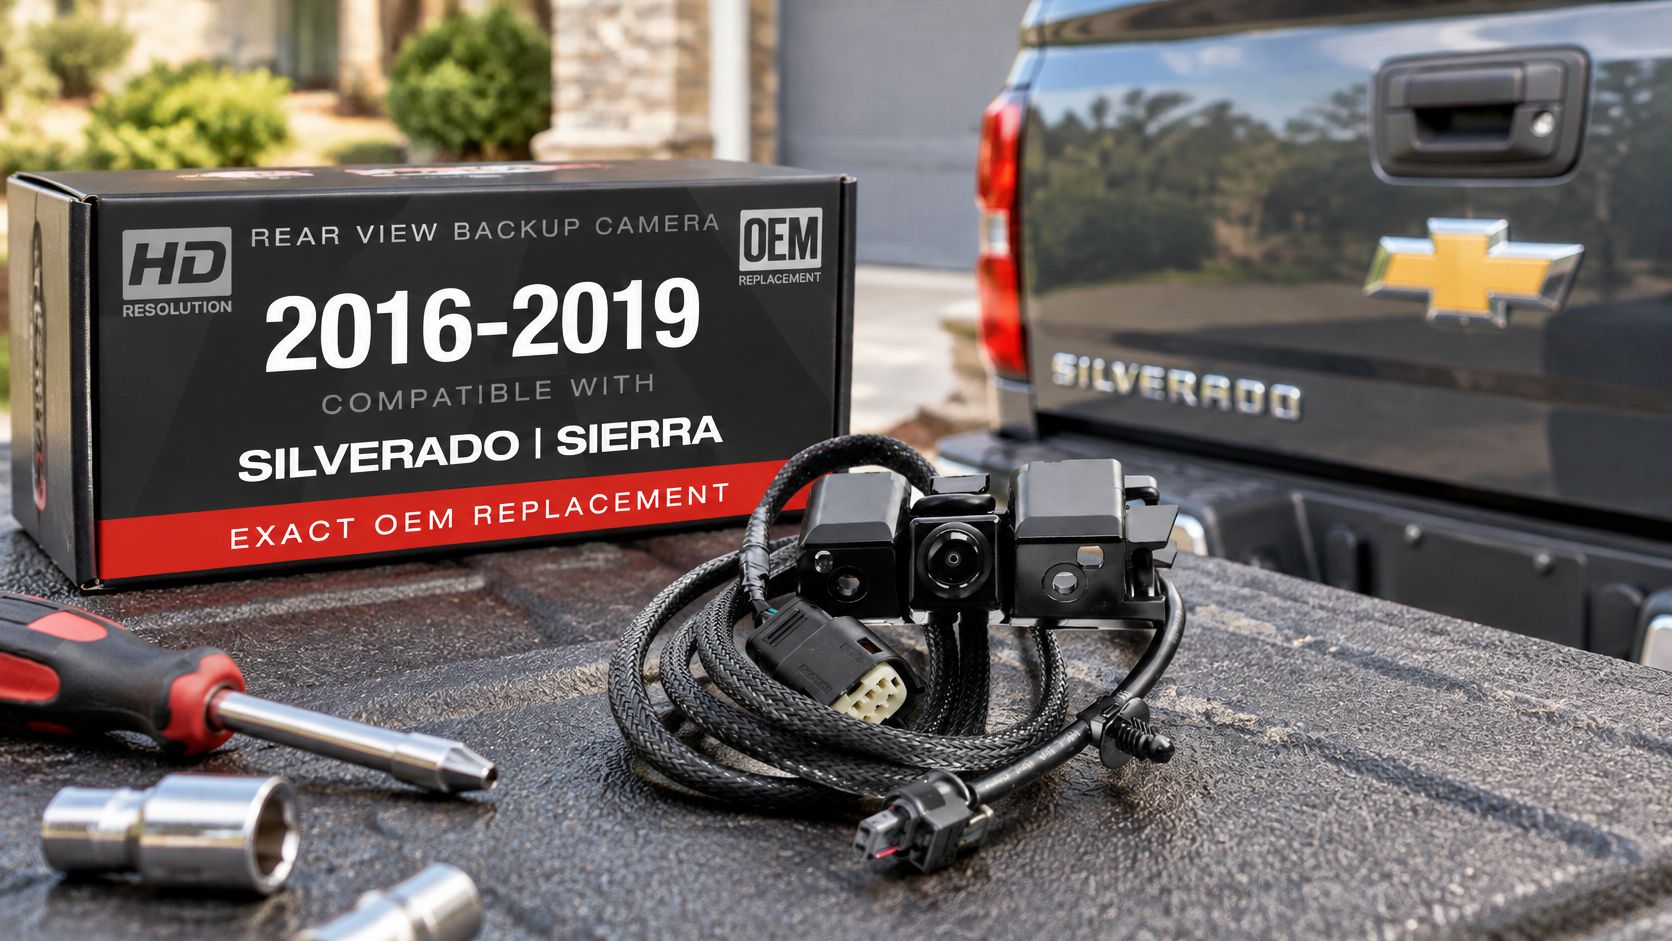
A factory-position replacement illustrates the kind of installation that preserves the intended rearward viewpoint.
Treat the missing view seriously
Older vehicles without a camera weren't retroactively equipped by the new-vehicle rule. On a truck, the body height and tailgate can hide small objects or people that don't appear in a conventional mirror check.
Good reversing technique still matters. Lendrum's Driving School offers practical guidance to build confidence when reversing, useful alongside a camera rather than as an alternative to checking your surroundings.
Practical rule: Treat the camera as a safety component. Judge the replacement by usable coverage and dependable operation, not simply by whether a picture appears.
Key Specs to Compare Before You Buy
Compare the entire image path: camera, video connection and display. A camera's advertised resolution won't help if the head unit can't accept its output or renders the image poorly.
Backup camera specs and what to look for
| Spec | What to look for | Why it matters |
|---|---|---|
| Resolution | Legible small objects on the actual compatible display | Children and small objects must remain distinguishable |
| Viewing angle | Useful rear coverage without excessive edge distortion | Wider isn't safer if objects become tiny or warped |
| Night vision | Infrared LEDs or a capable low-light sensor | Darkness can obscure detail despite a bright-looking picture |
| Water rating | A documented enclosure rating suitable for the mounting location and cleaning method | Water intrusion can disable the camera |
| Parking guidelines | Overlay lines matched to the vehicle's track width | Distance cues help judge gaps but don't replace observation |
| Mounting height | Matches the original camera position for a replacement | Changes the blind zone and nearest visible ground |
| Video output | Format matched to the head unit, such as NTSC or PAL | An incompatible signal can produce a blank or unstable image |
Read the picture, not just the specification
The FMVSS No. 111 rear-visibility document requires designated test objects to appear at their full width and height and specifies an average visual angle of at least 5 minutes of arc for the central targets, with none below 3 minutes. The practical meaning is straightforward: objects must be visible and large enough to recognize.
A wide-angle lens can show more pavement while making a low obstacle difficult to distinguish. Excessive downward tilt can create another problem: plenty of bumper in the picture, but too little useful view farther back. Screen brightness alone won't fix either issue.
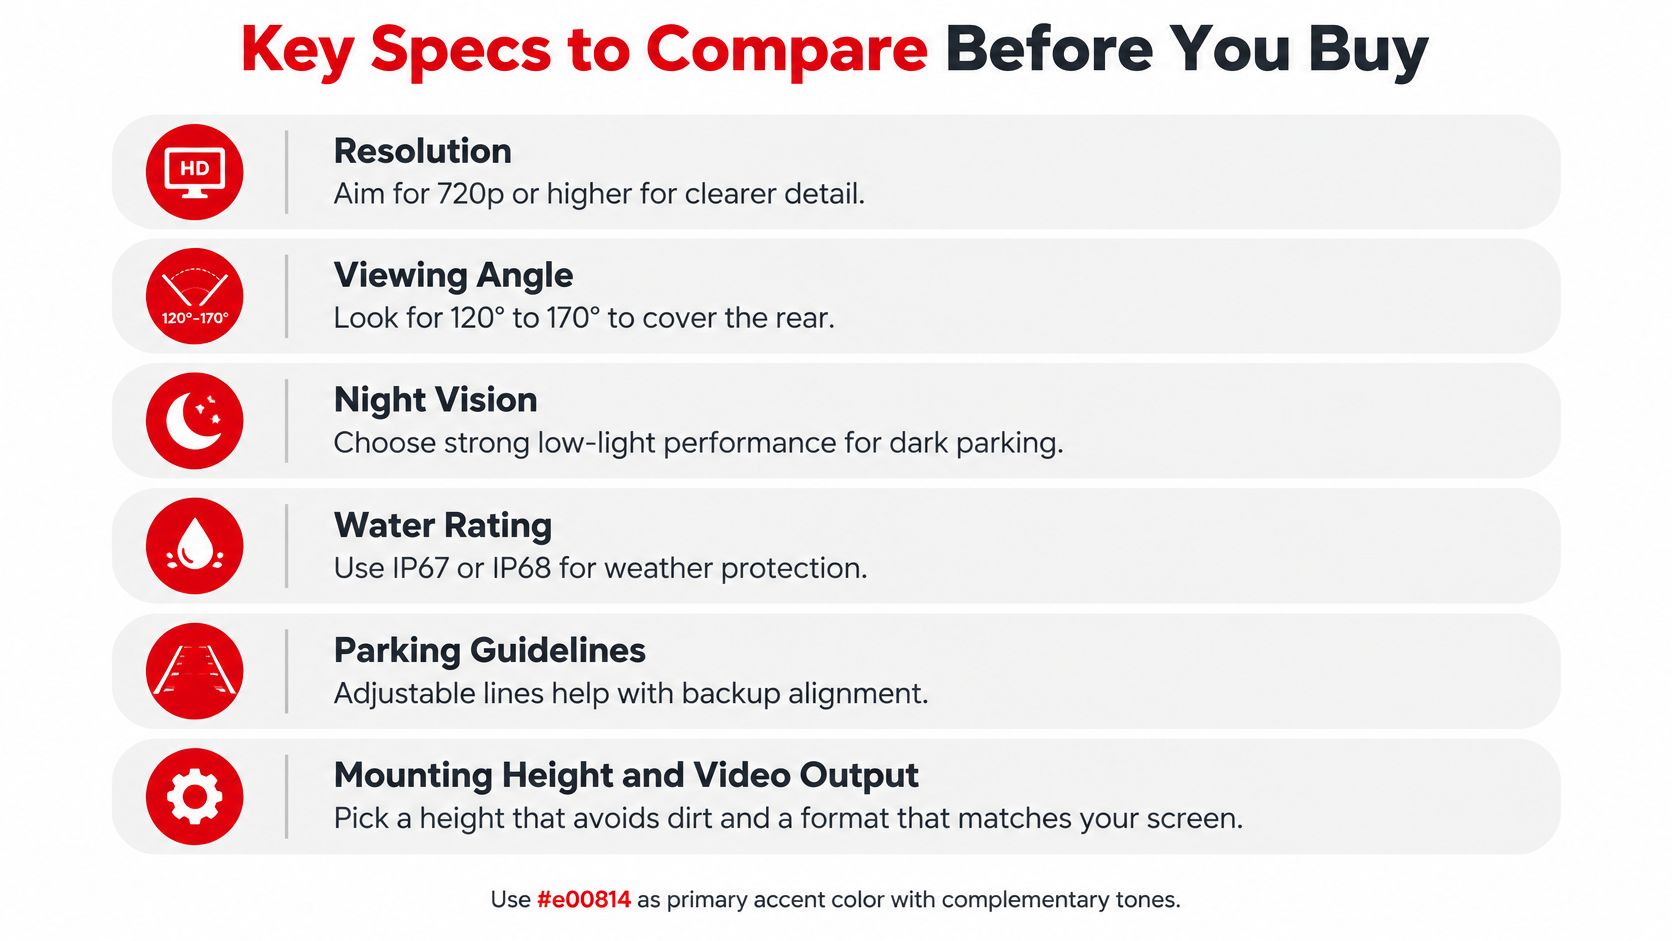
Use this visual checklist to organize the comparison, then verify the actual camera and display combination.
Prefer recognizable detail over maximum angle
Suppose you compare a moderately wide camera with controlled distortion against an ultra-wide camera that stretches objects at the edges. Put the same soft obstacle behind the parked vehicle and inspect it on the intended screen. If the moderate lens makes the obstacle easier to locate and interpret while retaining adequate coverage, that's the more useful installation.
Low-light performance deserves the same hands-on test. Look for recognizable edges under the vehicle's reversing lights, not merely a bright, noisy image. Infrared illumination can help, but reflections from nearby bodywork can overwhelm the scene.
Before paying, check the resolution and angle claims, low-light demonstration, enclosure documentation, guideline settings, mounting position and video format. There's no universal resolution or angle number that substitutes for checking the displayed view.
How to Confirm Fitment and CAPA Certification
A matching model name isn't enough. Confirm the physical part, electrical interface and certification documentation separately so a familiar-looking housing doesn't conceal an incompatible connector or signal.
- Record the full vehicle configuration. Write down the year, make, model, trim, cab and bed configuration, plus the factory camera and screen equipment. The common mistake is ordering by model name alone and overlooking an equipment-specific mounting arrangement.
- Search the vehicle on our website or contact our parts specialists with those details. We can help confirm compatibility; don't assume a screen automatically means the vehicle has a usable camera input.
- Match the original part number. Photograph the label on the old camera and compare it with the replacement listing and application notes. A similar housing or matching plug shape isn't proof that the internal electronics match.
- Check the certification claim for the exact part being ordered. Our explanation of CAPA-certified parts provides context, but request the applicable documentation rather than assuming every camera in a catalog shares the same certification.
- Confirm the display side. Identify the accepted video format, input type and any required interface or programming. The frequent slip is checking the camera connector while ignoring what the head unit needs.
- Compare the mounting tabs, housing dimensions, connector orientation and cable reach. A connector that reaches only when pulled tight will place strain on the terminals whenever the tailgate or liftgate moves.
- Keep the old camera until the replacement passes testing. Save its bracket, seals and connector photographs. Use a service diagram for the pinout, since wire color alone isn't a dependable identification method.
Read application lists literally
For example, the Backup Camera Compatible with 2016-2019 Chevy Silverado, GMC Sierra - OEM Replacement Reverse Camera 84062896, 590-111 lists specific Silverado and Sierra applications and replacement references. Use that application list to check the exact truck, rather than treating the broad product title as approval for every related model.
This fitment checklist helps organize the details before you place an order.
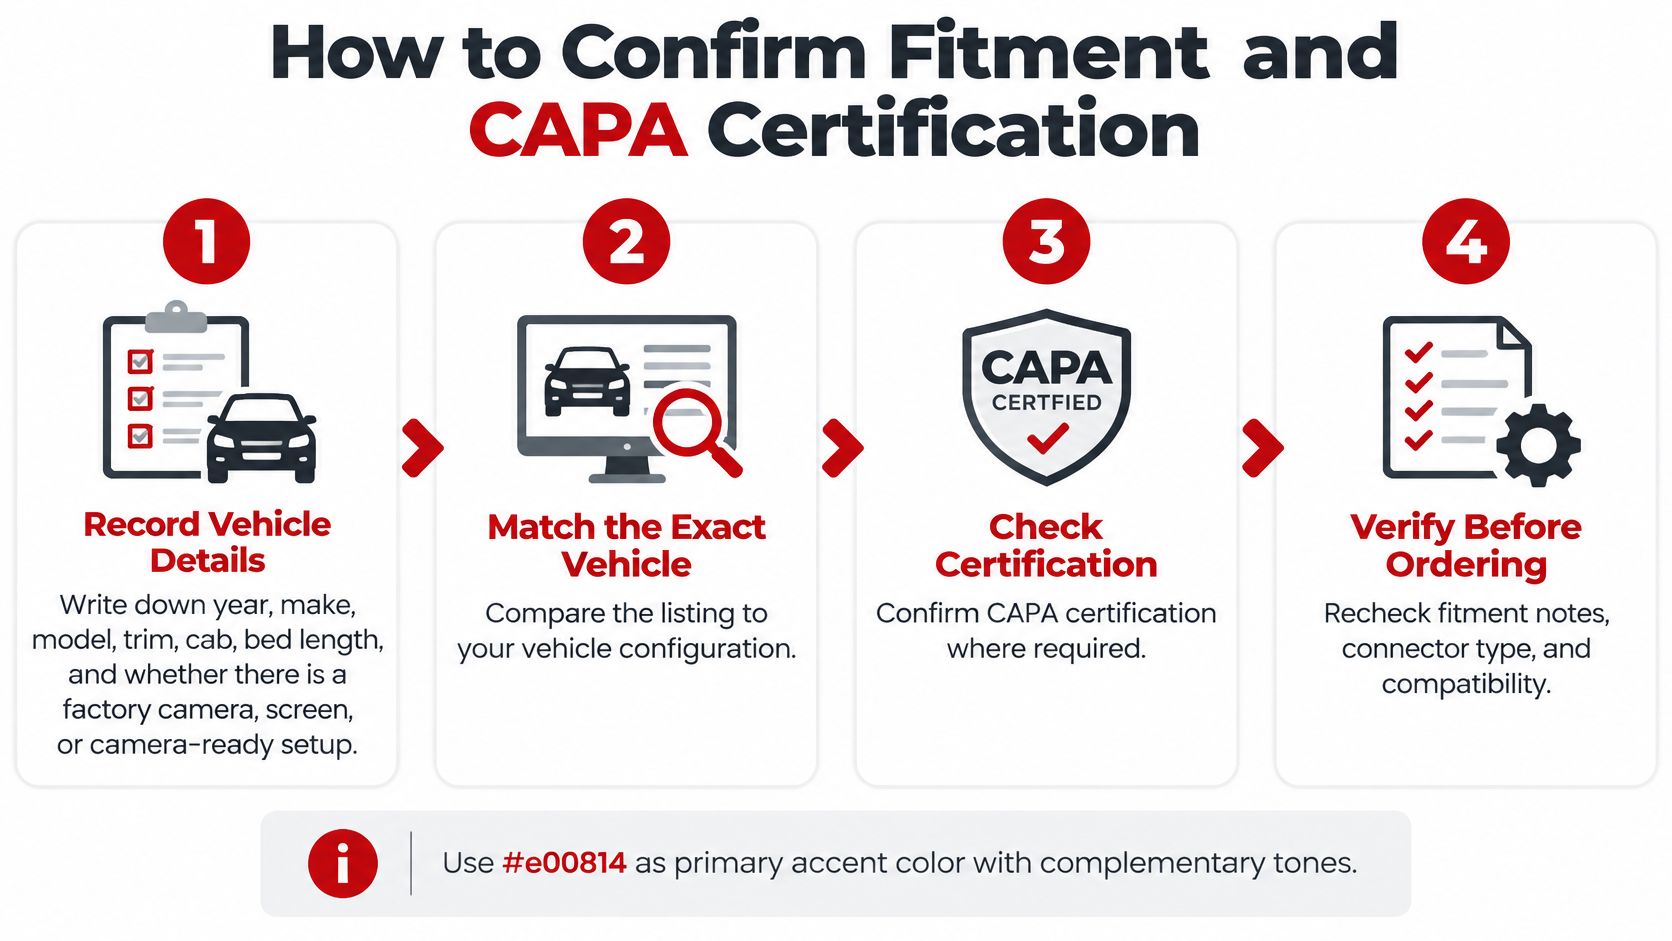
Certification and fitment answer different questions. Documentation may establish a part's certification status, but you still need to verify its application, connector and display compatibility for the vehicle on your driveway.
Wiring, Camera Placement and Connector Types
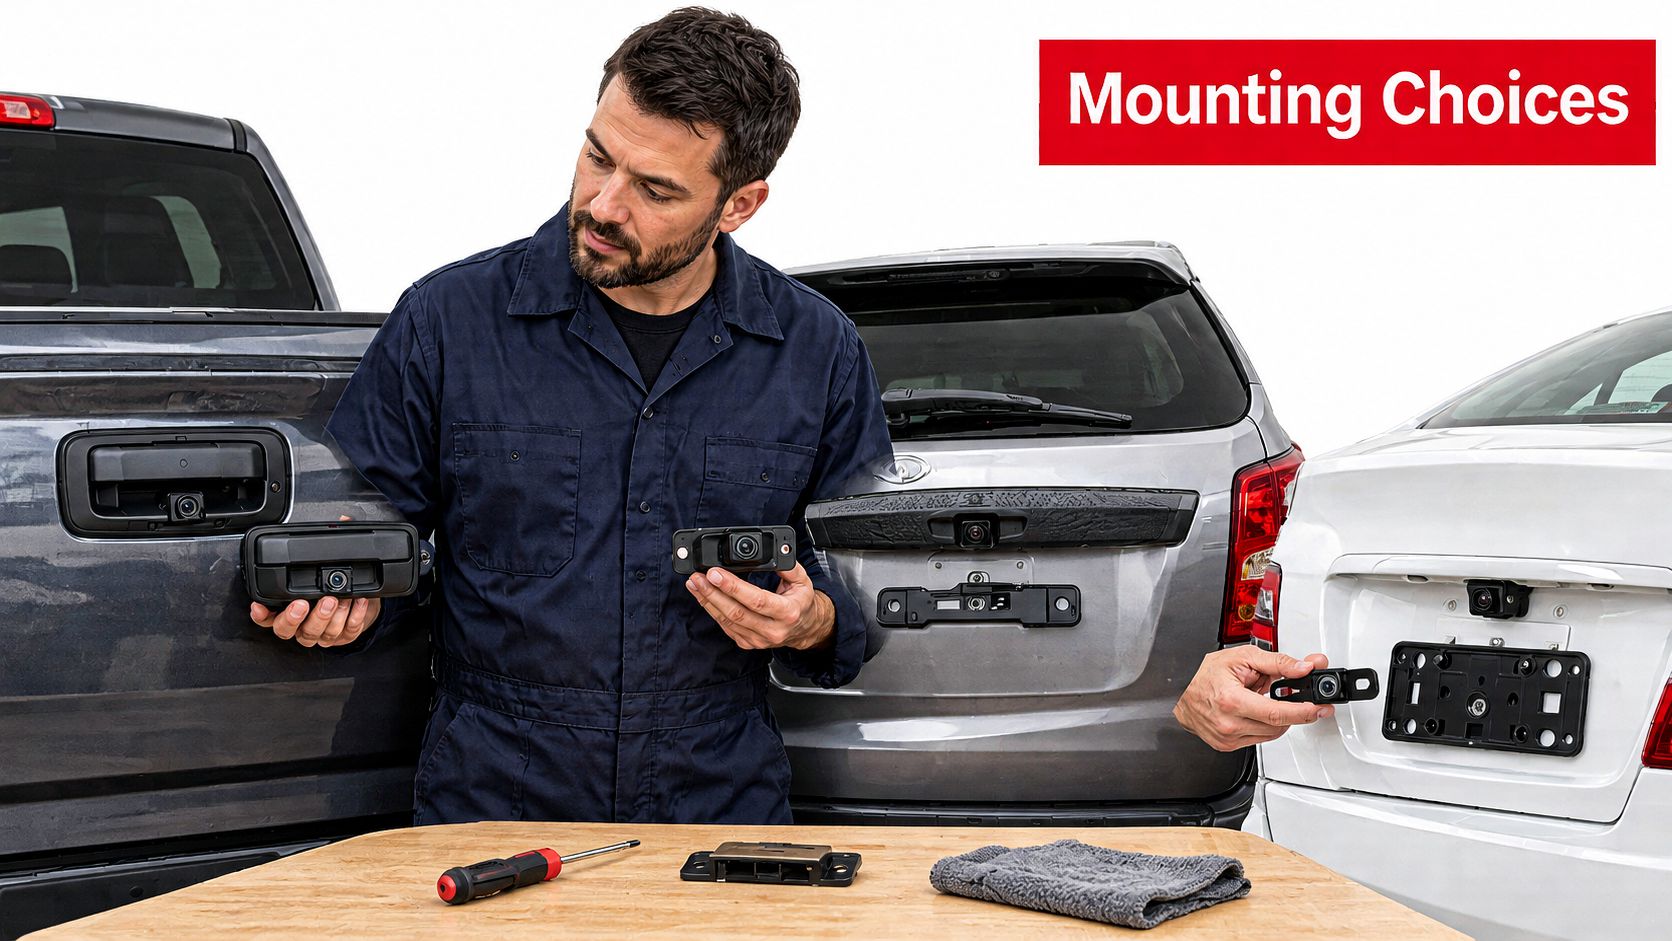
Tailgate-handle and liftgate positions usually provide a higher viewpoint with some protection from road spray. Bumper and license-plate positions can simplify universal mounting, but they expose the lens to more contamination and may place a hitch directly in its view.
Compare the housing and mounting arrangement before deciding where the cable should enter the body.
Trace the electrical paths
Start with power, using the supply specified for that camera and a properly protected circuit. Don't feed battery voltage into a factory camera without checking its supply requirements. Next, establish a sound ground at the specified grounding point or prepared chassis connection.
The reverse trigger tells the display when to switch views. Identify it with a wiring diagram and multimeter rather than guessing from insulation color; electronically controlled lighting circuits may need an appropriate interface. Finally, route the video signal to the correct input without crushing the cable or disturbing its shielding.
Backup camera connector types
| Connector type | Where it appears | Install note |
|---|---|---|
| OEM multi-pin plug | Factory harness on supported models | Plug in directly and avoid unnecessary splicing |
| RCA video plus power leads | Many aftermarket and universal kits | Verify video ground and the specified supply voltage |
| Reverse trigger wire | Reverse-light circuit or appropriate vehicle interface | Confirm activation only when intended |
| Ground wire | Chassis or body ground point | Use a sound connection, since resistance can cause instability |
| Waterproof butt or gel-filled splice | Cut-and-splice points | Use automotive-rated connectors, seal and strain-relieve |
| Digital or Ethernet harness | Newer OEM and some aftermarket systems | Follow the manufacturer's pinout, not a generic diagram |
Use our backup camera wiring diagram guide to understand the circuit arrangement, then confirm the vehicle-specific details. Route cables alongside the existing harness with suitable clips, away from exhaust components, hinges and latch mechanisms. Protect metal pass-throughs with grommets, seal compatible splices with adhesive-lined heat-shrink, and leave a drip loop where the camera arrangement permits.
Use the installation video as a visual aid alongside the instructions for your specific equipment.
Test the surroundings, not just the screen
NHTSA's rear-visibility analysis notes that tested systems could leave roughly 8–12 inches immediately behind the bumper at ground level difficult to see. Inspect that area on foot rather than assuming it appears on-screen.
Check the view in daylight, after dark and in wet conditions. On trucks, repeat the check with the usual load and towing equipment fitted. Use soft stationary targets, never a person standing behind a vehicle that could move.
Parking sensors can supplement camera coverage, but they aren't permission to skip a walk-around. Verify both systems independently if the vehicle has them.
Troubleshooting Blank, Frozen or Inverted Images
A camera fault can come from the power supply, reverse trigger, ground, video path, camera or display. Test in that order before replacing parts.
Secure the vehicle with the parking brake and wheel chocks. Keep people clear of its path, and use a helper when needed. Never work behind an unsecured vehicle while someone holds it in Reverse.
Backup camera symptoms, causes and fixes
| Symptom | Likely cause | Fix |
|---|---|---|
| No image in Reverse | Blown fuse, missing reverse trigger or unplugged connector | Check the fuse, test activation and reseat the plug |
| Blank or frozen image | Supply fault, damaged cable, camera or head-unit problem | Verify supply and ground, inspect the cable, then isolate camera and display |
| Flickering image | Intermittent connector or water in the plug | Inspect terminals, repair corrosion, reseal and strain-relieve |
| Inverted or mirrored image | Incorrect orientation or image setting | Use the specified rear-camera setting and mounting orientation |
| Image on one display only | Wrong input, incompatible output or interface fault | Confirm input selection and video compatibility |
| Distorted or fisheye view | Lens characteristics or unsuitable mounting position | Correct the aim or select a better-suited lens |
| Dim image at night | Dirty or fogged lens, poor illumination or weak low-light performance | Clean the lens and check lighting and infrared operation if fitted |
Separate the camera from the rest of the system
Measure voltage at the camera connector while the fault is present. A reading at an unplugged connector doesn't show whether the circuit can carry the required load. Check ground voltage drop during operation, and inspect the flexible harness section where the trunk lid or tailgate moves.
On a compatible analog system, a known-good camera or test monitor can help identify the faulty component. Avoid connecting generic test equipment to a proprietary digital harness without the correct interface. Follow the checks in this backup camera troubleshooting guide before replacing a part.
Confirm the image updates when you move a soft target through the camera's view, with the vehicle secured. This catches a frozen feed that may look plausible. Check whether the image is correctly oriented for the display before changing its settings.
Factory equipment can fail too
A NHTSA investigation opening document reported 109 complaints involving rear-view camera failures in 2021–2025 Polestar 2 vehicles, including complaints that an earlier software remedy hadn't corrected the issue. The finding doesn't establish a failure rate for aftermarket cameras. It shows why software and display integration belong in the diagnosis alongside the camera itself.
Check that the image appears and responds each time Reverse is selected. Treat a missing or unreliable image as a camera-system fault, and assess the area behind the vehicle directly before reversing.
Warranty, Maintenance and Long-Term Reliability
Warranty coverage requires correct installation and intended use on the vehicle the part was sold for. Before modifying a connector or bracket, confirm that you're following the applicable installation instructions and that the part is the correct application.
Most of our warranty claims are resolved through photo or video verification without returning the original part. We may request additional photographs, video or vehicle details before approval. If a return is required, we provide instructions.
Keep evidence that helps diagnosis
- Installation photographs: Capture the camera position, bracket and surrounding bodywork so the mounting arrangement is visible.
- Connection details: Photograph the plug, routing, ground point and any sealed splices before replacing trim.
- Vehicle information: Keep the application details and order information with the installation record.
- Symptom video: Show the screen behavior and the conditions that reproduce it, without compromising safe vehicle control.
Don't cut open a sealed camera to investigate internal moisture before discussing a claim. That can destroy useful evidence and make the original defect harder to assess.
Maintain the exposed parts
Clean the lens with a soft cloth and a mild cleaner suitable for the lens surface during routine washing. Avoid abrasive pads and harsh solvents. A clean exterior won't fix condensation behind the lens, which calls for an enclosure inspection.
At oil changes, inspect accessible cable sections for chafing and check seals and terminals for deterioration. Recheck the image after washing a truck, especially if water was directed near the tailgate, and inspect the bracket after rough-road use. Follow the product's cleaning limits rather than assuming every sealed housing tolerates direct pressure washing.
Repeated freezing after verified supply, ground, cable and display checks supports replacing the camera. Reseating a connector alone isn't enough to establish that diagnosis. Keep the test record so the next repair addresses the demonstrated fault instead of restarting the guessing process.
Choose the Right Camera Before You Order
Buy for an installation you can verify. Fitment, mounting position and a clear reverse-image test matter more than screen size or an unusually wide viewing angle, which can distort distance and make nearby obstacles harder to judge.
DIY owners
- Plan the installation: Identify a protected wiring route and confirm that the camera mount will hold its position after the trim is reinstalled.
- Test the finished setup: Check the image in daylight and after dark, with the vehicle safely in reverse, before considering the job complete.
Independent shops
- Agree on the acceptance test: Confirm with the customer that the image orientation, viewing angle and display behavior are acceptable before closing the repair.
- Check replacement availability: Confirm the correct replacement can be sourced before disassembling the vehicle, especially when the original camera is integrated into another component.
Fleet managers
- Set a replacement standard: Specify compatible camera and display systems for each vehicle group to reduce mismatched components during repairs.
- Plan for downtime: Identify which vehicles can be taken out of service for installation and testing, then schedule replacements accordingly.
Your next action is to assemble the vehicle details and confirm the exact listing. Search by vehicle or contact T1A Auto's parts specialists to check compatibility. T1A Auto offers CAPA-certified rearview cameras for supported applications. Within the first 90 days of delivery, if a part is defective or the wrong item was shipped, T1A Auto covers all shipping costs for any required return and replacement shipment.
