


How you tackle a broken bolt really comes down to one thing: is the bolt sticking out, or is it snapped off flush with the surface? If you’ve got a piece of the shank to grab onto, a good pair of locking pliers might be all you need. But for a bolt broken flush or even below the surface, you'll most likely need to carefully drill a pilot hole and use a bolt extractor. The key is to assess the situation before you grab a tool.
Your Go-To Guide for Stubborn Broken Bolts
There’s nothing quite like the sick feeling of a bolt snapping mid-turn. One minute you're making progress, the next you're staring at a project-killing problem. This guide is here to get you out of that jam. We’ll walk through the same methods mechanics and experienced DIYers use to deal with broken bolts, whether they're sticking out, snapped off clean, or completely recessed.
Think of this as your game plan for one of the most common headaches in any workshop. We'll start with a quick overview of the most reliable removal methods—from simple hand tools to more advanced techniques like welding a nut on. This will give you a solid idea of your options right from the start, so you can pick the right approach for your specific problem.
Key Removal Strategies at a Glance
Before we get into the nitty-gritty, it helps to see the big picture. There isn't a single "best way" to remove a broken bolt; it's all about matching the right tool and technique to the situation you're facing. Each method has its own sweet spot.
Here are the heavy hitters you should know about:
- Locking Pliers: Your first line of attack if there's enough of the bolt shank exposed to get a solid grip. It's the least destructive method and surprisingly effective.
- Drilling and Extractors: This is the classic approach for bolts broken at or below the surface. It demands a steady hand and some precision, but it works wonders when done right.
- Welding a Nut: A pro-level move for severely seized bolts, whether they're protruding or flush. The intense heat from welding is fantastic for breaking the bond of deep corrosion.
- Heat Application: Using a torch to heat the metal surrounding the bolt can make all the difference. The expansion helps crack loose stubborn rust or old thread locker.
Pro Tip: Before you try anything else, douse the broken bolt with a quality penetrating oil. Let it soak for at least 30 minutes—overnight is even better. A little patience here can save you a world of hurt and prevent you from making the problem worse.
Understanding the Variables
Your success hinges on more than just how the bolt broke. You have to consider the materials you're working with. For instance, trying to get a steel bolt out of an aluminum housing is a delicate operation. Aluminum is soft and easily damaged by too much force or heat, so you have to be much more careful.
To help you choose wisely, let's break down the common removal methods, their best-use cases, and what you're getting yourself into.
Broken Bolt Removal Methods at a Glance
This table gives you a quick comparison of the most common techniques for removing broken bolts. Use it to match your specific problem with the best possible solution.
| Removal Method | Best For | Key Tools | Difficulty Level |
|---|---|---|---|
| Locking Pliers | Bolts broken above the surface with an exposed shank. | Locking Pliers, Penetrating Oil | Easy |
| Drill & Extractor Kit | Bolts broken flush with or recessed below the surface. | Center Punch, Drill, Left-Hand Bits, Extractor | Medium |
| Weld-a-Nut | Protruding or flush bolts that are severely seized or rusted. | Welder, Appropriately Sized Nut, Wrench | Hard |
| Heat & Wax/Oil | Corroded bolts in sturdy metal housings (e.g., cast iron). | Propane/MAP Gas Torch, Penetrating Oil or Wax | Medium |
Looking at the options, you can see how the approach changes based on the scenario. A simple pair of pliers is great for an easy win, but a deeply seized bolt might call for the more advanced (and effective) weld-a-nut technique.
Assessing the Break and Building Your Toolkit
Before you even think about grabbing a wrench, take a moment and just look. Seriously. The success of this whole operation hinges on what you see right now. A good diagnosis is half the battle won.
The big question is, what kind of break are you dealing with? Is there a bit of the bolt shank sticking out past the surface? If so, you're in luck. Having something to grab onto opens up a world of easier, less destructive options.
On the other hand, if the bolt snapped off perfectly flush or—even worse—it's broken off below the surface, you've got a tougher challenge. That means you'll have to get creative and make a new way to get a grip on it. Your whole strategy flows from this one observation.
This flowchart breaks down that initial thought process and helps point you in the right direction.
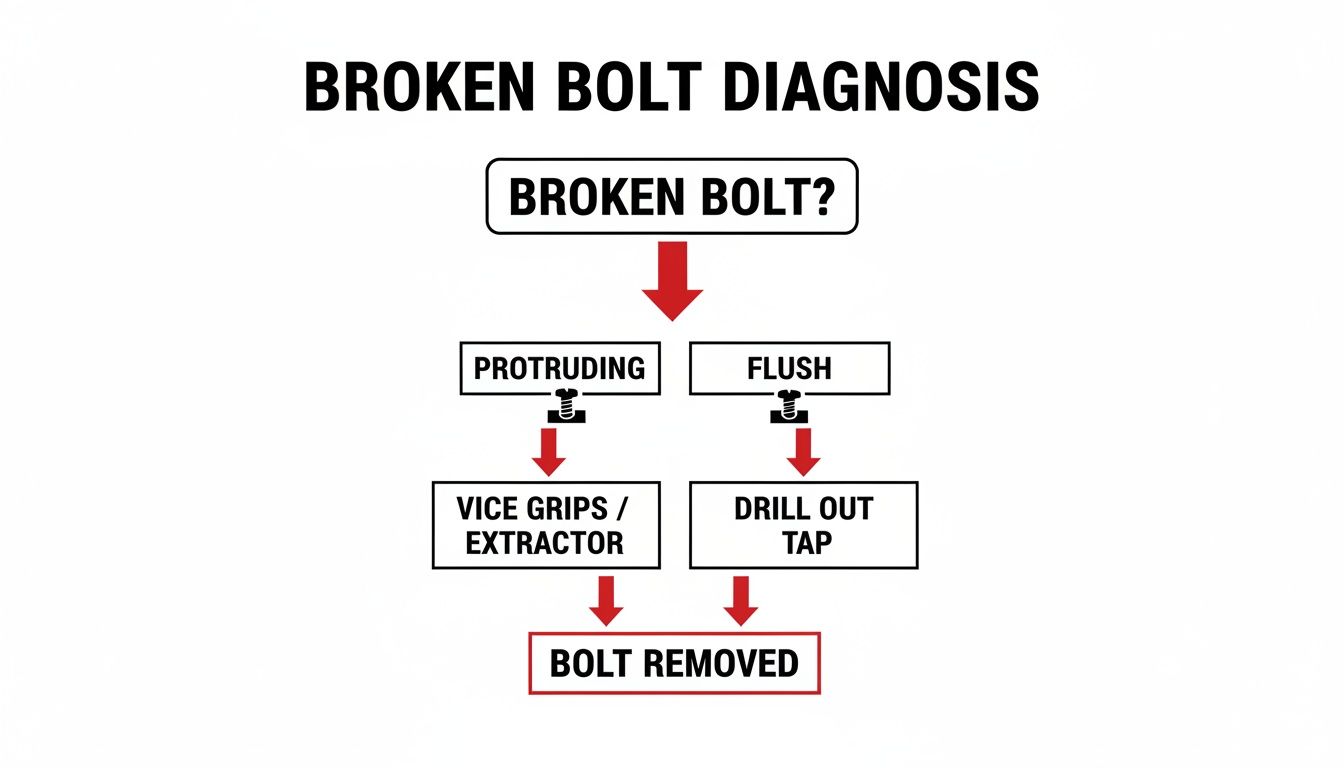
As you can see, figuring out if that bolt is protruding or flush is the very first step. It determines which tools you’ll need and the technique you’ll use.
Your Essential Bolt Removal Toolkit
Once you know what you’re up against, it’s time to gather your gear. Having the right tools isn’t just about making the job easier; it’s about preventing a small headache from turning into a full-blown migraine. A well-prepared toolkit is the best insurance you can have.
Here's a look at the core items you'll want for most broken bolt situations:
- Penetrating Oil: This is absolutely non-negotiable. A good quality penetrating oil creeps into the threads and breaks the chemical bonds that rust and corrosion create. Douse the bolt and give the oil time to work its magic—30 minutes is a minimum, but letting it sit overnight is even better.
- Safety Gear: Don't skip this. Tools slip, and tiny metal shards can become projectiles. At the very least, you need safety glasses. It's also smart to have a pair of quality cut-resistant gloves to protect your hands from sharp metal edges and slips.
- Center Punch: If your bolt is broken flush, this is your new best friend. A sharp center punch makes a small divot right in the middle of the bolt. This little guidepost is crucial for keeping your drill bit from wandering off-center and chewing up the threads you’re trying to save.
- Quality Drill Bits: Now is not the time to use cheap, dull bits. You need a set of sharp, high-speed steel (HSS) or cobalt bits. Even better? Left-hand drill bits. Since they spin counter-clockwise, the very act of drilling can sometimes generate enough bite and friction to back the broken bolt right out.
A rookie mistake is grabbing a drill bit that’s too big. The pilot hole just needs to be large enough for your extractor to get a solid grip. Drilling too wide weakens the bolt's remaining walls, and when you hammer in the extractor, it can actually expand the bolt and wedge it in even tighter.
Advanced and Specialized Tools
For those truly stubborn jobs, the basic kit might not cut it. When you're dealing with hardened steel bolts, fasteners seized by years of corrosion, or bolts broken in awkward places, it's time to call in the big guns.
These tools are a step up in cost and power, but they can be the one thing that stands between you and a costly trip to a machine shop.
When you need that extra bit of muscle, our lineup of specialized automotive tools has what it takes to get the job done.
Here's what the pros reach for when the going gets tough:
- Bolt Extractor Set: Often called "easy-outs," these come in a couple of main flavors. Spiral-fluted extractors have aggressive threads that bite hard into the pilot hole as you turn them counter-clockwise. Straight-fluted types are tapped in with a hammer and are less likely to expand the bolt, which makes them a safer bet for softer metals like aluminum.
- A Source of Heat: Never underestimate the power of heat. A simple propane or MAPP gas torch works wonders. By heating the metal around the bolt, you cause it to expand, breaking the death grip of rust and corrosion. For more delicate jobs, an induction heater is a game-changer—it heats the bolt red-hot in seconds without an open flame, making it perfect for working near fuel lines or plastic components.
- Welder (MIG or Stick): If you have a protruding stud that refuses to budge, welding a nut onto it is often the best way to remove a broken bolt, bar none. The intense, localized heat from the weld vaporizes rust, while the new nut gives you a perfect, six-sided surface to get a wrench on. It’s definitely an advanced move, but it is incredibly effective.
Tackling Bolts Broken Above the Surface

Hearing that snap is one of the worst sounds in a garage. But if you look down and see a piece of the bolt shank still sticking out, you can breathe a small sigh of relief. This is the best-case scenario for a bad situation. You have something to grab, which gives you a huge advantage over dealing with a bolt that’s broken off flush.
Before you start reaching for the heavy-duty tools, always try the simplest, least destructive option first. In this case, that means a good, solid pair of locking pliers. I’m not talking about a cheap, flimsy pair from the bargain bin—you need a quality set that can clamp down with serious force and not slip.
The Locking Pliers Method
Success here is all about getting an iron grip. Don't just lightly clamp the pliers on; adjust the jaw tension so you really have to squeeze to get them to lock onto the bolt remnant. You want those teeth to bite deep into the metal.
Once they're locked on tight, it's about steady finesse, not brute strength. If you just try to jerk the bolt loose, you’ll probably just round off what's left of the shank, making your life a lot harder. Instead, apply slow, firm, and consistent counter-clockwise pressure.
Pay close attention to any movement at all. Sometimes you have to gently rock it back and forth—a little clockwise, then a bit more counter-clockwise—to finally break the seal of rust or thread-locker. This simple trick is surprisingly effective for bolts that aren't completely seized.
When Pliers Just Won't Cut It
If the bolt isn’t budging and just laughs at your locking pliers, it’s time to escalate. This is where a lot of people get stuck, but it’s also where one of the most effective professional tricks comes into play: welding a nut onto the stub.
The "weld-a-nut" method is a true game-changer for two big reasons:
- It gives you a brand new head. Welding a nut to the broken stud creates a perfect hex head you can get a wrench or socket onto, letting you apply serious, even torque.
- It applies intense, localized heat. The heat from the welder travels down the bolt shank, shocking the threads and breaking the bond of even the most stubborn corrosion. It’s like using a torch and an extractor all in one shot.
Honestly, this is often the single best way to remove a seized, broken bolt. That one-two punch of a new gripping surface combined with the thermal shock is powerful enough to free fasteners that nothing else will touch.
How to Weld a Nut for Extraction
You’ll need a welder (MIG is usually easiest), a nut that’s slightly larger than the bolt’s diameter, and your usual safety gear. First, clean the top of the broken bolt with a wire brush to get a good ground and a clean surface for your weld.
Position the nut over the stud. The goal here is to fill the inside of the nut with weld, fusing it directly to the top of the broken bolt. Be careful not to weld the nut to the surrounding part—only to the bolt itself. Start with a few strong tack welds to hold it in place.
Once it’s tacked on, let it cool down for a minute. This is a critical step. As the metal cools, it contracts, and that slight shrinkage can be just enough to help break the rust's grip. Now, fit a wrench onto your newly attached nut and apply that familiar slow, steady torque to back it out.
The pros swear by this method for a reason. Shop surveys have shown that welding a nut is successful in over 92% of cases for seized stubs larger than 1/4-inch. That number jumps to an incredible 98% when mechanics grind small flats onto the remnant before welding.
Once you’ve finally won the battle and removed the old hardware, you'll need a quality replacement. Make sure the fix lasts by checking out our full line of automotive-grade replacement fasteners.
Removing Bolts Broken Flush or Below the Surface
This is the one that makes even seasoned DIYers take a deep breath. A bolt snapped off flush—or worse, recessed below the surface—leaves you with nothing to grab. Getting it out isn't about brute force; it's a game of precision, patience, and using the right tools in exactly the right order.
The most reliable strategy here is to drill a perfectly centered pilot hole and then use an extractor to back the remnant out. While that sounds simple enough, every single step is critical. One little slip, like an off-center hole, can mangle the threads you’re desperately trying to save. That turns a difficult job into a nightmare.
The Critical First Step: Center Punching
Before you even think about picking up a drill, you have to create a guide. I can't stress this enough: this is the most important part of the whole process. Without a solid starting point, your drill bit is going to wander all over the place, chewing up the surrounding metal and destroying the threads.
An automatic center punch is fantastic for this, but a classic punch and hammer work just as well. Your goal is to make a distinct dimple dead center on the broken bolt. Take your time. Measure if you have to. A perfect center punch is the foundation for a clean extraction.
A well-placed center punch is your insurance policy against a much bigger repair job. It keeps your drill bit exactly where it needs to be and dramatically increases your odds of saving the threads and the part.
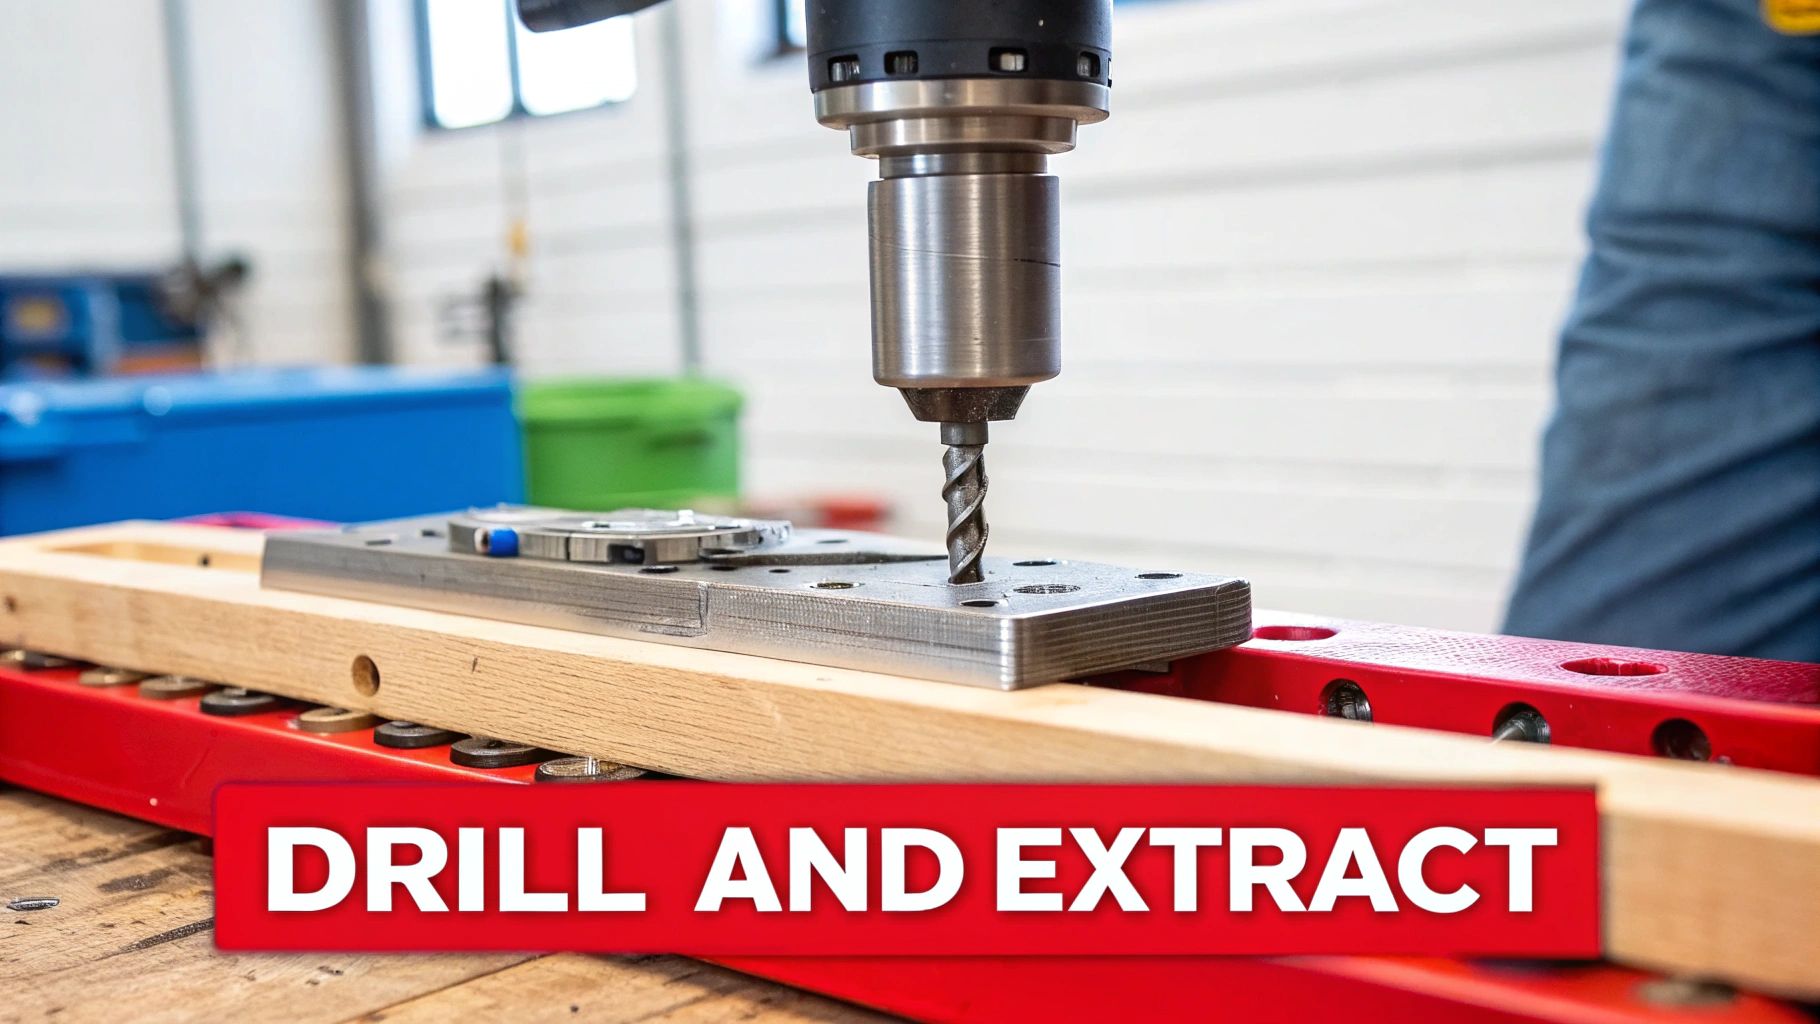
Drilling The Pilot Hole With Precision
With your guide mark set, it’s time to drill. This is where a very specific tool can be a game-changer: the left-hand drill bit. Unlike standard bits that drill clockwise, these spin counter-clockwise—the same way you turn a bolt to loosen it.
The magic here is that as the bit cuts into the bolt, the friction and bite can be enough to grab the remnant and spin it right out. I’ve had it happen many times; the broken piece starts backing out before you even reach for an extractor. It’s a huge advantage.
When you're choosing a drill bit size, stick to the recommendations that come with your extractor set. A common mistake is drilling a hole that’s too large. This weakens what’s left of the bolt and can cause the extractor to just expand it, locking it in even tighter. Start small.
Using a Spiral Fluted Extractor
If the left-hand drill bit didn't do the trick, your pilot hole is now perfectly prepped for a spiral-fluted extractor. This is the tool most people call an "easy-out." Its tapered, reverse-spiral threads are designed to bite into the walls of the hole as you turn it counter-clockwise.
Here’s the right way to use it:
- Select the Right Size: Pick the largest extractor that fits snugly in your pilot hole. A bigger extractor has more surface area to grip and is less likely to snap.
- Seat It Firmly: Gently tap the extractor into the hole with a small hammer. You want it seated securely, but don’t wail on it. Too much force can expand the bolt.
- Apply Steady Torque: Using a tap handle or a wrench, apply slow and consistent counter-clockwise pressure. You should feel the extractor bite and the bolt start to move. Avoid jerky motions—they can snap the hardened extractor, and then you've got a much bigger problem.
Experience and research show that using a non-destructive method like this is highly effective, succeeding 85-90% of the time. When you combine this with a quality penetrating oil applied 24 hours in advance, the success rate can jump to as high as 95% in under 30 minutes. You can explore the detailed findings on bolt extraction techniques to see why this approach works so well.
The Power of Heat
For bolts that are seriously seized by rust or corrosion, heat can be your ace in the hole. Heating the metal around the bolt causes it to expand. As it cools and contracts, that thermal cycle is incredibly effective at breaking the bond of even the most stubborn corrosion.
A simple propane or MAPP gas torch is usually all you need. Heat the area evenly until it's very hot to the touch (but not glowing red unless you're working with heavy steel). Let it cool completely, then try the extractor again. This little trick makes finding the best way to remove a broken bolt much, much easier.
Dealing with Seriously Stuck Bolts: The Heavy Hitters
Let's face it, sometimes a bolt is just a total nightmare. The head is so chewed up you can't get a wrench on it, or it's been rusted into place for so long it might as well be welded. When the usual tricks fail, it’s time to escalate. These are the pro-level techniques that can get you out of a serious jam and save you a trip to the machine shop.
When you're looking at a bolt with a completely rounded-off head, your standard sockets are useless. The goal shifts from gripping the flats to biting into whatever is left. This is where specialized extractor sockets come into play. They have aggressive, helical teeth inside that dig into the damaged head when you turn counter-clockwise, giving you the grip you desperately need.
Bring the Heat
For a bolt that’s seized solid by rust, heat is your absolute best friend. The idea is to heat the metal around the bolt, making it expand just enough to break the rust's death grip. A simple propane or MAPP gas torch can do the job, but for precision and safety, nothing beats induction heating.
An induction heater is a game-changer. It uses a magnetic field to make ferrous metals glow red-hot in seconds, and it does it without any open flame.
This is a huge advantage when you're working in tight engine bays or near things that don't react well to fire, like:
- Fuel lines
- Wiring harnesses
- Plastic trim and covers
- Rubber bushings
The focused, intense heat is way more effective than a torch and dramatically cuts down the risk of melting something you shouldn't.
The real beauty of applying heat is that it goes straight to the source of the problem. A bolt almost never breaks at the head; the failure point is almost always in the threads where corrosion has fused it to the surrounding metal. Heat directly attacks that bond.
It's interesting to note that industry data shows 80% of bolt failures happen in the threaded section. This is exactly why combining heat with an extraction tool is so powerful. In fact, pairing an easy-out with induction heat has been shown to have a 96% success rate on stubborn, high-strength bolts. The heat softens the parent metal just enough for the extractor to do its job. You can dig deeper into the science behind these bolt failure modes and solutions.
The Classic Hammer and Chisel Method
If you don't have fancy extractors or an induction heater on hand, don't worry. There's an old-school trick that works surprisingly well, and all you need is a sharp chisel and a good hammer. This approach is perfect for larger bolts with rounded heads where you have a bit of space to swing.
Just place the sharp edge of your chisel at the outer rim of the bolt head, making sure to angle it in the direction you want to turn it (counter-clockwise to loosen). Now, give the chisel a few sharp, solid whacks with the hammer. The shock from the impact helps shatter the rust, while the angled force starts to slowly walk the bolt out. It takes patience, but sometimes a little brute force is exactly what's needed when all else fails.
How to Prevent Broken Bolts in the Future
Once you’ve finally wrestled that broken bolt out, the last thing you ever want to do is go through that again. Honestly, the best repair is the one you never have to make in the first place. A little prevention saves a ton of frustration down the road and keeps your vehicle or equipment dependable.
Most bolts don't just snap out of nowhere. There's usually a reason, and more often than not, it's something avoidable. The number one cause? Overtightening. Cranking down on a bolt stretches it past its limits, creating a weak spot just waiting to fail under pressure. This is where using the right tools isn't just a good idea—it's your best defense.
Master the Torque Wrench
If there's one tool that will save you from this nightmare, it's a good torque wrench. Guessing how tight a bolt needs to be is a recipe for disaster. A torque wrench lets you apply the exact clamping force the manufacturer designed for that fastener, giving you a rock-solid connection without dangerously stressing the bolt.
Think about it—every critical bolt on your vehicle has a torque spec for a reason. Engineers figured out the perfect tension required for that bolt to do its job without breaking a sweat. Ignoring those specs is like redlining your engine everywhere you go. Sooner or later, something’s gonna give.
Using a calibrated torque wrench on every important fastener isn’t just a "best practice," it’s cheap insurance. It takes the guesswork out of tightening and makes it a precise science, nearly eliminating the risk of overtightening.
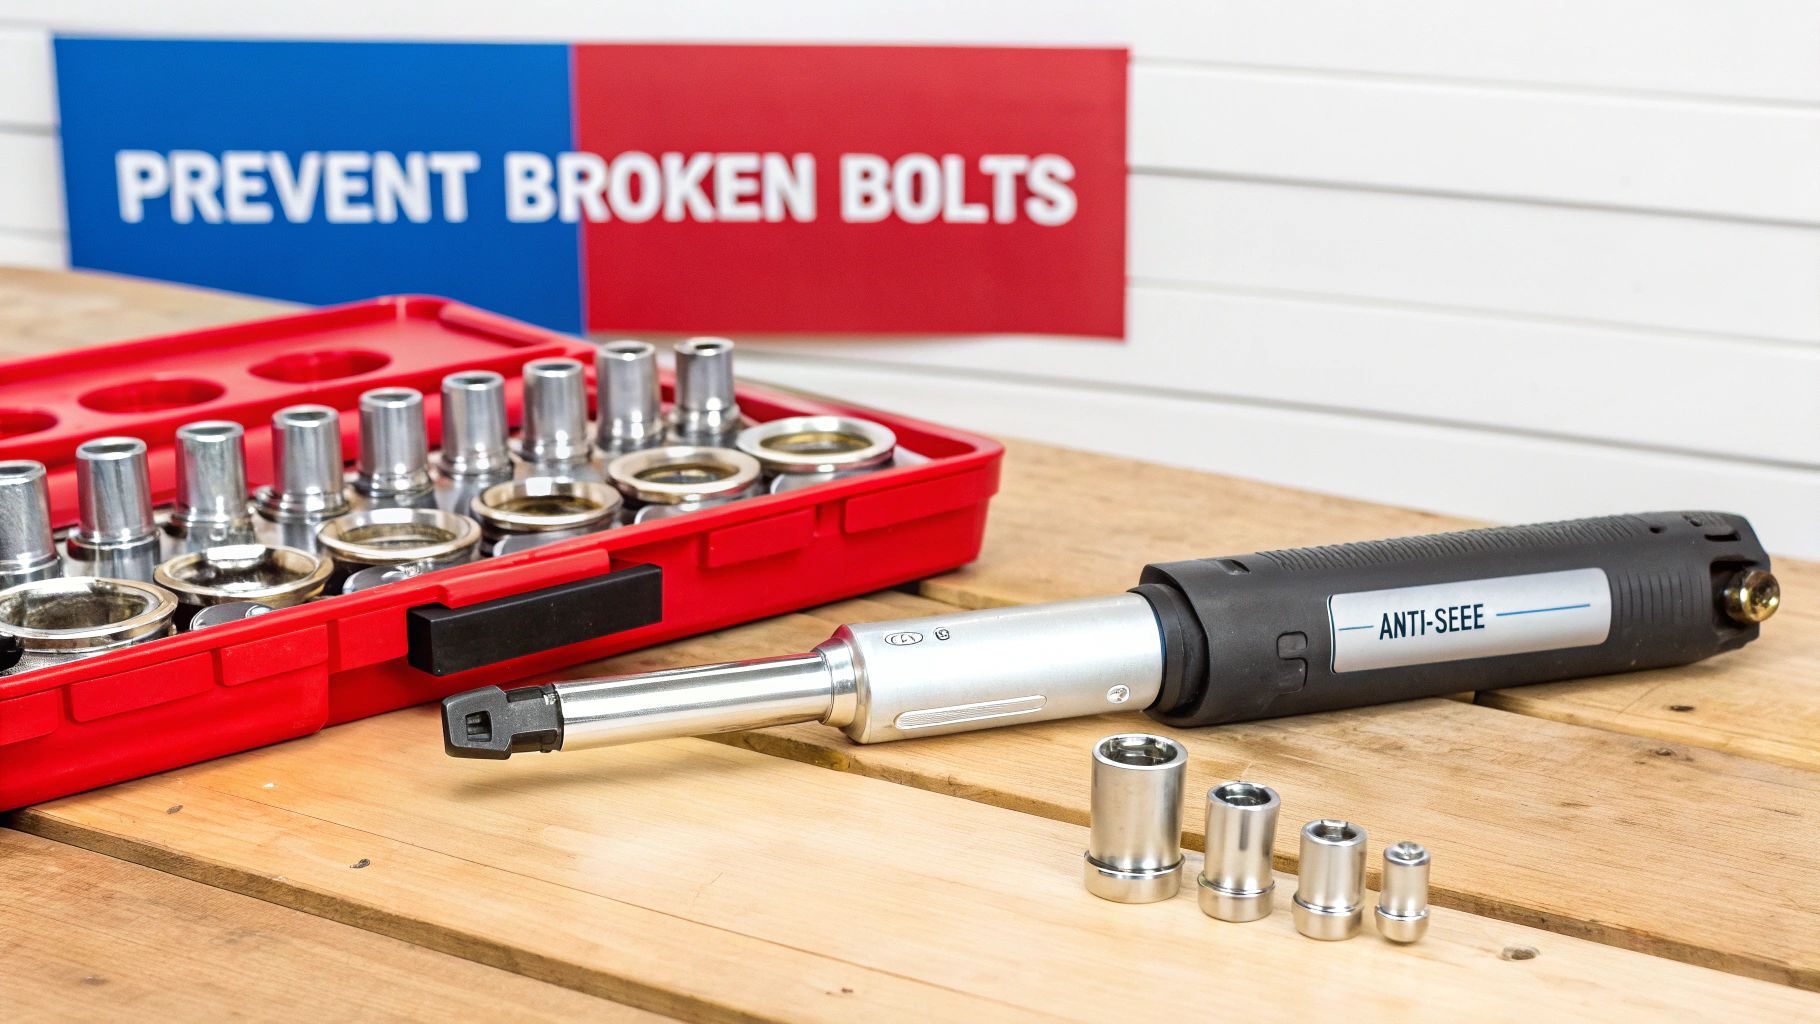
The Power of Anti-Seize Lubricant
The other big enemy of fasteners is corrosion. When you have two different metals touching, especially with heat and moisture in the mix, galvanic corrosion can practically weld them together. This is exactly why exhaust manifold bolts and old spark plugs become such a notorious pain to remove.
A simple but incredibly effective trick is to apply a thin coat of anti-seize compound to the threads before you install a bolt. This stuff creates a protective barrier, preventing direct metal-to-metal contact and blocking out the elements that cause seizing. It's a key part of the top preventive maintenance best practices that pros swear by.
You'll find a few different types, each for specific jobs:
- Copper-Based: Your go-to for high-heat situations, like exhaust parts and brake components.
- Aluminum-Based: A great all-around choice for most general automotive fasteners.
- Nickel-Based: Perfect for stainless steel or other specialty alloys where copper could cause a reaction.
If you want to dive deeper, check out our guide on using copper anti-seize for your projects. Just a small dab is all it takes to make sure that bolt comes out just as easily as it went in, even years from now.
Always Choose Quality Replacements
Finally, a word of caution: never reuse critical bolts that have been torqued to their limit. This is especially true for torque-to-yield (TTY) bolts, common in engine work. These are one-time-use bolts designed to stretch when installed, and they lose their clamping power if you try to use them again.
After all the sweat and effort you put into removing a broken bolt, finish the job right. Installing a new, high-quality fastener is the only way to ensure a reliable, long-lasting repair.
Your Questions About Broken Bolts, Answered
Run into a snag? It happens. Here are some of the most common questions we hear from folks dealing with a stubborn broken bolt, along with some straight-up advice from years in the garage.
What Happens If My Bolt Extractor Snaps Off Inside the Bolt?
This is just about the worst-case scenario, but don't panic. The moment an extractor breaks, the job instantly gets more complicated because that extractor is made of incredibly hard steel. A standard drill bit won't even scratch it.
Your best bet now is to very carefully grind out the broken extractor. For this, you'll need a solid carbide drill bit or a Dremel tool equipped with a carbide burr. Patience is key here; it's a slow and delicate process. Whatever you do, don't try to hammer it out—you’ll just wreck the threads you're trying to save. If you're not feeling confident, this is the perfect time to stop and call in a pro. A good mechanic or a local machine shop has seen this before and can save you a lot of grief.
Can I Use Penetrating Oil and Heat at the Same Time?
Absolutely not. Combining these two is a recipe for disaster. Most penetrating oils are highly flammable and can easily ignite when you put a torch to them, creating a dangerous fire hazard right in your workspace.
The proper technique is to use one method at a time. Start with penetrating oil and give it plenty of time to work, sometimes even overnight. If the bolt still won't budge, you need to completely clean all the oil off with a good brake cleaner before you even think about applying heat.
How Do I Know Which Drill Bit to Use for the Pilot Hole?
Getting the pilot hole right is crucial. Most decent bolt extractor kits come with a guide chart that matches the extractor size to the correct drill bit. If you don't have a guide, a good rule of thumb is to choose a drill bit that’s slightly less than half the diameter of the broken bolt.
You want the hole big enough for the extractor to get a solid grip, but not so big that it thins out the bolt's remaining walls. Drilling too large a hole can actually cause the bolt to expand as you turn the extractor, making it seize up even more. Always aim for the dead center of the bolt.
Once you've won the battle, get the right parts to finish the job right. For durable, guaranteed-fit replacement fasteners and components, check out our selection at T1A Auto. Find exactly what you need for your vehicle at t1aauto.com.
