


The chime starts before you've reached the end of the street. The door ajar light stays on, the dome light won't fade out, and you've already closed every door twice, once gently and once with a shove that rocked the whole vehicle. Nothing changes.
Here's the fork in the road, and it matters more than the diagnostic steps. Either a door isn't latched, or the switch that reports latch position is lying to the body control module. Those two problems look identical on the dashboard and have completely different urgency. One is a fuse-blowing nuisance. The other means a door can swing open at speed.
Everything below is built around answering that question first, then tracing the circuit if the answer turns out to be electrical. Find your symptom, run the first check, and only reach for the multimeter once you know the door is mechanically secure.
Table of Contents
- What Each Warning Pattern Usually Means
- When the Warning Hides a Real Latch Problem
- Trace the Faulty Switch and Stop Battery Drain
- Wet Weather and Warnings That Come and Go
- Decide Whether to Fix It Yourself or Book a Shop
What Each Warning Pattern Usually Means
Match the warning to the symptom, make the first check, and use the likely cause to guide the next diagnostic step. The pattern helps narrow the fault, but it cannot confirm it on its own.
| Symptom | Likely cause | First check |
|---|---|---|
| Warning stays on, all doors look shut | Door not fully latched or striker out of position | Push each door firmly and inspect the striker |
| Warning and one dome light stay on | Faulty ajar switch in that door latch | Test that door's switch and connector |
| Warning appears only after rain or a car wash | Water at the latch-to-harness connector | Dry and inspect the connector and harness |
| Door hard to close or will not lock | Latch pawl not fully engaged | Stop driving and verify latch engagement by hand |
| Warning flickers when door moves or harness flexes | Broken wire in the door-jamb boot | Flex the harness while watching the warning |
| Warning with hood or liftgate indicated | Hood or liftgate switch or latch | Check hood and liftgate latches for full closure |
| Battery drains overnight with interior lights on | Ajar circuit keeps modules awake | Run a sleep-current test after isolating the circuit |
The same dashboard lamp can have different causes. A door sitting slightly out of alignment with its striker may hold the latch switch open, while corrosion at an electrical connector can send the same false signal. The warning alone does not identify which fault is present, so begin with the symptom and check the corresponding door or opening.
The basic monitoring principle is longstanding. Federal rulemaking for school buses requires an open service door to trigger red warning lamps automatically, switch off the amber lamps, and flash at least 60 times per minute (Federal Register). Passenger cars use different symbols and circuits, but they still rely on a latch, striker, microswitch, or electronic position sensor to report whether an opening is closed. Misalignment, contamination, switch wear, wiring faults, or the control module's interpretation of the signal can all produce a false indication.
Some manufacturers have issued service bulletins linking intermittent rear-door-ajar warnings on certain extended-cab vehicles to upper or lower latch adjustment. A door that is also difficult to close points toward a mechanical issue that needs attention before replacing electrical parts. Check latch alignment and switch operation in context, rather than assuming a lighting component is responsible.
Start here: Push every door firmly, then check the hood and liftgate. If a door closes without a solid, secure engagement, treat it as a possible latch problem rather than a harmless warning.
Rear doors deserve a careful check when the warning begins after someone uses the back seat. They may be opened less often, and a stiff seal or latch can make closure less reliable. Compare how the door closes with the warning off and on, then check its latch and striker before moving to wiring tests. A door that is hard to close or will not lock is a safety concern; stop driving until you confirm it is securely latched.
When the Warning Hides a Real Latch Problem
Most guides treat a persistent warning as a failed latch switch and move straight to the meter. That's backwards on a subset of vehicles, and the consequences aren't cosmetic.
Stop and verify the door by hand before you drive anywhere if any of these are true:
- The door feels loose in its opening. Grab the door card and rock it with the door shut. Any perceptible movement is a retention problem.
- It takes unusual force to close. A latch that needs a slam to catch is not catching properly.
- The door won't lock. Locking depends on the latch reaching its fully engaged position.
- The warning changes when the vehicle moves. A signal that flickers with body flex points to mechanical movement, not a stable electrical fault.
The NHTSA recall document on latch engagement records that a continuously illuminated door-ajar warning can occur when an electronic latch pawl doesn't fully engage, which means the door may be able to open while driving. The same records show contaminated electrical contacts inside door latches producing persistent warnings while the latch stayed mechanically secure. Both faults light the same lamp.
The Ford Edge case shows how far this reaches. NHTSA opened an investigation into 2011–2013 Ford Edge vehicles after owners reported the warning staying lit with doors closed and latched, recording 1,983 related complaints and 14 reports of a door opening while the vehicle was driven. Twelve of those 14 involved passengers, often children, opening a door that had failed to lock because the warning condition prevented the doors from locking normally (NHTSA investigation file). The agency found no crashes, no accident-related injuries, and closed the file without establishing an unreasonable safety risk, while noting that closure was not a finding that no safety-related defect existed.
Say a driver's rear-door warning only appears above highway speed. Treat it as mechanical until proven otherwise, because that pattern is the signature of a door moving in its opening under load, not a wire that failed in your driveway.
Never defeat this warning with a jumper wire, a taped-down switch or a pulled fuse. It's the only signal you have that a door is unlatched, and suppression turns a diagnosable fault into an invisible one.
The correct order is mechanical first, electrical second. Verify latch engagement by hand, and if the mechanism is sound, work through the door latch repair walkthrough to see what a worn pawl and striker look like before you condemn the switch.
Trace the Faulty Switch and Stop Battery Drain
Once you've confirmed every opening is secure, tracing the electrical side becomes a short, logical sequence. Work it in order. Each step either clears the fault or narrows the branch.
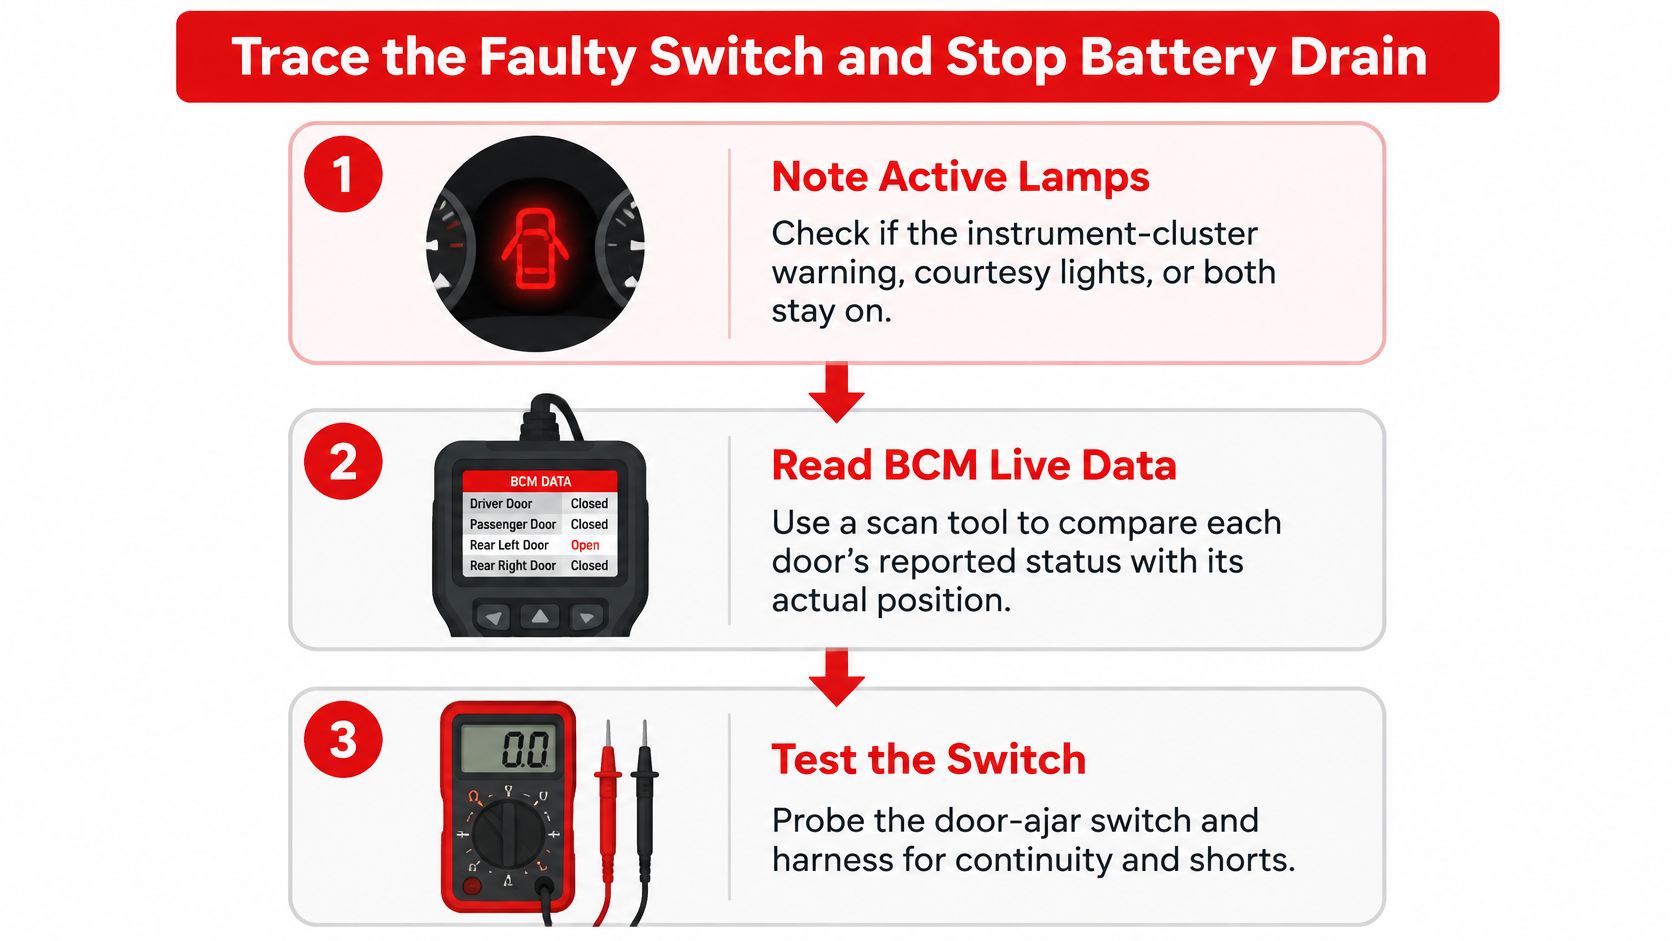
1. Note which lamps stay active. The instrument-cluster warning alone, the courtesy lights alone, or both. Interior lamps that stay lit put a load on the battery and point at a circuit still being commanded on, while a cluster-only warning can sit in what the module believes rather than in any lamp circuit. This one observation decides how much urgency the rest of the job carries.
2. Read body-control-module live data. A scan tool showing each door's status parameter lets you compare what the module reports against what you can see with your own eyes. A shut door reporting open is the one to chase. Skip this and you'll test the wrong door.
3. Inspect that door's latch switch, connector and wiring. Depending on the vehicle, the switch is mounted on the latch assembly or on the pillar. Look for corrosion, pushed-back pins, chafed insulation and a connector that isn't fully seated before anything else.
4. Confirm full mechanical latching, then let the vehicle sleep. This is a step many rush. Modules stay awake after unlocking or opening a door, so measuring vehicle-wide standby current immediately afterward tells you nothing useful. Close everything, including the hood and liftgate, lock the car as you normally would, and wait for the network to go to sleep before you clamp the meter around the cable or put it in series.
5. Isolate one connector at a time. Unplug a single door-switch or latch connector while watching both current draw and BCM live data. A sharp drop in current, or a status change on the tool, identifies that branch as the culprit. If nothing changes, the fault sits in the harness between that latch and the BCM, including every intermediate connector along the way.
6. Reseat the latch-connector pins before any continuity testing. A manufacturer technical bulletin on door-ajar diagnosis recommends checking and reconnecting the latch-connector pins before verifying wiring continuity to the module. A pin that's clean but not fully seated reads as an open circuit under every test you run afterward.
7. Test the switch with it electrically isolated. Compare the readings against the terminal table in the service information for your vehicle. A healthy binary switch transitions cleanly between near-zero resistance and open circuit. An unstable or intermittent reading on a switch that should be in one state is a failed switch, not a meter problem.
8. Retest through real-world conditions. Cycle the latch a dozen times, flex the harness through its full range, cycle the ignition, then recheck sleep current with the interior lamps off. The bar for success is a warning that stays correct through all of it, not a lamp that went out once in the driveway.
| Test | Healthy result | Fault sign | Next step |
|---|---|---|---|
| Latch connector pins | Clean, tight and fully seated | Corrosion or pushed-out pin | Clean or repair the pin before further testing |
| Switch closed (door shut) | About 0 to 1 ohm | Open circuit or unstable reading | Confirm the connector first, then replace the latch switch |
| Switch open (door open) | Open circuit | Near-zero resistance | Check for a stuck, corroded or shorted switch |
| Switch cycled through repeated latch operations | Clean transition on every cycle | Flickering reading | Inspect the harness and connector |
| Harness continuity to the BCM | Continuous, per service table | Break or high resistance | Repair the wire, including in the door-jamb boot |
The door-ajar warning switch reference lays out the same measurement standard: a repeatable transition between roughly 0–1 ohm and open circuit, with polarity and resistance specifications taken from the service information rather than from a generic chart. A stuck, corroded, contaminated or internally shorted latch switch reports a false open door, while wiring damage makes the signal flicker as the harness flexes. If the battery is your main worry, the procedure for checking for battery draw covers the meter setup and sleep timing in detail.
Four mistakes account for most failed repairs here. Condemning the body control module first wastes money on the most expensive part in the chain before the cheapest one has been tested. Measuring resistance with the switch still connected to the vehicle lets parallel circuits corrupt every reading. Overlooking a broken wire inside the flexible door-jamb boot leaves you replacing a good latch. And slamming the door repeatedly can momentarily restore contact and hide an intermittent fault that will return a week later.
Copy this into your notes: cluster lamp state, courtesy lamp state, BCM status per door, sleep current in milliamps, switch resistance open and closed, harness continuity to the module. Six lines, and the next person to open the hood picks up where you stopped.
Wet Weather and Warnings That Come and Go
If the warning arrives with the weather, stop testing switches and start chasing water. A technical service bulletin on water-related ajar codes describes water entering a rear-door trim or run-channel area, reaching the latch-to-harness connector, and electrically creating a false door-ajar signal. The latch is fine. The connector is wet.
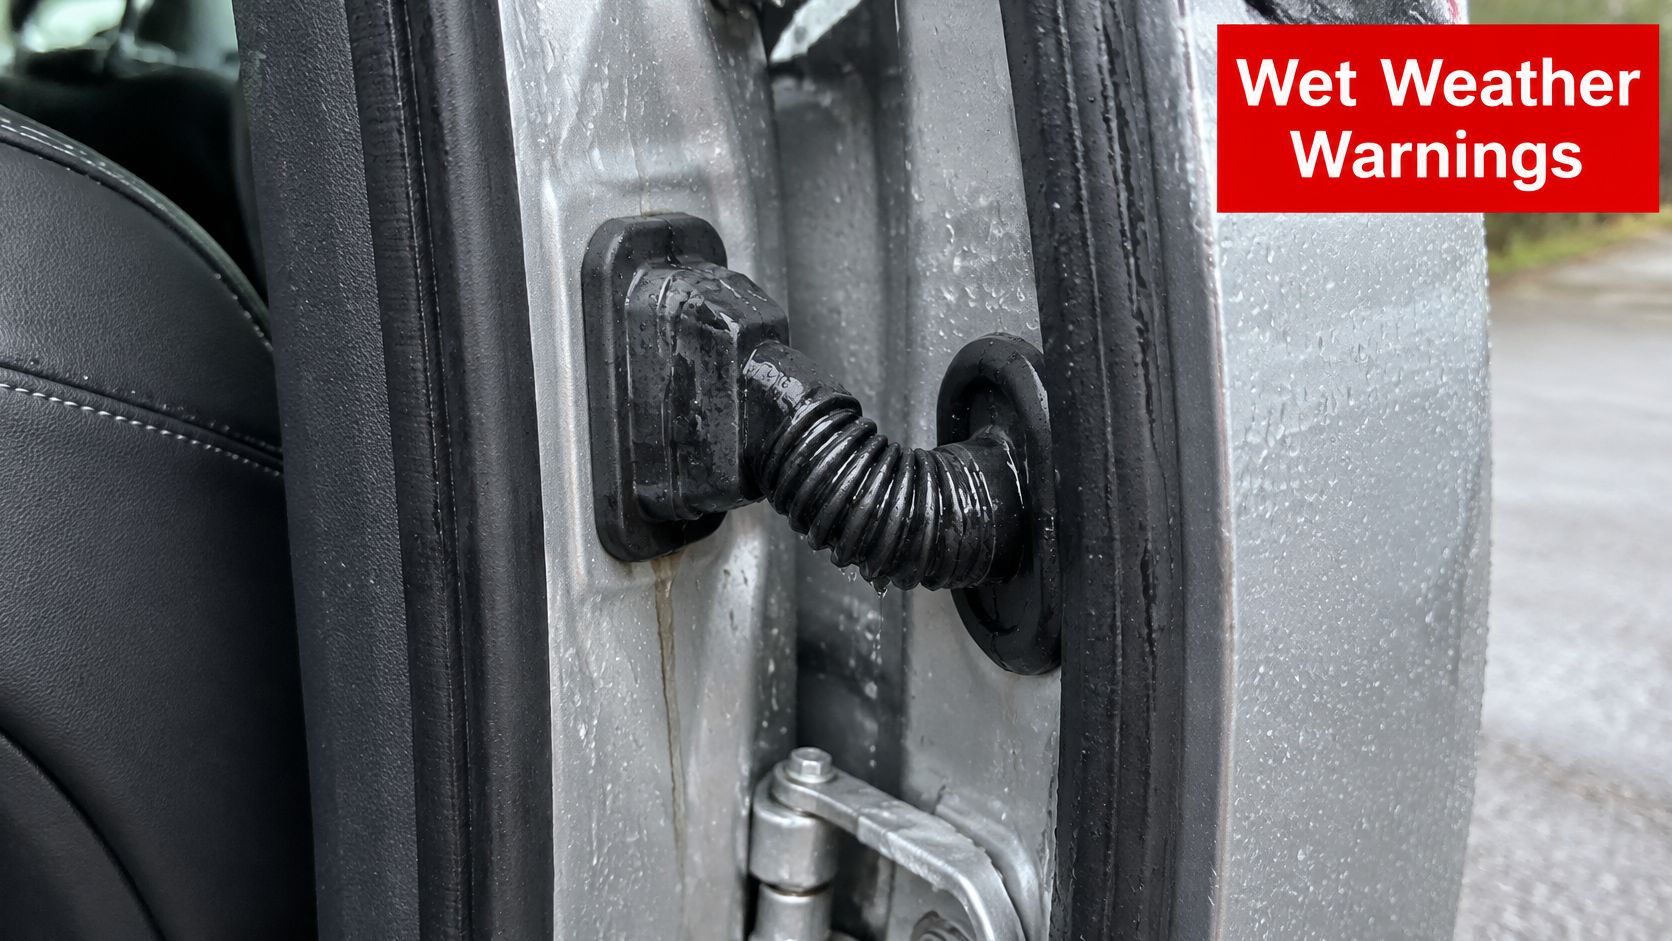
Keep a simple log for two weeks. Note the time, the weather, whether it rained overnight, whether the car was washed, and whether the warning clears once the vehicle has sat in dry air. A warning that appears after precipitation and disappears by mid-morning is a moisture path, not a worn latch.
Then inspect. Lift the door boot carefully, pull back the trim, and look for droplets, green or white corrosion on the pins, harness clips that have come loose, and seals that no longer sit flat. Dry the connector with compressed air, reseat it fully, and see whether the warning stays away through the next rain.
Distinguishing a wet contact from a failed assembly comes down to timing. Clears when dry, returns with the next rain means you follow the water path and fix the seal or the routing. Persists in dry weather sends you back to the switch and continuity tests.
Battery protection matters more than most owners realize. NHTSA materials connect persistent door-ajar conditions with dome lights staying on, battery discharge, and lost confidence that doors are latched. Don't leave a wet car parked overnight with the interior lamp burning, and check battery voltage if the warning has been on for several days. For the wider testing sequence, this guide to diagnosing car electrical problems covers the meter work that follows. Dry it, inspect it, test it electrically, and only then think about parts.
Decide Whether to Fix It Yourself or Book a Shop
The dividing line is mechanical confidence. If the latch engages fully by hand, the door locks, and reseating a connector clears the warning, you've got a job you can finish in a driveway with a scan tool and a multimeter.
| Keep it yourself if | Book a shop if |
|---|---|
| The latch engages fully and the door locks | The door won't latch cleanly or needs force |
| Reseating the connector clears the warning | The warning persists after a switch replacement |
| You can read live data or test the switch with a meter | The drain returns after you isolate the circuit |
| The fault sits in an accessible connector | The fault sits in the BCM or in harness runs you can't reach |
One rule overrides the table. If you're not sure the door is fully secure, treat it as a mechanical fault and don't drive until someone qualified confirms latch engagement. A nuisance warning is annoying. A door that opens at 60 mph is a different category of problem.
Parts ordering trips people up more than diagnosis does. A diagnostic result often points to a worn latch assembly, switch or hinge part, so confirm the exact part number against the year, make, model and door position before you buy. We stock door hinges, latches and the fasteners that go with them, searchable by vehicle, so the wrong-door mistake doesn't happen at checkout.
Write down the warning pattern, the door involved and every meter reading. Hand those notes to the shop and the technician skips straight to the failing branch instead of repeating your work.
Before the vehicle goes back into service, complete the final recheck: at least five full latch cycles on each door, a wet-weather retest after rain or a car wash if the original fault was intermittent, and a sleep-current recheck with the interior lights off. Anything less and you're guessing.
A warning light that won't quit is usually a latch, a switch or a connector, and all three are parts you can buy with confidence. T1A Auto stocks door latches, hinges, check parts and the fasteners around them, searchable by year, make and model so you order the right door the first time, and every product we sell carries a no-questions-asked 2-year warranty. Once you've traced the fault to a worn latch or striker, visit T1A Auto to match the exact part to your vehicle and put the warning out for good.
