


You usually notice a door handle problem at the worst time. Cold morning. Full hands. You pull the driver door on a truck you use every day, and the handle lifts with almost no resistance. Maybe it flops. Maybe it returns but the latch never releases. Maybe the tailgate handle works only if you tug it sideways first.
Most owners then search for a complete handle and hope that fixes it. Sometimes it does. A lot of the time, the problem is deeper in the assembly. The broken piece might be the return spring, the rod clip, the spindle, the gasket that let water in, or a latch that got so sticky it overloaded the new part.
That matters because door handle replacement parts aren't one thing. They're a mix of housings, pivots, clips, rods, seals, and fasteners that all have to match the vehicle and the failure. Get the diagnosis right, and the repair lasts. Get it wrong, and you install a new handle on top of the same problem that broke the last one.
Table of Contents
- Why Door Handles Fail More Often Than You Think
- Inside the Anatomy of a Door Handle Assembly
- Metal Versus Plastic and Why Material Matters
- How to Identify the Correct Replacement Part for Your Vehicle
- Common Failure Modes and What They Look Like in Real Life
- Cost, Warranty, and DIY Versus Professional Installation
- Buying, Installing, and Troubleshooting Step by Step
- A Quick Decision Guide Before You Click Order
Why Door Handles Fail More Often Than You Think
On pickups and SUVs, door handles live a rough life. The driver's exterior handle gets used all day, every day. Rear doors get yanked by kids and passengers who don't feel the mechanism binding. Tailgate handles get loaded hard when someone opens a sticky gate with one hand while supporting weight with the other.
Age adds up too. A broader market study estimates a global active vehicle fleet above 1.42 billion units in 2025, with an average vehicle age of 11.3 years in developed markets, which helps explain why replacement demand stays strong in this category (automotive door handles market study). That same source estimates the broader global automotive door handles market at $9.76 billion in 2025, projected to reach $15.54 billion by 2034, with exterior handles accounting for 58.5% of revenue and the aftermarket channel at 31.7%.
What breaks the original part
Most failures aren't mysterious. They come from repeated cycles, contamination, and force.
- Repeated pulls: Every handle sees thousands of normal cycles over time.
- Cold-weather shock: Frozen seals and sticky latches push load into the pivot and housing.
- Salt and moisture: Truck doors collect grime, then corrosion starts around pivots and hardware.
- UV exposure: Sun-baked plastics get chalky, brittle, and easier to crack.
- Misused force: If a latch drags, the handle becomes the weak link.
A separate market source puts the global automotive outside door handle market at about $4.3 billion in 2025 and projects $6.87 billion by 2034, implying a 5.2% CAGR. It also notes that vehicles typically need door-handle replacement after 8 to 12 years of service because of wear, corrosion, cosmetic degradation, and accidental damage (outside door handle market overview).
Practical rule: If a handle suddenly feels lighter than usual, don't assume only the handle failed. Check whether the latch or linkage was dragging first.
The two questions that matter
Before ordering anything, answer these:
- Which sub-component failed?
- What material and kit contents make sense for this truck, climate, and use pattern?
Those two answers save more time than any generic "fits your vehicle" badge.
Inside the Anatomy of a Door Handle Assembly
A handle assembly looks simple from the outside. Inside the door, it's a small system. Each piece controls a different symptom, and that's why diagnosis matters more than most buyers expect.
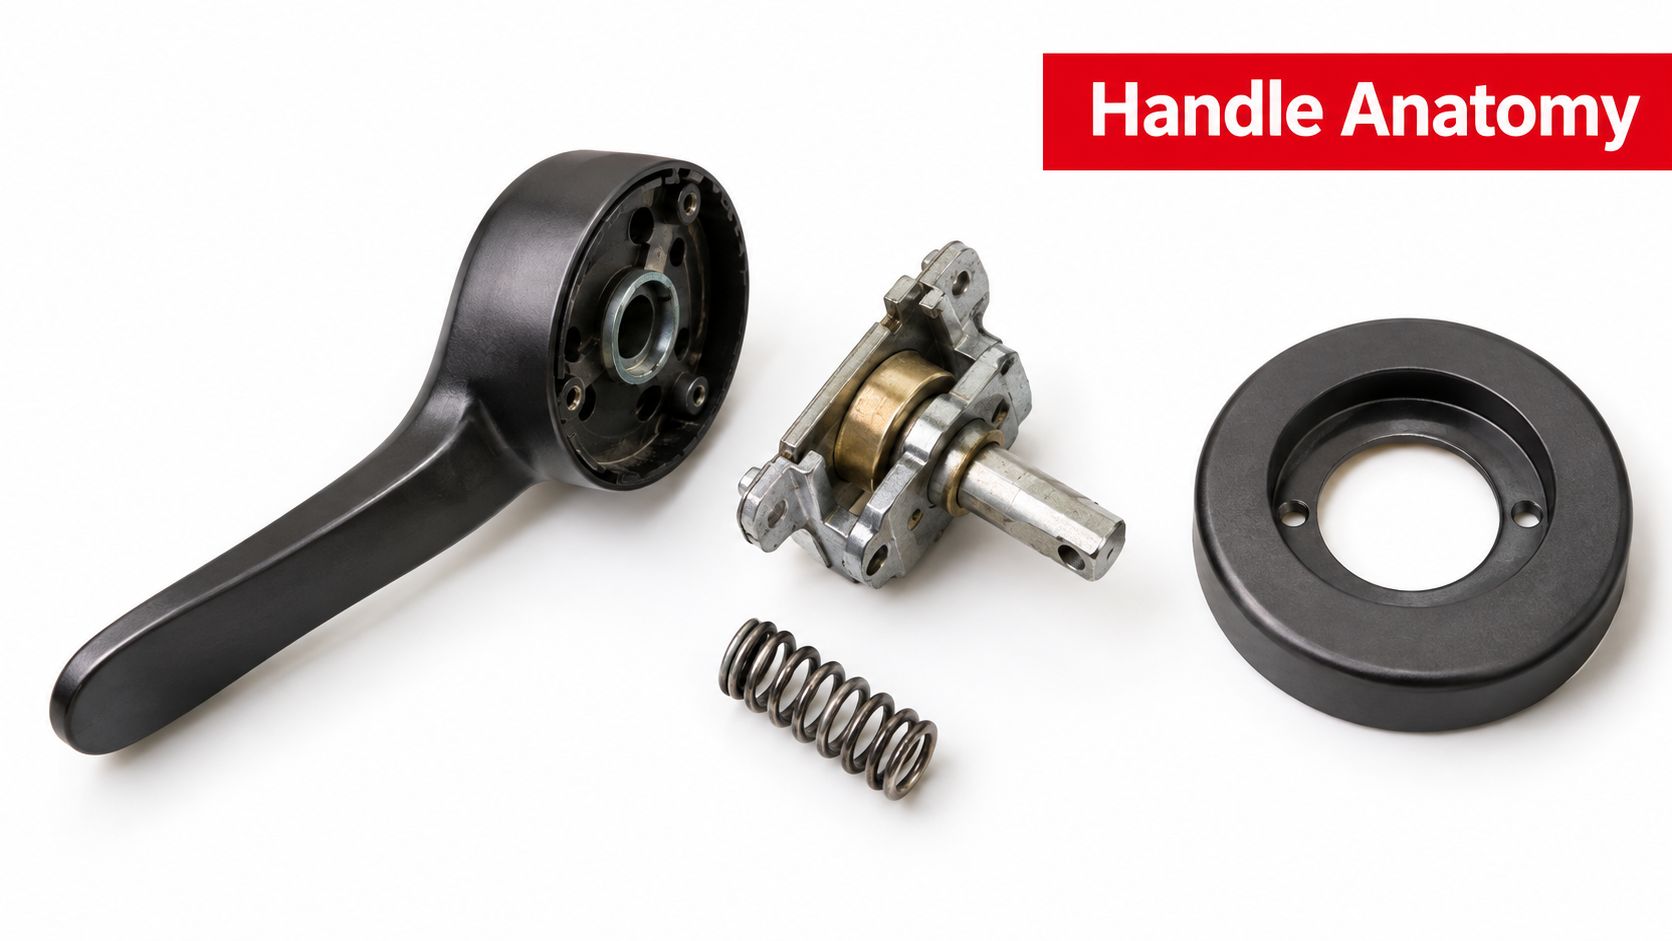
Exterior handle parts
On most truck and SUV exterior handles, you'll usually find these pieces:
- Handle body or lever: The part your hand grabs. If this cracks near the pivot, the handle may still move but won't pull the latch far enough.
- Carrier or housing: The structure behind the visible handle. A warped or broken carrier can make a new lever feel loose.
- Return spring: Brings the handle back to rest. When it breaks, the handle often hangs open or doesn't sit flush.
- Spindle or pawl: Transfers movement from the handle into the latch linkage. Wear here causes the classic "moves but does nothing" complaint.
- Gasket or seal: Sits between the handle and the door skin. If it's missing or damaged, water gets in and corrosion starts.
- Mounting bolts or clips: Hold alignment. Wrong hardware causes rattles, uneven fit, or stripped plastic ears.
- Linkage rod and rod clip: Connect the handle to the latch. If the clip pops off, the handle feels normal but the door won't open.
Interior and tailgate variations
Interior handles are simpler, but they fail in their own way. Usually it's the pull lever, the bezel, the mounting screws, or the rod clip behind the panel. A broken interior lever often feels slack or binds at one spot in the pull.
Tailgate handles are a different animal on pickups.
- The outer housing is often larger and takes more flex.
- Many include a key lock provision or trim cap.
- Newer trucks may use the same surface area for a camera mount or emblem area.
- Instead of one short rod, a tailgate setup may drive latch rods on both sides or work through a power release setup.
A tailgate handle that only works when you lift one side of the gate by hand usually isn't just a bad outer handle. Check rod adjustment and latch synchronization.
Why sub-parts matter when ordering
One undercovered problem in this category is that buyers often need exact sub-parts, not a full assembly. A neutral guide on handle repair kits notes that kits can include springs, spindle, fixing screws, rose covers, circlips, grease, and sometimes a latch, and that the fault may be a worn spindle, loose screws, or a misaligned latch rather than the handle body itself (door handle repair kit guide).
That same point applies to vehicles. If the failed piece is the spring or rod clip, replacing the whole visible handle without checking the rest is how people end up doing the job twice.
Metal Versus Plastic and Why Material Matters
Material choice isn't cosmetic. It changes how a replacement behaves in winter, under heavy use, and when the latch isn't moving as freely as it should.
What the material data means in real use
For handle bodies, zinc die-cast parts are usually the safer choice for high-use doors. One engineering and manufacturing reference lists zinc die-cast handle bodies at about 280 to 330 MPa tensile strength, 220 to 280 MPa yield strength, and HB 80 to 100 hardness, along with strong dimensional stability and creep resistance compared with reinforced plastics (zinc die-casting strength comparison).
That shows up in the shop as less flex at the pivot, less deformation around bolt points, and better survival on fleet trucks where the same door gets hammered all day.
Where plastic still makes sense
Plastic isn't automatically junk. A quality OEM-style plastic handle can work fine on a daily driver in a mild climate, especially if the latch and rods move freely and the vehicle isn't seeing commercial-duty use.
The trouble starts when buyers choose the cheapest version available and expect it to survive hard use, freezing temps, and sticky linkages. That's where thin pivots, brittle clips, and weak spring anchors let go first.
| Property | Die-Cast Metal (Zamak/Aluminum) | Reinforced Plastic (Nylon/ABS) | Use Case Fit |
|---|---|---|---|
| Strength and rigidity | Higher, with better pivot stability | Lower, more flex at stressed points | Metal for high-use doors |
| Cold-weather behavior | Better resistance to brittle fracture | More likely to embrittle at weak points | Metal for winter climates |
| Corrosion behavior | Needs protective coating | Base material doesn't rust, but hardware still can | Plastic can suit mild climates |
| Weight and cost | Heavier, usually pricier | Lighter, usually cheaper | Plastic for budget cosmetic repairs |
| Long-term wear | Better for repeated pulls | More sensitive to heat, UV, and fatigue | Metal for fleets and work trucks |
What I recommend by vehicle type
- Work trucks and fleet units: Choose metal or metal-reinforced parts first.
- Daily drivers in moderate climates: OEM-style plastic can be acceptable if the rest of the mechanism is healthy.
- Lease return or cosmetic refresh: A standard replacement may be enough if you're fixing appearance more than service life.
If you're comparing options, this overview of a metal handle for door applications is useful because it focuses on where upgraded metal makes practical sense rather than treating every vehicle the same.
How to Identify the Correct Replacement Part for Your Vehicle
Fitment mistakes usually come from rushing past the details that separate one handle from another. Same body style doesn't always mean same part. Keyless entry, trim level, paint finish, lock-cylinder provision, cab configuration, and tailgate style can all change the handle.
Start with the VIN, then verify the old part
The cleanest workflow is:
- Pull the VIN from the dash or door label.
- Use it to confirm exact year, trim, and equipment.
- Cross-reference the OEM part number on a factory diagram.
- Compare that against the aftermarket listing.
- Check your old handle before buying anything.
A VIN-based search narrows down mistakes that broad vehicle filters miss. If you want a quick way to understand the process, this guide on how to search parts by VIN number lays out why VIN decoding catches trim-specific differences that visual matching often misses.
What to compare by hand
Even after a VIN match, compare the old handle to listing photos and notes.
- Mounting stud pattern: Count studs and check their position.
- Rod clip style: Color and shape often matter.
- Lock cylinder opening: Some handles accept a key cylinder, some use a cap.
- Bezel profile: The curve against the door skin has to match.
- Texture or paint finish: Textured black and smooth paintable versions aren't interchangeable if appearance matters.
- Tailgate provisions: Camera, lock, and emblem mounting can change the whole assembly.
| Source | What It Confirms | Limitation |
|---|---|---|
| VIN lookup | Exact vehicle configuration | Doesn't show current broken-piece condition |
| OEM parts diagram | Original part number and assembly layout | Can be confusing on trim-package splits |
| Aftermarket fitment notes | Listing-specific compatibility | "Fits" filters can still be broad |
| Old part in hand | Studs, clips, bezels, lock provision | Only helps if part is complete enough to inspect |
Why a fits badge isn't final proof
A "fits your vehicle" badge is a filter result, not a diagnosis. It doesn't tell you whether your truck has keyless-entry hardware, the fleet trim textured bezel, or the tailgate camera provision that changes the part.
Match the listing to the vehicle and the failure, not just the year and model.
That's the step buyers skip when they order twice.
Common Failure Modes and What They Look Like in Real Life
The symptom tells you where to look. The sound and feel matter as much as the visual crack.
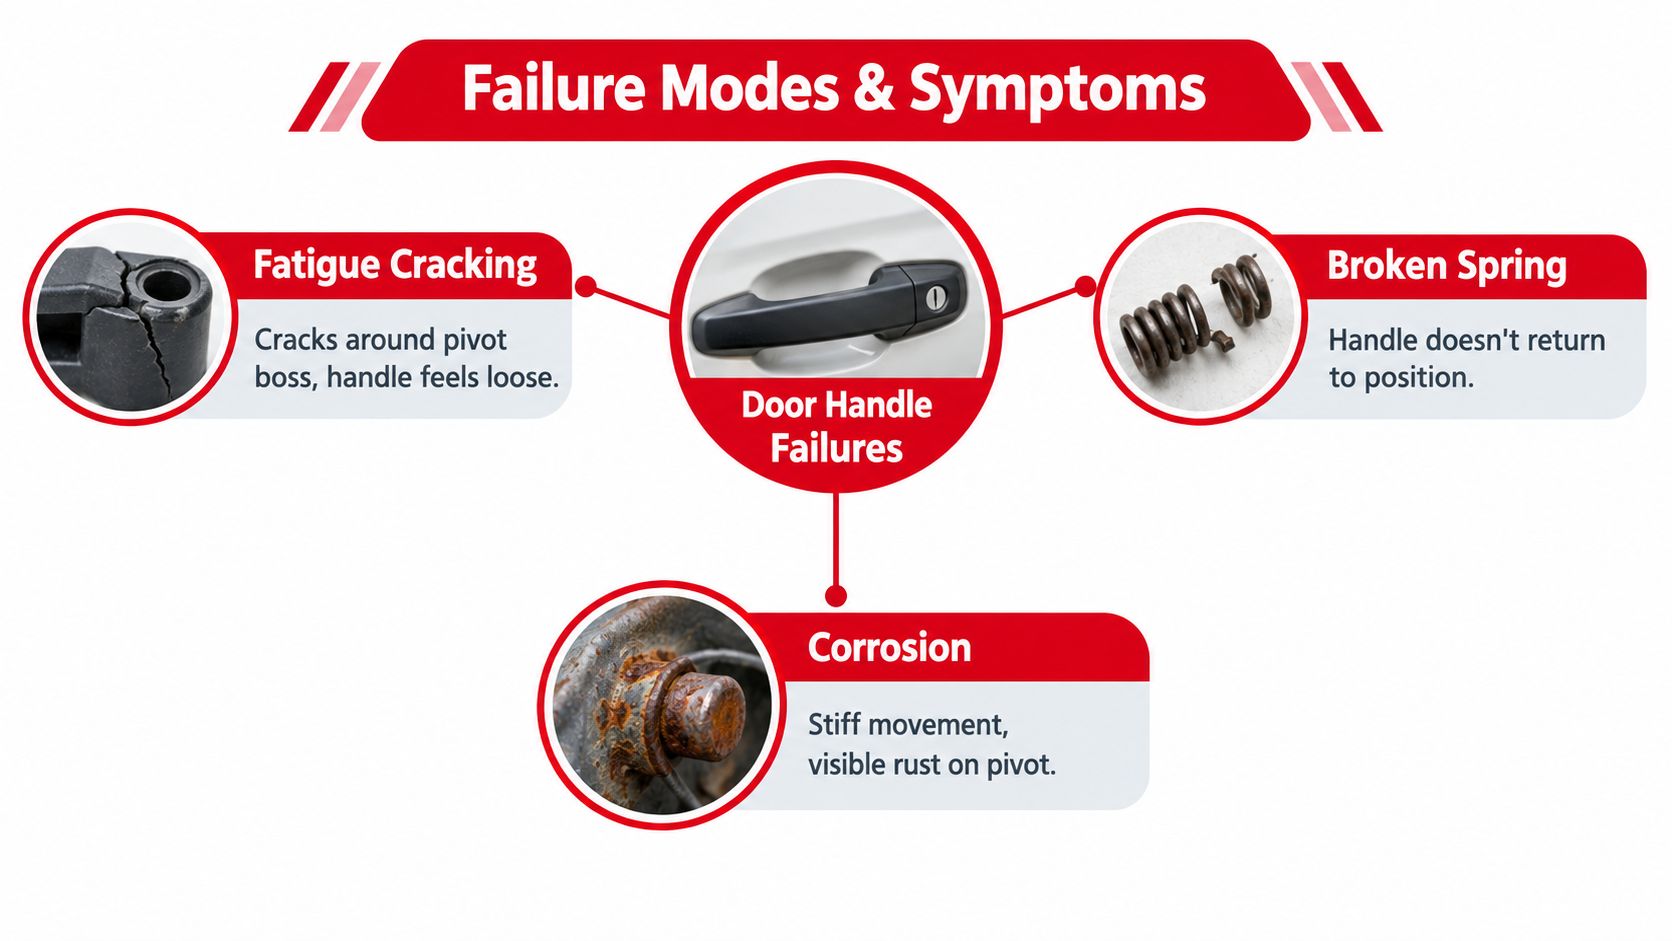
Failures you can feel at the handle
An engineering reference on a die-cast car door handle describes failure from repeated-cycle fatigue combined with stress concentration at pivots, linkages, and return-spring anchors, and reports one interior handle failure at about 72,000 km. The same reference points to electroplating effects, a long lever arm, and high actuation force from a sticky release mechanism as likely contributors (engineering analysis of handle failure).
In plain language, that means a handle often breaks because the mechanism behind it got hard to move.
Common real-world patterns:
- Crack near the pivot boss: The handle feels loose, then suddenly pulls farther than normal.
- Broken return spring: The lever stays partly open or doesn't snap back.
- Worn spindle or pawl: The handle moves smoothly but doesn't release the latch.
- Disconnected rod clip: The handle may feel almost normal, but nothing happens at the latch.
- Corrosion at pivot points: Pull effort rises over time, then the housing or lever fails.
Problems that mimic a bad handle
Not every no-open complaint is the handle itself. Recent coverage on front door handle failure highlights plastic fatigue, corrosion, UV exposure, and electronic actuator or sensor faults as common causes, and stresses checking material specs plus corrosion and UV resistance when choosing replacements (common causes of front door handle failure).
That matters on newer trucks and SUVs where a failing lock actuator can make owners blame the outer handle. If the handle feels intact but the door still won't release correctly, the fault may sit deeper in the lock system.
Quick symptom map
- Handle flops and stays out: spring or pivot failure
- Handle feels normal but door won't unlatch: rod clip, spindle, or latch issue
- Handle is stiff before failure: corrosion, dirt, frozen latch, or binding release
- Works only when pressing repeatedly: likely lock-side problem, not just handle-side
The cheapest fix is often the smallest failed part. The longest-lasting fix is solving the drag that caused it.
Cost, Warranty, and DIY Versus Professional Installation
Price isn't the only trade-off. The choice is how much risk you want in fitment, finish, and service life.
What changes the part choice
A bare economy handle can be enough for a light-duty commuter with a clean, free-moving latch. A truck that sees jobsite dust, winter salt, and daily use usually needs more than the cheapest plastic shell and generic clips.
Warranty also matters, but only if you read what it covers. Most handle warranties cover defects in the part itself. They don't usually cover broken tabs from over-torquing, scratched paint from installation, or failures caused by a seized latch that nobody serviced.
| Handle Type | Price Range (USD) | Warranty | DIY Skill Level |
|---|---|---|---|
| Interior handle | Varies by vehicle, material, and kit contents | Economy, mid-tier, and longer-coverage options exist | Beginner to moderate |
| Exterior side door handle | Varies by lock provision, finish, and material | Coverage differs by product line | Moderate |
| Tailgate handle assembly | Varies by camera, lock, and rod setup | Coverage depends on assembly complexity | Moderate to advanced |
| Power-lock-integrated unit | Varies widely by electronics and trim | Electronics and finish terms may differ | Advanced or professional |
When DIY makes sense
DIY is realistic when the job involves normal screw access and straightforward trim removal.
Good candidate jobs include:
- Interior pull handles: Usually accessible with basic trim tools.
- Simple exterior truck handles: Often manageable if the rods and clips are visible and reachable.
- Basic tailgate handles: Easier when there are no camera or powered release complications.
Jobs that often deserve a shop:
- Keyless-entry integrated handles
- Riveted or tightly packaged assemblies
- Tailgate units with camera or emblem transfer
- Cases where the latch is binding and diagnosis is uncertain
If you're comparing OEM against aftermarket before buying, this breakdown of aftermarket parts vs OEM is useful because it frames the decision around fit, materials, and warranty rather than brand assumptions alone.
A realistic decision shortcut
Ask yourself three things:
- Do you have trim tools, a socket set, and the patience to remove clips without breaking them?
- Can you identify whether the problem is mechanical or electronic?
- If the first install doesn't work, are you comfortable reopening the door?
If the answer to the last two is no, paying a shop is often cheaper than ordering extra parts after a bad first guess.
Buying, Installing, and Troubleshooting Step by Step
The smoothest repairs start before the order is placed. Confirm the VIN, verify the OEM number, and make sure the kit includes the small hardware you need. A handle without the right clips or gasket can turn a short job into a parts chase.
Tools to lay out first
For a typical exterior handle swap on a pickup, gather:
- Trim panel tools to lift clips without chewing up the panel
- Short Phillips #2 for tight access screws
- 10 mm socket for common mounting hardware
- Magnetic pickup tool for dropped fasteners inside the door
- Painter's tape to protect painted edges
- Silicone spray for the latch and pivot points
If the truck has keyless-entry hardware, disconnect the battery before unplugging anything in the door.
Install in the order that prevents rework
Use this sequence:
- Remove the trim panel carefully. Broken panel clips create rattles later.
- Inspect the latch before fitting the new handle. If the release is sticky, free it up now.
- Drop the handle rod at the latch and note exactly how the clip locks.
- Transfer clips, seals, and gaskets from the old assembly if the new part doesn't include them.
- Dry-fit the handle before final tightening. Watch stud alignment and bezel seating.
- Seat the spindle correctly if the design uses one with a lock cylinder or cap.
- Tighten fasteners evenly. Don't crush plastic ears or distort the housing.
- Test the handle at least three times before reinstalling the door panel.
A new handle that feels stiff before the panel goes back on is warning you about a linkage problem. Don't close it up and hope.
Troubleshooting after installation
Three post-install complaints show up again and again.
- Handle feels loose: Check missing gasket, under-seated clip, wrong stud spacing, or an unlatched rod clip.
- Handle won't return: Look at the return spring, rod routing, or a latch still dragging from grime or corrosion.
- Handle moves but won't unlatch: Recheck spindle engagement and lock-side function before blaming the new part.
If lock behavior is part of the symptom, it's worth reading a guide that helps you diagnose lock problems yourself before you order another handle. That's especially helpful on vehicles where a lock fault can feel like a bad handle.
One practical source for truck owners is T1A Auto, which carries vehicle-specific door handles, tailgate handle assemblies, and related high-wear parts with material and fitment details laid out clearly enough to compare options before you tear the door apart.
A Quick Decision Guide Before You Click Order
Most bad handle purchases come from skipping one of three checks.
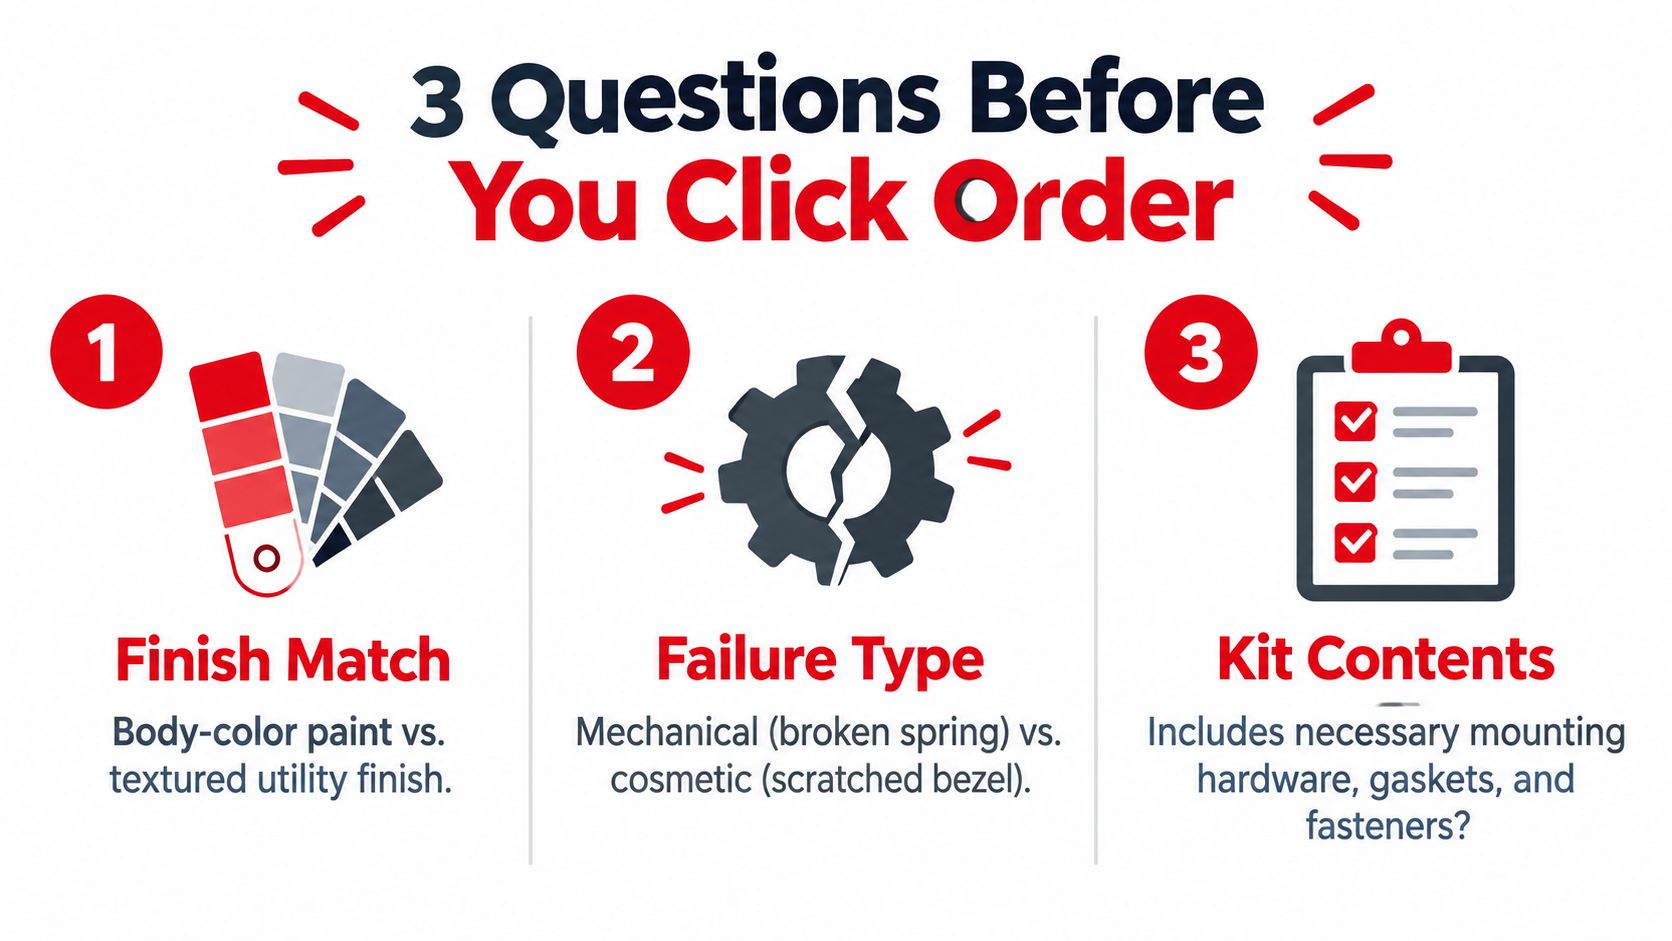
The three questions that prevent wrong orders
First, decide whether you need a finish match or a utility fix. Body-color painted handles, textured black work-truck handles, chrome caps, and smooth paintable shells aren't the same purchase.
Second, identify the failure type. If the issue is mechanical, buy for the broken function. If it's electronic, don't let a pretty new handle distract you from a lock actuator or switch problem.
Third, confirm the kit contents. A handle without the right clips, rods, seals, or fasteners can still be the wrong order even when the casting looks right.
Red flags that should stop the purchase
- No part number listed
- "Fits all years" language
- No clear note about lock cylinder, keyless entry, or camera provision
- No material description
- No view of the backside or mounting points
Buy the part that matches the failure, the trim, and the climate. If one of those three is off, the install usually turns into a comeback.
For owners, the simplest rule is this. If you can verify the fitment and identify the failed piece, a handle job is often manageable. If the diagnosis is fuzzy or electronics are involved, a shop should confirm the fault before parts get ordered.
If you're replacing worn or broken door handle replacement parts on a truck, SUV, or daily driver, T1A Auto stocks vehicle-specific exterior handles, interior handles, tailgate assemblies, and related hardware with clear fitment guidance and upgraded material options where they matter most. Visit T1A Auto to match the part to your vehicle before you pull the door apart.
