


The rear door on your Super Duty won't open from the outside. Maybe the handle flops loose in its pocket, maybe it pulls clean with no resistance and nothing happens, and now every passenger climbs across the front seat to get out. You search for an F-250 door handle replacement, find a part that looks identical for less than the price of a tank of fuel, and wait for the box.
It arrives. It doesn't fit, or it fits and the door still won't open. That's the moment worth pausing on, because the handle is often the last link in a chain that starts at a dry latch, a stretched rod, or cracked metal in the door shell. Diagnose first, order second, and a fifteen-minute job stays fifteen minutes.
Table of Contents
- Confirm the Right Handle Before You Order
- Tools, Parts and Workspace Setup
- How to Replace a Rear Exterior Handle Step by Step
- How to Swap an Interior Handle on 1999 to 2007 Models
- Why the New Handle Fails and How to Fix It
- Verify the Repair, Recall Status and Next Step
Confirm the Right Handle Before You Order
Most returns start with the same wrong assumption, that F-250 describes one truck. Ford began producing the first-generation F-Series in 1947, with the first trucks on sale for the 1948 model year, and the family's scale is exactly why a handle has to be matched by year, cab and trim rather than by badge. By January 2022 Ford had built its 40-millionth F-Series truck for U.S. customers, after reporting 26 million F-Series sales since January 1977, a milestone Ford's media release describes as roughly 10% of Ford's total vehicle production across the company's 119-year history.
That volume is why catalogs cut F-250 applications into narrow year bands instead of stocking one universal part. The name spans several generations of body design, latch system, mounting pattern and interior trim. A handle listed for a 1997-1999 F-250 is not automatically a fit for a later Super Duty, and assuming otherwise is how people end up with a part that bolts on but doesn't engage the latch.
Six checks in order
- VIN and model year. The VIN settles the year and the build configuration faster than any photo.
- Cab style. Regular, extended and crew cab rear doors are not the same door.
- Door position. Front and rear handles sit in different door shells with different linkage paths.
- Side. Driver and passenger handles are handed parts, not flippable ones.
- Inside or outside. Interior and exterior handles are entirely separate assemblies.
- Linkage type. Some applications pull a cable, others a metal rod, and the attachment at the handle end differs.
The 1997-1999 split is the sharpest example of why the badge alone tells you nothing. NHTSA's vehicle record for the 1999 F-250 covers a recall of certain 1997-1999 trucks rated below 8,500 lb GVWR, alongside related F-150 applications, in a campaign estimated at 1.1 million vehicles in total. The weight-class boundary is the tell: trucks on either side of it can differ in body platform, latch linkage and how the handle mounts.
The four application groups this guide covers
| Application | What to confirm | Why it matters |
|---|---|---|
| 1997 to 1999 F-250 under 8,500 lb GVWR | Model year and GVWR class | Same badge can use different hardware and body platform |
| 2011 to 2016 F-250 rear exterior handle | Door position and green rod clip on the linkage | Confirms the rod layout matches before you pull the panel |
| 1999 to 2007 F-250, F-350, F-450, F-550 interior handle | Cab style and side (driver or passenger) | Handles are side-specific and not interchangeable |
| Exterior handle with aftermarket chrome cover | Cover type and recall status | Cover damage and latch faults need different fixes |
Before you trust any listing, pull the VIN and use it to filter parts rather than browsing by year alone. A search by VIN number narrows the catalog to the exact build and saves the return shipping on a handle that was never going to fit.
Practical rule: keep the old handle on the bench until the new one is bolted in, the rod is seated, and the door has opened from the outside five times.
Compare the old and new parts side by side before anything gets removed. Mounting holes, the rod attachment point, the pivot geometry and the included hardware should match exactly. If the new handle ships without clips or a gasket that the old one has, order those before you start, not after the door is apart.
Tools, Parts and Workspace Setup
The full tool kit for a 2011-2016 rear exterior handle fits in one hand, and none of it is specialty equipment. Gather it before you touch the door so you're not hunting for a socket with the panel hanging by its wires.
- Plastic trim tool. A wide, stiff pry tool lifts panel clips without gouging the panel edge or chipping paint at the clip seats.
- 7 mm socket. For the small fasteners around the panel and switch housing.
- 10 mm socket. For the window-guide bolt, which you only loosen when clearance is tight.
- 11 mm socket. For the two retaining nuts that hold the handle body to the door shell.
- Ratchet with a short extension. The rear door cavity is shallow and a deep socket bottoms out against the inner skin.
Add a magnetic tray for fasteners, painter's tape for holding the vapor barrier back, and a rag to wipe the latch area clean. Lay the fasteners out in removal order as they come out. Clips and nuts that get dropped into the door cavity don't come back without fishing with a magnet, and sometimes they don't come back at all.
Why the trim tool earns its place
Prying a door panel with a screwdriver feels faster and almost always costs more time. It stretches or snaps the clips that hold the panel, and a broken clip is the single most common reason a door panel rattles at speed after a repair. The trim tool spreads the load across a wide edge so the clip releases instead of shearing.
Check the box against the old part
Before removal, confirm the new handle includes its clips, its rod or cable attachment, and its gasket, then lay it next to the old one. Any mismatch shows up now, while you can still drive to the parts counter, rather than with the door stripped and undriveable.
Prices vary widely by source. Advance Auto Parts listed Ford F-250 exterior door-handle replacements starting at $37.49 in 2026, while FordPartsGiant listed a genuine Ford F-250 Super Duty outside door handle at $16.91 against an MSRP of $22.00. Neither price means anything until you've checked the listed application against your VIN.
How to Replace a Rear Exterior Handle Step by Step
The 2011-2016 rear handle is a door-panel job, not a handle job. The trim tool and a 7 mm, 10 mm and 11 mm socket cover the whole procedure, as laid out in 1A Auto's published walkthrough, and the parts that decide whether the repair lasts are the rod clip and the vapor barrier.
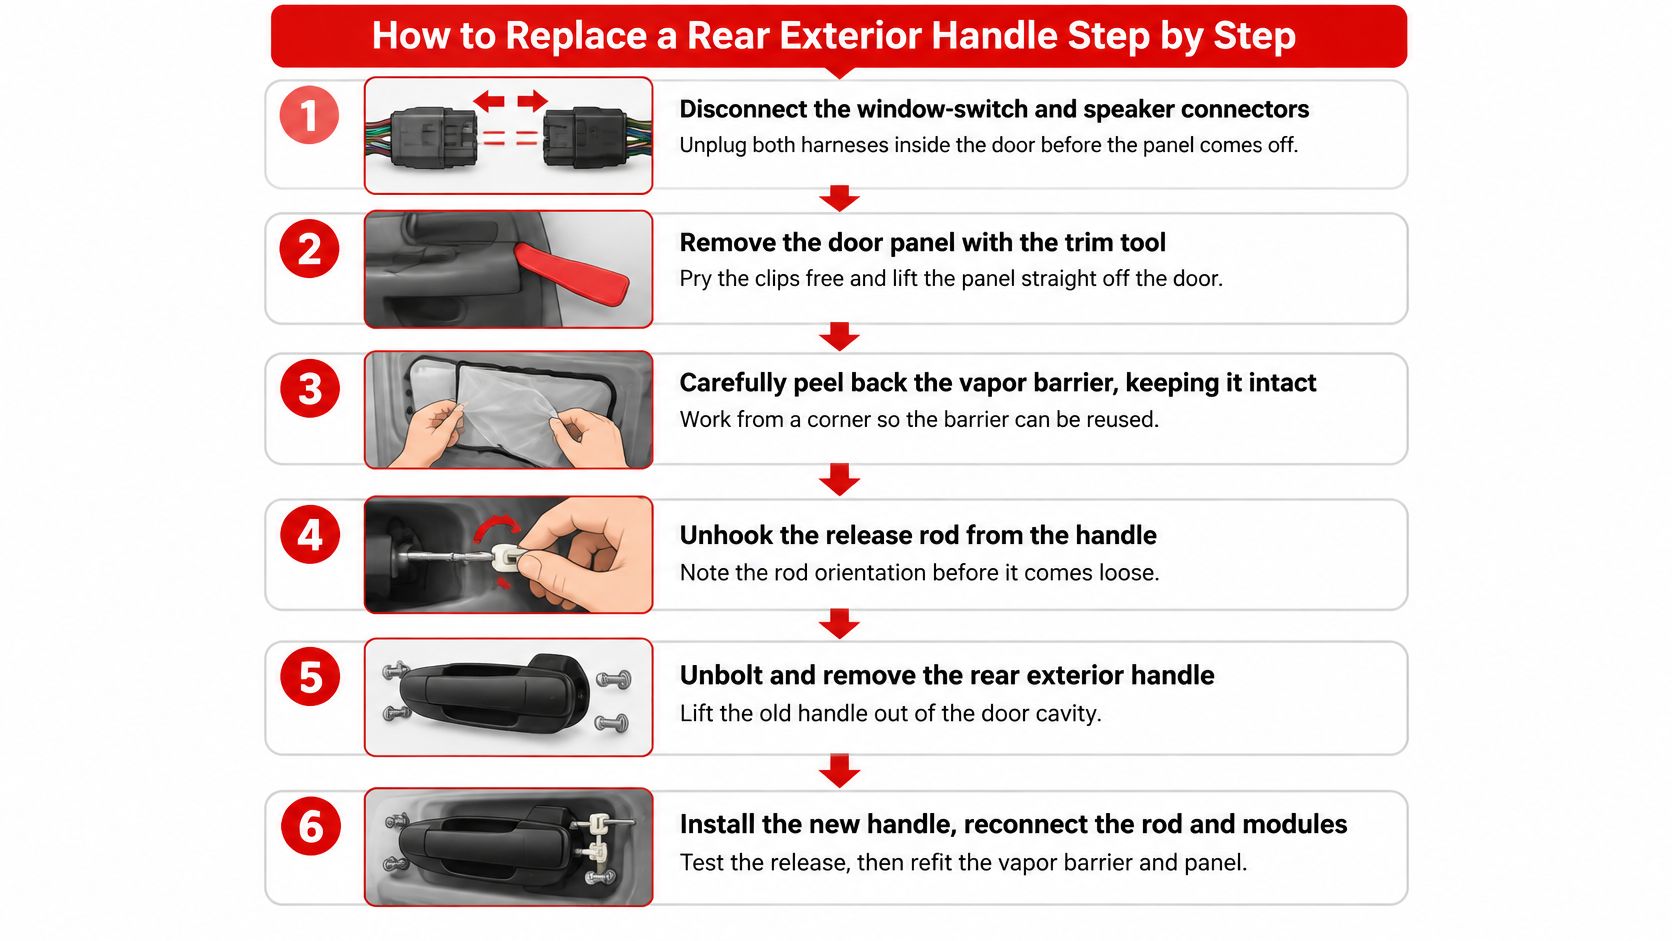
- Disconnect the window-switch and speaker connectors. Do this before the panel comes free. A panel dangling by its harness is how switch plugs and speaker terminals get torn.
- Remove the door panel with the trim tool. Work the bottom edge first, then up both sides, and lift the panel straight off the frame once the top clips release.
- Peel back the vapor barrier carefully. Start at a corner and keep the sheet intact. It's reusable, and a torn barrier is a water leak waiting for the next rain.
- Loosen the 10 mm window-guide bolt if clearance is restricted. Only when the guide blocks access to the handle nuts. You're moving the guide, not removing it.
- Release the handle rod from its green locking clip. Push or pry the clip's tab, then lift the rod out. Note the rod's orientation before it swings free.
- Remove the two 11 mm retaining nuts. Support the handle body with your free hand as the second nut comes off so it doesn't drop into the cavity.
- Fit the new handle and reconnect the rod. Seat the rod fully into the green clip, then tighten the two 11 mm nuts. Confirm the clip has clicked home before you move on.
- Test everything with the door open. Operate the exterior handle, interior handle, lock and latch several times. This is the step that catches a partially seated rod clip before the door can trap you inside or outside.
- Refit the vapor barrier around its full perimeter. Press the adhesive down continuously, top to bottom. Gaps at the edges let water reach the panel, speaker and latch area.
- Reconnect the speaker and window switch, hang the panel, and test again. Seat the panel on the upper frame first, then press the clips in around the perimeter.
Here's the procedure in motion if you'd rather watch the rod clip and vapor barrier steps than read them.
Steps 8 and 9 are the two people skip, and they're the two that come back as complaints. A rod clip that isn't seated gives you a handle that works once and then stops engaging. A vapor barrier that isn't sealed gives you a wet speaker and a latch that corrodes through a winter.
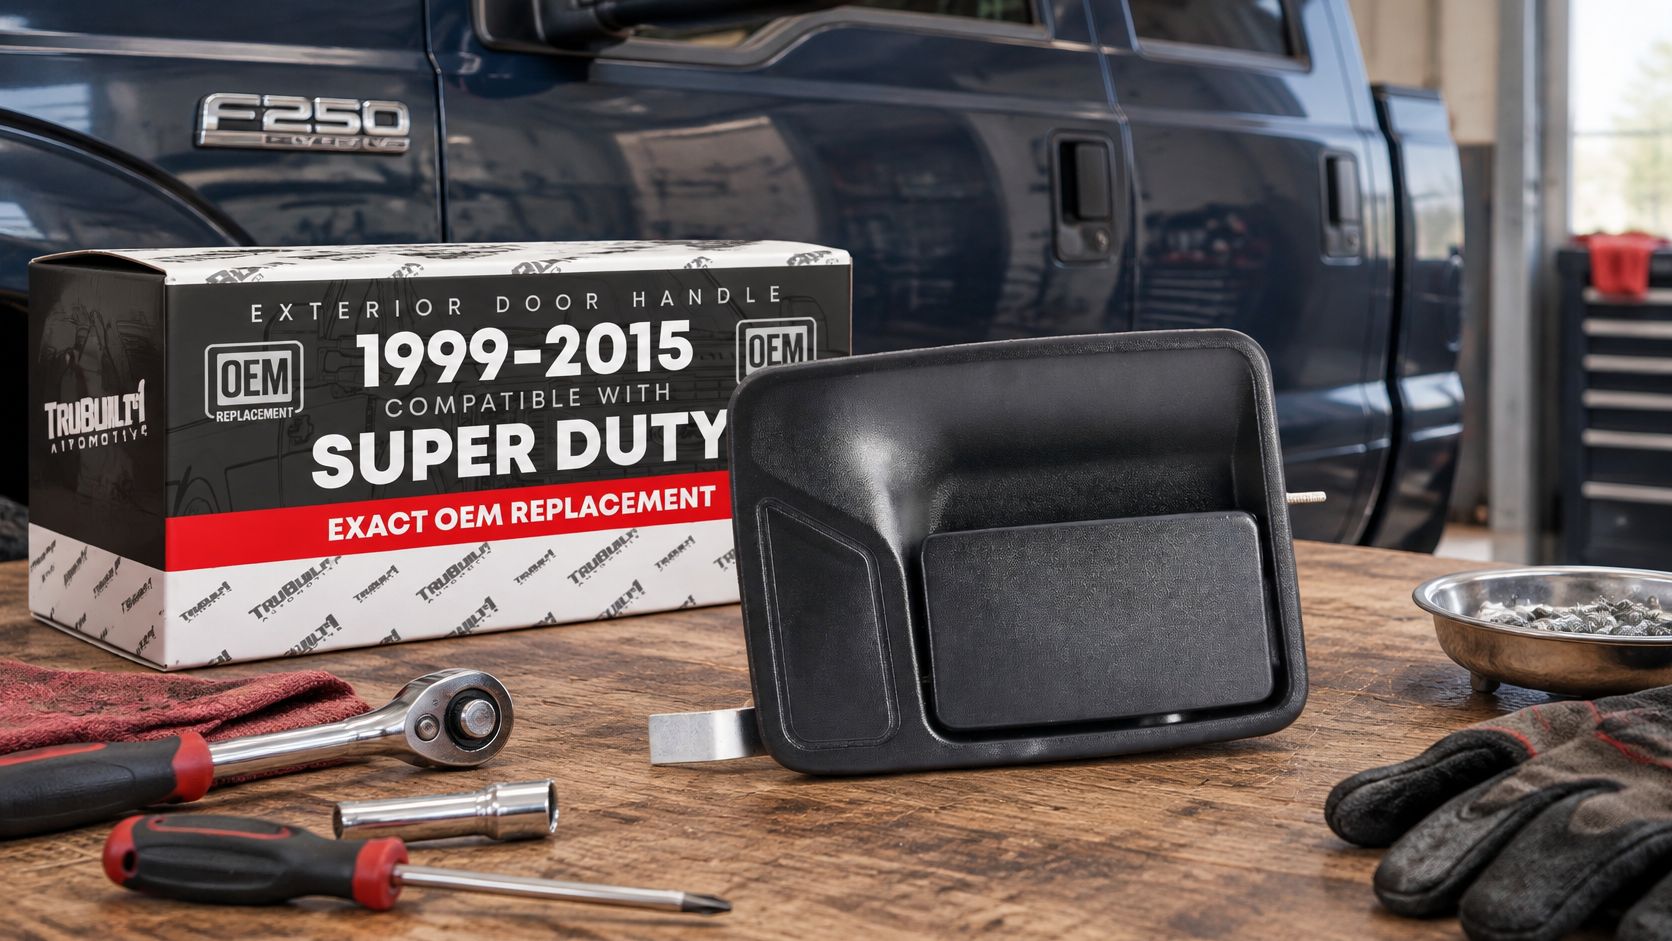
If you're working on a crew cab with a broken rear left handle, our Exterior Rear Driver Door Handle Replacement for 1999-2015 Ford Super Duty F250 F350 F450 F550 Crew Cab is listed in textured black plastic under OEM F81Z-2626601-AAB for the rear driver door. Check the listed year range against your VIN before ordering, since that span covers three distinct body generations.
How to Swap an Interior Handle on 1999 to 2007 Models
The interior handle on 1999-2007 F-250 through F-550 trucks has a trap built into the parts catalog. The application data on Go-Parts' repair guide identifies the replacement as side-specific and states plainly that driver and passenger handles are not interchangeable. Confirm cab style, door position and side before you order anything.
The sequence is shorter than the exterior job because there's no rod running through the outer skin:
- Remove the switch panel and disconnect its wiring. Pry at the marked notch, not the middle of the bezel.
- Lift the door panel off the upper frame. Release the perimeter clips first, then lift vertically so the top hooks clear.
- Disconnect the latch cable from the back of the handle assembly.
- Remove the handle mounting hardware and lift the old handle out.
- Lubricate the latch mechanism while the panel is off, especially if the old handle failed under heavy effort.
- Install the new handle and align the actuator rod before tightening the mounting hardware. Snugging the screws first and then fighting the rod is backwards.
- Reconnect the latch cable and hang the panel on the upper door frame, then press the clips home.
- Reconnect every electrical plug you disconnected, including the switch panel harness.
- Test with the door open. Opening, locking, and both inside and outside operation, several cycles each.
Use plastic trim tools throughout. Metal pry bars chip the panel edge and deform the clip seats, and a deformed seat is a rattle you'll chase for years.
The lubrication step people skip
If the original handle broke while someone was pulling hard on it, the handle wasn't necessarily weak. A dry, binding latch loads the handle far beyond what the plastic was designed to take, and the replacement will fail the same way. Clean the latch, lubricate it, and work it by hand until it moves freely before you connect the new handle.
Pulling the door panel is the same skill on both jobs, and it's worth getting right once.
For the driver side interior position, our Interior Front or Rear Driver Door Handle in all chrome metal is listed under OEM 6C3Z-2522600-AAA-ACHMT for the front or rear left door across several Ford applications. Match the listed application to your cab and door before ordering.
The guide describes the job as generally achievable with basic hand tools in under an hour, and that's a fair expectation for someone who has had a door panel off before. There's no reliable independent success-rate study to benchmark against, so judge your own progress by whether each step moves freely rather than by a stopwatch. If the new handle feels stiff once it's installed, stop pulling on it and go back to the latch.
Why the New Handle Fails and How to Fix It
A handle that broke is a symptom, and a like-for-like replacement only works if the cause left with the old part. Field reports on these trucks point to several interacting causes rather than one: worn hinge pins, stretched or badly routed cables and rods, cracked door-shell metal, and distorted mounting points, as collected in this Ford-Trucks forum thread on 1995 F-250 door handles. When the door structure flexes under pressure from the handle, a fresh handle is a temporary fix at best.
Start with the loose handle
A handle that wobbles in its pocket is the most misread symptom. People assume the plastic has worn, order a new one, and find the new one wobbles identically because the mounting surface behind it has deformed or the shell metal around it has cracked. Grab the handle with the door open and watch the door skin while you move it. If the metal moves with the handle, the handle is not the problem.
| Symptom | Likely cause | Fix |
|---|---|---|
| Handle feels loose or wobbles | Worn hinge pins, distorted mounting points or cracked door-shell metal | Inspect the mounting surface and shell; repair the structure before reinstalling |
| Handle moves but the door does not release | Cable or rod travel, kinked linkage or slipped clip | Check the linkage type, clip seating and cable routing |
| Handle breaks again within months | Door shell flexes under leverage or weak mounting point | Reinforce the mount or correct the shell; a like-for-like part will not solve it |
| Handle stiff or hard to pull | Dry or binding latch mechanism | Lubricate the latch and check for binding before testing the handle |
| Handle works from one side only | Wrong side or mismatched linkage | Compare the part number and side against the old handle |
Linkage is not uniform across years
The same model year range can hide two different linkage designs. Forum evidence on these trucks shows some applications using a cable and others, on a same-vintage truck, using a metal rod. That distinction changes what a "handle that doesn't release" means, so confirm the linkage type at your door before blaming the part you just bought.
If the door skin flexes when you pull the handle, stop shopping for handles and start looking at the door.
Before ordering a second handle, check the inner door shell for cracks around the mounting holes and run your hand along the linkage for a kink or a clip that has slipped out of its seat. A door latch replacement guide is the better next read when the linkage checks out but the door still won't release, because that's a latch problem wearing a handle's clothing.
Verify the Repair, Recall Status and Next Step
Not every broken handle is a parts job. Four different conditions get called "the door handle is broken," and they need four different responses: a scuffed or cracked cosmetic cover that still works, a snapped exterior handle with sound linkage, a failed release rod or cable, and a latch that no longer engages fully. Only the second one is solved by buying a handle.
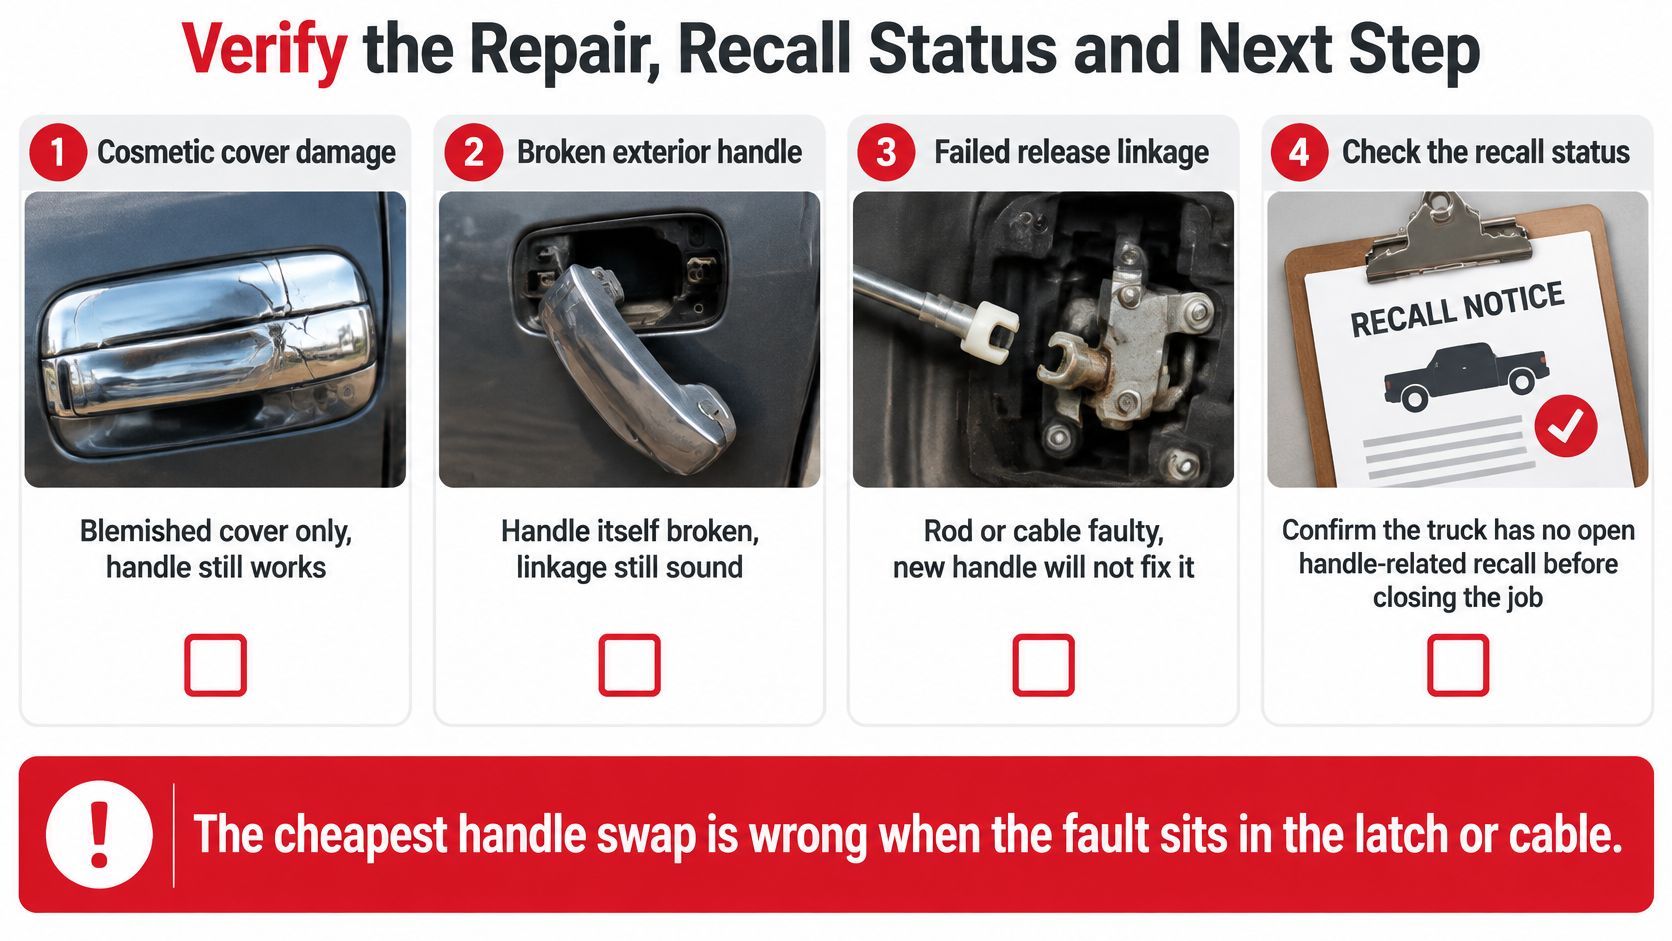
Ford and NHTSA recall documentation describes conditions involving frozen latches and bent or kinked door-latch actuation cables that can prevent a door from opening or closing, or allow it to open while driving, per this NHTSA recall document. The same documentation records a separate compliance recall involving aftermarket chrome exterior-handle covers on certain 2015-2017 F-Series vehicles, including 2017 F-250 to F-550 models, covering approximately 551 vehicles in North America, with 247 in the United States and 304 in Canada.
That second recall matters for a practical reason. If your truck wears aftermarket chrome covers and the handle has been giving trouble, the cover may be the issue rather than the handle underneath, and the fix isn't a new handle at all. Check your VIN against open recalls before you start the repair, not after.
The final test
With the panel reinstalled, work through the door the way a passenger would. Open and close it from the outside, then from the inside, then lock it and release the lock, then push against the closed door in a controlled way to confirm the latch holds. Any binding, any kink in the linkage, or any handle that needs two pulls goes back on the bench before the truck goes on the road.
A new handle on a flexing door shell or a binding latch will fail again, and the second failure usually takes the door skin with it. Treat repeat handle breakage as a structural or latch problem and stop buying plastic.
For the crew cab rear driver position, our listing for the Exterior Rear Driver Door Handle Replacement, part number F81Z-2626601-AAB, covers 1999-2015 Ford Super Duty F250 through F550 crew cab trucks and comes with a lifetime warranty on metal components, a 3-year warranty on standard items and free 90-day returns. Verify the year range against your VIN first, because the listing spans more than one body generation.
If the door still binds or the handle still feels loose after the swap, go back to the symptom table before you order anything else. The cheapest handle is the one you don't have to buy twice.
T1A Auto stocks the exterior and interior door handles, rod clips, latches, hinges and related fasteners these repairs call for, with fitment you can check against your VIN before anything ships. Every order over $75 ships free, returns are free for 90 days, and metal components carry a lifetime warranty while standard items carry a 3-year one. Visit T1A Auto with your truck's VIN in hand and get the right handle the first time.
