


Before you even think about popping off a door panel, let's talk about what you'll need to do the job right. I can't stress this enough: having the right tools on hand is the difference between a smooth, successful repair and a door panel full of scratches, gouges, and broken clips.
Trust me, trying to use a metal screwdriver to pry at plastic trim is a recipe for disaster. Getting everything you need laid out beforehand turns what could be a headache into a straightforward and satisfying project.
Assembling Your Toolkit for a Flawless Job
Jumping into a car project without the proper gear is a classic rookie mistake. When you're learning how to remove car door panel parts, your toolkit is your best friend. The whole idea is to get those stubborn clips and hidden screws out without damaging the delicate plastic or vinyl you're trying to preserve.
Must-Have Tools for the Job
These are the non-negotiables. Don't even start the job without them. Seriously. A small investment in these tools will pay for itself many times over in saved parts and sanity.
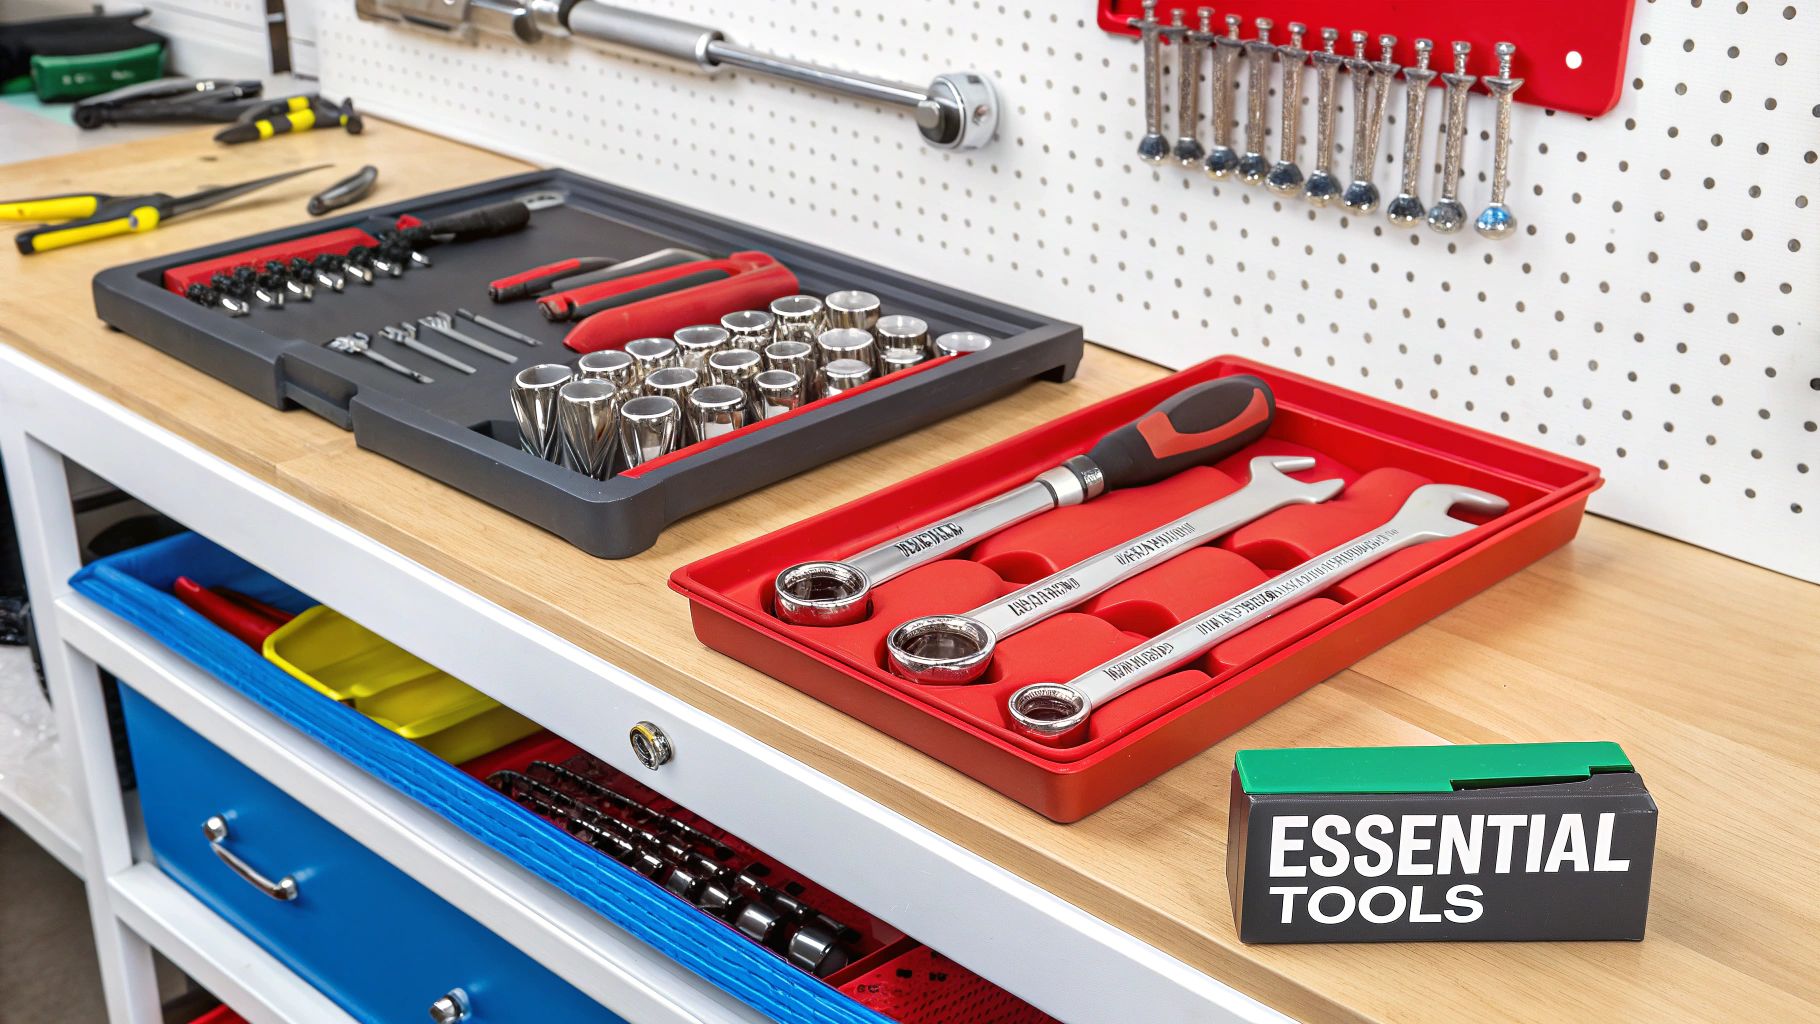
- Plastic Trim Removal/Pry Tool Set: This is your MVP. These tools are specifically designed to pop clips and pry panels without marring your car's interior. A flathead screwdriver is not a substitute.
- Screwdriver Set: You'll definitely need a good set of Phillips head and flathead screwdrivers in various sizes. It’s also a good idea to have some Torx bits, as many cars use those star-shaped screws—a T15 or T20 is a common size you'll encounter.
- Socket and Ratchet Set: A basic socket set is crucial for the bolts that typically secure armrests and door pulls. Most of the time, you'll be reaching for sockets between 7mm and 12mm.
Tools That Just Make Life Easier
You could probably get by without these, but they make the process so much smoother and more organized. Once you've used them, you'll see why they're worth having. A magnetic parts tray, for instance, sounds simple, but it’s a lifesaver for keeping track of all those little screws.
A well-organized workspace is a safe and efficient workspace. I've seen a one-hour job turn into a weekend-long hunt for a single, critical screw that rolled under the seat. Don't let that be you.
This isn't just a niche task, either. The global market for these kinds of panel removal tool kits has ballooned to over $1.28 billion. That number shows just how many people—from pro mechanics to DIYers like us—are pulling panels for speaker upgrades, window motor replacements, and other common repairs.
Essential vs. Optional Tools for the Job
To make it even clearer, here’s a quick breakdown of what you absolutely need versus what’s just nice to have.
| Tool | Purpose | Why It's Essential or Optional |
|---|---|---|
| Plastic Trim Tool Set | Prying panels and popping clips | Essential. Prevents scratching paint and breaking plastic clips. The #1 tool for this job. |
| Screwdriver Set | Removing visible and hidden screws | Essential. You'll encounter Phillips, flathead, and often Torx screws. |
| Socket Set | Removing bolts | Essential. Needed for larger fasteners holding on armrests or grab handles. |
| Needle-Nose Pliers | Disconnecting electrical connectors | Optional. Very helpful for stubborn clips on window/lock switches without breaking them. |
| Magnetic Parts Tray | Keeping screws and clips organized | Optional. A "nice-to-have" that prevents lost fasteners and major headaches. |
| Flashlight or Headlamp | Illuminating dark corners | Optional. Invaluable for seeing hidden screws inside door pulls or under the dash. |
Having the right gear isn't just about making the job possible; it's about doing it cleanly and professionally.
If you're looking to build out your garage collection, you can find a solid selection of essential automotive tools that will cover this project and many more to come.
Locating Every Hidden Screw and Fastener
Automakers are masters of disguise. Honestly, the hardest part of pulling a door panel isn't the physical work—it's the detective work. You have to find every single hidden fastener they've tucked away. Missing just one screw is the #1 reason people end up cracking their panels, which turns a quick fix into a costly headache.
You have to start thinking like the engineers who designed it. They place screws where they provide the most support, but they also hide them to keep the interior looking clean and seamless. Your job is to find all their clever hiding spots before you even think about prying.
Common Hiding Spots for Screws
The good news is that most car manufacturers follow a similar playbook. This means you can usually find screws and fasteners in a few predictable locations. A good first step is to just run your hand along the panel, feeling for any small indentations or plastic covers that seem out of place.
These are the prime suspects to investigate first:
- Inside the Door Pull or Armrest: This is almost always ground zero. Look deep inside the cup where you grab to close the door. You’ll often find a small rubber or felt mat at the bottom. Lift it out with a pick tool, and I’d bet you find one or two screws underneath.
- Behind the Interior Door Handle: That little plastic trim piece, or bezel, around the door release lever is another classic hiding spot. There’s usually a small plastic cap you can gently pry off to reveal a screw.
- Under the Window Switch Panel: The entire console for your window and lock switches is a major hotspot. Use a plastic trim tool to carefully lift the whole unit up and out. Disconnect the wiring harnesses, and you'll almost certainly find mounting screws holding the main panel to the door frame.
On many sedans and trucks I've worked on, for example, popping out the window switch console is non-negotiable. It often reveals two to three critical screws. If you skip this, the panel will feel loose, but it will absolutely refuse to come off, which is a classic recipe for frustration and a broken panel.
Uncovering Deeper Secrets
Once you've cleared the usual suspects, it’s time to hunt for the less common fasteners. Sometimes, engineers get extra sneaky and hide screws behind other small components you have to remove first.
The golden rule is simple: if the panel resists, you've missed something. Never, ever force it. Just stop, grab a flashlight, and look again. A hidden screw is almost always the culprit.
Here are a few more places I always double-check:
- Courtesy Lights: Those little lights at the bottom of the door? The lens often pops out with a small flathead or trim tool, revealing a screw behind it.
- Speaker Grilles: This is less common, but on some models, you have to pop off the speaker grille to get to screws holding the main panel on.
- Sail Panel Trim: That’s the small, triangular piece of plastic up by the front of the window where the side mirror is mounted. This piece often pops straight off, revealing a hidden clip or screw.
By patiently working your way through these areas, you can be confident you’ve found every connection point. This careful, methodical process is what separates a clean, professional job from a messy, damaging one. Once you’re absolutely sure every last screw is out and sitting safely in your magnetic tray, you’re ready to move on.
The Delicate Dance: Popping the Clips Without Breaking Them
Now for the moment of truth. With all the screws out, the only thing holding your door panel on is a perimeter of plastic clips. This is where patience and a gentle touch will save you a lot of headaches. The trick is to apply slow, steady pressure to pop them loose, not just yank on the panel.
Forget about using brute force; you'll just end up with a handful of broken clips and maybe even a cracked panel. Your best friend here is a good set of plastic trim removal tools. Seriously, don't even think about grabbing a flathead screwdriver. It will absolutely chew up the soft plastic of your panel and scratch your car's paint.
How to Pry Like a Pro
I always like to start at a bottom corner. There’s usually a bit more flex down there, which makes it easier to get your tool started. Wedge your widest, flattest trim tool into the seam between the panel and the metal door frame.
Work it in slowly until you feel it hit something solid—that’s your first clip. Now, instead of prying like you're opening a can of paint, gently twist the tool or lever it away from the door. You’re coaxing it, not forcing it. You'll hear a distinct ‘pop’ when the clip lets go. That’s your signal to move on.
This image shows you exactly where to start and how to apply pressure with a plastic tool.
Using a wide tool is crucial because it spreads the pressure out. A narrow tool concentrates all the force in one tiny spot, which is a great way to crack the plastic around the clip.
Once that first one pops, the rest is a matter of repetition. Slide your tool along the gap to the next clip, usually about six to eight inches away. Insert the tool, apply that same steady pressure, listen for the pop, and continue. I usually work my way up one side, then across the bottom, and finally up the other side, leaving the top for last.
Why This Matters More Than Ever
Door panels aren't just simple pieces of plastic anymore. They’re complex assemblies that house speakers, window controls, and even airbags. It's a big business, too—the global automotive door panel market was valued at $24.1 billion back in 2017 and is expected to climb to $34.2 billion by 2025. This shows just how much technology is being packed into them, which is why getting them off cleanly is so important. If you're interested in the industry trends, you can read the full research on the automotive door panel market.
I’ve learned this the hard way: always have a bag of spare clips ready before you start. No matter how careful you are, old plastic gets brittle and a clip will eventually snap. Having replacements on hand turns a project-halting disaster into a minor inconvenience.
If you hit a clip that just refuses to budge, don’t double down with more force. That’s when I’ll bring in a second tool—one of those forked clip pullers. You can slide it in right next to the stubborn clip to get better leverage and pop it straight out.
After you've freed all the clips around the sides and bottom, the panel will feel loose, but it's not ready to come off. Stop and do not pull it away from the door. It’s still hanging on by a lip along the top of the window sill. The final move is to lift the entire panel straight up an inch or two. This will unhook it from the window channel, and only then can you pull it away from the door.
How to Disconnect Wires and Linkages Safely
You’ve got the panel loose and lifted away from the door frame. It’s a great feeling, but don't get ahead of yourself. The panel is still attached to the door by a tangle of wires and mechanical rods. This is where patience really pays off. If you just yank the panel away now, you're almost guaranteed to break an expensive connector or snap a crucial linkage.
So, take a breath. Support the panel with one hand (or a knee, if you're like me) and take a peek into the gap. You'll spot several wiring harnesses running to the window switches, speakers, and maybe a courtesy light. You'll also see one or two thin metal rods hooked into the interior door handle and lock. The mission now is to free each one without causing any damage.
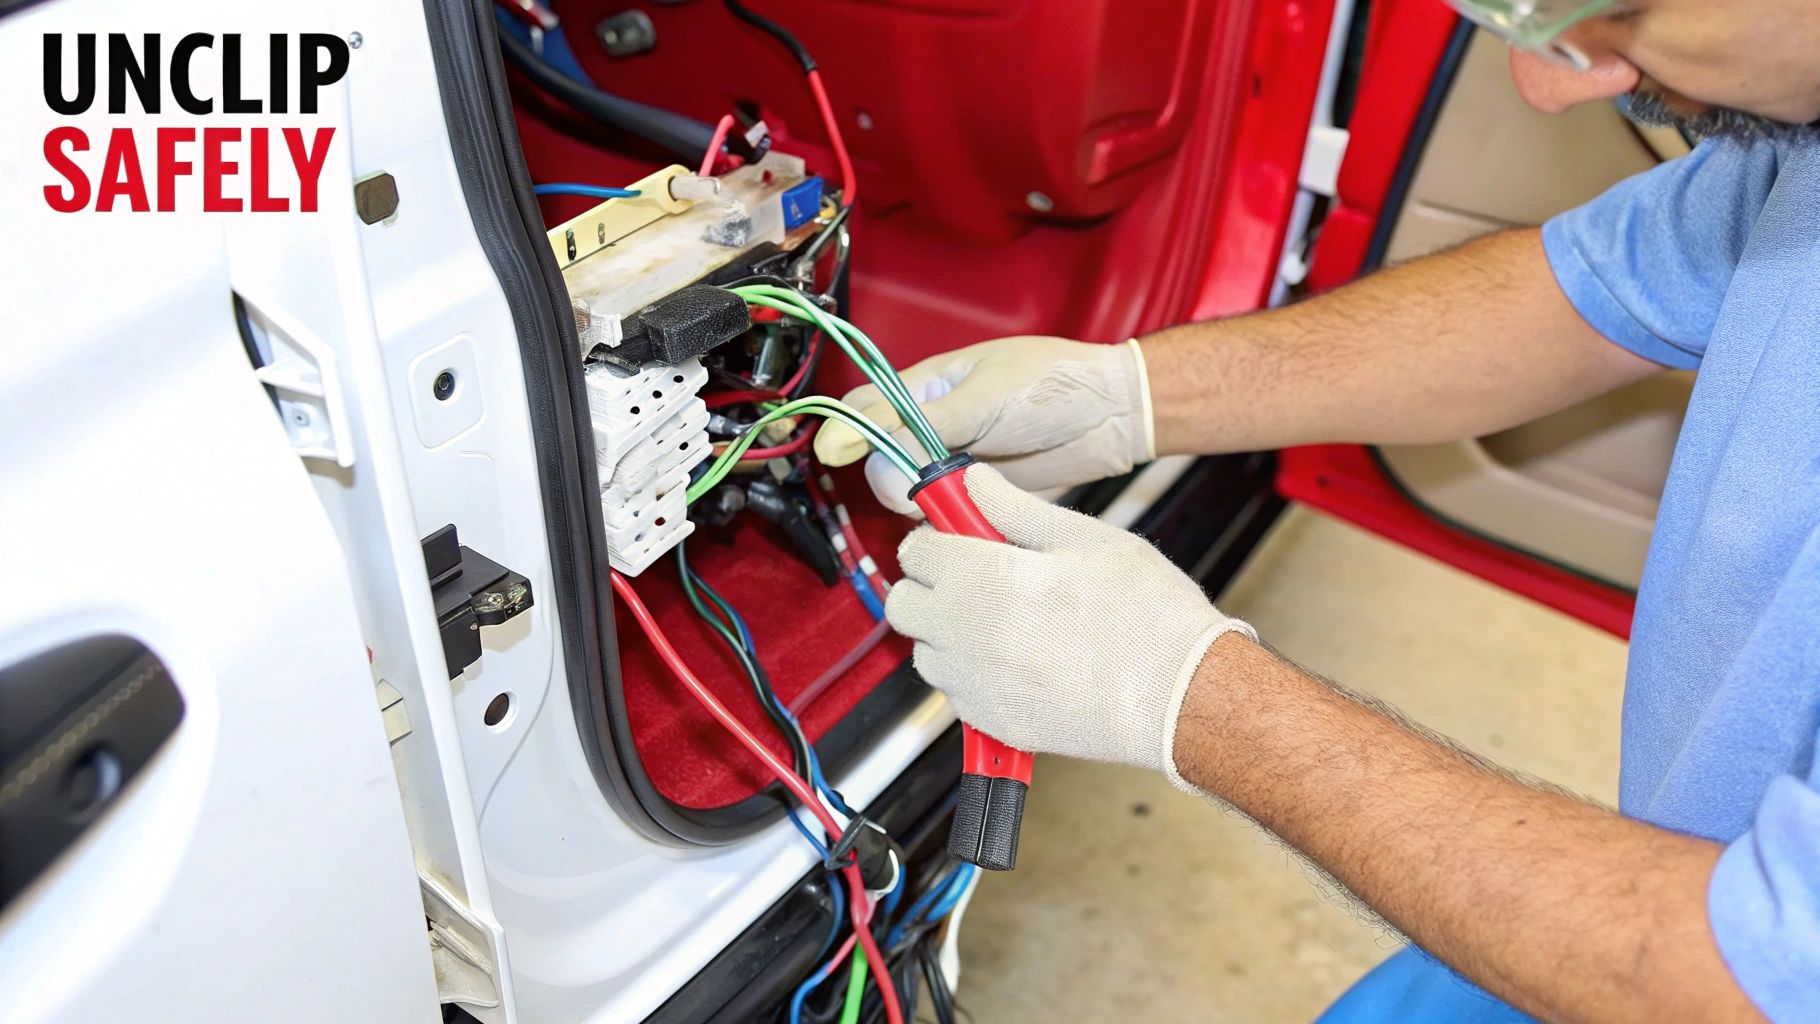
Navigating Electrical Connectors
Every one of those plastic electrical connectors has a tiny release tab. You have to press it just right to get the plug to come loose. I’ll be honest, these tabs can be a real pain—they’re often small, hidden, and have become brittle over the years. Whatever you do, don't force them.
I find a small flathead screwdriver or even just a fingernail is perfect for depressing the tab while you gently wiggle the connectors apart. A golden rule here: never pull on the wires themselves. Always grab the plastic housing. On some vehicles, you might find connectors with a secondary lock, like a little slide-out clip, especially for things like powered mirrors. Getting these small mechanisms right is a skill you'll use on other jobs, too, like if you're replacing side view mirror glass.
Pro Tip: Before you unplug a single thing, grab your phone and snap a quick picture. This creates a perfect visual roadmap for putting everything back together, which is a lifesaver when you have several similar-looking plugs.
Handling Mechanical Linkages
Alright, on to the mechanical rods for the door handle and lock. These are usually held in place by small, hinged plastic clips. The trick is to swing the clip away from the rod—think of it like opening a tiny gate.
Once you’ve flipped the clip open, the Z-shaped end of the rod should lift right out of its hole. This is another one of those skills that comes in handy, especially for jobs that involve both mechanical and electrical parts, like what you’d find with professional power window repair services. Those little retainers frustrate a lot of people, but a gentle touch is all it takes.
It's amazing how much more complex this step has become over the years. The global automotive door panel market was valued at $32.4 billion in 2023 and is expected to reach $43.8 billion by 2030, largely because manufacturers keep packing more electronics and using advanced composite materials. These newer, lighter materials can be easier to damage, making a careful approach more important than ever.
Once every last wire and rod is disconnected, you can finally set the door panel aside. Find a safe spot for it where it won’t get scratched, kicked, or stepped on. And with that, the hard part is officially over. You now have full access to the guts of your car door, ready for whatever repair or upgrade you have planned.
7 Common Mistakes That Can Wreck Your Door Panel (And How to Avoid Them)
Learning to pull a door panel is a fantastic skill for any DIYer, but it's one of those jobs where a few small mistakes can lead to big, expensive headaches. I’ve seen it happen more times than I can count—even experienced folks get tripped up when they're in a hurry.
From using the wrong pry tool to yanking on a panel that’s still secretly bolted down, these slip-ups are completely avoidable. Let’s walk through the most common pitfalls so you can get the job done right the first time.
The Panel Is Loose but Won't Budge
This is, without a doubt, the most common wall people hit. You've found every screw you can see, you've popped all the clips, and the panel is wiggling freely. But when you try to pull it off, something is holding on for dear life.
Whatever you do, stop pulling. If you force it now, you’re almost guaranteed to crack the panel.
In 99% of these cases, there's a sneaky hidden fastener you missed.
- Get a good flashlight and check the usual hiding spots again. Look inside the door pull cup (often under a small rubber mat), behind the interior door handle trim piece, or under the window switch panel.
- Gently move the panel around. Feeling where the resistance is coming from can help you zero in on the location of that last screw.
- Remember, most panels need to be lifted straight up an inch or so before they can be pulled away from the door. The top edge has a lip that hooks over the window sill.
Using a Screwdriver as a Pry Tool
This one makes me cringe every time I see it. It’s so tempting to just grab a flathead screwdriver to start prying, but that's the fastest way to gouge your soft plastic panel and scratch the paint on the door.
The solution is simple and cheap: get a proper plastic trim removal tool set. They're designed to spread the prying force over a wider area and are soft enough that they won't mar your car's interior. You can find a decent set online for under $15.
Ripping Out Wires and Connectors
Once the panel pops loose, the instinct is to just pull it away. But hold on—it's still attached by a bundle of wires for your speakers, window switches, and courtesy lights. Yanking the panel away is a surefire way to break a fragile plastic connector or, worse, pull the wires right out of their pins.
Pro Tip: Never pull on the wires themselves. Always grip the plastic body of the connector. Most have a small release tab you need to press with your thumb or a small screwdriver before they'll separate.
Rushing this part can turn a 20-minute speaker swap into an afternoon of tedious wiring repair.
Snapping the Door Handle Rod Clips
Finally, let's talk about the little plastic clips that hold the metal rods for the door handle and lock. These are a classic beginner's mistake. They look like they should be pried apart, but they're not.
These clips are hinged. You just need to flip the little "gate" open, and the rod will lift right out. Trying to force them with a screwdriver will snap the plastic retainer every single time, and then you're off to the auto parts store. Patience during these final few disconnections is what separates a clean job from a frustrating one.
Troubleshooting Common Panel Removal Issues
Even with the best preparation, you can run into a snag. Here’s a quick guide to solving the most frequent issues people encounter.
| Problem | Likely Cause | Solution |
|---|---|---|
| Panel won't budge at all | A hidden screw is still in place. | Double-check under armrest mats, behind the door handle trim, and under the window/lock switch panel. |
| The edge of the panel won't pop loose | A tough retaining clip is holding on. | Use a plastic trim tool to get as close to the clip as possible and apply firm, steady pressure. Don't jerk it. |
| Panel is loose but won't lift off | The top window sill channel is still engaged. | Ensure all clips are popped, then lift the entire panel straight up about 1-2 inches before pulling it toward you. |
| A connector won't unplug | The locking tab is still engaged or there's dirt in the connection. | Locate the small release tab on the connector. Press it firmly while wiggling the connector. A small flathead can help depress the tab. |
Getting stuck for a minute is normal. The key is to stop, think, and investigate rather than just applying more force. A little patience goes a long way.
Your Reinstallation Checklist for a Rattle-Free Finish
Getting the panel off is a major win, but don't celebrate just yet. The job isn't done until that panel is back on correctly, and I can tell you from experience, a sloppy reinstallation is the #1 cause of those annoying rattles and loose trim pieces that will drive you crazy later.
Let's walk through this process to make sure your work looks and feels like it came straight from the factory.
Before you even think about lifting the panel back into place, do a quick function check. Reconnect every single one of those electrical harnesses—window switches, mirror controls, speakers, you name it. Turn the key to the accessory position and test everything. Does the window go up and down smoothly? Do the locks engage? Is the speaker working? Trust me, finding an issue now saves you the headache of tearing it all apart again.
The Reinstallation Sequence
Once you've confirmed all the electronics are good to go, it's time to physically mount the panel. This isn't just a matter of shoving it on; there’s a definite sequence that ensures a perfect, tight fit.
-
Reconnect the Mechanical Bits: First things first, re-attach the door handle and lock rods. Guide the metal rods back into their levers and swing the little plastic retaining clips back into place. You're listening for a solid "click" that tells you they're secure.
-
Hook the Top Lip: This is the most critical part of the whole process. Angle the panel and carefully hook its top edge over the metal window sill. Let it slide down until it sits flush against the glass. This lip is what provides the main support for the entire panel.
-
Line Up the Clips: With the top secure, gently push the panel toward the door frame. Peek through the gaps and make sure each plastic clip is perfectly aligned with its corresponding hole in the door's sheet metal.
Take your time here. If even one clip is misaligned when you start applying pressure, you’re almost guaranteed to snap it. If you broke a few during removal (it happens to the best of us), now is the time to replace them. A full set of secure fasteners is the secret to preventing future vibrations.
If you find yourself short, a comprehensive Toyota Tacoma body fastener kit or a similar vehicle-specific set can be a real project saver.
Securing the Panel for a Silent Ride
Alright, everything's lined up. Now, use the heel of your hand to give a firm, sharp tap directly over each clip location. You’ll hear and feel a satisfying pop as each one seats itself. Make your way around the entire perimeter of the door.
Finally, put all the screws back in. Tighten them until they are snug, but don't go crazy. Overtightening can easily strip the plastic threads, making that screw useless.
Reattach any final trim pieces, like the door handle bezel and the window switch console, and you're done. A properly reinstalled door panel will be solid, silent, and look like it was never even touched.
Still Have Questions? Let's Cover the Common Sticking Points
Even with a perfect guide, it’s only natural to have a few “what if” questions rattling around in your head before you start pulling on your car's door panel. First-time projects always seem to have their own unique quirks.
So, let's run through some of the most common issues people face. Getting these sorted out now can be the difference between a frustrating afternoon and a job you're proud of.
"What If I Break a Plastic Clip?"
First off, don't sweat it. This happens to literally everyone, from weekend warriors to pro mechanics. Those little plastic clips get brittle over time from baking in the sun and freezing in the winter. It’s almost a guarantee that one or two will snap, no matter how gentle you are.
Luckily, this is an easy and cheap fix.
- Be Prepared: The smartest thing you can do is buy a small kit of replacement trim clips before you even start. You can find vehicle-specific or universal assortments at any auto parts store or online for just a few bucks.
- Swap It Out: If a clip breaks, just use a pair of needle-nose pliers to pull out the broken bits from the door and the panel. The new clip will pop right into the slot on the back of the panel, no tools required.
Trust me on this one: a secure fit is non-negotiable. Even one missing clip can cause an incredibly annoying rattle or vibration when you're driving down the road, making your perfect repair job feel unfinished.
"Is It Different for Manual Windows?"
Yes, absolutely. If you're working on a car with old-school manual window cranks, there’s one extra step that can trip you up. That handle has to come off before the panel will budge, and it's held on in a pretty clever way.
There's a small, C-shaped metal clip hidden behind the handle, nestled between it and the plastic washer. The easiest way to get it off is with a dedicated window crank removal tool.
But if you don't have one, a simple shop rag can work in a pinch. Just wedge the rag between the crank and the washer and use a back-and-forth "flossing" motion. The fabric will snag the edges of the C-clip and pull it off. Fair warning, that clip will likely go flying, so try to aim it somewhere it won't get lost forever in a dark corner of your garage.
"How Do I Get It Back on Perfectly?"
Getting the panel back on right is just as crucial as getting it off. A sloppy reinstallation is the number one cause of new rattles, gaps, and trim that just doesn't look right.
Here’s how to nail it:
- Test Everything Before You Commit. Reconnect every electrical plug before you even think about snapping the panel into place. Turn the ignition on and test your windows, locks, mirrors, and speakers. It’s a thousand times easier to fix a missed connection now.
- Hang It From the Top. This is the key. The top lip of the door panel is designed to hook over the metal window sill. Get that top edge seated first, and let the panel's weight hang on it.
- Line Up and Pop In. With the top secure, the rest is just a matter of aligning the plastic clips with their corresponding holes in the door. Give a firm but gentle smack with the heel of your hand directly over each clip location to seat them. You should hear a satisfying pop.
- Finish with the Fasteners. Reinstall all your screws until they're just snug. Remember, you're screwing into plastic, so it's very easy to overtighten and strip the holes. Finally, pop any remaining trim pieces back on.
Here at T1A Auto, our goal is to give DIYers the confidence to tackle their own repairs with top-notch parts and solid advice. If your project includes replacing a door handle, window regulator, or side mirror, check out our catalog of premium aftermarket parts that come with a guaranteed fit. We're here to help you get the job done right.
