


A front wheel bearing replacement is a must-do repair when you start hearing that tell-tale humming, grinding, or clicking from your front end—especially if the noise changes when you turn. This is a common DIY job, but it does require getting your hands dirty. You'll be removing the wheel, brake caliper, rotor, and axle nut to get to the bad bearing or hub assembly. The reward? Restoring your vehicle's safety and getting back that quiet ride.
Is It Time for a Front Wheel Bearing Replacement?
It’s easy to ignore that faint humming sound from your front wheels at first. You might just crank up the radio or write it off as road noise. But when that hum grows into a steady growl or a nasty grinding, it's a clear signal something’s wrong.
A failing front wheel bearing isn't just an annoyance; it’s a critical safety issue. Letting it go can lead to serious damage or, in the worst-case scenario, the wheel separating from your vehicle entirely.
This is a really common repair. As cars get older and roads seem to get rougher, wheel bearings take a constant beating. This is especially true for high-mileage vehicles that have seen their share of potholes and bumpy roads. Taking a proactive approach is key. Knowing the definite signs of failure helps you make the right call before a small problem turns into a huge, expensive one. We talk more about how age impacts these components in our fleet vehicle maintenance checklist.
Decoding the Noises and Sensations
So, what are you listening for? The classic symptom is a humming or growling sound that starts out quiet but gets louder the faster you go. The real diagnostic clue is how the sound changes when you steer. For example, if you hear the noise when you turn left, that often points to a bad bearing on the right front wheel. That’s because the vehicle’s weight shifts, putting a heavier load on the outside wheel.
Besides the noise, you might feel a slight vibration through the steering wheel or even the floor. As the bearing gets worse, you might notice some looseness or "play" in the steering, making the car feel less responsive.
A quick reference can help you narrow down the culprit. Sometimes, a bad bearing can mimic other front-end problems, so it's good to know the differences.
Symptom Checker: Bad Wheel Bearing vs. Other Issues
| Symptom | Likely a Wheel Bearing If... | Could Also Be... |
|---|---|---|
| Humming/Growling | The noise gets louder with speed and changes pitch when turning. | Worn or cupped tires, differential issues. |
| Clicking/Popping | You hear it mostly during sharp, low-speed turns. | A failing CV axle/joint is a very common cause. |
| Steering Vibration | It's a constant, speed-sensitive vibration, not a violent shake. | Unbalanced tires, bent wheel, brake rotor issues. |
| Loose Steering | You can feel a "wobble" or "play" when checking the wheel by hand. | Worn ball joints, tie rod ends, or control arm bushings. |
This table is just a starting point. The best way to be sure is to get your hands on the wheel and check it yourself.
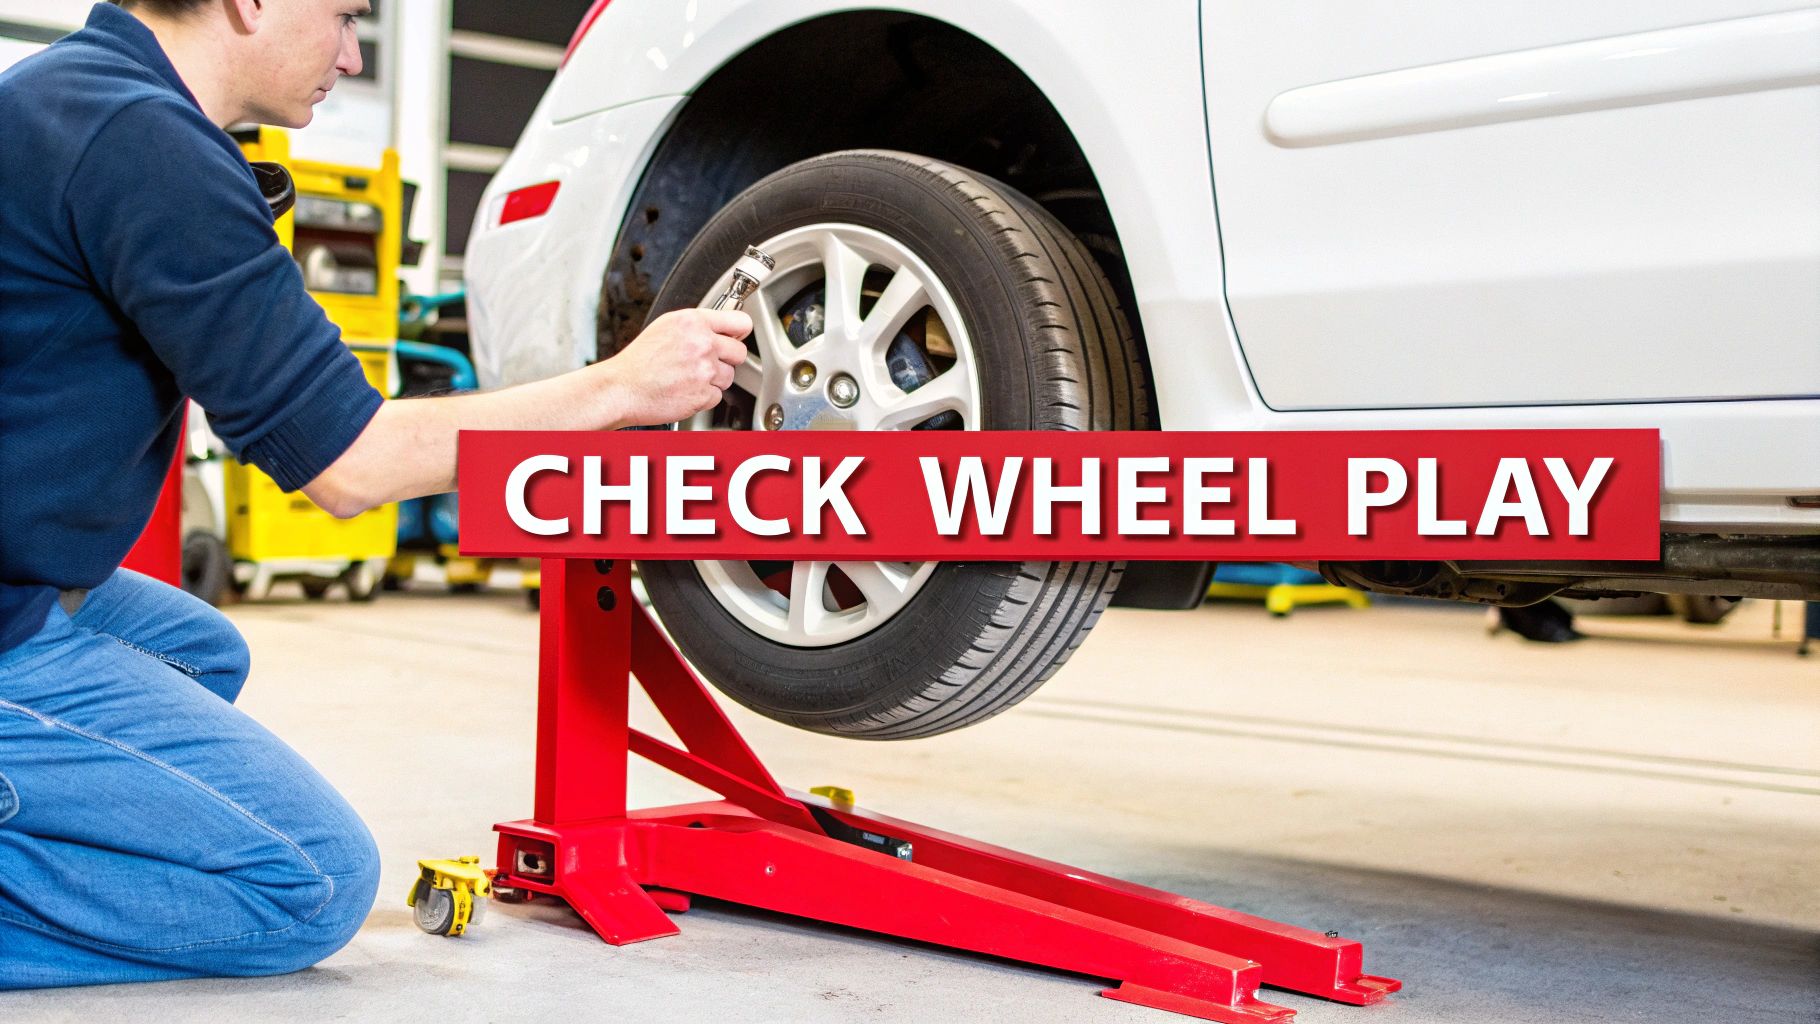
The Hands-On Wobble Test
To know for sure, you need to do a physical check. Get the front of your vehicle jacked up safely and secure it on jack stands. Never, ever work under a car supported only by a jack.
With the wheel off the ground, grab it at the 12 o'clock and 6 o'clock positions and try to rock it in and out. If you feel any significant play, hear a clunk, or see movement, that bearing is almost certainly shot and needs to be replaced.
Next, do the same test holding the wheel at the 3 and 9 o'clock positions. If you feel play here, it can also point to a bad bearing, but it's often a sign of a worn tie rod end, so it's a good time to inspect those as well.
Gearing Up: The Right Tools and Parts for the Job
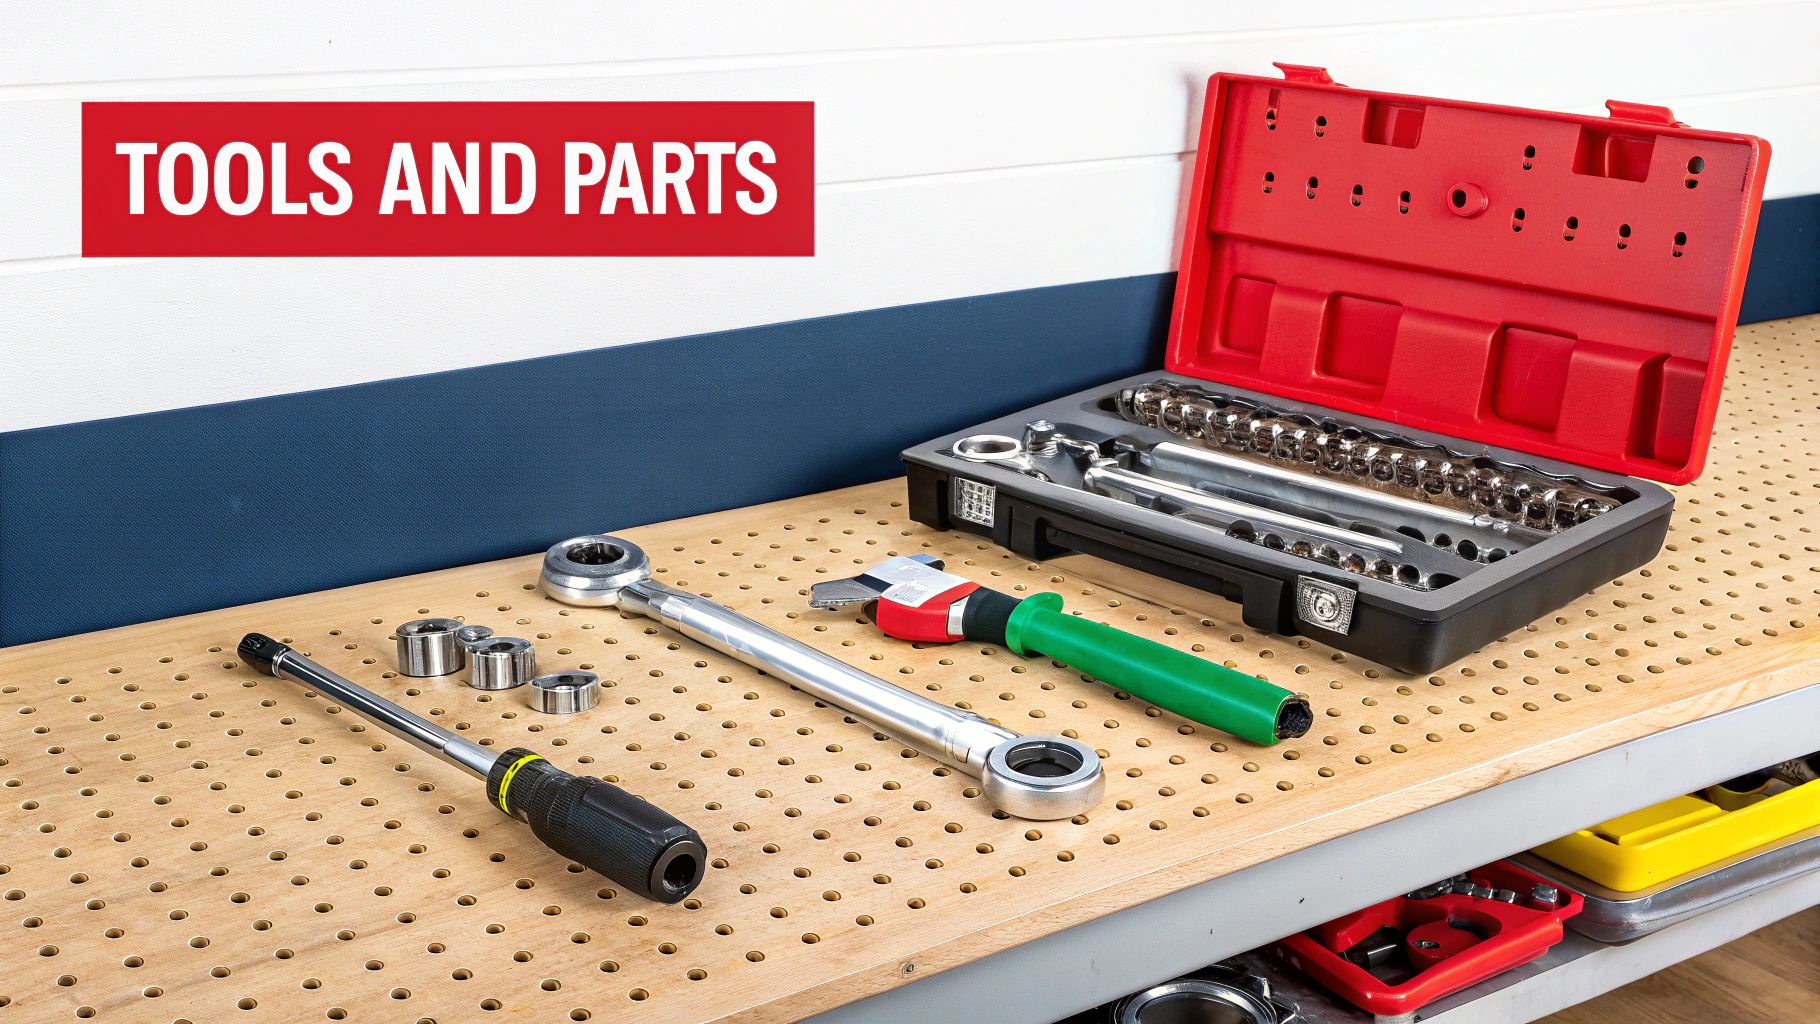
Trying to tackle a front wheel bearing replacement without the right gear is a surefire way to turn a weekend project into a week-long ordeal. This isn't a job for that basic socket set you keep in the trunk; you're going to need some serious hardware to muscle off stubborn bolts and correctly install the new parts. Getting everything you need laid out before you start is the difference between a smooth job and a major headache.
Think about it: your standard ratchet is great for a lot of things, but it’s going to laugh at you when you try to break loose an axle nut torqued to over 200 ft-lbs. This is where having the right tools isn't just a suggestion—it's a requirement.
Your Essential Tool Checklist
While the exact sizes might vary from a Ford to a Honda, the core tool list for a wheel bearing job is pretty universal. You'll need a mix of your trusty hand tools plus a few heavy hitters.
- Heavy-Duty Breaker Bar: This is non-negotiable. You need one for the leverage to crack that axle nut and stubborn lug nuts. A long handle is your best friend here.
- Reliable Torque Wrench: Getting the new parts on is all about precision. The axle nut torque is what sets the bearing preload, and just "getting it tight" is a recipe for disaster. An incorrect torque can kill your brand-new bearing in no time.
- Impact Wrench (Optional but a Game-Changer): An air or electric impact wrench will save your knuckles and a ton of time. It makes zipping off lug nuts, caliper bolts, and even the axle nut almost effortless.
- Comprehensive Socket and Wrench Set: You'll need a good range of sockets, almost always metric for modern cars. This includes a big axle nut socket, which is typically 30mm to 36mm. A few wobble sockets can also be lifesavers for bolts tucked away at weird angles.
- Slide Hammer or Hub Puller: If that old hub assembly is rusted solid into the steering knuckle (and it probably is), a slide hammer or a hub puller is the only way to convince it to come out without damaging anything else.
- Bearing Press or Press Kit: This is only if you're replacing a press-in style bearing. You’ll need a hydraulic shop press or a specialized on-car bearing press tool kit.
Don't have a press or slide hammer just lying around? Most local auto parts stores rent them out. It's a smart, cost-effective way to get pro-level equipment for a job you might only do once. Even when you're saving a bundle on labor, you'll still interact with the wider automotive industry services for parts and specialty tool rentals.
Choosing the Right Replacement Part
Before you click "add to cart," you have to know what you're working with. Wheel bearings generally come in two flavors, and the type your car has completely changes the parts you need and how tough the job will be.
Bolt-In Hub Assembly: This is what you'll find on most modern cars and trucks. The bearing comes sealed inside a complete hub unit that simply bolts onto the steering knuckle. It’s the most DIY-friendly design by far since no press is needed.
Press-In Bearing: On some vehicles, the bearing is a standalone ring that has to be pressed out of the knuckle, and the new one pressed back in. This job is much more involved and absolutely requires a hydraulic press.
Pro Tip: If your car has a press-in bearing, look into buying a complete steering knuckle that comes with a new hub assembly already pressed in. It costs more upfront, but it turns a very difficult job into a simple bolt-off, bolt-on affair. Trust me, it can save you hours of work and a ton of frustration.
The single best way to make sure you get the right part is to use your car's Vehicle Identification Number (VIN) when ordering. It's the only way to avoid the guesswork with different sub-models or mid-year production changes.
Investing in a quality replacement hub from a reputable supplier like T1A Auto is just as important as using the right tools. It's the key to a lasting repair you won't have to think about again for another 100,000 miles. Need to fill a few gaps in your toolbox? You can find a wide selection of professional-grade automotive tools at https://www.t1aauto.com/collections/tools to help you get the job done right.
A Practical Walkthrough of the Replacement Process
Alright, with your tools laid out and the right parts in hand, it’s time to get your hands dirty. We're moving from theory to the real-world, hands-on job of replacing that front wheel bearing. I'm going to walk you through the actual flow of the work, pointing out the little tricks and critical checkpoints that make for a safe and successful repair.
Before you even think about loosening a bolt, let’s talk safety. Your vehicle needs to be on a flat, level surface. Get that parking brake on and chock the rear wheels. Loosen the lug nuts just a bit while the tire is still on the ground, then get the front end in the air and onto a solid pair of heavy-duty jack stands.
Safety First, Always
I can't stress this enough: never, ever work on a vehicle that's only supported by a floor jack. Jack stands are non-negotiable for your safety. Once the car is resting on the stands, give it a good, firm shake to make sure it’s completely stable before you crawl under there.
One last thing—disconnect the negative terminal on your battery. It’s a simple but vital step that prevents electrical gremlins, especially since you’ll be working right next to the ABS sensor wiring.
Beginning the Disassembly
With the vehicle secure, the real work begins. Take off the front wheel to get access to the brake and hub assembly. This first step opens up your workspace, so take a second to keep your lug nuts and wheel somewhere safe and organized.
Your first major obstacle is the brake caliper. It's usually held on by two big bolts on the back of the steering knuckle. Once those are out, you should be able to slide the caliper right off the brake rotor.
Here's a pro tip: never let the caliper dangle by its brake hose. That’s a fast track to a damaged hose and potential brake failure. Grab a bungee cord or a piece of wire and hang the caliper securely from the strut or control arm, keeping it well out of your way.
Once the caliper is supported, the brake rotor should slide right off the hub. If it’s being stubborn and is stuck on with rust, a few solid whacks with a hammer on the flat face of the rotor (the part between the wheel studs) will usually pop it free.
Tackling the Axle Nut and Hub
Now you're staring down the main event: the hub assembly itself and that big, intimidating axle nut. That nut is on there with a serious amount of force, and getting it loose is often the toughest part of this whole job.
You’ll need some serious leverage. The best way is to have a helper inside the car mashing the brake pedal while you put your back into it with a long breaker bar and the correct axle nut socket. If you're flying solo, you can often wedge a big screwdriver or a pry bar through the caliper bracket and into the rotor's cooling vanes to lock it in place.
After the axle nut is off, you can turn your attention to the hub assembly. For a bolt-in style bearing, you'll find three or four large bolts on the backside of the steering knuckle holding the hub in place. It can be a tight squeeze back there, which is where a good set of wobble sockets and extensions really earns its keep.
These bolts have likely been rusting in place for years. Douse them with a good penetrating oil and give it time to work its magic. Sometimes, a sharp hit on the head of the bolt with a hammer is enough to shock the threads and break the rust's grip.
Removing a Seized Hub Assembly
More often than not, the old hub assembly is practically welded to the steering knuckle with rust and grime. This is where you need to apply some brute force, but intelligently. A slide hammer is your best friend here. Thread it onto the wheel studs, and you can deliver powerful, direct impacts to pull the hub straight out of its home.
If you don't have a slide hammer, you can sometimes use a large hammer and a punch to carefully tap the hub out from behind. If you go this route, be extremely careful not to damage the steering knuckle or, even more importantly, the threads on the end of the CV axle.
While you're wrestling with the hub, keep an eye on the ABS sensor. This little guy is delicate. It's often mounted right on the knuckle with its wire routed nearby, making it incredibly easy to damage. Unplug its connector and carefully free the wire from any clips to keep it safe and out of harm's way.
The need for these parts is huge. The global demand is driven by massive vehicle production, especially in places like the Asia-Pacific region. China, for instance, produced over 26 million vehicles in 2023, which means a constant need for front wheel bearing replacements in both new cars and the aftermarket. The global automotive hub bearing market was valued at USD 9.1 billion in 2025 and is expected to hit USD 13.3 billion by 2034, showing just how common this repair is across the world. You can discover more insights about the automotive hub bearing market and its growth drivers online.
Preparing for the New Installation
Once the old hub is finally out, fight the urge to just slap the new one in. The single most important step for ensuring your new bearing lasts is prepping the mounting surface.
The inside of the steering knuckle, where the hub sits, has to be perfectly clean and smooth. Any speck of rust or leftover grime can make the new hub sit crooked. That tiny misalignment puts uneven stress on the new bearing, guaranteeing it will fail prematurely.
Use a wire brush, some sandpaper, or even a die grinder with a conditioning disc to clean that surface until you see shiny, bare metal. Just be careful not to actually remove any metal from the knuckle itself, as that can mess up the fit.
A clean surface is a happy surface. Think of it like this: you wouldn't paint a wall without cleaning and sanding it first, because the new paint would just peel right off. The same idea applies here. A perfectly clean mounting surface is the foundation for a long-lasting repair.
After it’s spotless, wipe a very thin layer of anti-seize compound on the mating surface inside the knuckle. This little detail will make life so much easier for the next person who has to do this job—which might be you again years down the road.
General Torque Specification Guidelines
Torque specs aren't just suggestions; they are critical engineering requirements. Your vehicle's service manual is the ultimate authority, so always check it for the exact numbers. That said, this table gives you a general ballpark for what to expect on a typical car or light truck.
| Component | Typical Torque Range (ft-lbs) | Notes |
|---|---|---|
| Lug Nuts | 80 - 120 ft-lbs | Always tighten in a star pattern to ensure even clamping force. |
| Caliper Bracket Bolts | 70 - 130 ft-lbs | These are critical bolts; using a thread-locking compound is often recommended. |
| Caliper Guide Pins | 20 - 40 ft-lbs | These smaller bolts require much less torque. Over-tightening can cause damage. |
| Hub Assembly Bolts | 50 - 90 ft-lbs | Ensure these are tightened evenly to seat the hub correctly in the knuckle. |
| Axle Nut | 150 - 250+ ft-lbs | This specification is extremely important for setting the bearing preload. Never guess. |
Remember, these are just general guidelines. The axle nut torque, in particular, can vary wildly and getting it right is absolutely crucial for the bearing's lifespan. Using a properly calibrated torque wrench isn't optional—it's the only way to do this job correctly and safely.
Finishing the Job and Rechecking Your Work
You’ve got the new bearing hub assembly installed, which is a huge step, but don't drop the tools just yet. This last part of the job is all about precision. Getting the reassembly right is what separates a successful repair from one you’ll be doing again in a few months.
The single most critical step here is torquing the axle nut correctly. This isn’t just about making it tight; this sets the preload for the new bearing. Think of preload as the exact amount of clamping force the bearing needs to spin smoothly without any play or excess friction. Get this wrong, and you're setting that new bearing up for a very short life.
Dialing in the Axle Nut Torque
Your vehicle's service manual is your best friend here. It will give you the exact torque spec you need, and these numbers are no joke—they can range anywhere from 150 ft-lbs to well over 250 ft-lbs. Never, ever guess or rely on "feel." This has to be precise.
Once you hit that magic number with your torque wrench, you have to lock the nut in place so it can't back off. You’ll typically run into one of two styles:
- Stake Nut: This nut has a little rim that you'll need to bend or "stake" into a small groove on the axle shaft. A quick tap with a chisel or a blunt punch does the trick.
- Castle Nut & Cotter Pin: This one has slots, like the top of a castle turret. You'll line up one of the slots with a hole in the axle, slide a fresh cotter pin through, and bend the ends to lock it down.
One thing I can't stress enough: never reuse an old cotter pin or stake a nut in the same spot. It's a tiny detail that makes a huge difference in safety. New hardware is cheap insurance.
This whole process—securing the vehicle, removing the old parts, and carefully installing the new ones—is a methodical flow.
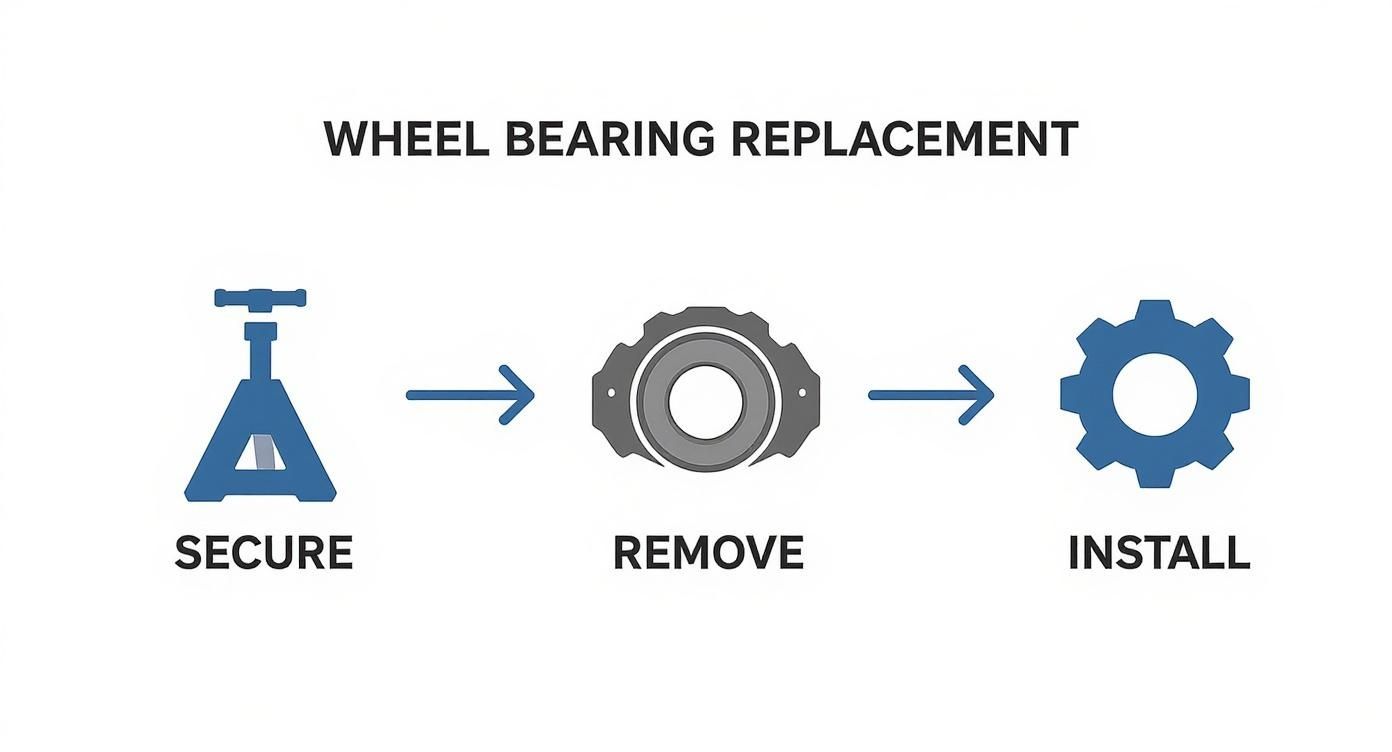
As the visual shows, putting everything back together with care is just as important as taking it apart.
Reassembling the Brakes and Final Touches
With the axle nut torqued and secured, you're on the home stretch. Now you can put everything else back on in the reverse order you took it off. Slide the brake rotor over the wheel studs first, then grab your brake caliper.
Before you bolt that caliper on, do yourself a favor and service the guide pins. Just pull them out, wipe off all the old, crusty grease, and apply a fresh, thin layer of high-temp brake lube. It takes two extra minutes but ensures your pads wear evenly and prevents the caliper from sticking down the road.
It's jobs like these that are becoming more and more common. With the average age of vehicles in North America now over 12.8 years, we're seeing more wear-and-tear items fail. This trend is a major reason the automotive bearings market was valued at USD 21.49 billion in 2025. Older cars just need more love. You can read more about the growing automotive bearings market trends at Mordor Intelligence.
The All-Important Test Drive
Alright, everything is torqued, tightened, and double-checked. Get the wheel on, lower the car, and let's go for a spin to make sure we got it right.
- First, go slow. Pull out and drive in a straight line, listening carefully. You shouldn't hear any of the clicks or pops you might have heard before.
- Next, find an empty lot. Make some gentle S-turns. The steering should feel solid and quiet, without that humming or grinding noise that sent you on this mission.
- Then, check the brakes. Give them a few gentle presses to make sure they engage smoothly and evenly.
- Finally, head for the open road. If all feels good, bring it up to highway speed. The best part of this job is hearing... absolutely nothing. The quiet ride is your reward.
Troubleshooting Common Problems and Pro Tips
Even with the right tools and a solid plan, a front wheel bearing job can throw you a curveball. Rust, seized parts, and other little surprises are just part of the territory when you're wrenching on a vehicle with a few miles on it. But don't worry—a few tricks of the trade can turn a show-stopping problem into a minor speed bump.
When a job goes sideways, the most common culprit is a component that's completely rust-welded in place. Whether it's the hub assembly stuck in the knuckle or the CV axle refusing to pop out, just grabbing a bigger hammer isn't the answer. You've got to work smarter.
Battling Seized and Stubborn Parts
A frozen hub or axle is a rite of passage for any DIY mechanic. Before you get aggressive, your best friend is a high-quality penetrating oil. Douse the area where the two metal surfaces are joined and, most importantly, be patient. Let it soak for a good 15-20 minutes; that time can make all the difference.
If a good soak doesn't break it free, it's time to bring in the heat. A small propane or MAPP gas torch can work wonders.
- Apply heat evenly around the outside of the steering knuckle where the bearing hub is seated.
- Keep the flame moving constantly. You want to avoid creating hot spots that could warp the metal.
- The goal is expansion. Heating the knuckle makes it expand just slightly, which is often enough to crack the rust's grip on the hub.
After a few minutes of heat, a couple of sharp blows from behind with a dead-blow hammer or a slide hammer should be enough to persuade it out. This one-two punch of penetrating oil, heat, and focused impact is the go-to method for pros when parts just won't cooperate.
Handling ABS Sensor Mishaps
That little ABS sensor is incredibly delicate and notoriously easy to damage during this job. If the plastic housing cracks or the wire gets nicked while you're hammering away, you're pretty much guaranteed an ABS warning light on the dash when you're all done.
If you break it, don't sweat it too much. Swapping in a new ABS sensor is usually a simple fix. It's often held in by a single bolt, and the new one just plugs right into the harness. The key is to order the right part for your specific vehicle to make sure the fault code clears.
Here's a pro tip that'll save you a headache: take the ABS sensor out of the knuckle before you start banging on anything. It usually just takes one bolt and a gentle twist to pull it free and get it out of harm's way. This little step can save you time and money.
Diagnosing Post-Repair Noises
There's nothing more frustrating than finishing a job, taking a test drive, and hearing a new noise. Before you start questioning your work or the new part, check a few common culprits.
- Check the Dust Shield: That thin metal shield behind the brake rotor bends if you just look at it wrong. If it's making even the slightest contact with the rotor, you'll hear a god-awful scraping sound.
- Re-Torque Everything: Go back and double-check your torque specs on the hub bolts, the caliper bracket bolts, and especially that main axle nut. A loose axle nut is a classic cause of humming or clicking sounds.
- Was It the Other Bearing? It's a tough pill to swallow, but sometimes noise from a bad bearing on one side can travel and fool you into thinking it's coming from the other. If the hum is still there, you might need to give the other front wheel a spin.
Running through this checklist will solve most post-repair problems. By being methodical, you can ensure your hard work pays off with a smooth, quiet ride.
Your Top Wheel Bearing Replacement Questions Answered
Even when a job goes smoothly, it's natural to have a few questions pop up. We've been there. Here are the answers to the most common things people ask after swapping out a front wheel bearing, based on our years of experience in the garage.
Can I Really Drive on a Bad Wheel Bearing?
Technically, the car will still move, but you absolutely shouldn't drive on a failing bearing. It's a huge safety risk.
A worn-out bearing creates a ton of friction and heat, which can cause the hub to lock up solid. In the worst-case scenario—and it does happen—the wheel can completely separate from your vehicle while you're on the road. It’s a problem that only gets worse and more expensive, potentially damaging the hub, steering knuckle, and even the axle. If you hear that telltale growl, the only safe move is to park it until it's fixed.
What's the Real Cost Savings: DIY vs. a Mechanic?
Doing this job yourself can save you a serious amount of cash. Taking your car to a shop for a front wheel bearing replacement will likely set you back anywhere from $350 to over $800 per wheel, sometimes more depending on the car and what shops charge in your area.
When you tackle it at home, you're mostly just paying for the part. A quality hub assembly usually runs between $50 and $200. Even if you have to rent a tool or two, you’re still putting hundreds of dollars back in your pocket. It's one of the most rewarding DIY jobs when you see the final bill.
It is a great feeling to save that much on labor, but part quality is key. Choosing between different part types can be confusing, but our detailed guide on OEM vs. aftermarket parts can help you make an informed decision about what's best for your vehicle and budget.
Should I Just Replace Both Front Bearings at Once?
Yes, absolutely. We always recommend replacing wheel bearings in pairs. Think about it: both bearings on that front axle have seen the same miles, the same potholes, and the same weather. If one side has worn out enough to fail, the other side is almost certainly on its last legs.
Doing them both at the same time is just smart preventative maintenance. It saves you the headache of tearing everything apart again in a few months and, more importantly, keeps your vehicle’s handling and steering safe, balanced, and predictable.
For a guaranteed fit and lasting performance, trust T1A Auto for your next wheel bearing replacement. Our premium aftermarket hubs are engineered for durability, ensuring a smooth, quiet ride for years to come. Find the perfect part for your vehicle at https://t1aauto.com.
