


A blurry backup camera isn't just a minor annoyance—it's a real safety hazard. Learning how to clean your backup camera lens is a simple, two-minute fix that makes sure one of your car’s most important safety features is working correctly, helping you avoid costly mistakes every time you put it in reverse.
Why a Clean Backup Camera Is So Important for Your Safety
It's easy to write off a fuzzy backup camera as just one of those things, but the reality is a lot more serious. A lens covered in a thin layer of road grime, dust, or even water spots can seriously compromise your safety. It’s like trying to drive with smudged glasses—everything gets distorted and hard to judge.
That distortion directly messes with your car's advanced driver-assistance systems (ADAS). Today's backup cameras do more than just show you what's behind the car; they’re the eyes for features like dynamic parking guidelines and rear cross-traffic alerts. A dirty lens can make these critical tools totally unreliable when you need them.
The Real-World Risks of a Dirty Lens
Think about parallel parking on a busy street. That thin layer of dirt can completely hide a low curb, a kid's bicycle, or a small animal that's just out of your line of sight. A distorted view can also make the parking grid lines look warped, causing you to misjudge the distance and end up with a scraped bumper.
This problem gets even worse in bad weather. Rain and road salt mix to create a grimy film that scatters light, turning a clear image into a useless, blurry mess right when visibility is already poor.
A study on ADAS performance revealed that obscured cameras can significantly reduce object detection, increasing the risk of low-speed collisions by up to 40% in certain conditions.
It's About More Than Just Parking
The need for a clear view goes way beyond the parking lot. If you're driving a truck or an SUV, a clean backup camera is non-negotiable for safely hitching a trailer. Misjudging the alignment by even an inch because of a blurry picture can lead to a lot of frustration and potential damage to your vehicle.
When you get down to it, taking a moment to properly clean your camera lens is a tiny investment of your time that pays off big in safety and peace of mind.
Get the Right Tools for a Crystal-Clear View

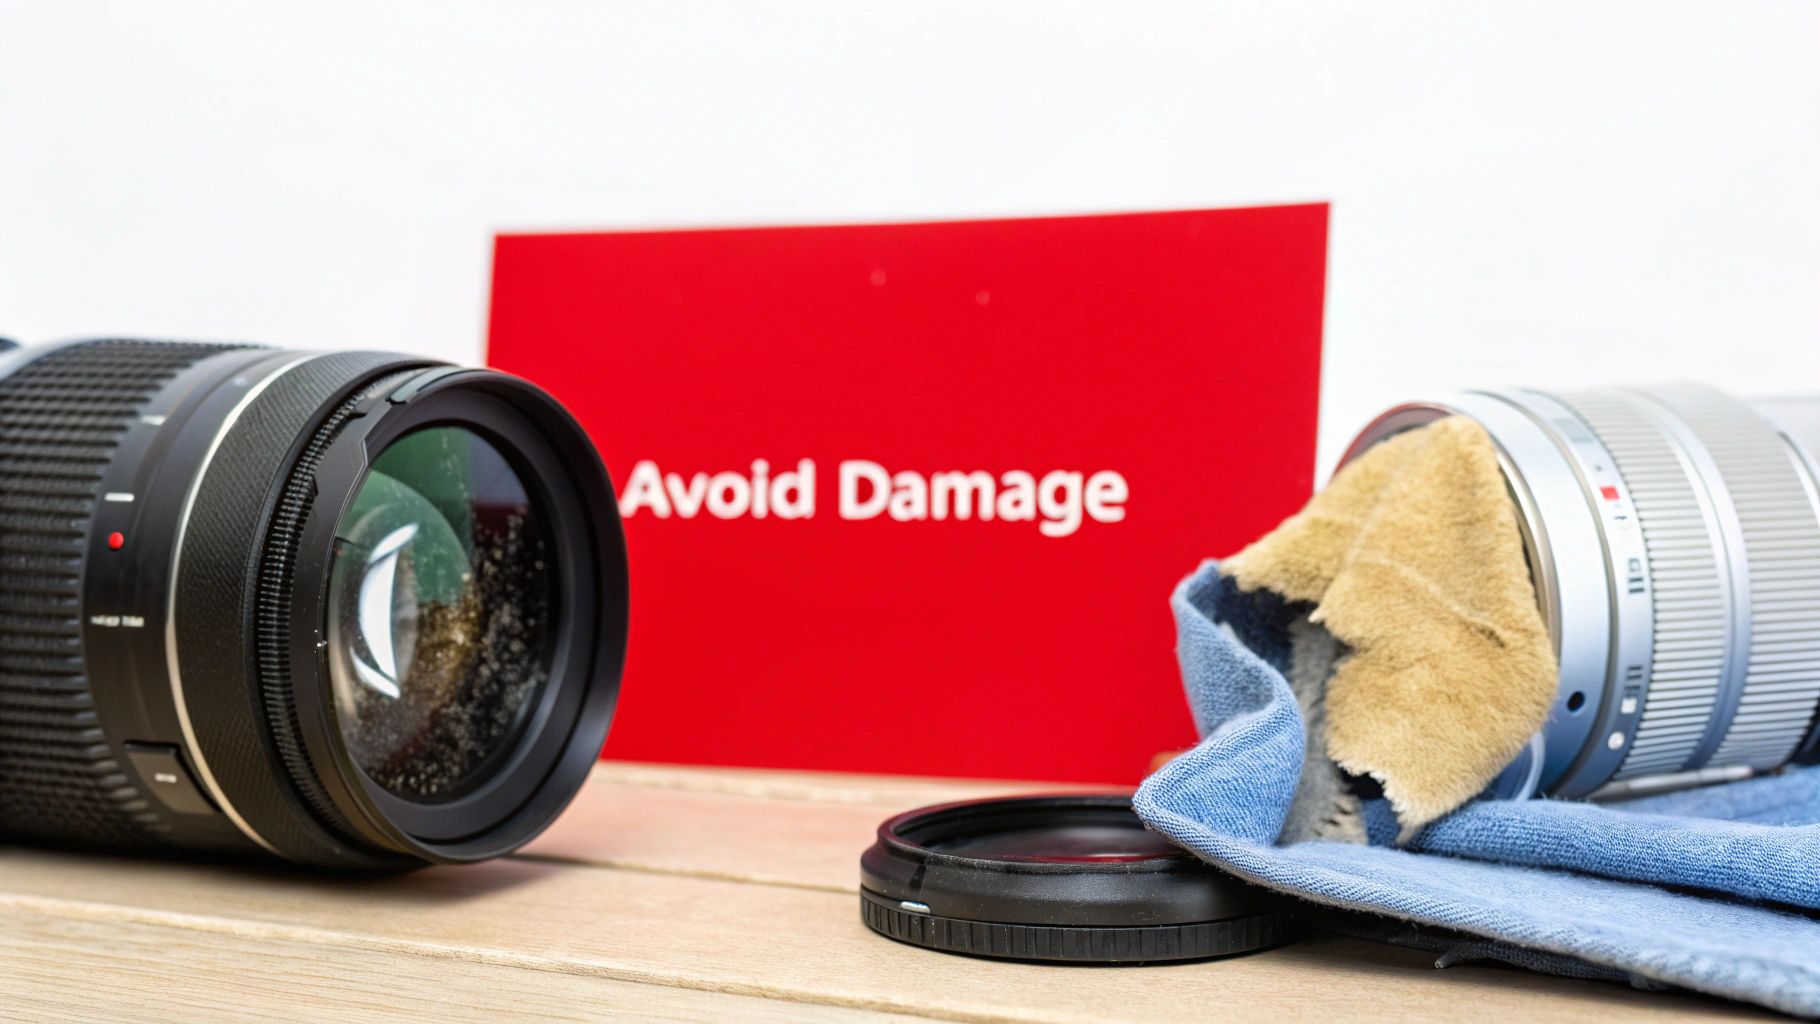
Before you touch that camera, let's talk tools. Grabbing the wrong supplies can quickly turn a simple cleaning job into a costly repair. Your backup camera lens isn't just a piece of glass; it’s a sophisticated optic, often with a delicate anti-glare coating that harsh chemicals can easily strip away, leaving you with permanent haziness.
Think of it like cleaning expensive eyeglasses. You wouldn't just grab a rough paper towel and a splash of Windex, right? The same logic applies here. The right tools are gentle, effective, and won’t risk scratching the polymer lens or damaging the weatherproof seals around the housing.
Safe vs Unsafe Supplies for Your Backup Camera
Choosing the right cleaner and cloth is the most critical part of this job. To make it simple, I've put together a quick comparison of what works versus what will almost certainly cause damage.
Your Backup Camera Cleaning Toolkit: Safe vs Unsafe Supplies
| Item | Recommended (Safe) | Avoid (Unsafe) | Reasoning |
|---|---|---|---|
| Cleaning Cloth | Soft, clean microfiber cloths (use at least two) | Paper towels, shop rags, napkins, old t-shirts | Abrasive materials leave behind micro-scratches that build up over time, creating a blurry or hazy image. |
| Cleaning Solution | Ammonia-free automotive glass cleaner OR a 50/50 mix of 70% isopropyl alcohol and distilled water | Household cleaners (Windex), vinegar, bleach, all-purpose cleaners | Harsh chemicals can eat away at the lens's anti-glare and hydrophobic coatings, causing irreversible damage. |
| Debris Removal | Ultra-soft detailing brush, makeup brush, or canned air | Stiff-bristled brushes, your fingernail, sharp objects | Aggressive methods can gouge or scratch the lens surface before you even start wiping it down. |
Ultimately, your goal is to lift the dirt away, not grind it into the lens. Using the safe options listed above will protect your camera and keep it working like new.
Your Go-To Cleaning Kit
You really only need a few things to get this done right. Most of them are probably already in your garage or under your sink.
- Microfiber Cloths: You’ll want at least two. One is for applying the cleaning solution and gently wiping away grime, and the second, completely dry one is for the final buff to make sure there are no streaks.
- Gentle Cleaning Solution: An automotive-specific, ammonia-free glass cleaner is perfect. If you don't have that, a homemade mix of 70% isopropyl alcohol and distilled water in a spray bottle works just as well.
- Soft-Bristled Brush: For cameras caked with dried-on mud or heavy grit, a small, ultra-soft brush (think makeup brush or a dedicated camera lens brush) is your best friend for loosening that debris before you wipe.
A bit of expert advice: Industry studies are clear on this. Obscured lenses can lose up to 50% of their image contrast, which directly impacts the performance of critical safety features that rely on that camera. A clean lens isn't just for convenience; it's a safety check.
Using the correct materials not only ensures you get that crystal-clear view back but also protects the long-term health of your camera. If you need to stock up, you can find many of the essential detailing tools for this and other jobs right here.
The Right Way to Clean Your Camera Lens
Once you've got your supplies, the actual cleaning part is a breeze—if you do it right. The secret isn't scrubbing harder; it's using a gentle, methodical touch that protects that delicate lens surface. I've seen too many people rush this and end up with permanent scratches from a tiny piece of hidden grit.
The single most important thing you can do is get the loose debris off before you even think about wiping. It’s just like washing a car—you always rinse the heavy stuff off first, right? If you skip this, you’re basically just grinding sand and dirt right into the lens.
Pre-Cleaning Is Everything
Take a close look at the camera. If it's caked in mud or covered in a layer of dust, grab a can of compressed air or a super-soft brush. A clean makeup brush or a dedicated camera lens brush works perfectly to gently whisk away the grit. This simple step makes a huge difference in preventing scratches.
Got some stubborn, dried-on gunk? A quick, light spritz of your cleaning solution can help loosen it up. Give it a moment to work its magic before you move on. Patience is key.
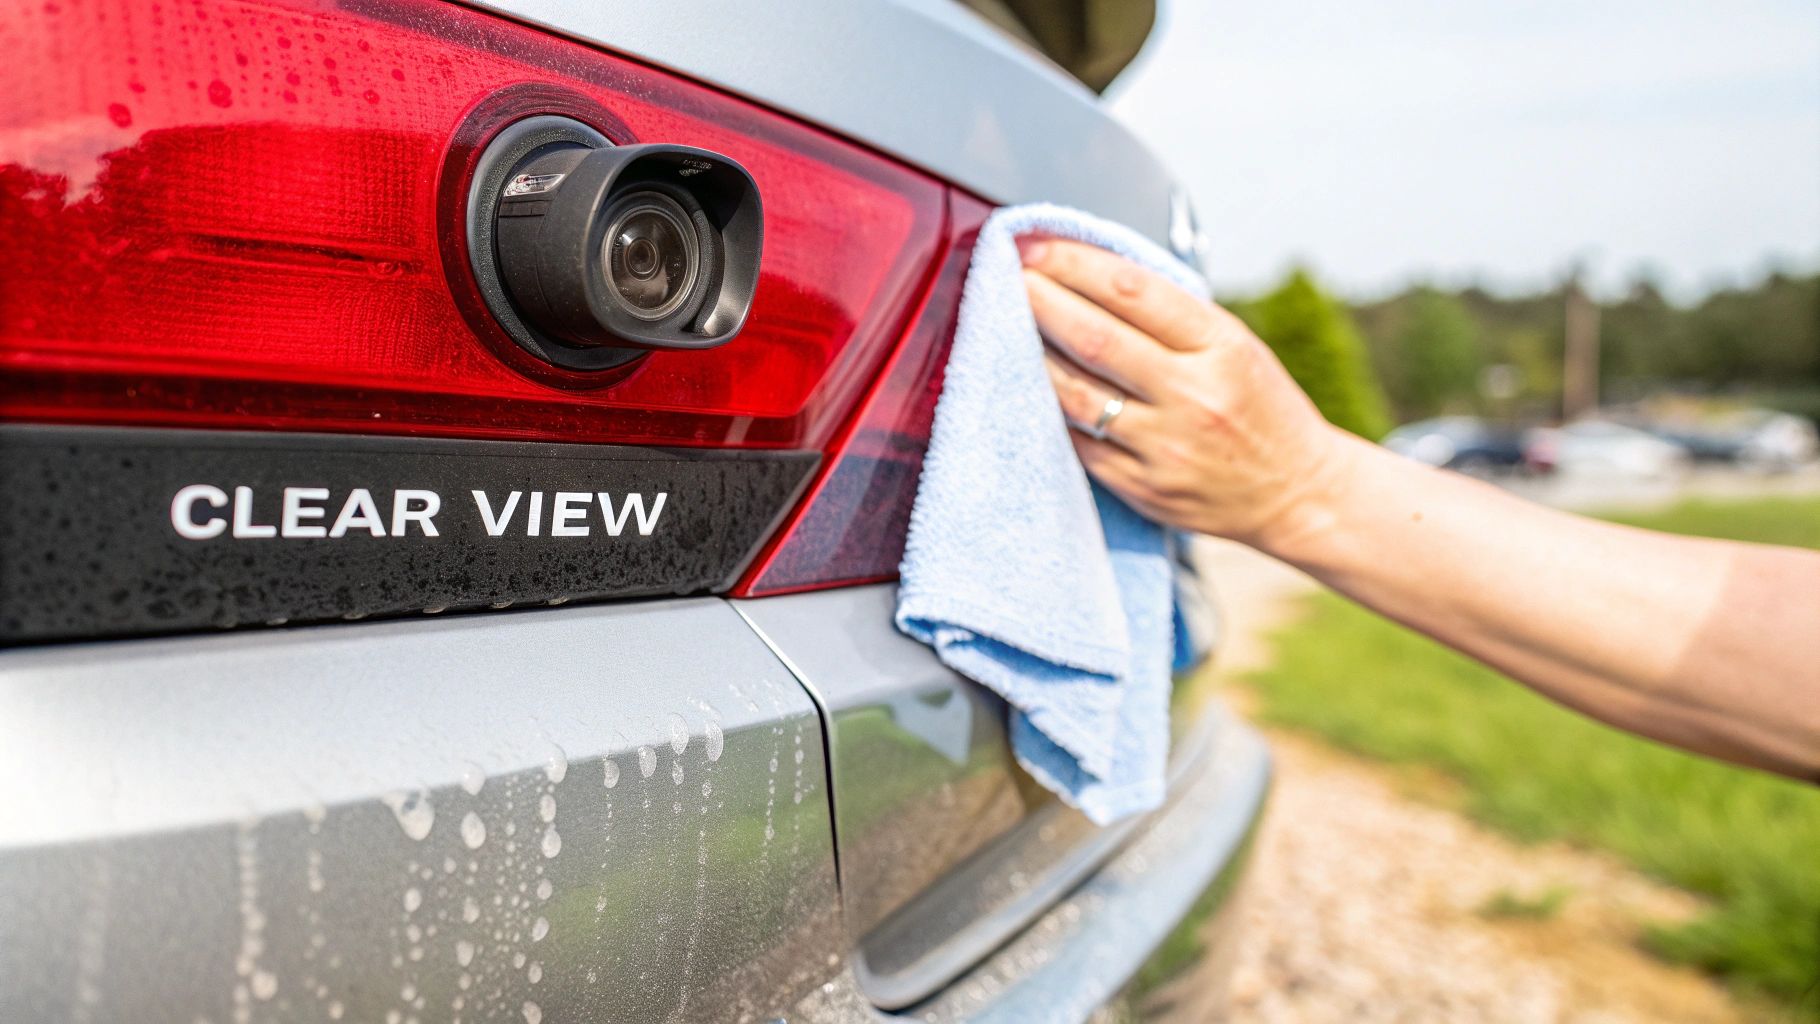
The Gentle Wipe-Down
With all the loose particles gone, you're ready for the main event. The golden rule here is to never spray cleaner directly onto the camera assembly. You'll risk forcing moisture past the seals and into the sensitive electronics, which can lead to that dreaded internal fogging or even kill the camera completely.
Here’s the process I always follow:
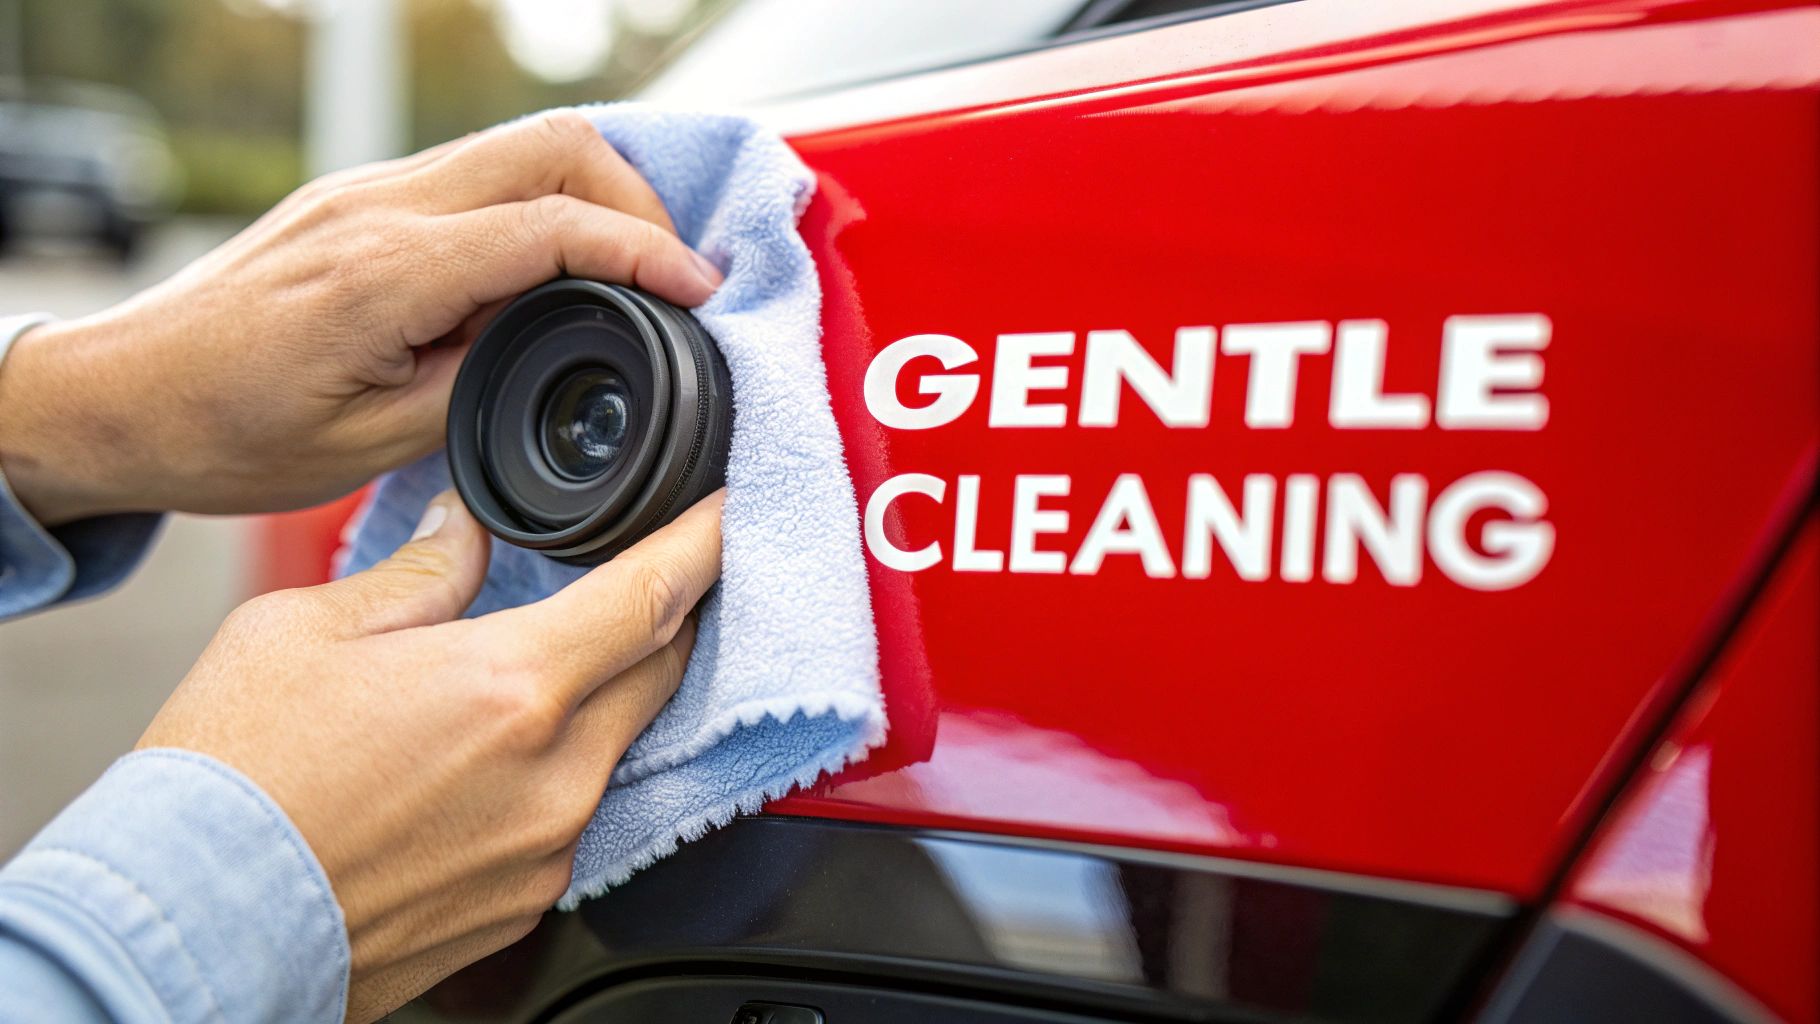
- Apply cleaner to the cloth, not the camera. Lightly dampen a clean spot on your first microfiber cloth with your cleaning solution. It just needs to be moist, not dripping wet.
- Wipe in gentle circles. Start from the center of the lens and work your way to the edges using small, soft circular motions. This lifts the grime off the surface instead of just smearing it around.
- Buff it dry. Immediately grab your second, completely dry microfiber cloth. Use the same circular motion to buff the lens, which gets rid of any leftover moisture and stops streaks from forming.
Pro Tip: Think about where your camera is mounted. A camera on an exposed bumper will get pelted with way more road grit than one tucked under a trunk lid, which might just get dusty. Tailor your pre-cleaning effort based on its location.
The whole thing should take you less than a minute. Keeping your lens clear is just as important for safety as maintaining other parts of your vehicle. In fact, if you're looking to improve overall visibility, learning the best way to clean foggy headlights for lasting clarity can also make a massive difference. Following these simple steps ensures you get a crystal-clear view every time you back up, without accidentally damaging a critical piece of safety tech.
Common Cleaning Mistakes That Can Damage Your Camera
Knowing what not to do is just as important as following the right steps. With the best intentions, it's surprisingly easy to turn a quick cleaning job into a frustrating and expensive problem. One wrong move can leave you with permanent scratches, a hazy lens, or even a misaligned camera.
I can’t tell you how many times I’ve seen people grab the nearest thing—a paper towel, a dirty shop rag, even the sleeve of their shirt—to wipe their camera lens. It seems harmless enough, but these materials are loaded with abrasive fibers. Each wipe creates tiny micro-scratches that build up over time, eventually scattering light and making your camera's view permanently blurry.
Applying Too Much Force
Another classic mistake is scrubbing the lens with too much pressure. Your backup camera is a delicate, precisely calibrated instrument. Pushing too hard won't just scratch the lens; you could actually knock the entire camera module out of alignment inside its housing. That's a surefire way to mess up your parking grid lines and throw off any object detection features.
Remember, the goal is to gently lift the dirt away, not grind it into the lens. A light, circular motion with the right cloth is all it takes to get that crystal-clear view back.
This "less is more" approach is a smart rule for all vehicle care. For example, many common mistakes in car interior cleaning come from using aggressive techniques or the wrong products, which is a perfect parallel to caring for your camera.
Key Mistakes to Avoid
Here are the big no-nos I see most often that can seriously compromise your camera’s performance:
- Using Household Cleaners: Steer clear of anything with ammonia, bleach, or other harsh chemicals. Windex might be great for windows, but it will strip the anti-glare coatings right off your camera lens, leaving it with a permanent haze.
- Spraying Directly on the Camera: Never do this. It forces liquid past the camera's seals, which can cause internal condensation and fogging—or worse, a complete electronic failure.
- Skipping the Pre-Clean: Wiping a lens that's still covered in sand or grit is basically like rubbing it with sandpaper. Always, always blow or rinse off the loose, heavy stuff first to avoid scratching the surface.
When Cleaning Just Won't Cut It
Sometimes, you can clean your backup camera lens perfectly, but the image is still a blurry, foggy mess—or maybe it's just a black screen. When that happens, the problem isn't dirt on the surface. It's time to look a little deeper.
More often than not, the culprit is either a permanent scratch on the lens itself or a broken seal that’s let moisture creep inside the camera housing. Both are common issues, but they require different approaches.
Scratches vs. Internal Fogging
If the blurriness is always in the same spot, you might be dealing with a scratch. To check, run your fingernail very gently across the lens. A scratch will feel like a tiny groove or catch that you can't wipe away.
Internal fogging, on the other hand, looks like a soft haze over the entire view. You might notice it clears up on a warm, sunny day, only to come right back when it’s cold or rainy. This condensation is a dead giveaway that the camera’s weatherproof seal has failed.
Unfortunately, a scratch is permanent. The only real fix is to replace the camera unit.
As for internal moisture, you might find some DIY fixes online, but they're almost never a permanent solution. That moisture will eventually corrode the sensitive electronics inside, leading to total failure.
Expert Tip: Your best bet for a permanent fix is a full replacement. Once a camera's seal is compromised, it's only a matter of time before moisture damages the internal components and shorts out the camera for good.
Time for a Replacement?
If you're staring at a deep scratch, persistent internal fogging, or a completely black screen, it's clear that cleaning isn't the answer anymore.
The good news is that replacing a backup camera is a pretty straightforward job for most DIYers. If you're ready to give it a shot, our guide on how to install a backup camera walks you through the entire process step-by-step.
While newer high-end vehicles are starting to feature advanced, self-cleaning camera systems, millions of cars on the road still rely on older tech. Knowing how to properly maintain—and when to replace—your camera is a skill that will serve you well for years to come.
The Future Is Clear: Automated Camera Cleaning Systems
While it’s good to know how to clean your backup camera lens by hand, the auto industry is already moving on to the next big thing. More and more new cars are hitting the road with built-in, automated camera cleaning systems, making a blurry view a thing of the past without you even having to step out of the car.
These aren't just simple squirters, either. Some of these systems are pretty clever, using a tiny, high-pressure nozzle to mist the lens with washer fluid and then immediately drying it with a puff of air. Others just use a targeted blast of compressed air to knock off dust or water droplets. It’s a sure sign that automakers now see a clear camera view as an essential safety feature, not just a convenience.
Why Are Automated Systems Becoming So Common?
This isn't just about adding another fancy gadget to the spec sheet. The real driver behind this trend is the rise of advanced driver-assistance systems (ADAS). Think about it: features like lane-keeping assist or automatic emergency braking depend entirely on getting clean, constant visual information. A lens caked in mud or road salt can blind these systems right when you need them most.
This push for reliability is driving some serious money into the market. Back in 2022, the global automotive camera cleaning system market was already valued at around US$670 million. Analysts are now projecting it to explode, potentially reaching nearly US$4.9 billion by 2031. That kind of growth tells you just how heavily automakers are investing. You can dig into the numbers and see the automotive camera cleaning system market projections for yourself.
As cars get smarter and more autonomous, having clean sensors is no longer optional. An automated cleaning system is the only way to guarantee the car’s “eyes” are always open, keeping its safety features online and reliable, no matter the weather.
Of course, even with this new tech, millions of us are still driving cars that need a good old-fashioned manual cleaning. If you've tried cleaning your lens and the view is still foggy, scratched, or just plain broken, it's time to think about a replacement. Restoring that crystal-clear view is simple with high-quality park assist cameras.
For a guaranteed fit and lasting performance, T1A Auto offers premium, CAPA-certified replacement cameras engineered to meet or exceed OEM standards. Find the perfect match for your vehicle at https://t1aauto.com.
