


So, your car door handle has given up the ghost. The good news is that swapping it out is a job most people can tackle with basic tools and some patience. I always break it down into four main phases: figuring out the exact part you need, getting the old one out, installing the new one, and then making sure it all works.
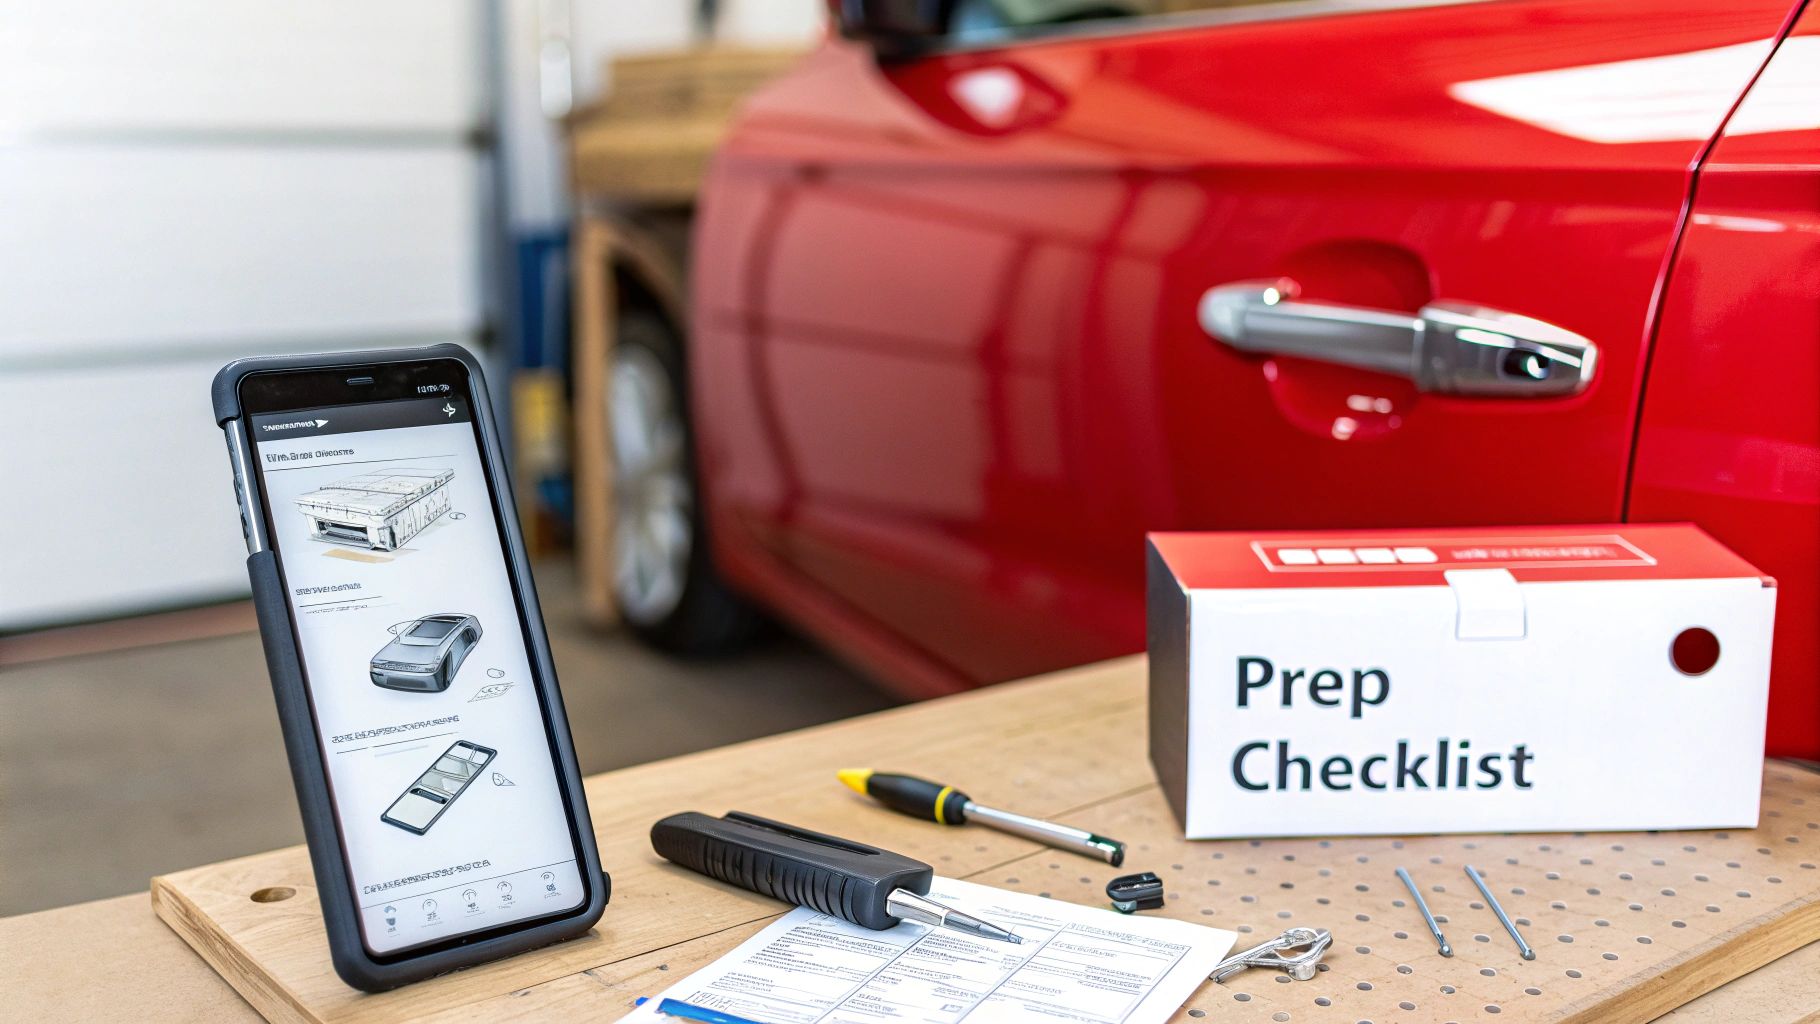
Your Pre-Replacement Success Checklist
Before you even think about picking up a wrench, a little prep work goes a long way. This is where you can save yourself a ton of headaches. Trust me, there's nothing worse than getting a door panel off only to realize you bought a handle for the wrong side of the car.
Identifying Your Car Door Handle Type
First things first: Are we talking about the handle on the inside of the door or the outside? They’re completely different parts and are not interchangeable. Once you’ve got that sorted, you need to figure out what kind of tech is hiding in there.
The table below breaks down the common types you'll encounter. Getting this right is the most critical part of the entire process.
Identifying Your Car Door Handle Type
| Handle Feature | Key Identifiers | Replacement Consideration |
|---|---|---|
| Interior | Located on the inside door panel. Often includes a separate lock lever. | Usually simpler to replace but requires removing the entire door panel. |
| Exterior | The handle on the outside of the car. | Can be keyed for a manual lock, have a button for keyless entry, or be a plain pull handle. |
| Manual | A simple mechanical lever. No wires connected to it. | Easiest to replace. Common on older or base-model vehicles. |
| Powered/Keyless | Has a button, sensor, or light. Wires will be connected to the back. | You must get a handle with the exact same electronic features to avoid system errors. |
| Paint-to-Match | Body-colored. Smooth, primed, or painted finish. | Replacements often come in black plastic. If you want a perfect match, look for a "paint-to-match" version. |
| Chrome/Textured | Has a specific finish, like chrome, brushed metal, or textured black plastic. | Match the finish to your other door handles for a professional look. |
Knowing these details ensures you’re not just buying a handle; you’re buying the right handle for your specific car.
Verifying the Fitment and Function
Car door handle technology isn't what it used to be. A few decades ago, everything was purely mechanical. Now, even a basic sedan might have handles with touch sensors for keyless entry. With roughly 70 million vehicles sold worldwide in 2021 alone, the variety of parts out there is staggering. This shift means a simple swap now often involves unplugging wiring harnesses and making sure the new part communicates with your car’s computer. You can get a better sense of this evolution by looking into the growth of automotive door handle technology.
I can't stress this enough: The most common mistake people make is ordering the wrong part. Always, always, always use your vehicle's Year, Make, Model, and Trim level to check for compatibility. If you have your Vehicle Identification Number (VIN), use it. It’s the surefire way to guarantee a perfect match.
What to Look For When Ordering Your Part
When you're browsing online, the devil is in the details. You absolutely have to specify which door the handle is for: front driver side, front passenger side, rear driver side, or rear passenger side. They are all unique and shaped differently.
Don't forget the finish, either. Does your car have shiny chrome handles, or are they painted the same color as the body? A lot of aftermarket parts come in a standard matte black. That might be fine if you're on a tight budget, but if you want it to look right, you’ll need to find a direct match or a "paint-to-match" replacement that you can have sprayed locally. Getting these small details right from the start will save you from a world of frustration.
Gathering the Right Tools for the Job
Let's be honest: trying to replace a car door handle without the right tools is a recipe for disaster. It’s like attempting to cook a gourmet meal with just a butter knife. You might get somewhere, but you'll almost certainly end up with a mess, a lot of frustration, and probably some damage.
Getting all your tools lined up before you start is the key to making this job go smoothly. It's the difference between a clean, professional-looking repair and a door panel covered in new scratches.
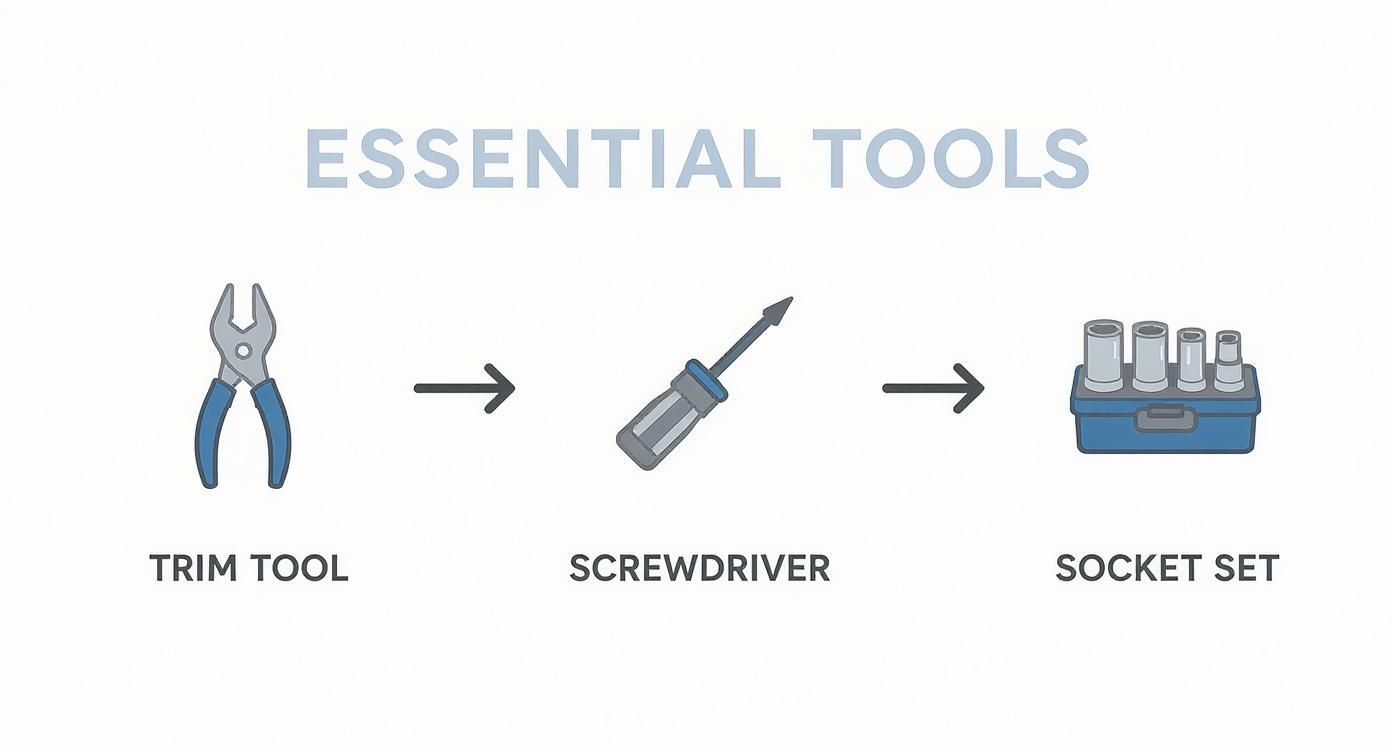
Your Essential Toolkit
While every car has its quirks, most door handle replacements rely on the same core set of tools. Before you even think about popping off that door panel, make sure you have these handy.
- Socket Set with Extension: This is for the bolts holding the handle in place, and sometimes the door panel itself. That extension is crucial for reaching bolts tucked away deep inside the door.
- Screwdriver Set: You'll almost always need both Phillips and flathead screwdrivers for the various screws holding the panel and other bits together.
- Plastic Trim Removal Kit: I can't stress this enough—do not skip this. Using a screwdriver instead is the #1 way people gouge their plastic trim and scratch their paint. These tools are designed to do the job safely.
- Needle-Nose Pliers: Invaluable for getting a grip on those tiny, awkward clips that connect the lock and latch rods.
Specialty Tools You Might Need
Depending on what you drive, you might encounter some less common fasteners. A quick search on a forum for your specific model can save you a headache later. You might discover you need a Torx bit set, which is common on many European and newer American cars. A small pick tool can also be a real lifesaver for releasing stubborn little retaining clips without snapping them.
Pro Tip: A magnetic tray is the unsung hero of any interior car work. It's so easy to drop a tiny screw down into the abyss of the door frame, never to be seen again. A simple magnetic tray keeps all your hardware in one place and saves you from that panicked search.
It’s interesting to note that the global automotive door handles market is projected to hit around $7.01 billion by 2033. This growth is largely because of the shift towards more complex electronic and smart handles. As this technology evolves, it makes the decision between different part types even more important. You can dive deeper into this in our guide comparing OEM vs aftermarket parts. For more on the market trends influencing these components, you can find more insights about the automotive door handles market on imarcgroup.com.
Removing the Old Car Door Handle
Alright, let's get our hands dirty. This is where the real work begins. Taking out the old handle isn't complicated, but it does demand a bit of patience. The whole point is to remove the broken part without creating a new problem, like scratching your paint or breaking a plastic clip.
Before you even think about touching the door, pop the hood and disconnect the negative terminal on your car’s battery. This is absolutely critical, not just a suggestion. Modern cars have airbags in the doors and all sorts of sensitive electronics. Skipping this step could lead to an accidental airbag deployment or fry a component, turning a straightforward fix into a massive headache.
Gaining Access Inside the Door
With the battery disconnected, the next step is getting that interior door panel off. For many people, this is the most nerve-wracking part of the job. Carmakers do a great job of hiding the screws and clips, and if you just start yanking on it, you're almost guaranteed to break something.
- Hunt for Hidden Screws: Start by looking in the obvious, yet hidden, places. Check inside the little pocket where you grab to close the door, in the armrest, and sometimes behind small trim pieces near the side mirror.
- Pry, Don't Gouge: Grab a plastic trim removal tool—seriously, don't use a screwdriver—and start at one of the bottom corners. Gently work the tool between the panel and the metal door frame until you feel the first clip pop loose. Work your way around the panel from there.
- Lift and Separate: Once you've released all the clips around the sides and bottom, you'll need to lift the whole panel straight up. It hooks over the top of the door frame along the window sill.
If you find yourself stuck, don't force it. We've put together a much more detailed guide on how to remove a car door panel that walks you through the process with more specific examples.
These are the tools that will make the job go smoothly and prevent any accidental damage.
Starting with the right prying tool is the key. It prevents you from scratching your door or breaking those fragile plastic panel clips before you even get started.
Detaching the Handle Mechanism
With the panel off, you'll see a plastic sheet, known as a moisture barrier, stuck to the door. You don't need to rip the whole thing off. Just carefully peel back a corner to create an opening large enough to get your hands and tools inside. You’ll want to press it back into place later to keep water out of your car's interior.
Peer inside, and you'll find the back of the door handle, connected to a mess of metal rods and maybe a few wires.
Pro Tip: Before you unclip or unplug a single thing, take a clear picture with your phone. This little step has been a lifesaver for me on countless occasions. It’s the perfect cheat sheet when you're putting it all back together.
Those metal rods are usually held on by small plastic clips. You’ll need to carefully rotate or un-snap the clip to free the end of the rod. Go easy here; years of heat and cold can make this plastic very brittle. Once the rods are disconnected, unplug any electrical connectors.
Finally, you can unbolt the handle itself. These are typically 10mm bolts. You might need a socket with an extension to reach them. Once they're out, the old handle assembly will pull right out from the outside of the door.
Installing the New Car Door Handle
https://www.youtube.com/embed/MD_Y4B4NjK0
With the old, broken handle out of the way, you're on the home stretch. Getting the new one in is basically the reverse of what you just did, but this is where paying attention to the small stuff really counts. If you rush this part, I can almost guarantee you’ll be pulling that door panel off again sooner than you'd like.
Your first move is to carefully slide the new handle into the opening from the outside of the door. You're looking for a snug fit—it should sit perfectly flush against the door's sheet metal with no weird gaps. Once it's seated properly, go ahead and thread the mounting bolts in by hand. This little trick prevents you from cross-threading them, which is a headache you don't need.
Securing the New Handle
Alright, grab your socket wrench. When you tighten these bolts, the word to remember is "snug," not "Hercules." Overtightening is probably the most common mistake people make here. It can easily crack the new plastic housing or, even worse, strip the threads right out of the door frame. Just a firm, gentle turn is all it takes to hold it securely.
Give the handle a little wiggle. It should feel solid, with no play at all. If it feels loose, take a second to double-check that it's seated correctly and that no debris got wedged in there.
Reconnecting Rods and Wires
Now for the most important part of the job: reconnecting the rods and any wiring. This is what makes the handle actually work. Remember that picture you took before taking everything apart? Now's the time to pull it up.
Each rod needs to slide back into its specific home on the new handle assembly and be locked down with its plastic clip. You're listening for a very distinct "click" when that clip snaps shut. That sound is your confirmation that it's secure. If a clip feels soft or doesn't close with a confident snap, it might be worn out. A loose rod is the #1 reason a new handle fails to open the door.
- Latch Rod: This is the one that connects to the actual door latch mechanism.
- Lock Rod: This rod controls the lock, whether you're using a key or the power lock button.
If your handle has a wiring harness—say, for keyless entry or a courtesy light—plug it in now. Make sure it clicks into place and the locking tab engages. A loose electrical connection can lead to intermittent problems that are an absolute nightmare to track down later.
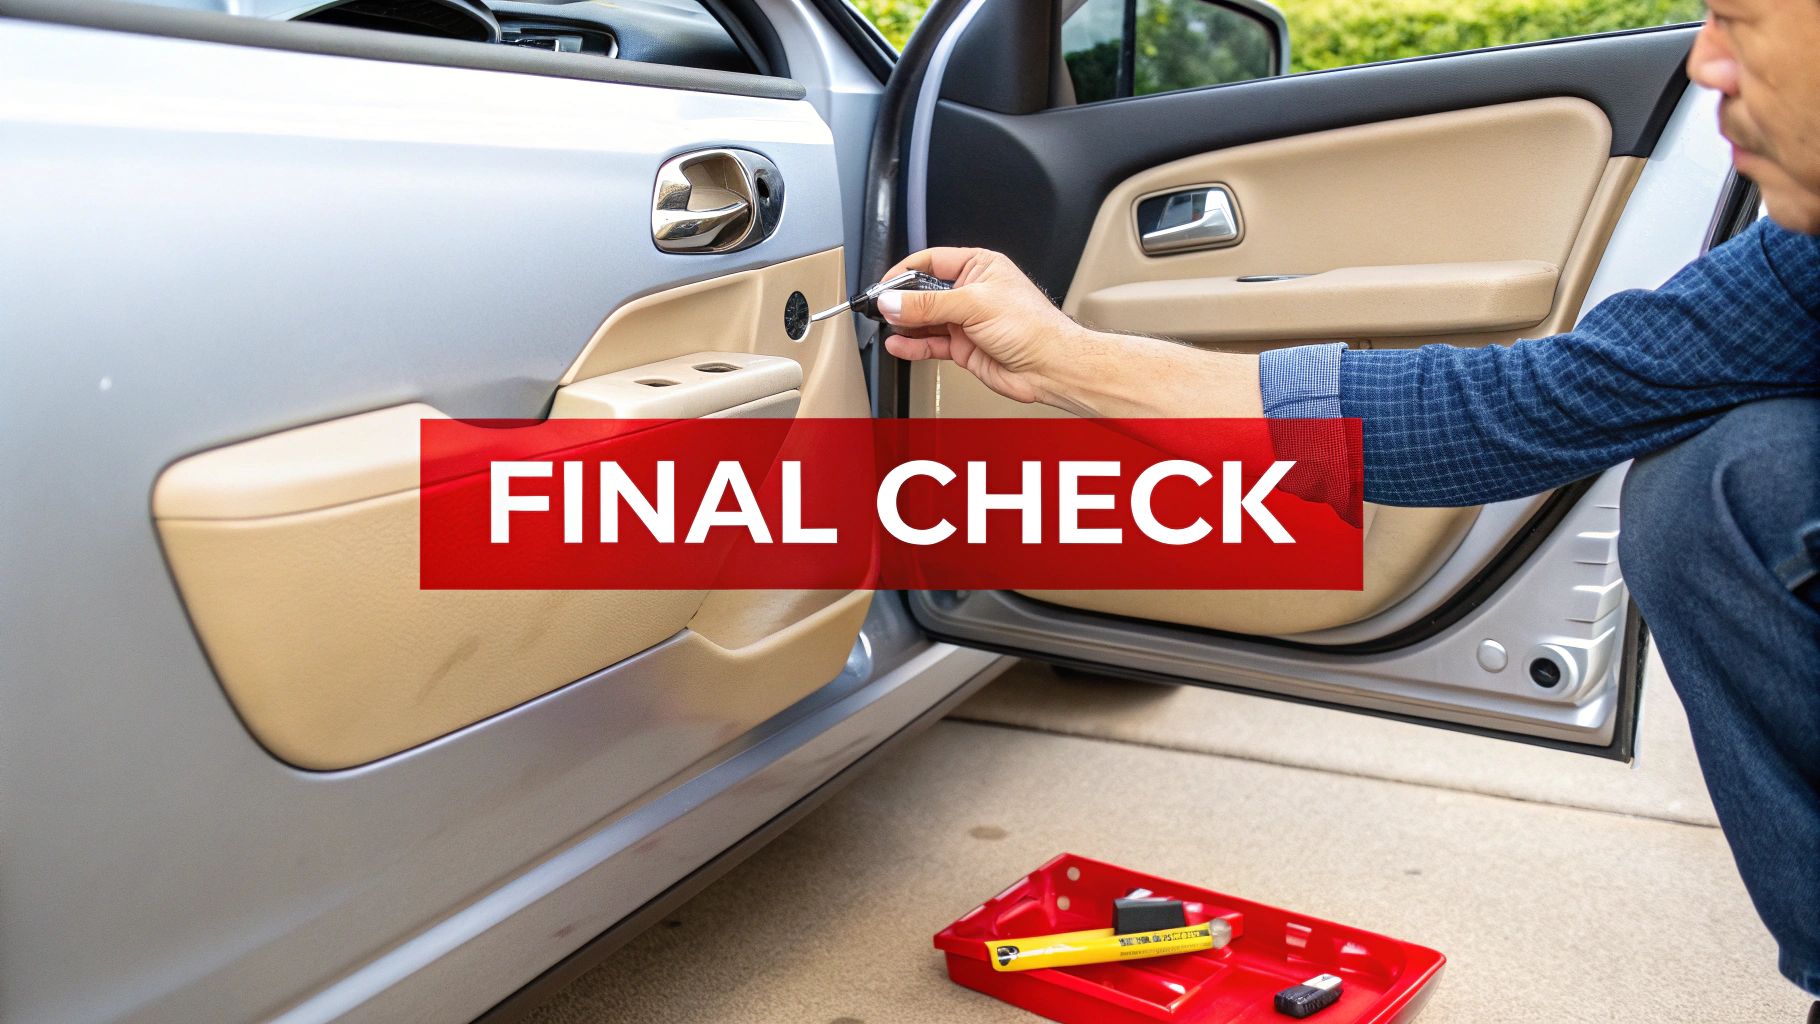
Before you even think about putting that door panel back on, it's time to test everything. Seriously. This five-minute check can save you an hour of pure frustration. It’s the single most important step in this entire process.
The All-Important Function Test
With all the guts connected but the door panel still off, go ahead and reconnect your car's battery. Now, you're going to put that new handle through its paces.
- Test the Exterior Handle: Make sure the door is unlocked and pull the outside handle. The door should pop open smoothly. Do this a few times to be sure.
- Test the Lock: Use your key fob, the interior power lock switch, and the physical key in the lock cylinder (if you have one). Lock and unlock the door multiple times. Critically, confirm the exterior handle does not open the door when it's locked.
- Test the Interior Handle: Reach inside and pull the interior handle. The door should open just like it always has.
- Check All Functions: If your door panel has window or mirror switches, it's a good idea to plug them in temporarily and make sure they're still working.
If anything fails this test, stop right there. The culprit is almost always a rod that isn't clipped in correctly or an electrical plug you forgot. Pinpoint the problem now while everything is still easy to get to.
Once everything works flawlessly, you can disconnect the battery again and move on to the final steps.
Finishing Up and Fixing Common Snags
Alright, with the new handle in place, you're on the home stretch. The last part is all about putting everything back together correctly and knowing how to deal with any little hiccups that might come up. Taking your time here is what separates a professional-feeling job from a sloppy one that rattles.
First things first, carefully press that plastic moisture barrier back into position. The black, tacky adhesive around its edge should still be sticky enough to get a good seal. Don't skip this—it's your main defense against water getting inside the door and causing mold, rust, or electrical gremlins.
Putting the Interior Door Panel Back On
Now it's time to get the interior panel back on the door. You’re essentially just doing the removal process in reverse. The easiest way to start is by hanging the top lip of the panel over the metal window sill.
Next up, plug in all the electrical connectors you disconnected earlier. This usually includes your window switches, power lock buttons, and maybe your mirror controls. Listen for a solid "click" for each one; that little sound confirms you've got a secure connection and won't have to tear it all apart again.
With everything connected, it's time to line up the plastic clips on the back of the panel with the holes in the door frame. I like to start at a top corner and give it a firm bump with the palm of my hand to pop the first clip in. Just work your way around the entire edge of the panel until it's snug and secure against the door.
Finally, put back any screws you removed, typically in the armrest or behind the interior handle. Pop any small trim covers back into place, and you’re almost done.
Common Problems and How to Fix Them
Even when you do everything right, sometimes things don't work perfectly on the first try. It happens to the best of us. Here are a few of the most common issues you might run into.
- The Handle Feels Loose: If there's some play or wiggle in the new exterior handle, it usually means the mounting bolts inside the door aren't torqued down quite enough. Unfortunately, you'll have to pull the panel off again to get in there and snug them up.
- The Door Won't Open from the Outside: Nine times out of ten, this means the latch rod has popped out of its little plastic clip. If that rod isn't securely connected, it can't pull on the latch mechanism to open the door.
- The Power Locks or Windows Don't Work: This is the classic "oops" moment. Before you panic, check your electrical connectors. It's incredibly easy to miss one or not push it in all the way when you're focused on the mechanical parts.
Pro Tip: If the handle feels stiff or the lock seems to bind, a misaligned rod is often the culprit. It's likely rubbing against something inside the door. You'll have to open the panel back up, but simply adjusting the rod's path can make all the difference.
Troubleshooting is a massive part of any DIY repair. It's also where technology is changing the game; things like augmented reality repair solutions are giving us a glimpse into the future of diagnosing these kinds of problems.
Once the panel is fully reassembled, reconnect your car's battery. Now, do one final, thorough check of everything. Test the interior and exterior handles, the power locks, and the windows. If everything works as it should, give yourself a pat on the back for a job well done.
Frequently Asked Questions
When you're diving into a door handle replacement, a few questions always seem to come up. Knowing the answers beforehand can save you a ton of headache and maybe even a few bucks. Let's tackle the big ones.
How Much Does It Cost to Replace a Car Door Handle?
The final bill for a new door handle can swing pretty wildly depending on whether you DIY it or call in a pro.
If you're handling the install yourself, you're mostly just paying for the part. A basic, no-frills aftermarket handle could be as cheap as $20 to $50. But if you're dealing with an official OEM part or one that has all the fancy keyless entry sensors, you could be looking at $100 to over $300. It's a big range.
Handing the job over to a mechanic? Expect to add labor costs to that part price. Most shops will charge somewhere between $100 and $200 for the work. All in, a professional replacement can run from $150 to $500, and you can bet that high-end or tech-heavy cars will push the upper end of that scale.
For a really detailed look at what goes into that number, check out our guide on the car door handle replacement cost.
Can I Replace Just the Broken Piece of the Handle?
This is a common question, but unfortunately, the answer is almost always no. Door handles are manufactured and sold as a single, sealed assembly. So even if it’s just one tiny plastic bit that broke, you can't buy that piece on its own.
I've seen people try to superglue a broken handle back together, and it just doesn't last. The constant pulling and mechanical stress means it's doomed to fail again, usually at the worst possible time. Your only real, long-term solution is to replace the entire handle unit.
Do I Need to Paint the New Door Handle?
This really comes down to the handle you buy and the look you want. Plenty of aftermarket handles come in a standard matte black or chrome, and if that works for your car, you’re all set.
But if your original handle was color-matched to your car's body, you have a couple of options:
- Order Pre-Painted: The easiest route is to get a handle from a dealership that's already painted to match your vehicle's specific paint code. It's convenient, but it's also the priciest way to go.
- Paint-to-Match: A more popular and wallet-friendly approach is buying a "paint-to-match" handle. These come primed and ready for paint, so you can take it to any local body shop for a perfect, professional finish.
When you're ready for a replacement that gives you OEM quality without the dealer markup, T1A Auto has what you need. Find the right part for your car and get back on the road by shopping our full selection at https://t1aauto.com.
