


Before you start reaching for your toolbox, let's make sure we're chasing the right problem. A worn-out car door hinge isn't subtle; it gives you some pretty obvious clues, like a sagging door that’s a pain to close or that awful popping and creaking sound. Pinpointing these signs from the get-go means you're not wasting time on the wrong fix.
Diagnosing a Failing Car Door Hinge
Is your car door putting up a fight every time you try to shut it? Or maybe it groans and creaks like a haunted house opening? These aren't just quirks your car is developing with age—they’re classic symptoms of a bad door hinge. Before we get into the "how-to" of replacing one, you need to be dead sure the hinge is actually the issue.
The most common signs are things you can easily see and hear for yourself.
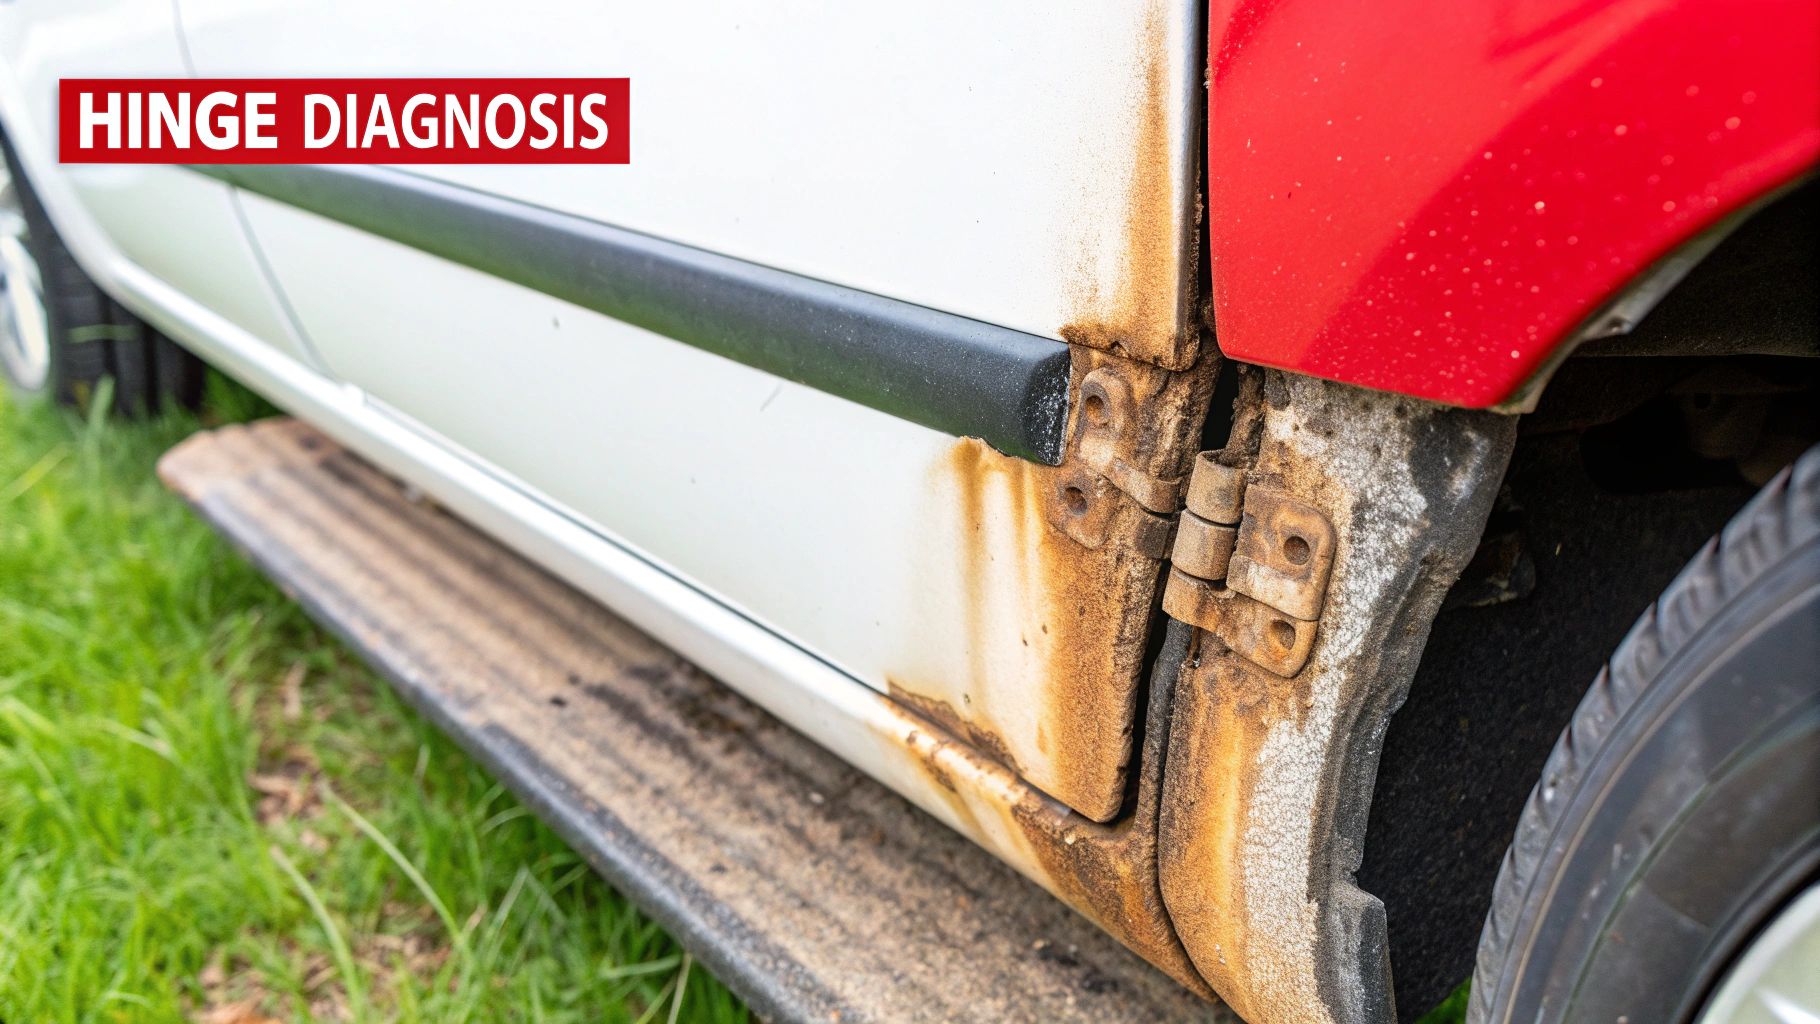
- Strange Noises: If you hear loud popping, clicking, or grinding when you swing the door open or closed, that's your first major red flag. This is usually the sound of the hinge pin and its bushing grinding together because they’ve worn down or lost their lubrication.
- A Drooping Door: Open the door just a foot or so and see if it drops. A door that sags and needs a little "lift" to latch correctly is a dead giveaway that the hinge is too worn to hold the door's weight anymore.
- Misalignment Issues: Take a look at the gaps around your door when it's fully closed. Is the space between the door and the body uneven? If it's wider at the top and nearly touching at the bottom, the hinge is almost certainly to blame.
Finding the Real Reason for Failure
So, why do hinges fail in the first place? More often than not, it's just good old-fashioned wear and tear. A car door gets opened and closed tens of thousands of times, and that repetitive motion slowly grinds down the pins and bushings inside the hinge.
Rust is another big killer of hinges, especially if you live somewhere with high humidity or where roads are salted in the winter. Corrosion can cause the hinge to seize up, or it can eat away at the metal until it weakens, cracks, and fails. Don’t forget about physical damage, either. Even a minor parking lot bump or swinging the door into a high curb can be enough to bend the hinge plates and knock the alignment out for good.
Quick Home Test: You can confirm a bad hinge with a simple check. Open the door partway, grab the bottom corner firmly, and try to lift it straight up and down. If you feel any significant vertical play or hear a clunking noise, you've found excessive wear in the hinge pins and bushings.
A Worldwide Issue
This isn't just a problem for a few unlucky car owners; it's a universal part of a vehicle's life cycle. Across the global automotive industry, door hinge replacement is a common repair, driven by how cars are made and used.
With the average vehicle in the United States staying on the road for about 12 years, it's no surprise that door hinges are one of the most frequently replaced pieces of hardware. They just see so much action. You can learn more about the automotive door hinge market and its global trends to see just how common this repair is.
Getting Your Gear in Order: The Essential Toolkit
Before you even think about loosening a single bolt, let’s talk about tools. Walking into a door hinge replacement unprepared is a surefire way to turn a manageable job into an all-day ordeal. Having the right equipment ready to go makes all the difference, ensuring the work is safe, clean, and professional.
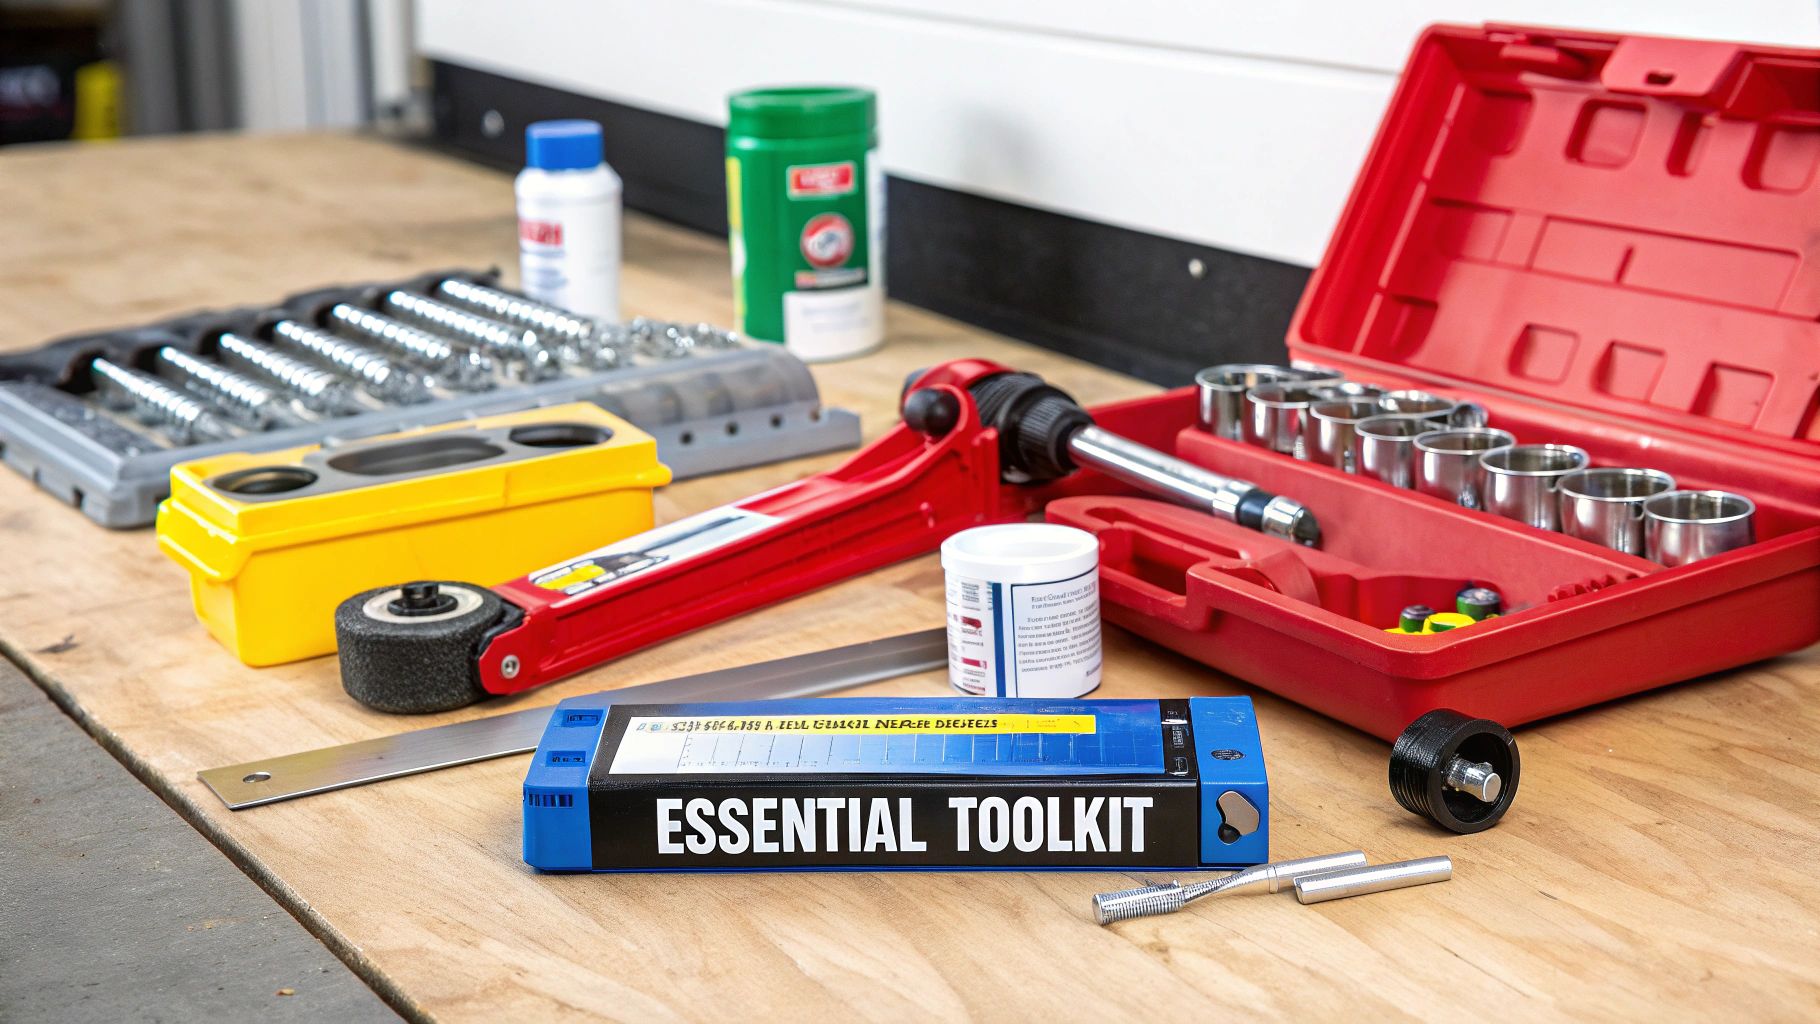
Table: Essential Toolkit for Door Hinge Replacement
Here’s a breakdown of what you'll need. This isn't just a list; it's a game plan to avoid unnecessary trips to the auto parts store or, worse, causing damage to your vehicle.
| Tool/Material | Primary Function | Pro Tip |
|---|---|---|
| Floor Jack | Safely supporting the door's weight. | Place a block of wood or a thick towel between the jack and the door to prevent scratching the paint. |
| Socket Set | Removing hinge bolts from the door and frame. | Get a set with a ratchet and various extensions. 10mm to 14mm sockets are most common for this job. |
| Breaker Bar | Loosening stubborn, factory-tightened bolts. | Factory bolts often have thread locker. The extra leverage from a breaker bar prevents stripped bolt heads. |
| Penetrating Oil | Freeing up rusted or seized bolts. | Spray any rusty bolts about 30 minutes before you start. It works wonders. |
| Painter's Tape | Protecting paint around the work area. | Mask off the edges of the door and the car body near the hinges. An accidental wrench slip won't lead to a costly touch-up. |
| Permanent Marker | Marking the original hinge position for alignment. | Tracing the old hinge's outline on the car body gives you a perfect reference point for installing the new one. |
Having these items on hand means you can focus on the task itself. Proper preparation is the first and most critical step in doing the job right.
The Heavy Lifter: Don't Skip the Floor Jack
The most critical piece of equipment here is your floor jack. A modern car door is surprisingly heavy, easily weighing anywhere from 60 to over 100 pounds with all its internal components. Trying to wrestle with that kind of weight by yourself is a recipe for a strained back or a badly scratched door. The jack does the heavy lifting, allowing you to focus on the bolts.
My Golden Rule: Never let the bare metal of the jack saddle touch your car's paint. Always use a buffer—a small block of wood or even a folded shop towel works perfectly. This simple step is the difference between a clean job and an expensive trip to the body shop.
Hand Tools: Your Bread and Butter
Your primary weapons will be a good quality socket set with a ratchet and a few extensions. While most hinge bolts you'll encounter are metric, having a complete set ensures you're ready for anything.
Factory-installed hinge bolts can be notoriously tight, often secured with a thread-locking compound. This is where a breaker bar or a long-handled ratchet becomes your best friend. The added leverage breaks those bolts free cleanly, saving you from a world of frustration and the risk of stripping a bolt head.
The Pro's Secret Weapons for a Flawless Finish
A few cheap and simple items are what separate a DIY job from a professional one. I call these my "secret weapons" for a damage-free repair.
- Penetrating Oil: If you spot any rust on the bolts, don't even try to turn them without hitting them with some penetrating oil first. A quick spray a half-hour before you start can work its way into the threads and save you a massive headache.
- Painter's Tape: This is your insurance policy against accidental slips. Carefully tape off the paint on the door and the A-pillar around the hinges. It takes two minutes and can save you hundreds in paint repair.
- Fine-Tip Permanent Marker: Before you remove a single bolt, trace the outline of the old hinge directly onto the car body. This trick is invaluable. It gives you a visual target that gets you 90% of the way to perfect alignment when you put the new hinge on.
Removing the Old Hinge Without Damaging Your Car
Alright, you've got your tools laid out and a plan in mind. Now for the hands-on part. This is where a little patience and precision will save you from turning a simple job into a trip to the body shop. The first, and most critical, task is to safely manage the door's weight.
A car door can easily top 75 pounds, and trying to manhandle it is a bad idea. Get your floor jack and position it right under the bottom edge of the door, closer to the rear corner. Never put the jack's metal saddle directly on the paint—use a block of wood or a thick, folded towel as a cushion. Slowly raise the jack until it just makes contact, supporting the full weight without actually lifting the car.
Preparing for a Clean Disconnect
Before you loosen a single bolt, you have to deal with the electronics. Modern doors are a hub of wiring for windows, locks, speakers, and mirrors. Open the door and find the rubber boot that runs between the door and the car's body, right near the hinges. That’s your wiring harness.
You'll need to get that harness disconnected. On some cars, you can just pull the rubber boot back from the A-pillar to access the connector. On others, you might have to pop off an interior kick panel to find it. If you have to dig deeper into the interior, our guide on how to remove a car door panel walks you through the process so you don't snap any of those fragile plastic clips.
This visual guide shows you the three essential first moves.
Following this order—support, disconnect, then unbolt—is the safest and most efficient way to get started.
The Pro Trick for Perfect Alignment Later
Want to save yourself a massive headache when it's time to put everything back together? Grab a permanent marker. Before you even think about putting a wrench on a bolt, carefully trace the outline of the old hinge right onto the door and the car’s A-pillar.
This simple step creates a flawless template. When it comes time to install the new hinge, you just line it up with your marks, and your door alignment will be 90% perfect from the get-go. It turns what can be a frustrating guessing game into a simple, straightforward process.
Pro Tip: Don't skip tracing the old hinge. It's the single most effective trick for getting a factory-perfect fit with the new part. This two-minute step can easily save you an hour of tedious adjustments later.
Loosening and Removing the Hinge Bolts
Now it's time to unbolt the hinge. I usually start with the bolts on the door side, then tackle the ones on the body. If a bolt puts up a fight, don't just muscle it—that’s a surefire way to strip the head. Reach for your breaker bar to get some extra leverage. A quick, sharp pop of force is way more effective than slow, grinding pressure.
If you run into a really rusty bolt, soak it with penetrating oil and let it sit for a good 15-20 minutes. A few light taps on the bolt head with a hammer can also help vibrate the rust loose and let the oil seep in.
Once the bolts are out, the old hinge should come free. It’s not a bad idea to have a friend help steady the door as you work the hinge out. With the old, worn part in your hand, you're officially ready to move on to installation and alignment.
Installing and Aligning Your New Door Hinge
Okay, the old hinge is out, and you're on the home stretch. Don't rush this part, though. Getting the new hinge installed and perfectly aligned is where the real skill comes in. This is what makes the difference between a sloppy job and a repair that makes your door feel brand new again.
First things first, get that new hinge into position. If you've got a quality replacement, it should slide right into place. Remember those marker lines you traced earlier? They're about to become your best friends. Line up the new hinge perfectly with those marks on both the door and the A-pillar.
Getting the Initial Fit Just Right
Start by threading the bolts in by hand. Don't even think about grabbing a wrench yet. You want the hinge snug enough to stay put but with just enough play for those tiny adjustments you'll need to make. Getting this initial placement right is half the battle.
Once the bolts are hand-tight, go ahead and lower your floor jack ever so slightly. Let the door's full weight settle onto the new hinge. This small step helps seat everything correctly before you move on to the final alignment and tightening.
It's also a good time to appreciate the quality of the part you're installing. The global door hinge market is huge, valued at around USD 9.5 billion, and a big chunk of that is focused on durable materials. Stainless steel, for instance, makes up about 40% of the market for a reason—it’s built to last. In North America alone, the market pulls in roughly USD 4.2 billion in revenue, largely because people demand reliable hardware that won't fail them.
The Art of Perfect Alignment
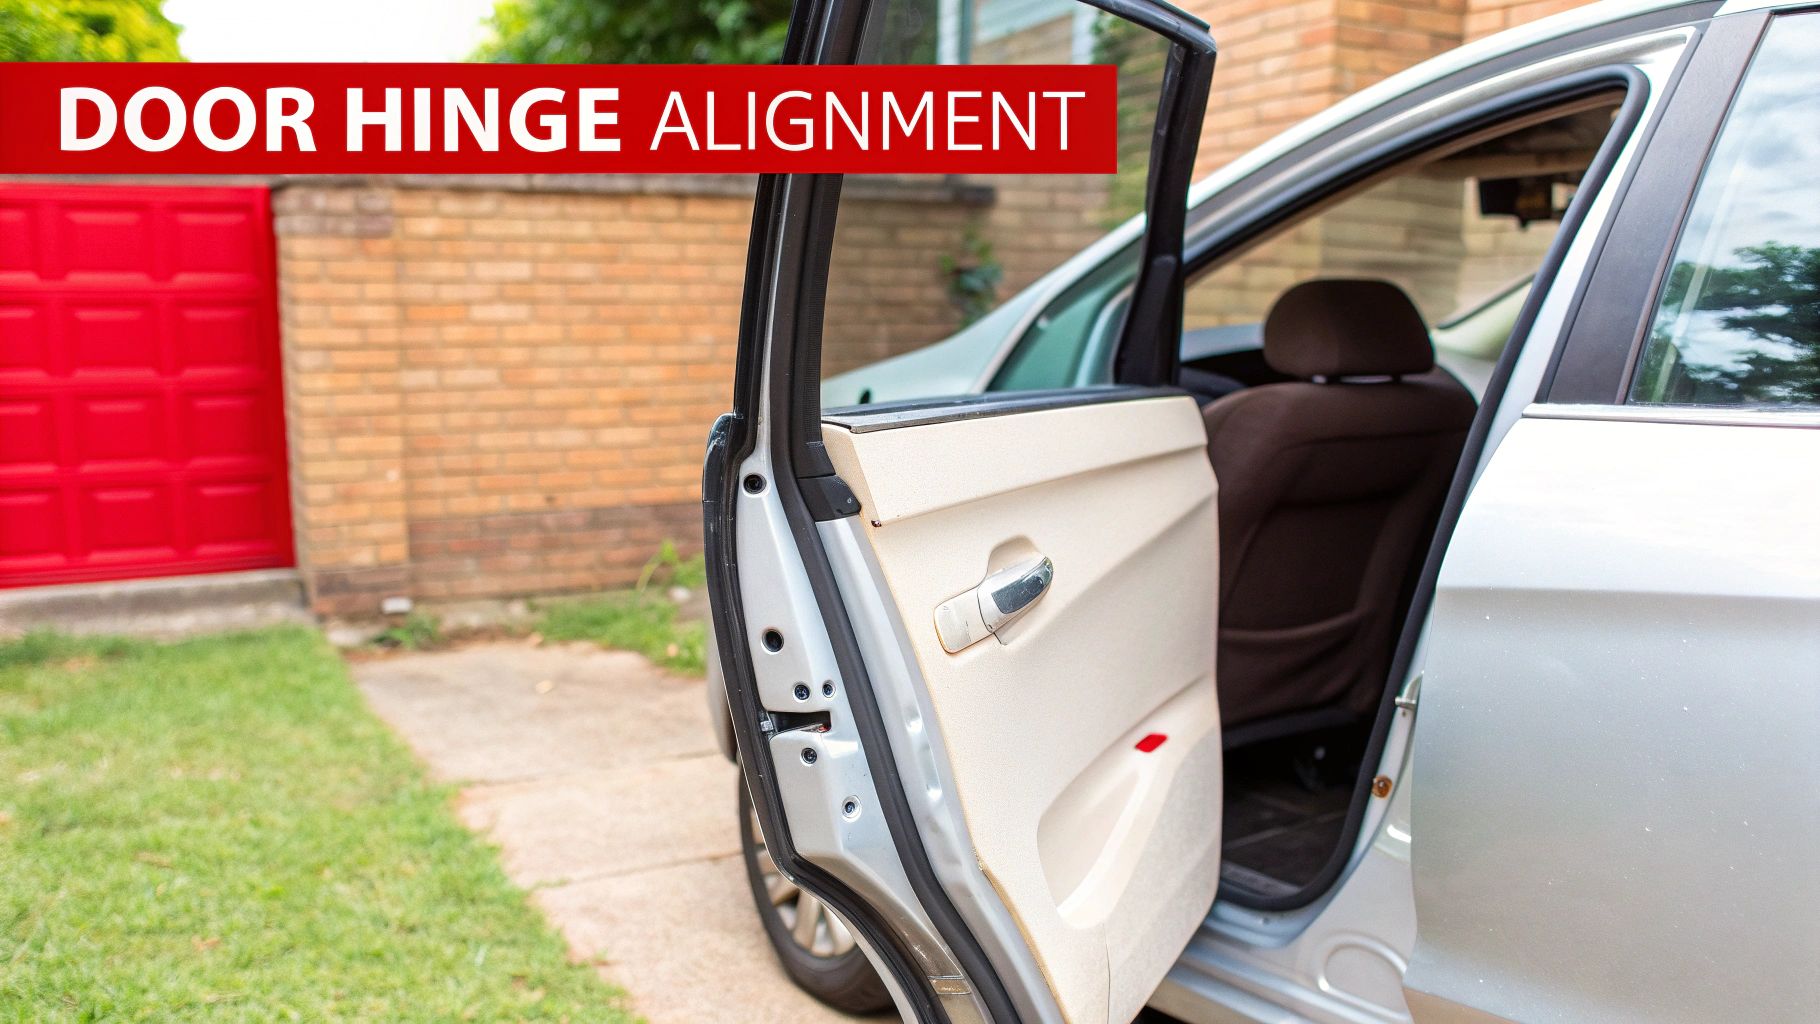
Now for the most critical step: alignment. This is more finesse than force. Close the door very slowly, but don't latch it shut. Your eyes are your best tool here. Take a hard look at the gaps all the way around the door—the space between it and the front fender, and the gap between the door and the rear quarter panel.
- Check the Panel Gaps: Is the gap consistent from top to bottom? You're aiming for a clean, uniform line all the way around.
- Feel the Body Lines: Run your hand over the seam where the door meets the fender and the quarter panel. It should feel perfectly smooth and flush. If the door sits proud or recessed, you're not done yet.
If an adjustment is needed, just slightly loosen the bolts and gently nudge the door up, down, in, or out. This is where having a friend to help is invaluable. They can support the door's weight, freeing you up to make those precise movements.
Alignment is a Game of Patience: Make a small adjustment, snug the bolts, and check your work. Then do it again. And again. It might take a few tries to nail it, but this meticulous process is what separates a quick fix from a professional-grade repair.
Once you’re happy with how the door sits, it's time to tighten the bolts down. Use your ratchet to get them good and secure, but don't go for the final torque just yet—that comes a little later. If you're looking for parts that make this process easier, you can find a great selection of high-quality aftermarket door hinges that are designed for a perfect fit.
With the door perfectly aligned, you’re ready to move on to the final checks that will lock in all your hard work.
Final Checks to Ensure a Lasting Repair
Alright, the door is hanging perfectly, and it closes with that satisfying thunk. It’s tempting to pack up the tools and call it a day, but don't skip these last few steps. This is what separates a quick fix from a professional, long-lasting repair. Taking a few extra minutes here will guarantee your hard work holds up for years.
First things first, let's talk about those hinge bolts. Getting them "good and tight" just doesn't cut it. Bolts that are too loose will inevitably work their way out with road vibration, while cranking down on them too hard can strip the threads right out of the door or frame. That’s a nightmare you don’t want.
Grab your torque wrench. Your vehicle's service manual is your best friend here—it will list the exact torque spec, usually in foot-pounds (ft-lbs). This is the only way to get it perfect.
This isn't just about being a perfectionist. A door that comes loose is a serious safety hazard. Applying the correct torque is what keeps that heavy door securely attached to the car's body, whether you're just driving to the store or, heaven forbid, in an accident.
Reconnecting and Testing Everything
With the bolts torqued down, it's time to bring the door's electronics back to life. Carefully plug that main wiring harness back in. You should hear and feel a solid click as it seats. Once it's connected, work the rubber boot back into place on both the door and the A-pillar to keep water and dirt away from the connections.
Now, before you even think about putting the door panel back on, run a full systems check. Be methodical here.
- Window: Run the power window all the way down, then all the way back up. Listen for any weird noises.
- Locks: Hit the lock button inside the car. Then try your key fob. Do this a few times to make sure it's reliable.
- Speaker: Flip on the radio. Is the speaker in that door working?
- Mirror: If you have power mirrors, check the controls. Does it move up, down, left, and right like it should?
Finding a problem now is a simple fix. Finding it after the door panel is back on is just frustrating.
The Finishing Touches for a Job Well Done
The last thing we need to do is a bit of preventative care. A new hinge needs lubrication to stay quiet and move freely. I prefer a good white lithium grease for this. Just a small dab on the pivot pin and any other moving parts is all it takes to prevent squeaks and protect against premature wear.
Finally, take a close look around where you were working. Did you accidentally scratch the paint around the bolts? It happens. A tiny chip in the paint is an open invitation for rust. Grab a bottle of automotive touch-up paint that matches your car's color and dab it over any exposed metal. This simple step seals it off from moisture and stops rust before it can even start.
Common Questions About Replacing Car Door Hinges
Even the most straightforward car repair can throw you a curveball. When you're dealing with door hinges, a few common questions almost always pop up. Let's tackle them now so you can keep your project on track.
Should I Replace the Whole Hinge or Just the Pin?
This is probably the number one question I get. If the hinge plates themselves look solid—no bends, cracks, or heavy corrosion—then just replacing the worn-out pin and bushings is a great, wallet-friendly fix. This is often all you need to do to correct a sagging door.
However, if you see any signs of metal fatigue, stress cracks, or significant rust on the hinge body, don't even think about a partial repair. A complete replacement is the only safe and reliable way to go.
What if the Bolts are Rusted Solid?
It's a familiar story: you get everything ready, put a wrench on the bolt, and... nothing. It's completely seized. Before you reach for more muscle and risk stripping the bolt head, grab a can of quality penetrating oil. Give the stubborn bolt a generous spray and let it sit for a good 30 minutes—patience is key here.
If it still won't budge after soaking, a few sharp taps with a hammer on the wrench can often be enough to break the rust's grip and get things moving.
How Do I Get the Door Alignment Perfect?
Getting the door lined up just right can feel like an art form, and it's a major source of anxiety for many DIYers.
The secret to alignment is patience. The outline you traced of the old hinge is your best friend—it will get you about 90% of the way there. From that point on, it’s all about small, incremental adjustments. Move the door just a tiny bit, close it gently, and check your panel gaps. Keep tweaking until they are perfectly even all around.
Knowing whether to use an OEM or aftermarket hinge can also make a big difference in fitment. To get the full picture, check out our in-depth comparison of OEM vs. aftermarket parts to help you decide. Getting these details right from the start makes the whole job go a lot smoother.
For durable, high-quality replacement parts that guarantee a perfect fit, trust T1A Auto. Shop our extensive selection of door hinges and more at https://t1aauto.com.