


Before you even think about ordering new mirror glass, you need to be sure that's all you actually need. It’s a common mistake. You see a crack, assume it's a simple glass swap, and end up with a part you can't use because the real problem lies deeper.
A simple crack or chip? Yeah, that's usually a straightforward glass replacement. But if the housing is busted, the power-adjust motor is dead, or the fancy sensors are on the fritz, you're looking at a whole new assembly. Figuring this out first will save you a ton of time, cash, and a massive headache.
Deciding if Glass Replacement is Your Best Option
The choice between replacing just the glass and swapping the entire unit comes down to a quick, honest damage assessment. The goal is to isolate the problem. Is the damage purely superficial and contained to the glass itself, or has it messed with the mirror’s core function and structure?
This isn't just about saving a few bucks; it's about doing the job right. The global market for mirror glass replacements was valued at a whopping USD 6.8 billion in 2024, which tells you just how often this specific repair comes up. From a rock kicked up on the highway to a bathroom mirror slowly surrendering to humidity, targeted glass replacement is a massive industry.
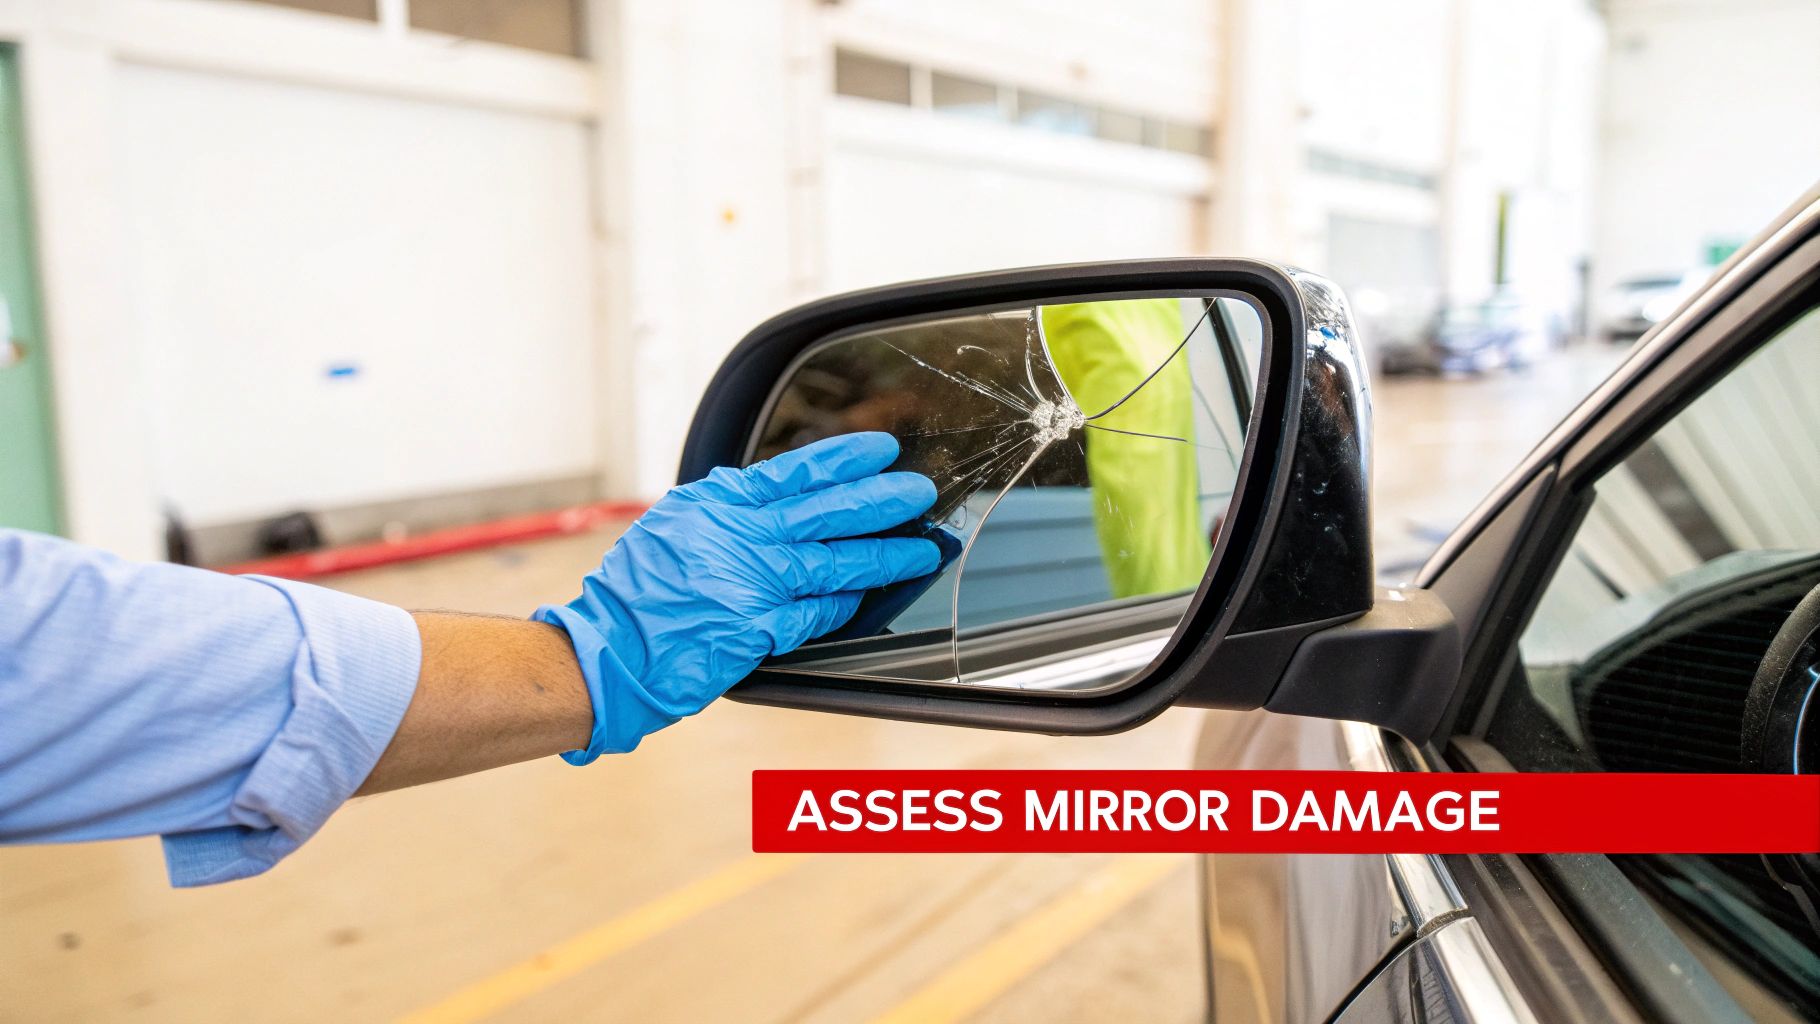
Assessing Automotive Mirror Damage
With modern cars, diagnosing a side or rearview mirror takes a bit more detective work. You have to look beyond the glass.
Here's what to check:
- Look at the Housing: Is the outer plastic shell cracked, deeply gouged, or broken? If the housing is compromised, slapping new glass in it is like putting a band-aid on a broken bone. It's not a real fix.
- Test the Controls: If you have a powered mirror, run it through its paces—up, down, left, and right. If it’s unresponsive, jerky, or makes grinding noises, the internal motor is likely shot. That means you need a whole new assembly.
- Check the Heat: On a chilly or foggy morning, hit your rear defroster (this usually turns on the heated mirrors). If the good mirror clears up but the damaged one stays foggy, its heating element is dead.
- Watch for Warning Lights: For mirrors equipped with blind-spot monitoring or other sensors, look for any related warning lights on your dash. A faulty sensor often can't be replaced on its own, forcing you to replace the entire unit and get it recalibrated.
If you run through these checks and realize the problem is bigger than just the glass, our guide on https://www.t1aauto.com/blogs/t1-auto-blogs/side-mirror-replacement can show you what to do next.
Diagnosing Household Mirror Issues
Things are usually simpler with household mirrors. Here, the main concern is the frame's integrity and how securely it's mounted. If a big bathroom mirror has a crack but is still solidly on the wall, a glass-only replacement is the perfect solution.
But what if the mirror just looks... off? Sometimes, moisture gets behind the glass and attacks the silver backing, causing a foggy look or black spots. This is called "desilvering." Before you give up, see if the issue is just stubborn water spots. You can try some effective methods for removing hard water stains from glass. If that doesn’t work and you can see the backing is truly peeling or damaged, it's time for a replacement.
Repair or Replace Deciding Your Mirror's Fate
Not sure which route to take? This quick table should help you decide whether you're looking at a simple glass repair or a full assembly replacement.
| Type of Damage | Recommended Action | Reasoning |
|---|---|---|
| Simple crack or chip in the glass | Replace Glass Only | The structural and functional parts of the mirror are still intact. |
| Cracked or broken mirror housing | Replace Entire Assembly | The housing protects internal components; a broken one compromises the whole unit. |
| Power-adjust motor not working | Replace Entire Assembly | The motor is an integral part of the assembly and is rarely sold or replaced separately. |
| Heated mirror function has failed | Replace Entire Assembly | The heating element is built into the mirror assembly and cannot be repaired. |
| Blind-spot sensors malfunctioning | Replace Entire Assembly | Sensors are highly calibrated and integrated; a full replacement and recalibration are needed. |
| "Desilvering" or black spots | Replace Glass Only | This is a failure of the mirror's reflective backing, not the frame or housing. |
Ultimately, this assessment is the most important step. Taking a few minutes to diagnose the problem correctly ensures you buy the right parts and get your mirror back to working—and looking—as it should.
Key Takeaway: The goal of your initial check is simple. If the problem is only the glass, just replace the glass. If the frame, housing, motor, or any built-in tech is busted, you have to replace the entire assembly to guarantee safety and proper function.
Gathering Your Tools and Sourcing the Right Glass
Before you even think about popping off that old mirror, let's talk about getting prepped. Trust me, showing up to the job unprepared is the fastest way to turn a 30-minute fix into an afternoon-long headache. Getting your gear in order now is the key to a smooth, safe, and successful installation.
The tools you’ll need can shift a bit depending on whether you're working on your car or a mirror at home, but the safety equipment is absolutely non-negotiable.
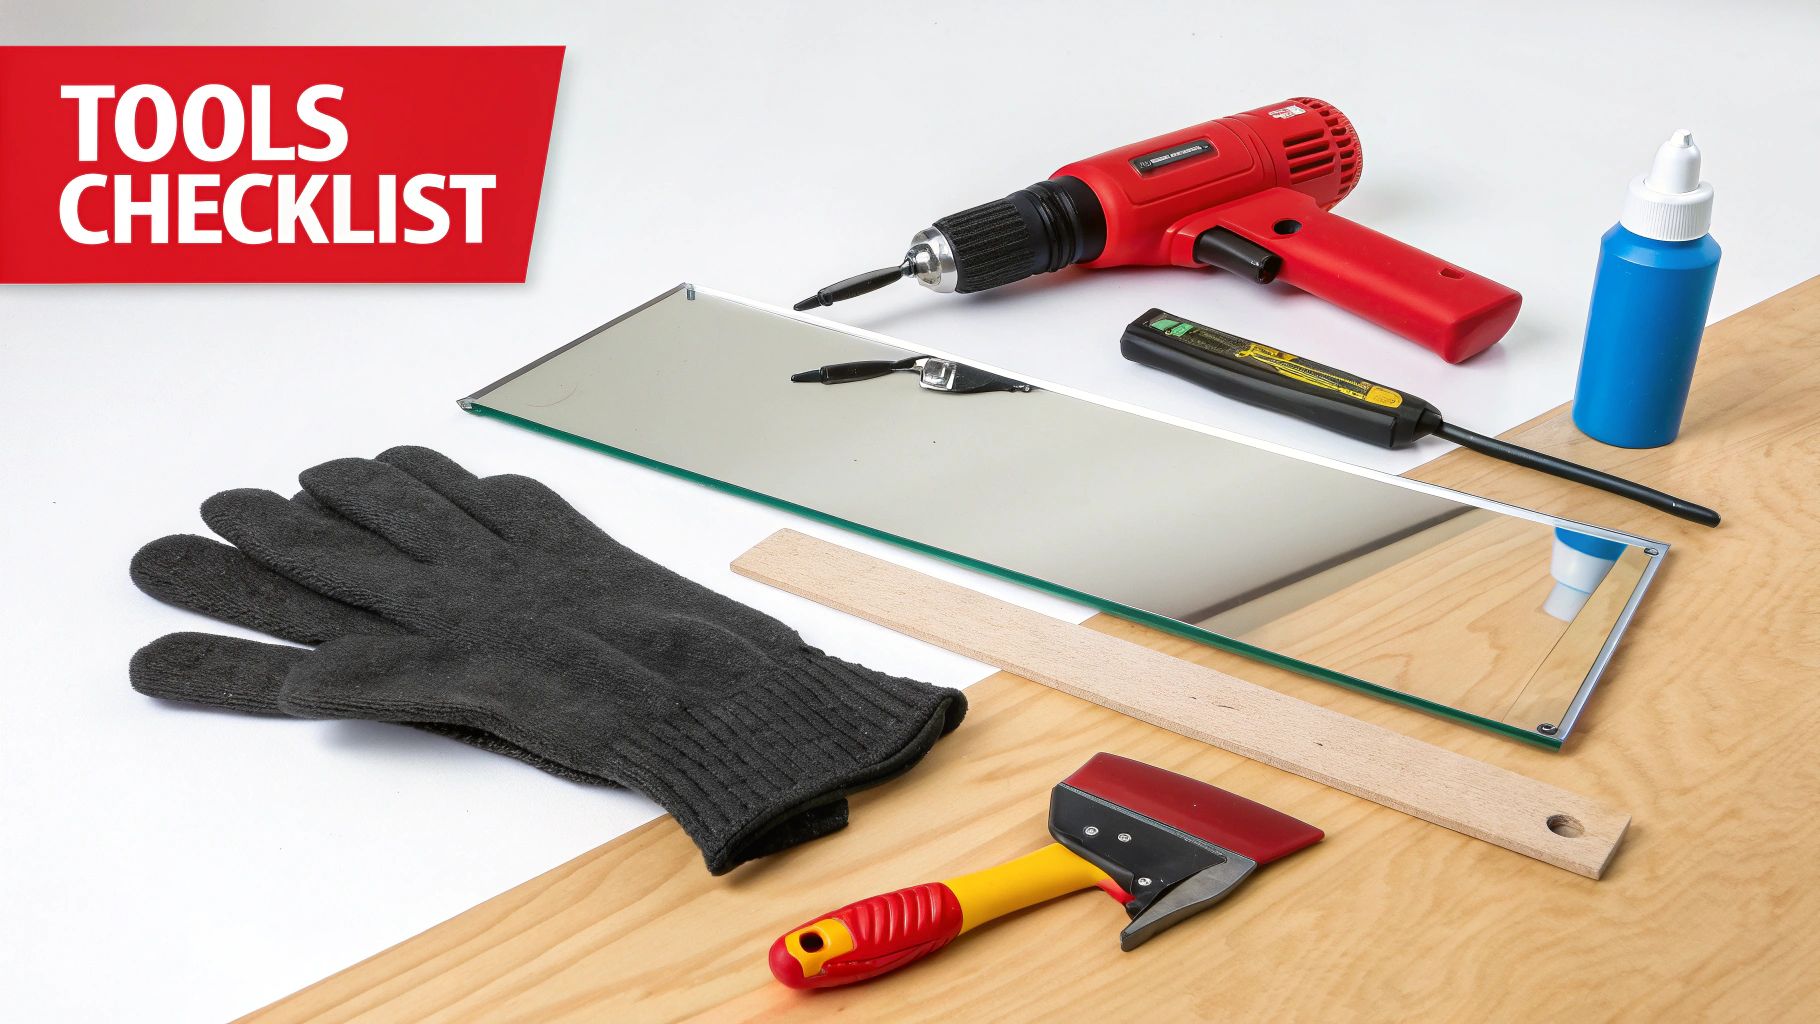
Your Essential Toolkit
Let's start with safety, because broken glass is no joke. Once you’re protected, the rest of the tools are pretty straightforward.
Safety First—Always:
- Safety Glasses: This is mandatory, not optional. Tiny glass shards can fly when you least expect them.
- Thick Work Gloves: A good pair of cut-resistant gloves is your best defense against nasty cuts when handling broken pieces.
Core Tools for the Job:
- Plastic Pry Tools: If you’re working on a car, these are a must-have. They let you get behind the mirror without scratching your paint or cracking the plastic housing.
- Heat Gun or Hair Dryer: This is your secret weapon. A little heat goes a long way in softening the old adhesive, making the glass much easier to remove.
- Adhesive Remover: Have a citrus-based remover handy to tackle any stubborn, sticky residue left behind.
- Cleaning Supplies: You’ll want some isopropyl alcohol and a few clean microfiber cloths to get the surface perfectly prepped for the new glass.
A rookie mistake I see all the time is someone using a metal screwdriver to pry off the old glass. It almost always ends in scratching the housing or, even worse, cracking it. A cheap set of plastic pry tools is a seriously smart investment.
Finding the Perfect Automotive Replacement Glass
Getting the right piece of glass for your car is critical, especially with all the tech packed into modern mirrors. The wrong part might not fit, its features won't work, or both.
This is where your car’s Vehicle Identification Number (VIN) becomes your best friend. The VIN holds the key to all the factory-installed options on your specific vehicle. Any reputable supplier can use it to pinpoint the exact mirror you need, ensuring it has the correct features like:
- Heating elements for those frosty mornings.
- Auto-dimming technology to cut down on glare from behind.
- Blind-spot indicators that flash to keep you safe.
You'll also face the choice between OEM (Original Equipment Manufacturer) and aftermarket parts. OEM guarantees a perfect factory match, but high-quality aftermarket glass can save you a good chunk of money without sacrificing performance. To make a smart choice, it helps to review the differences: https://www.t1aauto.com/blogs/t1-auto-blogs/oem-vs-aftermarket-parts
Sourcing Glass for Household Projects
For mirrors inside your home, the game is less about electronics and all about getting the measurements spot-on. Grab your tape measure and pay close attention.
Measure Twice, Cut Once:
- Carefully measure the height and width of the spot where the mirror will hang.
- If you're dealing with a custom shape, making a cardboard template is a foolproof method to guarantee the new glass will fit perfectly.
- Think about the glass thickness. For a standard bathroom vanity, 1/4 inch (6mm) is a good, sturdy choice.
You can get custom-cut mirror glass from local glass shops or find it through online specialists. It doesn't hurt to know a little about glass itself, either. For example, having a basic understanding safety and strength features of different glass types can help you ask the right questions, especially for mirrors in busy areas where safety is a top priority.
For a kid’s room or home gym, you might want to consider an acrylic (plexiglass) mirror. They're shatter-resistant and much lighter than glass, making them safer and easier to install, though the reflection isn't quite as sharp.
With your tools ready and the right glass on the way, you're all set to tackle the removal.
A Practical Guide to Replacing Your Car’s Mirror Glass
Replacing the glass in your car's side mirror is one of those jobs that looks way more complicated than it actually is. I get it—the thought of prying glass off and messing with wires can be daunting. But honestly, whether you've got a basic manual mirror or a fancy heated one with all the bells and whistles, the core job is something you can definitely handle.
We’re going to walk through this step-by-step, starting with the trickiest part: getting the broken glass out without making things worse. The key here is patience, not speed. If you rush it, you could easily damage the mirror housing or the little motor inside, turning a simple fix into a much bigger headache.
Getting the Old Mirror Glass Out Safely
First things first, you have to remove the old, broken glass. The real challenge isn't the glass itself, but the super-strong adhesive holding it to the backing plate. This is where a heat gun (or even a hairdryer on high) is your best friend.
Gently warm up the surface of the mirror, keeping the heat source moving so you don’t concentrate it on one spot and risk warping the plastic housing. After a minute or two of this, you’ll feel the adhesive start to soften up.
Now, grab a plastic pry tool and carefully slide it into the gap between the glass and the housing. Work it around the edges, gently prying as you go. You'll feel the adhesive slowly give way. If you hit a tough spot, don't force it—that’s how you snap the mounting clips. Just give it a little more heat and try again.
My Go-To Trick: If the glass is shattered into a million pieces, cover the whole thing with a layer of packing tape before you start heating and prying. This keeps all those tiny, sharp shards together and prevents them from flying everywhere when the glass finally pops off. It’s a simple step that makes the whole process much safer and cleaner.
Once the glass is loose, you might find some wires attached. Don't pull! We'll deal with those next.
What to Do with Different Mirror Types and Their Connections
This is where you need to pay attention, because what’s behind the glass depends entirely on your car’s features. Not all mirrors are built the same.
Here’s a quick rundown of what you’ll likely find:
- Manual & Basic Power Mirrors: These are the simplest. The glass is just stuck to a backing plate that snaps onto the motor. No wires, no fuss.
- Heated Mirrors: You’ll see a couple of small electrical tabs on the back of the mirror with wires connected to them. These are for the heating grid. They usually just pull straight off—you can use your fingers or a pair of needle-nose pliers to gently slide the spade connectors off the tabs.
- Mirrors with Blind-Spot Sensors: Along with heating wires, you might see a small connector for the blind-spot warning light. These typically have a tiny release clip you need to press before you can gently pull the plug apart.
Before you disconnect anything, I highly recommend snapping a quick photo with your phone. It’s the perfect reference to make sure you put everything back exactly where it belongs.
Putting Your New Mirror Glass In
Alright, old glass is out, and you know what you’re working with. The finish line is in sight. Before you grab the new mirror, take a moment to prep the surface. Use some isopropyl alcohol to thoroughly clean any old adhesive gunk off the backing plate. A perfectly clean surface is crucial for the new adhesive to get a solid, long-lasting grip.
It's pretty wild how common this repair is. The automotive mirror industry is huge, projected to hit USD 5.595 billion by 2025. Think about this: in the US, road debris alone is responsible for about 10 million mirror replacements every single year. Pro shops sometimes use special UV adhesives that cure in sunlight, but the high-quality adhesive pads that come with most DIY kits work great. You can actually dig into some of these numbers in the latest mirror market reports.
Most replacement glass you buy will come with adhesive pads already on the back. Just peel off the protective film. If you disconnected any wires, now’s the time to reconnect them.
Hooking Everything Back Up:
- For heated mirrors, just slide the spade connectors back onto the tabs on the new mirror.
- If you have a blind-spot monitor, plug the connector back in. You should feel a little click as it locks into place.
With the wires connected, you're ready to seat the new mirror. Carefully line up the backing plate with the motor mount inside the housing. Apply gentle, even pressure right in the center of the mirror. You’re listening for a solid "click" or "snap"—that’s the sound of the retaining clips engaging and locking the mirror in place. Once it's snapped in, press firmly around the outer edges to make sure the adhesive makes full contact.
Don’t pack up your tools just yet. Hop in the driver's seat and test everything. Use the controls to move the mirror up, down, left, and right. If it’s heated, turn on your rear defroster and check if the glass gets warm to the touch. And if you have blind-spot sensors, make sure the warning light functions. This quick final check confirms the job is done right and you're good to go.
Handling Interior and Household Mirror Replacements
When you bring the job indoors, the basic idea of replacing mirror glass is the same, but the game completely changes. We're going to walk through two of the most common jobs you'll run into: swapping your car's interior rearview mirror and dealing with household mirrors, like that big one in your bathroom or on a closet door. Each has its own quirks.
Your car’s interior rearview mirror looks simple enough, but these days they often hide sensitive electronics for things like auto-dimming. On the other hand, a large household mirror might be held on with a few simple clips or, much more intimidating, a whole lot of industrial-strength glue. Knowing how to approach each one is the key to getting a clean, professional result without any headaches.
Swapping Your Car's Interior Rearview Mirror
Unlike your side mirrors where you can often pop just the glass out, the interior rearview mirror is almost always replaced as a single, complete unit. The glass is built right into the housing, so a glass-only swap just isn't in the cards. It's usually a pretty quick job, but the wiring for features like auto-dimming or a built-in garage door opener adds an extra step.
For a Standard, No-Frills Mirror:
These are the easiest of the bunch. The mirror is attached to a metal mounting button on the windshield with a single set screw—you'll likely need a Torx or Allen wrench for this. Just loosen that screw, and the whole mirror assembly will slide right up and off the button. Slide the new one on, tighten the screw back down, and you're good to go.
For Auto-Dimming and Other Advanced Mirrors:
With these, you'll see a wire running from the mirror up into the headliner. Here’s the process:
- Disconnect the power. Start by gently prying off the small plastic housing where the mirror mount meets the headliner. Inside, you'll find a small electrical connector. There’s a little release tab on it—press that and carefully unplug it.
- Remove the mirror. Now it's just like the standard version. Loosen the set screw on the mount, and the mirror will slide off the button.
- Install the new mirror. Slide the new unit onto the windshield button and tighten the screw until it feels snug. Be careful not to overtighten. Then, plug the electrical connector back in until you hear it click, and snap the plastic cover back on.
This quick visual breaks down the core actions for most modern automotive mirror jobs.
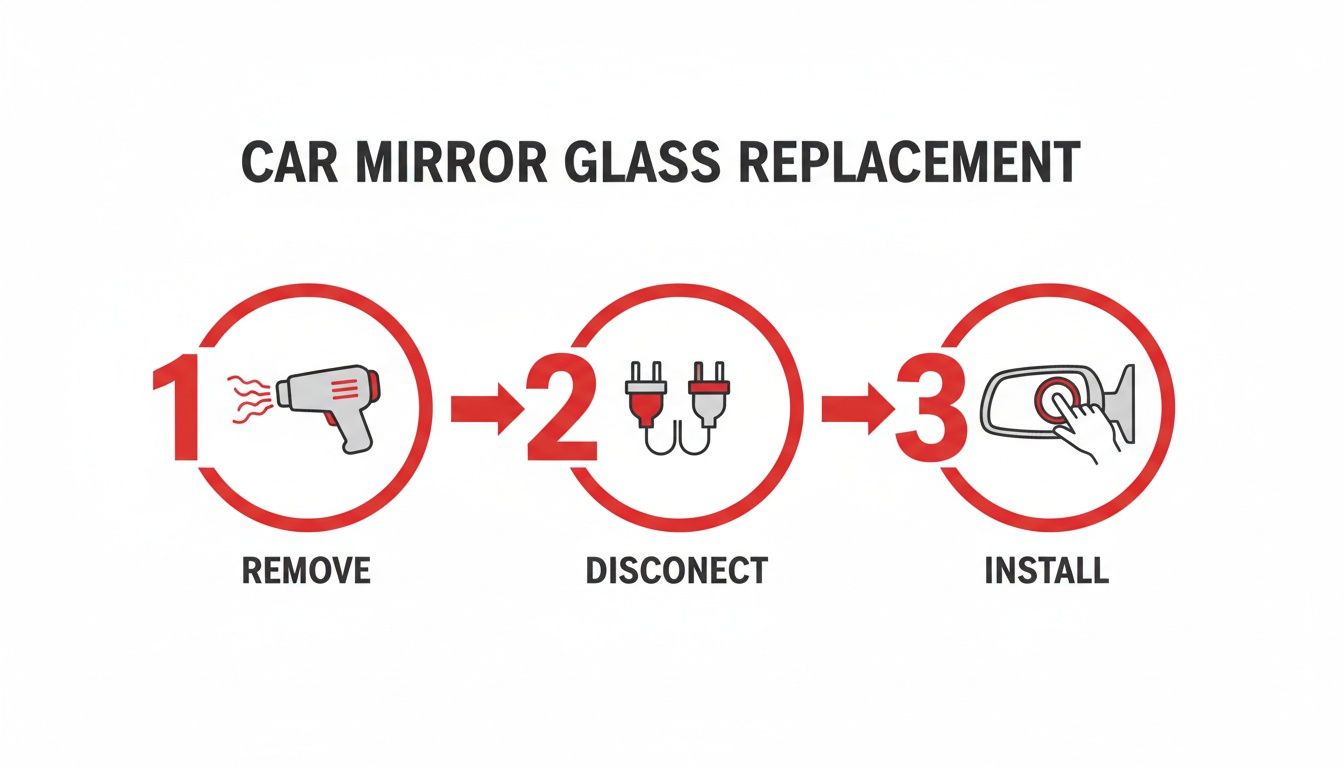
While this graphic is geared toward exterior glass, the fundamental steps—remove, disconnect, install—are pretty much universal for any modern vehicle mirror.
Managing Household Mirror Replacements
When you’re figuring out how to replace mirror glass inside your home, you're almost always dealing with one of two mounting methods: clips or adhesive. Each demands a completely different removal strategy.
Removing a Mirror Held by Clips
This is the easier scenario, thankfully. The mirror is held in place by small plastic or metal clips that are screwed into the wall. You'll just need a screwdriver.
Some setups use spring-loaded clips on the top edge, which means you can push the mirror up slightly to clear the bottom clips. For others, you just unscrew one of the top clips, carefully tilt the mirror forward, and lift it out of the remaining brackets.
Pro Tip: Grab a helper. Large mirrors are surprisingly heavy and incredibly awkward to handle alone. One person can support the weight while the other works on the clips. Trust me, it drastically reduces the risk of dropping and shattering the glass all over the floor.
Tackling a Glued-On Mirror
This is the big one—the job that requires a good dose of patience. When a mirror is glued directly to the drywall, you can't just yank it off. If you do, you're pretty much guaranteed to take a huge chunk of your wall with it.
The best way to handle this is with heat and a cutting tool. Use a heat gun to gently warm the surface of the mirror, which will soften the mastic adhesive behind it. Then, slide a long, thin tool like piano wire or a flexible drywall knife behind the mirror and use a slow, sawing motion to cut through the softened glue. Work your way down from the top, section by section. It’s tedious, but it’s the only way to save your wall from major damage.
Installing Your New Household Mirror
Once the old mirror is down, proper prep is everything. You'll need to scrape and sand the wall to get rid of any old adhesive, patch any dings with spackle, and then give the area a fresh coat of primer. A smooth, primed surface ensures the new mirror will sit flat and that the new adhesive will get a good, solid bond.
The quality of the mirror's backing is also a big deal. It's interesting to note that the Asia Pacific region currently dominates the mirror coatings market, holding a revenue share of 38.6% in 2024. The epoxy-backed coatings common there are designed for serious durability, especially in humid places—a great lesson for anyone installing a bathroom mirror. A mirror's silvering can start to degrade after about 10-15 years, but choosing a replacement with a superior modern coating can extend its life by as much as 40%. You can dig into more data on how coatings impact longevity in this market analysis from Fact.MR.
Adhesive vs. Clips: Which Mounting Method Is Best?
When installing a new household mirror, you're typically choosing between adhesive for a sleek, hardware-free look or clips for flexibility and easier removal down the line. Each has its place, and this table breaks down the pros and cons to help you decide.
| Mounting Method | Best For | Pros | Cons |
|---|---|---|---|
| Adhesive | Permanent installations; a clean, "floating" look. | - Seamless, hardware-free appearance - Evenly distributes weight |
- Very difficult to remove - Can damage the wall upon removal |
| Clips | Renters; areas where you might redecorate often. | - Easy to install and remove - No damage to the wall - Allows for repositioning |
- Visible hardware can detract from the look - Risk of clips loosening over time |
Ultimately, adhesive is great for a "forever" mirror, while clips offer practicality and are far more forgiving if you ever change your mind.
When you're ready to install, use a specialized mirror mastic. Apply it to the back of the new glass in vertical, S-shaped beads about 5-6 inches apart. Never apply it in closed circles, as this can trap moisture and cause the silver backing to fail over time. With your helper, carefully press the mirror onto the wall, using a level to get it perfectly straight. Use painter's tape or temporary wood braces to hold it securely for at least 24 hours while the mastic cures completely.
Final Checks and Troubleshooting Common Issues
You’ve installed the new glass and the hard part seems over—but don’t put your tools away just yet. This last phase is all about quality control. Taking a few extra minutes now to make sure everything is working perfectly will save you a ton of headaches down the road.
Think of it as the final 10% of the job that gives you 90% of the peace of mind. Trust me, you don’t want to discover your mirror heater is dead during the first frost of the season or find a nasty vibration at highway speeds.
Testing and Calibrating Your New Mirror
After any car mirror replacement, a full functional check is non-negotiable. Today's mirrors are loaded with tech, and you have to confirm that every feature is talking to the car correctly after the swap.
Get in the driver's seat and run through a quick but thorough checklist:
- Power Adjustment: Grab the joystick and move the mirror through its entire range—up, down, left, and right. You're listening for smooth, quiet operation. Any grinding or hesitation is a red flag.
- Heater Function: Flip on your rear defroster, which usually powers the mirror heaters too. Wait a minute or two, then carefully touch the glass. It should feel noticeably warm.
- Sensors and Indicators: If the mirror has a blind-spot monitor, start the car. Have a friend or family member safely walk into the vehicle's blind spot to trigger the warning light. Make sure it illuminates as it should.
What if nothing happens when you try to adjust it? The problem might go deeper than the mirror itself. Our guide on what to do when your power mirror is not working can help you hunt down the culprit, whether it's a simple fuse or a bad switch.
Expert Tip: Never skip the test drive. A mirror can seem rock-solid in the driveway but reveal a subtle wobble or whistle at 60 mph. A quick spin around the block is the best way to confirm the glass is fully seated and secure.
Common Problems and Simple Fixes
Even when you do everything right, little issues can pop up. The good news is that most of them are an easy fix if you catch them early.
The most common complaint is a wobbly mirror. Nine times out of ten, this just means the backing plate isn't fully snapped into the motor assembly. Don't be shy—give the center of the mirror another firm, even press with the palm of your hand. You should hear a solid click as the clips lock in.
If the heating element isn't working, the cause is usually a loose connection. You’ll have to carefully pry the glass off again, but once you do, check that the spade connectors are pushed all the way onto the terminals on the back of the glass.
Final Touches for Household Mirrors
For an indoor mirror, the final checks are all about looks and safety.
First, step back and eye it from across the room. Grab your level and check it one last time to make sure it’s hanging perfectly straight. Then, get up close and inspect the edges for any adhesive "squeeze-out." You can carefully slice away any cured excess with a plastic scraper or a razor blade held at a flat angle. A dab of mineral spirits on a rag will clean up any sticky residue.
Finally, give the mirror a gentle push on its corners and in the center. It should feel completely solid against the wall, with no wiggle or flex. This simple check ensures your new mirror is mounted safely for good.
Frequently Asked Questions About Mirror Glass Replacement
Even with the best instructions, you're bound to have a few questions when you start a mirror replacement project. Getting these common hang-ups sorted out beforehand can save you a ton of frustration and help you avoid the little mistakes that can derail the whole job.
Let's walk through some of the most common questions that pop up when you're ready to swap out that broken mirror glass.
Can I Just Use Any Old Glue to Stick the New Mirror On?
Definitely not. If there's one thing you need to get absolutely right, it's the adhesive. Using the wrong stuff is probably the most common—and most damaging—mistake you can make.
For your car's side mirrors, you must use a specialized automotive mirror adhesive. This isn't just regular super glue; it's formulated to handle constant vibration, wild temperature swings, and moisture. The good news is that most replacement mirror glass kits, like the ones we offer, already include the correct adhesive patches.
Now, if you're working on a household mirror, say in a bathroom, you'll want to grab a tube of high-quality mirror mastic. This type of glue is designed to be chemically neutral so it won't attack the sensitive silver backing of the mirror over time.
Heads Up: Stay away from standard construction adhesives or all-purpose silicones. Many of them contain harsh solvents that will literally eat through the mirror's reflective layer from the back. You'll end up with ugly black spots or what's known as "desilvering." Always double-check the label to make sure the product is explicitly marked as "safe for mirrors."
How Do I Hook Up a Heated Side Mirror?
This is way simpler than it sounds. When you look at the back of a heated mirror, you'll see two small metal tabs or prongs. Your car will have two corresponding wires waiting, usually with simple spade connectors on the ends.
It's a pretty straightforward hook-up:
- Before you press the new glass into its housing, just gently slide those spade connectors onto the metal tabs.
- Don't worry about getting them mixed up. On most vehicles, these connections aren't polarized, so it doesn't matter which wire goes on which tab.
- Just be gentle here—the tabs can be a little delicate.
Once they're connected, you can snap the mirror into place. The easiest way to test your work is to turn on your vehicle's rear defroster, which almost always powers the heated side mirrors at the same time.
Is It Cheaper to Replace Just the Glass or the Whole Mirror?
Nine times out of ten, it's way cheaper to replace just the glass. A piece of replacement mirror glass can run you anywhere from $20 to $100, depending on whether it's heated or has auto-dimming features. For a simple crack, it’s an incredibly budget-friendly fix.
On the other hand, a complete mirror assembly—the whole unit with the painted housing, the internal motor for adjustments, and all the wiring—can easily cost several hundred dollars, especially if you're buying an original part from the dealership.
So, if the mirror's housing is fine and the power adjustment features still work perfectly, sticking with a glass-only replacement is your best bet financially. But if the housing itself is smashed or the motor is shot, you’ll have to bite the bullet and replace the entire unit to get everything working safely again.
When you need reliable, high-quality replacement parts for your vehicle, T1A Auto has you covered. Find the exact-fit side mirror glass or complete assembly you need, backed by our durability guarantee.