


A cracked side mirror is more than just a cosmetic eyesore; it's a genuine safety hazard that messes with your ability to see what's happening around you on the road. A prompt side mirror replacement isn't just about making your car look good again. It’s about keeping your full awareness, making sure your safety features are actually working, and staying on the right side of the law.
Don't Ignore That Broken Mirror
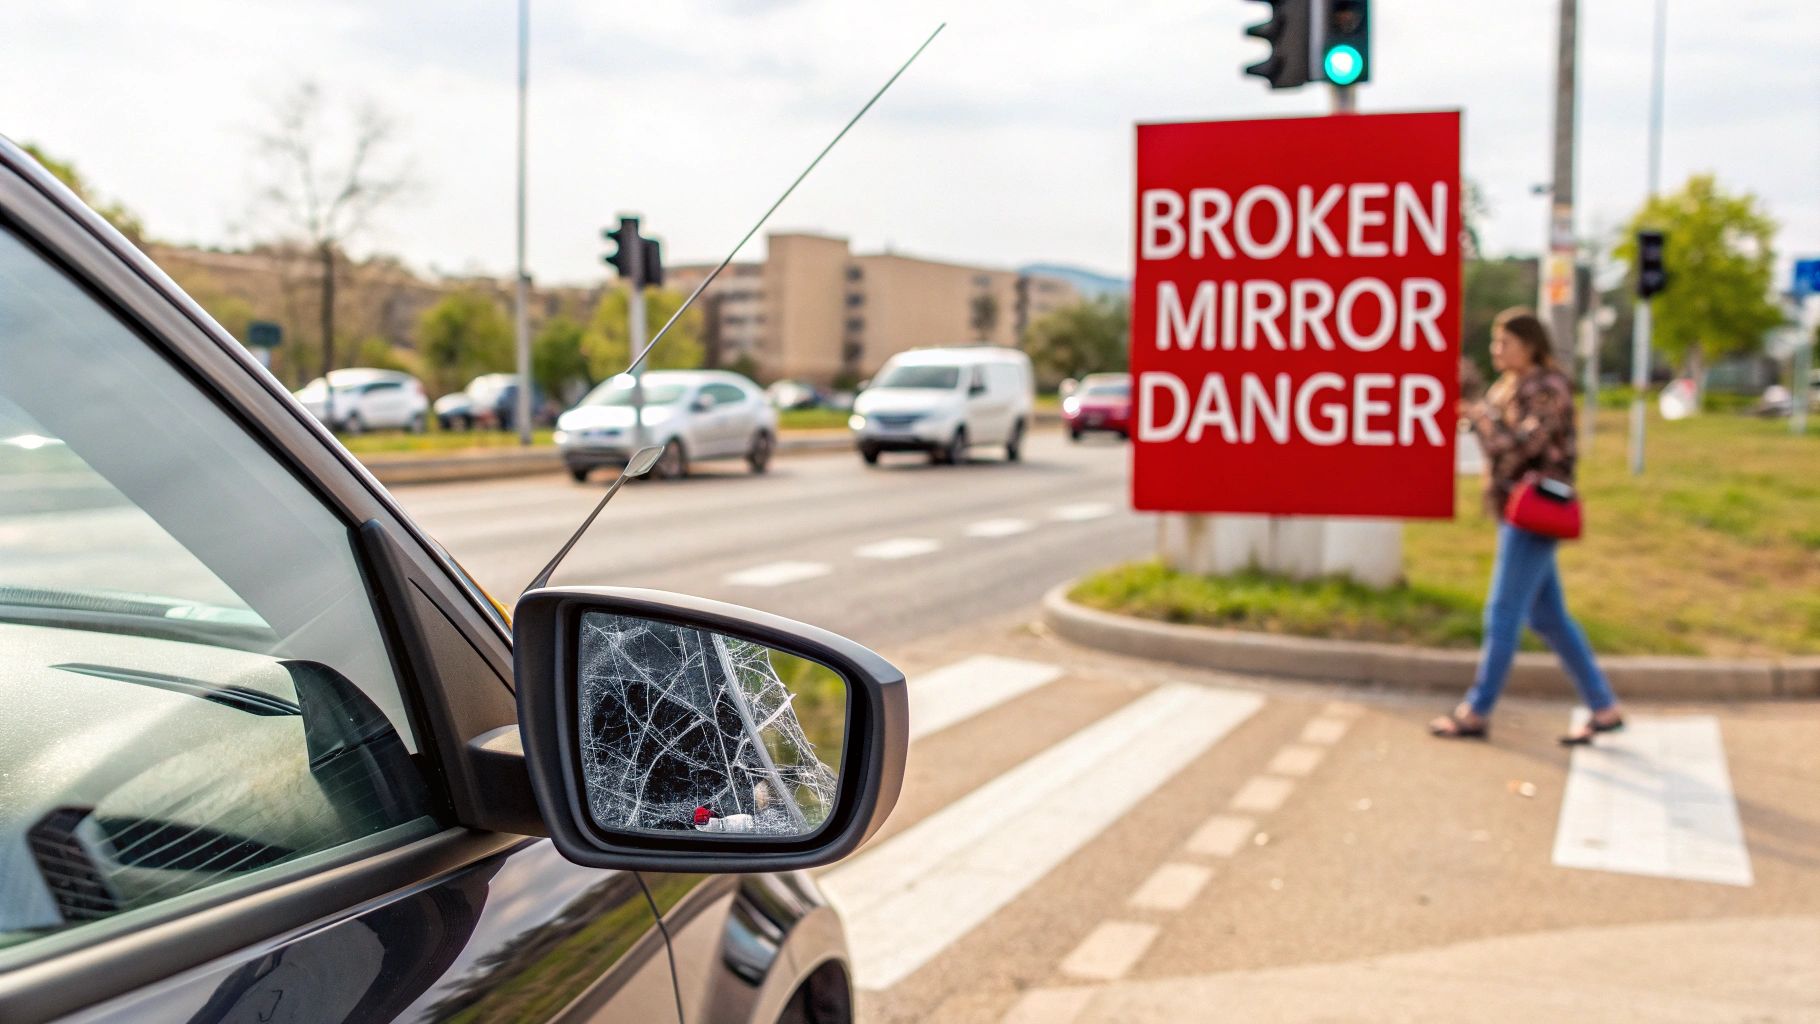
It’s tempting to shrug off a damaged side mirror as something you’ll get to later, but that’s a risky move. Your mirrors are absolutely critical for checking blind spots, changing lanes safely, and backing up without hitting something or someone. When one is shattered or gone, your field of view shrinks, and that’s a dangerous blind spot to have.
Think about it: you're trying to merge onto a busy highway. You glance over, but the cracked mirror gives you a fractured, confusing picture of the traffic coming up behind you. That split-second of uncertainty is all it takes to cause a serious accident.
It's More Than Just Broken Glass
The damage often goes much deeper than the reflective surface. Today's side mirrors are packed with technology that’s tied directly into your car's safety systems. A single impact can create a ripple effect of problems you might not even notice at first.
- Blind-Spot Sensors Can Fail: These sensors, which are lifesavers on modern cars, are typically tucked inside the mirror housing. A good whack can knock them out of commission, meaning you'll get false alarms or, even worse, no warning at all when a car is hiding in your blind spot.
- Turn Signal Indicators Go Dark: Many mirrors have those handy built-in LED turn signals. If they're broken, other drivers have no idea you're about to turn or change lanes, dramatically increasing the risk of a collision.
- Heating Elements Stop Working: That defrosting feature is essential for clear vision in icy or rainy weather. If the wiring is damaged, you'll be left with an obscured mirror right when you need it most.
- Power-Folding Motors Die: If you use power-folding mirrors to squeeze into tight parking spots, damage to that little motor can leave you stuck—literally.
A broken side mirror isn't just a cosmetic flaw; it's a functional failure of a key safety system. Addressing it promptly is a non-negotiable part of responsible vehicle ownership.
The Legal and Financial Headaches
Putting off the repair can also get you into hot water. In most places, having a functional driver-side mirror isn't optional—it's the law. Driving without one could earn you a traffic ticket and a fine.
A busted mirror is also a common reason to fail a state vehicle inspection, forcing you to get it fixed anyway. It’s no surprise that the global market for these advanced mirrors was valued at US$8.7 billion in 2022; they're becoming more complex and vital every year. You can learn more about the growing vehicle side mirror market trends to see just how important these components are.
A quick side mirror replacement saves you from all these potential problems and lets you get back on the road with confidence.
Getting the Right Tools and Replacement Mirror
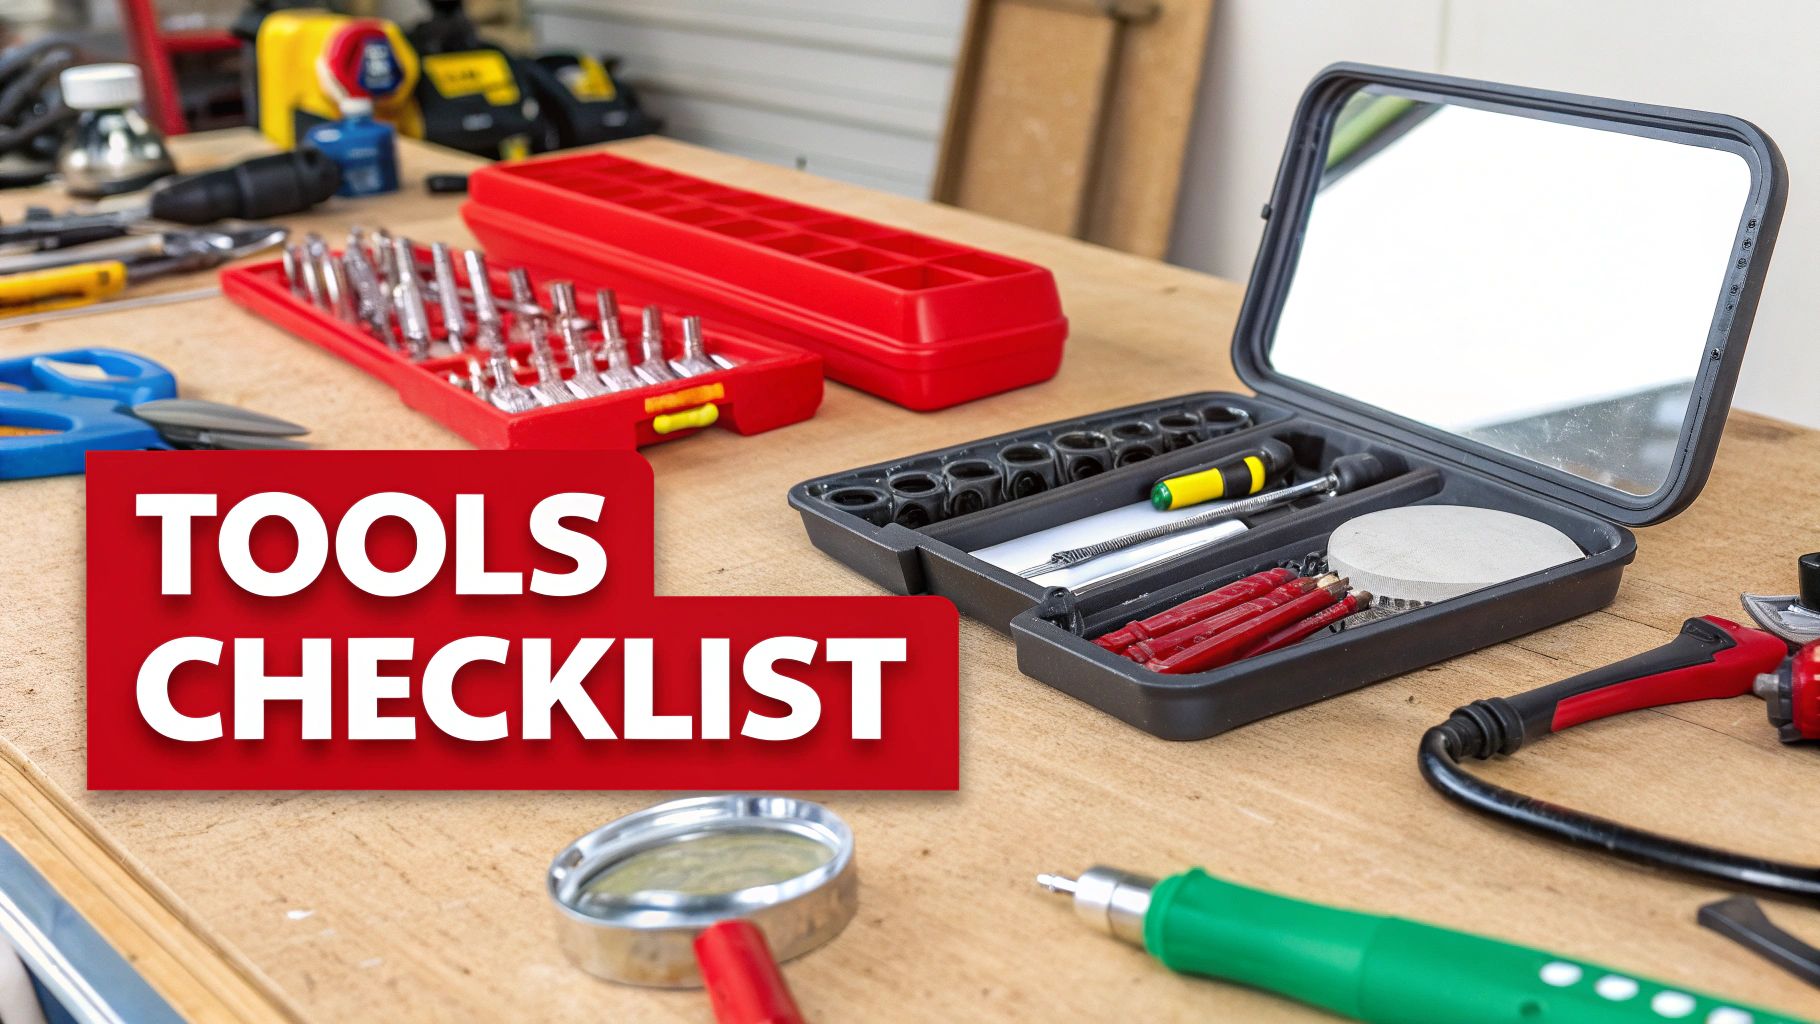
Before you even think about touching the car, let's talk about getting your supplies in order. This is the single most important step. Trust me, trying to rush this job without the right gear is the fastest way to turn a 30-minute fix into a weekend-long headache full of scratched paint and snapped plastic clips.
You don't need to roll out a professional mechanic's chest, but there are a few essentials you absolutely need for a clean, damage-free swap. Having everything within arm's reach means you can get in the zone and not have to stop mid-job for a run to the auto parts store.
Assembling Your Toolkit
Here’s what I recommend having on hand. Some of these are universal, but things like socket sizes will depend on what you drive.
To make things crystal clear, here's a quick rundown of your must-have tools. Having these laid out and ready will make the whole process go much smoother.
Essential Toolkit for Side Mirror Replacement
| Tool | Purpose | Pro Tip |
|---|---|---|
| Socket Wrench Set | Removing the mounting bolts that secure the mirror to the door. | Most cars use 10mm or 12mm bolts, but always double-check your specific model first. |
| Plastic Pry Tools | Safely removing interior door panels and trim without scratching paint or breaking clips. | Don't even think about using a flathead screwdriver here. A cheap set of these is worth its weight in gold. |
| Screwdriver Set | Tackling any small Phillips or flathead screws, especially on the interior door panel. | A multi-bit driver is perfect for this, so you have all the common sizes in one tool. |
| Painter's Tape | Protecting the paint around your work area from accidental slips and scratches. | This is your best insurance policy against a costly paint touch-up. A few strips create a great buffer zone. |
Taking a few minutes to organize these tools is a small step that pays off big time, preventing frustration and potential damage.
Finding the Perfect Replacement Mirror
Now for the main event: the mirror itself. This is where a lot of people mess up. It’s incredibly frustrating to order a part, take everything apart, and then realize your new mirror is missing the heated glass or integrated turn signal your car originally had.
Your car’s Vehicle Identification Number (VIN) is your secret weapon here. The VIN locks in every detail about your car's factory options. When you shop for parts, use your VIN to filter the results and guarantee you get a perfect match for features like:
- Heated Glass
- Power Folding
- Integrated Turn Signals
- Blind Spot Warning Lights
- Puddle Lights
- 360-Degree Camera Systems
You’ll also need to decide between OEM, aftermarket, and used parts. OEM (Original Equipment Manufacturer) parts are a perfect match but are the priciest. Used parts from a junkyard are cheap but can be a gamble. High-quality aftermarket parts, however, often hit that sweet spot of great performance and a much friendlier price tag.
If you're weighing your options, learning about the OEM vs. aftermarket auto parts debate can help you make a smart choice for your budget and your car.
Getting the Old Side Mirror Off
Alright, you've got your tools laid out and the new mirror is waiting. Now for the fun part: the actual side mirror replacement. This might seem like a big job, but if you take it slow and steady, it's totally manageable. Let's start with the single most important safety step before we even think about touching a tool.
Safety first—always. Before you do anything else, disconnect the car's battery. This simple action prevents any nasty surprises, like short-circuiting the electronics when you get to the mirror's wiring. Just find the negative terminal (it usually has a "NEG" or "-" sign), loosen the nut, and slip the cable off. Easy.
Popping Off the Interior Trim
The mirror's mounting bolts and its wiring connector are hiding behind a piece of interior trim. In most cars, you're looking for a small, triangular plastic cover right in the corner where the window meets the door. Sometimes, this piece even has a small tweeter speaker in it. On other models, it might be the upper part of the main door panel itself.
Grab your plastic pry tools—not a screwdriver!—and gently slide one into the seam. Work your way around the edges, applying a bit of steady pressure until you hear the clips pop free. Trust me on this: using a metal screwdriver is a surefire way to gouge the plastic and scratch your door.
This graphic gives you a great visual of the whole removal process.
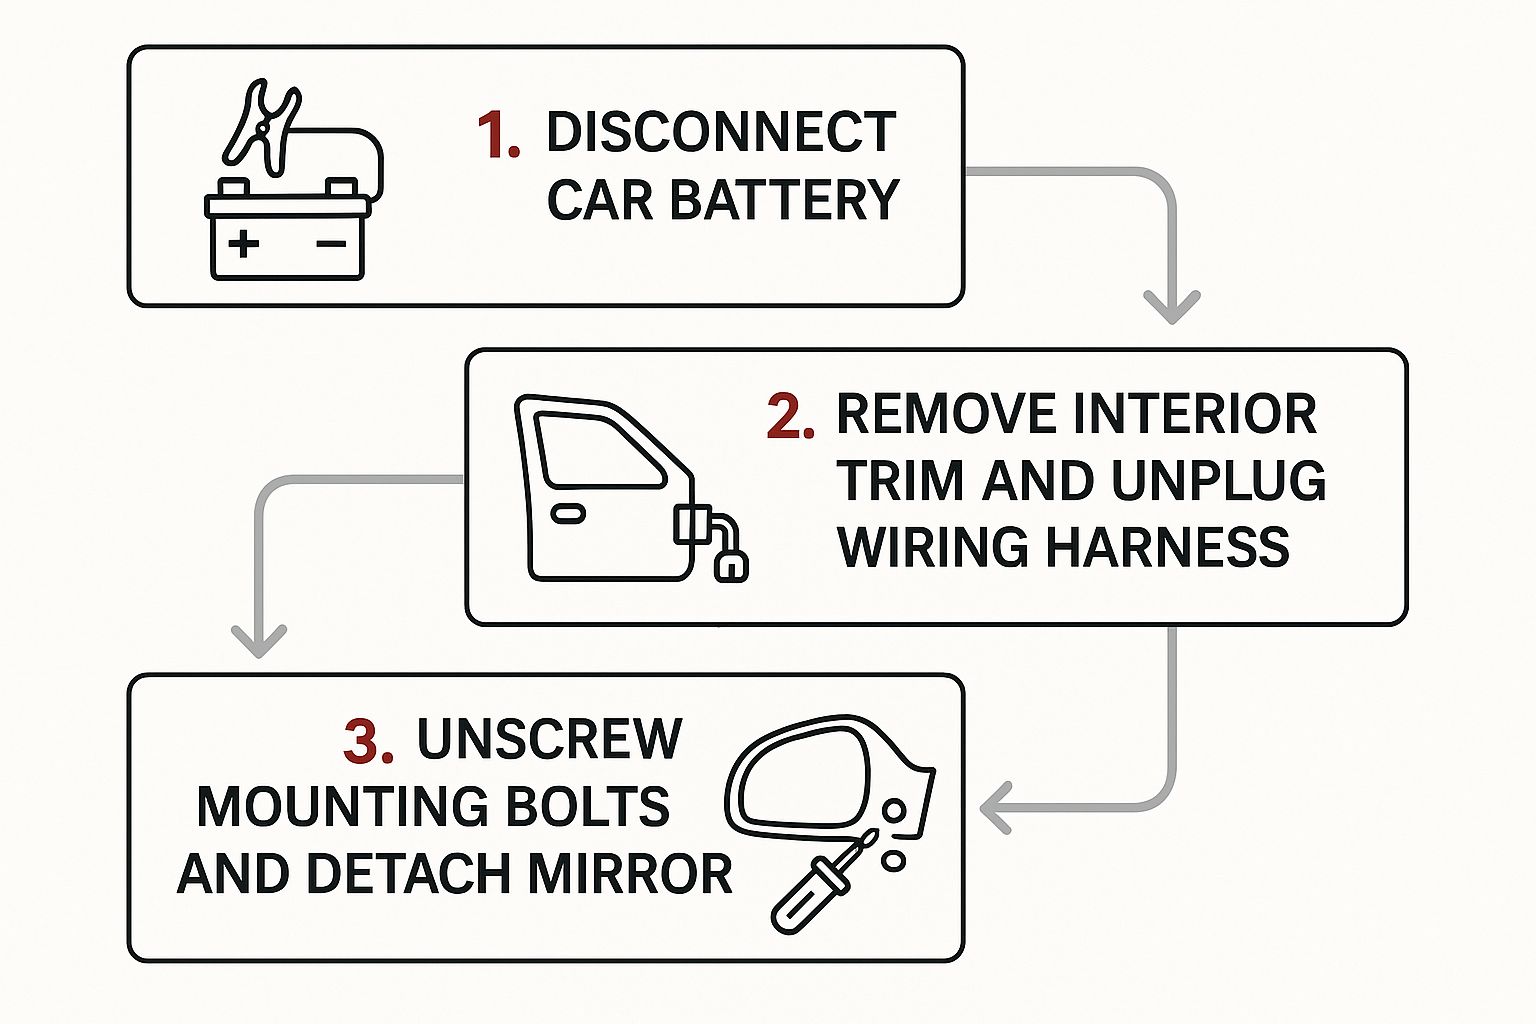
As you can see, following these distinct stages keeps the job clean and prevents any damage.
My Go-To Trick: Before you even start prying, lay a few strips of painter's tape on the door frame right along the edge of the trim piece. It acts as a buffer. If your tool slips, it hits the tape, not your paint.
With the cover off, you'll see the electrical plug for the mirror. There's a little release tab you'll need to press down on, then pull the two halves of the connector apart. They can be a bit stiff from years of being clipped together, so be patient and wiggle it gently. You don't want to snap that plastic tab.
Unbolting the Mirror Assembly
Now that the wiring is free, you can clearly see the bolts holding the mirror assembly to the door. You’ll typically find three of them. Grab your socket wrench—you’ll probably need a 10mm or 12mm socket—and start loosening them. A magnetic parts tray is your best friend here for keeping those bolts from rolling away into another dimension.
Here’s a crucial bit of advice: as you get to the last bolt, use your free hand to support the old mirror from the outside. These assemblies are heavier than they look, and you definitely don't want it to drop and scratch your door paint on its way down.
By the way, if you found that only the glass itself was cracked and the rest of the housing is fine, you might be in luck. You can often just replace the glass, which is a much simpler job. We have a whole guide on replacing just the side view mirror glass if that's the case.
It’s interesting to see how this technology is changing. Traditional mirrors are slowly being replaced by camera-based systems. In fact, the market for these advanced setups is projected to balloon to US$23.63 billion by 2029. This whole shift toward camera-based mirror systems is driven by automakers chasing better aerodynamics and wanting to integrate more driver-assistance features.
Now that the old mirror is off and out of the way, you’re ready for the most satisfying part of the project.
Installing the New Side Mirror Assembly
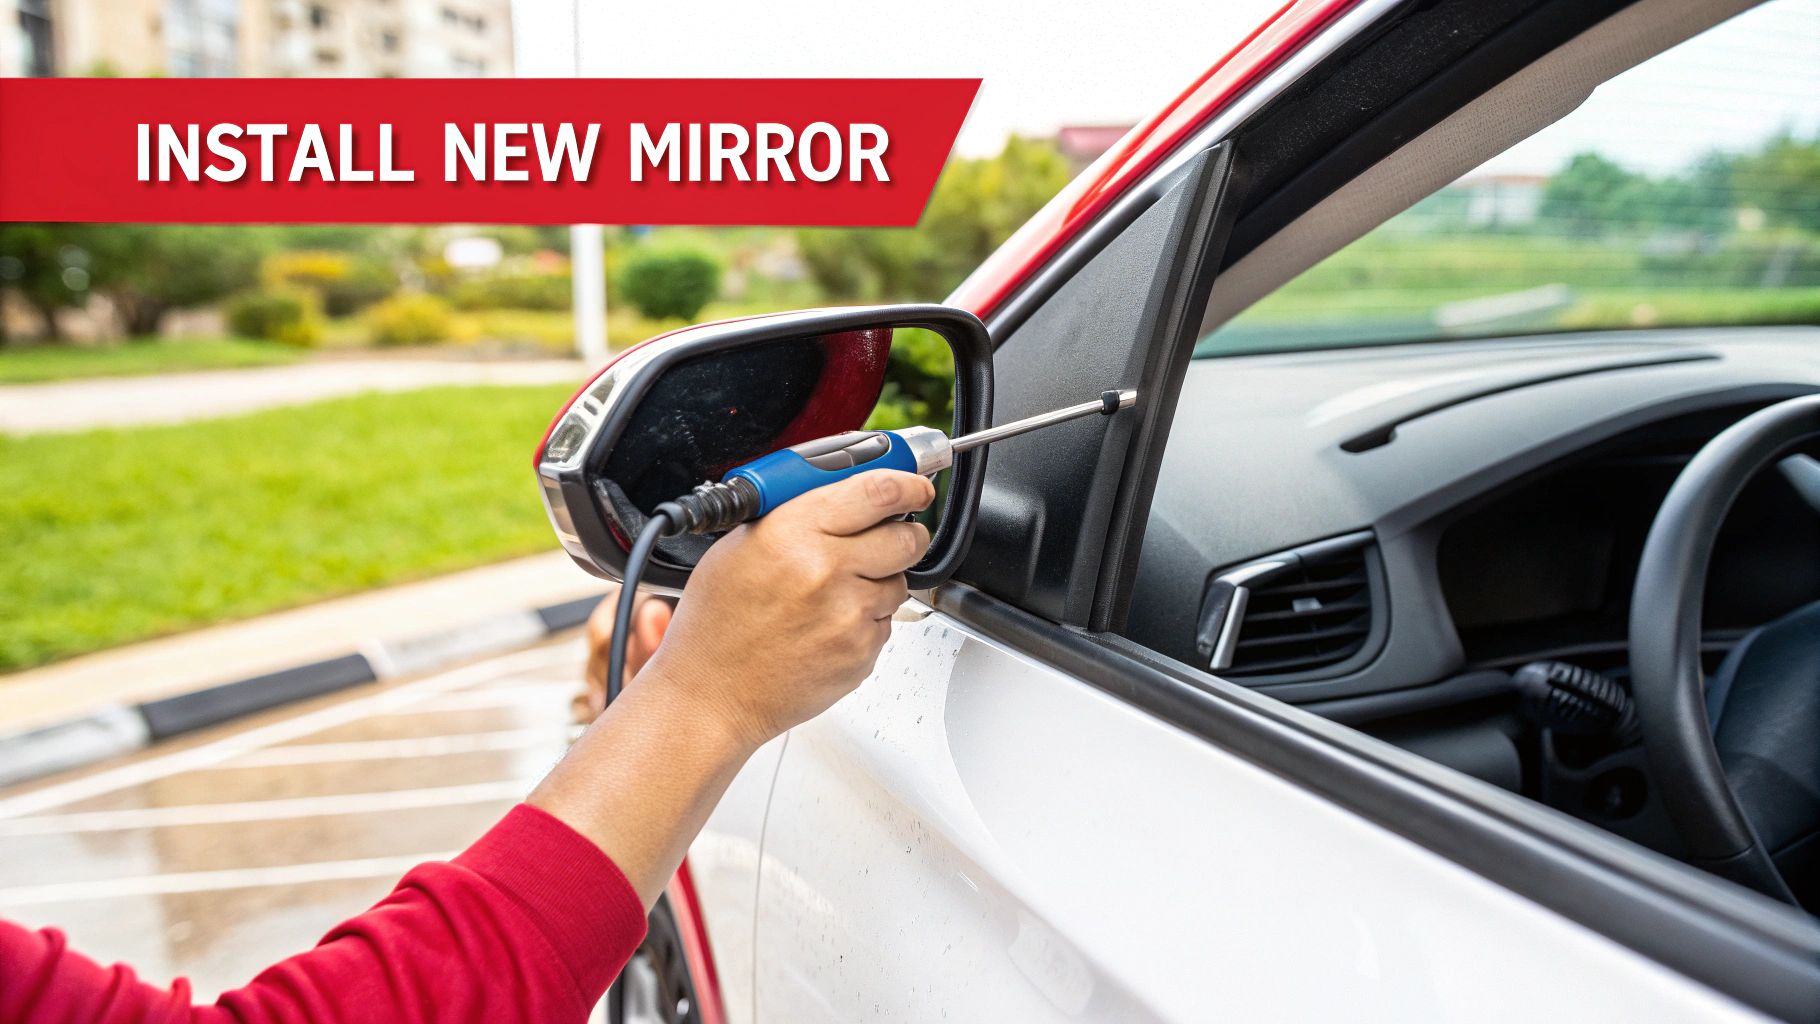
Alright, the old, busted mirror is gone. You're on the home stretch now, and this is the fun part—seeing your car start to look whole again. The difference a new, shiny mirror makes is always surprising. Getting that perfect, factory-like fit is all about patience and attention to a few small but critical details.
Before you even think about grabbing the new mirror, take a second to clean up the mounting area on the door. It's probably caked with years of road grime and gunk. A quick wipe with a clean rag and a little all-purpose cleaner goes a long way.
This simple cleaning step is more important than it seems. It helps the gasket on the new mirror create a perfect seal against the door, which is your best defense against wind noise and water leaks. A clean surface is the secret to a professional side mirror replacement.
Securing the Mirror and Connections
Okay, time to pick up your new mirror. The first thing you'll want to do is carefully feed the wiring harness through the opening in the door. Go slow and be gentle here—yanking on these wires can easily damage the delicate pins inside the connector, which is a headache you don't want.
With the wires safely through, line up the mounting studs on the mirror with the holes in the door. It should sit nice and flush. Now, from inside the car, plug in the electrical connector. You're listening for a solid "click" that tells you it's securely locked in.
For mirrors with features like heaters or turn signals, these connections are everything. Having a basic grasp of understanding your car's electrical system can definitely make you feel more confident at this stage.
Pro Tip: Always start threading the mounting nuts or bolts by hand. This completely prevents cross-threading and ensures the mirror seats evenly against the door. Get them all finger-tight before you even touch a wrench.
Final Tightening and Reassembly
Once everything is hand-tight, grab your socket wrench to finish the job. The trick here is to tighten the bolts in a crisscross or star pattern, just like you would with lug nuts on a wheel. This spreads the pressure out evenly across the mirror's base.
You want them snug, but don’t go crazy. It’s surprisingly easy to crack the new plastic housing if you overtighten. Just get it firm and secure; there's no need to muscle it.
The last piece of the puzzle is putting that interior trim panel or tweeter cover back on. Line up the plastic clips with the holes in the door panel and give it a firm, even push. You’ll hear them snap satisfyingly back into place. A good fit here will save you from those annoying rattles and vibrations down the road.
Final Checks and Troubleshooting
You’ve got the new mirror bolted on and looking great, but don't start packing up your tools just yet. This last part—the final function check—is what separates a pro job from a frustrating do-over. Let's make sure everything works just as it should.
First things first: go ahead and reconnect the negative terminal on your car battery. With power restored, it's time to put your new mirror through its paces.
Putting Your New Mirror to the Test
Hop into the driver's seat, fire up the car, and get ready to test every single feature. Be methodical here; a quick glance won't cut it.
- Power Adjustment: Grab the control switch. Does the mirror glass move smoothly up, down, left, and right? You’re looking for a crisp, immediate response.
- Heated Defrost: If your car is equipped with heated mirrors, hit the rear defroster button. Wait a couple of minutes, then carefully touch the mirror glass. It should feel warm.
- Turn Signal Indicator: Flip on your turn signal. Get out of the car and walk around to confirm the little LED in the mirror housing is flashing properly.
- Blind-Spot Light: This one might require a helper. Have someone stand in your blind spot to see if the warning light illuminates as it should.
Spending five minutes on this now can save you a huge headache down the road.
Remember, a successful mirror replacement isn’t just about the physical fit. It’s about restoring 100% of the original electronic functionality.
Quick Fixes for Common Problems
So, what happens if something isn't working right? Don't sweat it. Most of the time, the fix is surprisingly simple.
If the power controls seem completely dead, the culprit is almost always a loose electrical connector. Before you do anything else, disconnect the battery again. Then, carefully pop the interior door panel off and check that the wiring harness is fully seated. You should feel a distinct "click" when it's locked in place.
Notice a small gap between the mirror and the door frame? This is usually a sign that the mirror wasn't mounted evenly. Just loosen the mounting bolts a bit, press the entire mirror assembly flush against the door, and then re-tighten the bolts in a star pattern to distribute the pressure.
These two simple checks will solve 90% of post-install hiccups and make sure your DIY repair is one you can be proud of.
Got Questions About Your Side Mirror Swap?
It's totally normal to have a few questions rattling around in your head after you've bolted on that new mirror. Doing this job yourself for the first time always brings up some "what ifs," especially when it comes to cost and legal stuff. Let's get those last few details sorted out.
Think of this as the final check-in to make sure you've covered all the bases.
So, What's This Going to Cost Me?
The price tag on a side mirror can be all over the map. For an older car with a basic, no-frills mirror, you might get away with spending as little as $50 for the glass. But if you're driving something newer with all the bells and whistles—heated glass, turn signals, blind-spot cameras—that complete assembly could easily push past $500.
Now, consider what a shop would charge. Professional labor usually adds another $75 to $150 to the bill. By tackling this yourself, you get to put that money right back into your pocket.
Can I Get Away with Just Replacing the Glass?
Often, yes. If the mirror glass is the only casualty and the housing and all the electronics are still in good shape, just popping in new glass is a fantastic, budget-friendly fix. It's way faster and cheaper.
But if the plastic casing is busted or the power functions are dead, you're looking at a full assembly replacement. That’s the only real solution. You can find a huge variety of aftermarket side mirrors online that are built to match your car's exact features, so you know you're getting the right part.
Does the New Mirror Have to Be Painted?
That really depends on the replacement part you buy. Most aftermarket mirrors come in a standard, textured black plastic finish, which honestly looks just fine on a lot of cars. Some of the pricier ones show up pre-primed, ready for you to paint.
For a seamless factory look, you've got two paths. You can either bite the bullet and order a pre-painted OEM part from a dealership, or you can take your new aftermarket mirror to a local body shop. They can match it to your car’s paint code perfectly.
Is It Illegal to Drive with a Busted Mirror?
This is a really important one. In just about every state, driving without a working driver-side mirror is a big no-no and will definitely get you a ticket. The laws for the passenger-side mirror are sometimes a bit more relaxed, but only if your main rearview mirror gives you an unobstructed view behind you.
Honestly, for your own safety and to stay on the right side of the law, just make sure both mirrors are intact and working properly. It's a straightforward fix that keeps you safe, legal, and ready for any vehicle inspection.
At T1A Auto, we're committed to providing premium aftermarket parts that offer a guaranteed fit and lasting durability, all backed by a lifetime warranty. Find the perfect replacement for your vehicle today.
