


So, your tailgate handle finally gave up the ghost. It's a common problem on any hard-working truck, but the good news is that you can absolutely fix this yourself. The whole process is pretty straightforward: you'll pop off the inner panel, carefully unhook a couple of rods from the old handle, bolt the new one in, and then put it all back together.
The real trick is being gentle with the plastic clips that hold the latch rods—they can be brittle. And here’s a pro tip: always, always test the new handle to make sure it works perfectly before you bolt that access panel back on. Trust me, it’ll save you a ton of frustration. With a few basic tools, you can knock this out in less than an hour.
Why Your Tailgate Handle Broke and What to Expect
A broken tailgate handle is almost a rite of passage for a truck owner. It rarely happens because of one forceful yank. Instead, it’s the slow, inevitable result of thousands of openings and closings, day in and day out, mixed with a constant beating from the elements.
The main culprit here is plastic fatigue. The plastic used in these handles gets bombarded with UV rays from the sun, which slowly breaks it down and makes it brittle. What was once a flexible, strong piece of plastic becomes weak over time. One cold morning, when the plastic has zero give, you pull on it with a gloved hand, and snap. That's all it takes.
It's not always just the handle itself, either. The internal bits and pieces can wear out, too. You might find the handle feels sloppy or just flops around without actually unlatching anything.
Understanding the Failure Points
Before you jump online and order a new part, take a minute to figure out exactly what broke. A quick look can save you from buying something you don't need.
- Broken Handle Lever: This is the most common one. The part you actually pull on just snaps off. It's an easy diagnosis because a piece of it is probably still in your hand.
- Worn Internal Clips: Inside the tailgate, little plastic clips connect the handle to the metal rods that run to the latches on either side. These clips can get brittle and break, leaving the handle disconnected from the mechanism. The handle moves, but nothing happens.
- Sticking Latch Mechanism: Sometimes the problem isn't the handle at all. Rust and grime can build up in the actual latch mechanisms on the sides of the tailgate, causing them to stick. This puts a ton of extra strain on the handle until it finally fails under the pressure.
Here's a quick rundown of what you'll be doing.
Quick Overview of the Tailgate Handle Replacement Process
| Stage | Key Actions | Estimated Time | Critical Tip |
|---|---|---|---|
| Preparation & Access | Lower tailgate, gather tools, and remove the inner access panel screws. | 10-15 minutes | Keep screws in a magnetic tray so you don't lose them inside the tailgate. |
| Handle Removal | Disconnect the two latch rods from their clips and unbolt the old handle assembly. | 15-20 minutes | Be patient with the rod clips; they're often fragile. Use a small flathead screwdriver to gently pry them open. |
| New Handle Installation | Bolt the new handle in place, reconnect the latch rods, and secure the clips. | 10-15 minutes | Make sure the rods click securely into the new clips. A loose rod means a non-working handle. |
| Testing & Reassembly | Test the handle multiple times. Once confirmed, reinstall the access panel. | 5-10 minutes | Do not skip this! Confirm the tailgate opens and closes smoothly before putting the panel back on. |
Getting this done yourself is incredibly satisfying and saves a trip to the shop.
OEM vs. Aftermarket Parts
Alright, time to buy the replacement. You've got two main choices: OEM (Original Equipment Manufacturer) or aftermarket. An OEM part is the exact same one the factory put on your truck. It guarantees a perfect fit, but you'll pay a premium for that peace of mind.
Aftermarket parts, on the other hand, are made by other companies. They are much more budget-friendly and, in many cases, are just as good—sometimes even better, with designs that reinforce common failure points.
This isn't some tiny market, either. We're talking about a massive industry. The automotive tailgate market was valued at a staggering $15.3 billion in 2024 and is only getting bigger. That kind of growth is driven by the sheer number of trucks on the road and the fact that more people are tackling DIY repairs just like this one. If you're curious, you can explore further automotive market trends to see just how much this part of the industry is booming.
Getting Your Tools and the Right Handle Lined Up
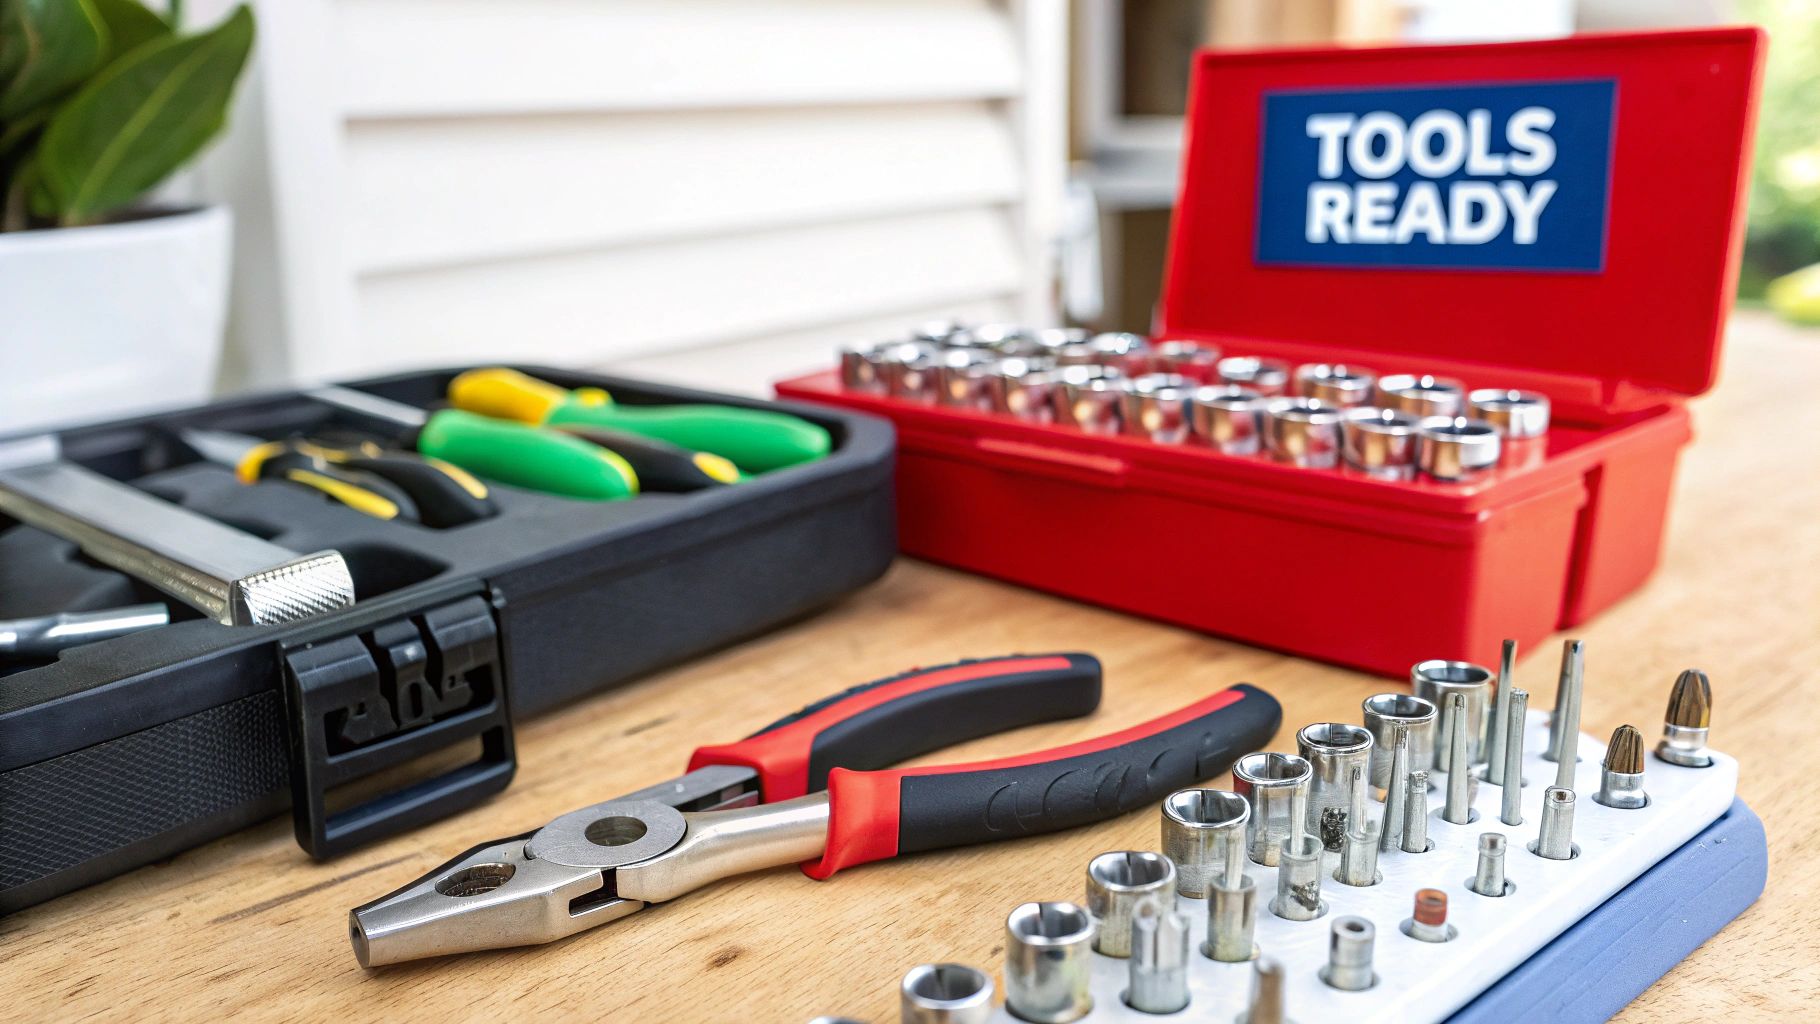
There’s nothing worse than getting halfway through a project only to realize you’re missing the one tool you absolutely need. A bit of prep work can turn a frustrating afternoon into a smooth, 30-minute fix. So, before you even touch your tailgate, let’s get your gear in order.
Having the right equipment is about more than just speed—it’s about preventing damage. Sure, you could use a tape-wrapped flathead screwdriver to pry off the access panel, but that’s also a great way to scratch your paint or snap a hidden plastic clip. This is where a dedicated set of trim removal tools comes in handy; they're cheap and designed for exactly this kind of delicate work.
Your Essential Tool Checklist
You don't need a professional-grade setup for this job, but a few key items will make all the difference. Make sure you have these on hand before you start:
- Socket Set with Extension: Most tailgate panels are held on with Torx or standard hex bolts. A basic socket set, paired with a 3-inch extension, will give you the reach you need to get into those tighter spaces.
- Trim Removal Kit: As I mentioned, these plastic pry tools are your best friend. They’ll let you pop off the inner tailgate panel without leaving a single mark.
- Needle-Nose Pliers: You'll need these for the small, fiddly metal clips that connect the latch rods to the handle assembly. Trust me, your fingers won't be able to do it.
- Magnetic Tray: This one’s optional but highly recommended. It’s a lifesaver for keeping all your screws and bolts from rolling away and getting lost.
A Quick Pro Tip: Don't skimp on your screwdriver or Torx bits. A cheap, soft metal tool can easily strip the head of a stubborn screw. That turns a simple task into a major headache that might even require a screw extractor to fix.
Finding the Perfect Replacement Handle
With your tools ready, it’s time to find the right part. This is where you need to be precise. The handle has to be an exact match for your truck’s make, model, and year. The easiest way to guarantee a perfect fit is by using your vehicle's VIN or searching by its specific details on a reliable parts website.
The material of the handle also plays a huge part in how long it will last and how it looks. Most factory handles are simple textured plastic, but you can often find upgrades like chrome-plated steel or reinforced polymers that stand up better to sun damage. Think about how you use your truck—if it’s a daily workhorse, a more durable handle might be a smart investment. For a deeper dive, check out our guide on the differences between OEM and aftermarket parts to help you decide.
The price for a new handle can vary quite a bit, which isn't surprising given the market. The global automotive tailgate market is on track to hit $17.17 billion by 2026, largely because of the massive popularity of pickup trucks in North America. This means you have a ton of choices, from a basic $20 plastic handle to a $200 assembly with built-in electronics.
Getting the Old Tailgate Handle Out
Alright, you've got your tools and the new handle ready to go. Now for the fun part: taking the old, busted one off. This is usually where you'll spend most of your time, but don't worry, it's pretty straightforward if you take it slow. First things first, we need to get inside the tailgate.
Look for the access panel on the inside of your tailgate. It's typically held on by a bunch of Torx or hex-head screws. Once those are out, don't just yank on the panel. It's also held in place by plastic clips that get brittle over time, especially on older trucks. Grab your trim removal tool and gently work your way around the edges, prying with steady pressure until you hear them pop loose. Breaking a clip isn't the end of the world, but it's an annoyance you can easily avoid with a little patience.
With the panel out of the way, you'll see the guts of the tailgate latch system. The handle is connected to the latches on either side by two metal rods. Our next job is to get those disconnected.
Freeing Up the Latch Rods
This is where your needle-nose pliers will be your best friend. Each rod connects to the handle assembly with a small plastic clip. Think of it like a tiny gate that swings open. You'll need to carefully unlatch that little gate and swing it away from the rod.
- Heads-up for Ford F-150 owners: These clips are notoriously stubborn. I've often had to use a small flathead screwdriver to gently coax the clip open without putting too much stress on the plastic.
- For Chevy Silverado and Ram 1500: You usually have a bit more room to work, which is nice. The trick is to push on the clip's tab itself, not the rod. Bending one of these rods is a headache you don't want.
Once the clip is open, the rod will slide right out. Do the same for the other side, and the old handle is officially disconnected from the latches.
A word of caution: Those rods are bent to a specific shape for a reason. If you accidentally warp one while wrestling it out, the new handle might not operate smoothly or at all. Easy does it.
This infographic gives you a great visual of how to use pliers to unclip the rods without breaking anything.

As you can see, it's all about finesse, not force. Using the right leverage is key to preventing damage.
Unbolting the Handle and Pulling It Out
The rods are free, which means the only thing left holding the old handle in place is a couple of nuts or bolts. Grab your socket wrench, probably with an extension, and remove them. The entire handle assembly should now be loose.
From inside the tailgate, give the handle a little push while pulling from the outside. You might have to wiggle it a bit to get it through the opening. Watch out for your paint! It's super easy to scratch the tailgate if you pull the handle out at a weird angle. A pro tip is to stick some painter's tape around the opening before you even start for some cheap insurance.
Once the old handle is out, take a second to wipe down the area around the opening. Getting rid of all that built-up gunk will help the new handle sit flush and create a much better seal. And just like that, you're halfway there.
Getting Your New Tailgate Handle Installed
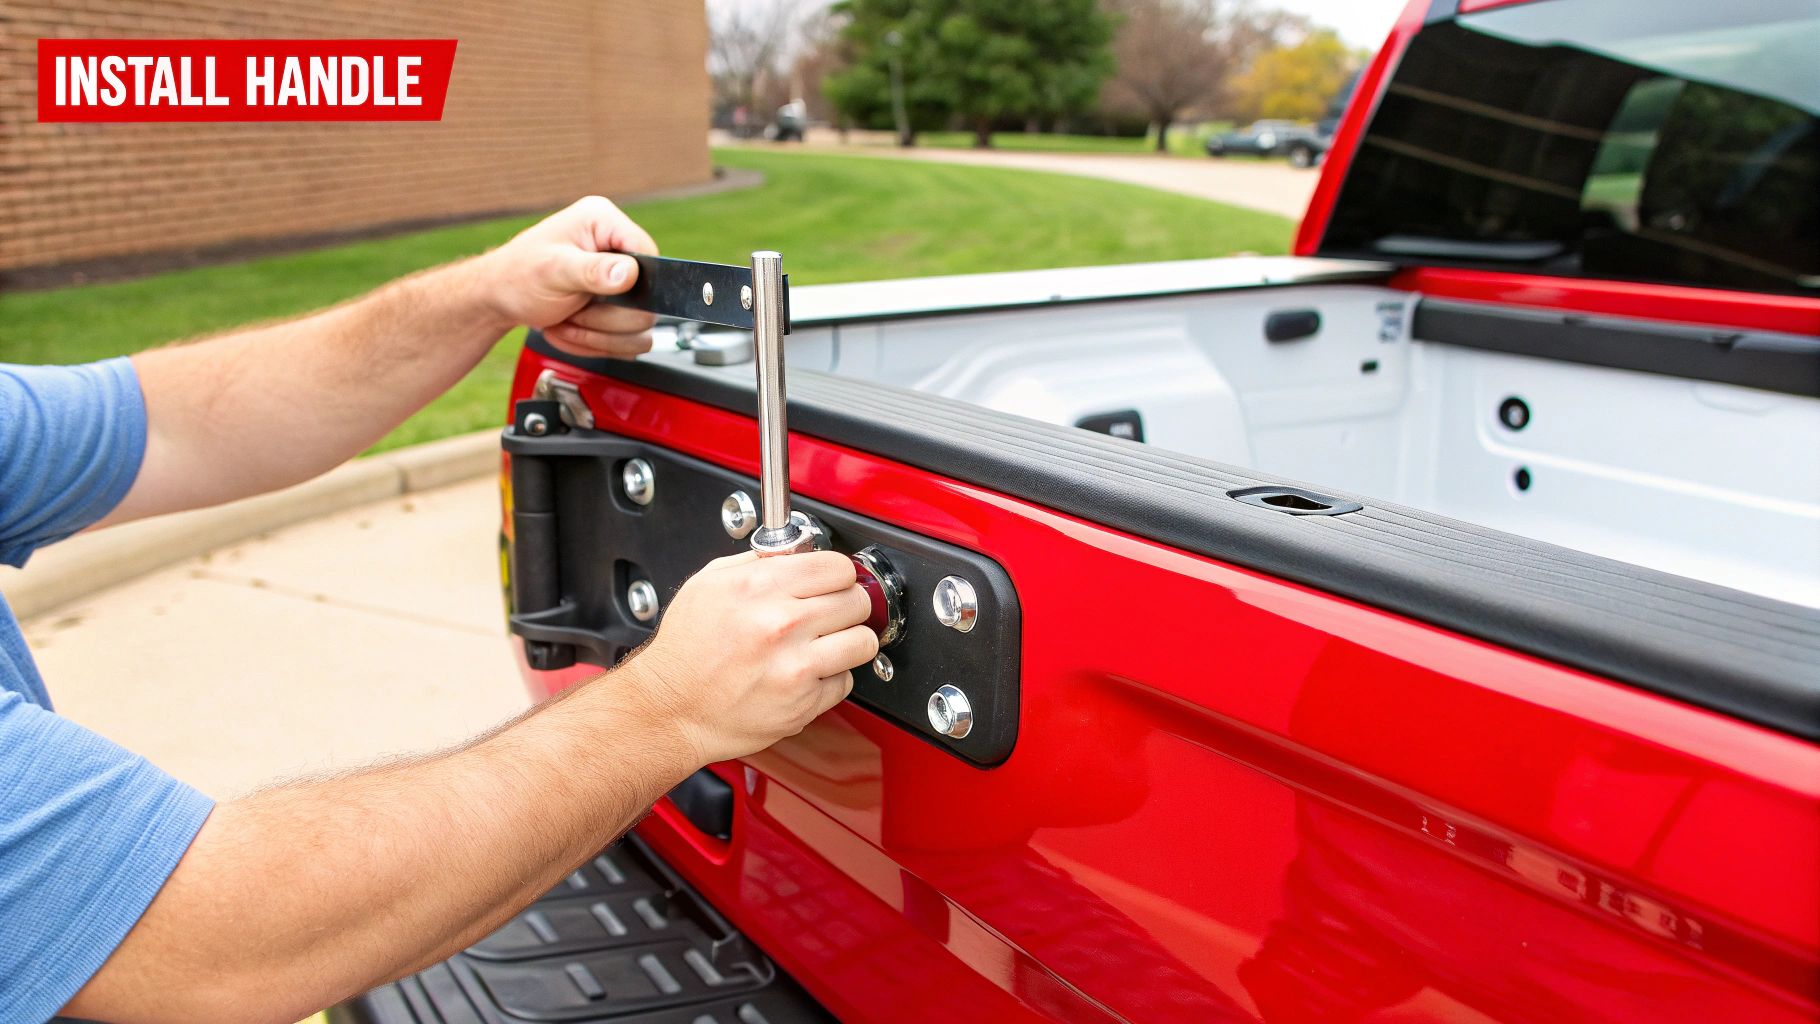
Alright, with that old, busted handle out of the way, you're in the home stretch. This is the satisfying part—seeing your truck come back together. The name of the game here is patience and precision. Taking your time now means your new handle will work smoothly for years.
First things first, take your shiny new handle and carefully guide it through the opening from the outside of the tailgate. You might need to wiggle it a bit to get it to settle in just right. Your goal is to have it sitting completely flush against the tailgate's sheet metal. If it’s crooked or not seated properly, it won’t just look bad; it can let moisture sneak in and start causing rust issues down the line.
Securing the Handle
Once the handle is flush, it’s time to lock it down. Working from inside the tailgate again, start threading the nuts or bolts onto the handle's mounting studs. Always start them by hand! This is the best way to prevent cross-threading, which is a massive headache you don't want.
After they’re hand-tight, finish the job with your socket wrench. You want them snug and secure, but don't go full Hercules on them. Overtightening is a common mistake that can easily crack the new plastic housing, putting you right back where you started.
Reconnecting the Latch Rods
Pay close attention here—this is the most important step of the whole installation. These rods are what connect your handle to the latches that open the tailgate. If they aren't right, nothing else matters.
- Take one of the rods and slide its end into the correct hole on the new handle’s lever.
- Swing the little plastic retaining clip over the rod.
- Press it down firmly until you hear and feel a solid "click."
That click is your best friend. It tells you the rod is locked in and won't pop out when you hit a pothole.
If a clip feels loose or just won't snap into place, stop. Don't force it. The clip might be worn out, or the rod isn't seated all the way. Take a second look before trying again. Now, just repeat the process for the second rod.
This is also a good moment to be sure you're using a quality part. If you're looking for options that are guaranteed to fit and last, you can find a huge selection of replacement tailgate handles that match your specific truck.
Don't Skip This Final Check
Before you even think about reinstalling that access panel, you have to test your work. And I don't mean just one pull. Operate the handle at least 10 times in a row. Pull it, then use a screwdriver to push both side latches into the "closed" position. Does the handle release them smoothly every single time?
This simple test is your insurance policy. It confirms the mechanism is working perfectly and saves you from the frustration of having to take everything apart again. If it feels stiff or one side hangs up, now is the time to fix it while everything is still open.
Once you’re confident it's working flawlessly, you can bolt the access panel back on and enjoy a tailgate that opens like new.
Troubleshooting Common Installation Problems
Even the most carefully planned DIY job can throw you a curveball. If you’ve installed your new tailgate handle and something feels off, don't worry. Nine times out of ten, it’s a simple fix you can knock out in a few minutes while the access panel is still off.
One of the most common things I hear is that the new handle feels stiff or is a real chore to pull. This almost always points to a lack of lubrication, not a problem with the new handle itself. The latch mechanisms on both sides of the tailgate get clogged with years of grime and rust.
Before you start taking things apart again, grab a can of white lithium grease. Give both latch assemblies a good spray, working the mechanism by hand a few times to get the grease deep inside. You'll probably feel the difference immediately.
Handle Moves but Tailgate Won't Open
This is another classic scenario, and it's usually all about the connecting rods. You pull the handle, you feel the movement, but the tailgate itself doesn't budge. This tells you that one or both of the rods has likely slipped out of its plastic clip.
- Check Your Connections: Get a good look at where the rods clip into the new handle. Are those little plastic retaining clips snapped completely shut? A clip that's only halfway closed is guaranteed to let go.
- Look for Binds: Make sure the rods have a clear path and aren't bent or rubbing against anything inside the tailgate. Even a minor bend can be enough to stop the rod from pulling the latch all the way open.
If you’ve checked the rods and everything looks good, the latch itself might be seized. We've got another guide that dives deep into how to fix a stuck tailgate latch that can walk you through that specific repair.
The Tailgate Won't Latch Securely
So, you can close the tailgate, but it doesn't feel solid, or worse, it pops open on its own. The culprit is often the rods again. This time, they might be adjusted a bit too tightly, which keeps the latches from fully engaging when you shut the tailgate. Try giving the rods just a little more slack by adjusting where they sit in the clips.
Pro Tip: Before you tighten down the handle’s mounting bolts for the last time, put a small dab of blue thread locker on them. This is a cheap and easy way to keep vibrations from loosening the handle over time, making sure your repair lasts.
It’s no surprise these parts wear out. The global automotive tailgate latch market was valued at around $2.1 billion in 2024, driven in part by the increasing complexity of modern tailgates. While new trucks often have integrated cameras and electronics, the core mechanical parts haven't changed much, which is great news for the DIYer. You can explore more on the tailgate components market if you're curious about the industry's growth.
Your Top Questions Answered
Even with a straightforward job like this, a few questions always pop up. Let's tackle some of the most common ones I hear from people learning how to replace a tailgate handle for the first time.
How Long Does This Job Really Take?
If you're new to this, set aside a good 45 to 60 minutes. That gives you plenty of time to work carefully without rushing. For someone who's done this before and has their tools ready to go, you could easily knock it out in under 30 minutes.
What really slows people down is the condition of the truck itself. If you're dealing with a decade of rust on the bolts or those little plastic clips on the latch rods are brittle, you’ll need to take your time. A little patience now saves you from a much bigger headache later.
Do I Replace Just the Handle or the Whole Thing?
This is a great question, and the short answer is: replace the whole handle assembly. This usually includes the handle lever you pull, the housing it sits in, and the internal mechanism. You'll rarely find just the plastic handle sold by itself, and honestly, trying to swap just that part is a nightmare you don't want.
Buying the complete assembly is the only way to go. It guarantees all the parts are fresh, fit perfectly, and are meant to work together. This saves you from a wobbly handle or another failure in a few months.
What If My Tailgate Has a Backup Camera?
Working around a backup camera is no big deal—it just adds one small step. Once you get the access panel off, you'll see the camera's wiring harness. You just need to unplug it before you can unbolt the handle assembly.
Look for a small plastic tab on the connector; gently press it down and pull the two halves apart. Be careful not to yank on the wires. When you're putting the new handle in, just remember to plug the camera back in before you put the access panel back on. Easy peasy.
While you're working on the outside of your truck, don't forget the inside! Proper vehicle care means keeping all parts in top shape, and that includes keeping your car's interior clean.
For a guaranteed fit and parts designed to last, T1A Auto offers premium aftermarket tailgate handles engineered with upgraded materials to prevent common failures. Find the perfect match for your truck and get the job done right the first time. Visit https://t1aauto.com to browse our selection.