


When you hear "hub bearing vs wheel bearing," what we're really talking about is the style of the assembly. A traditional wheel bearing is a component that needs to be pressed into the steering knuckle or hub with special tools. On the other hand, a hub bearing assembly is a complete, pre-assembled, bolt-on unit.
This one difference is huge. It's what makes replacing a hub assembly a manageable job for a serious DIYer, while pressing in a new wheel bearing is almost always a job for a professional shop.
Understanding Hub Bearing vs Wheel Bearing Differences
At their core, both components do the same job: they allow your wheels to spin freely with minimal friction while supporting the vehicle's weight. But how they're packaged and installed couldn't be more different.
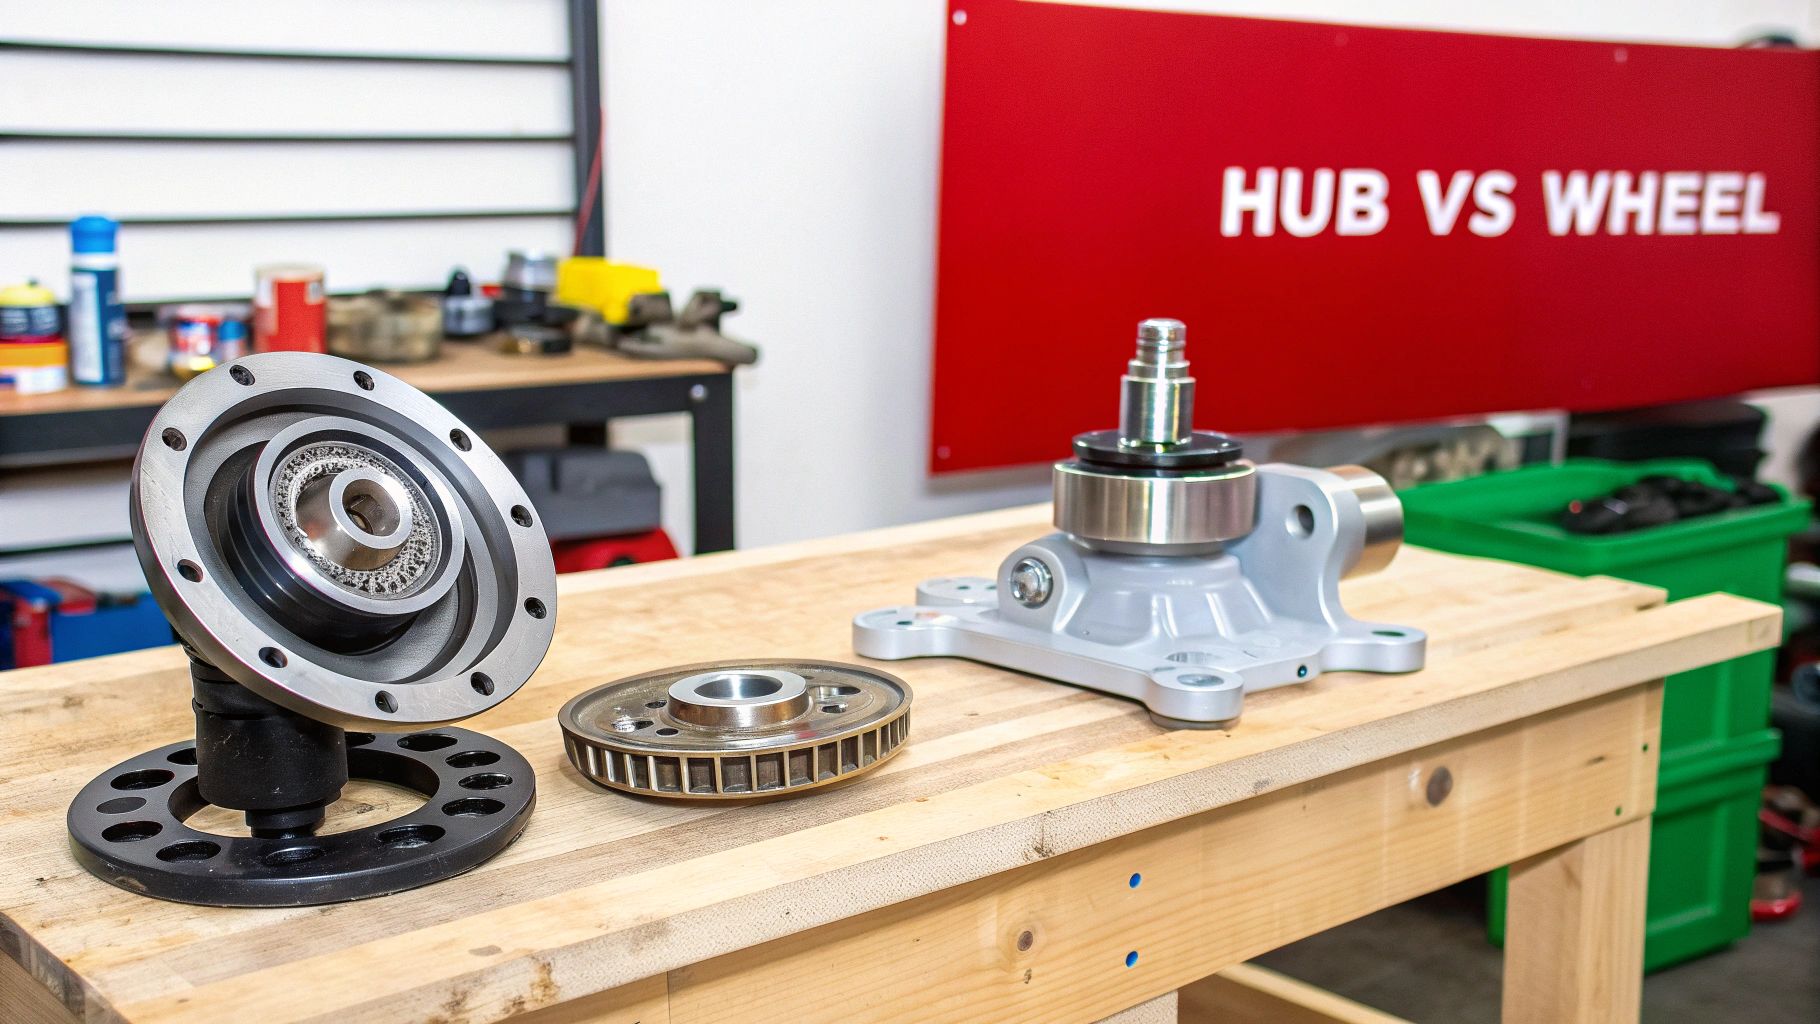
Hub bearing assemblies are designed for convenience and precision right out of the box. They arrive as a single, sealed unit, often with the wheel studs and even an ABS sensor ring already integrated. This all-in-one design drastically simplifies the replacement process.
Traditional wheel bearings are the old-school, individual components. You get the inner and outer races, the cage, and the rollers or balls. It's up to the technician to press them in perfectly, pack them with the right amount of grease, and install the seals correctly.
Let's break down the key differences in a quick table.
Key Differences at a Glance
This table offers a snapshot of the fundamental differences between a modern hub assembly and a traditional wheel bearing setup. Think of it as a cheat sheet for understanding their design, installation, and typical use cases.
| Attribute | Hub Bearing (Assembly) | Traditional Wheel Bearing |
|---|---|---|
| Design | A single, pre-assembled unit with a flange, bearing, and seals. | Individual components: inner/outer races, rollers, and cage. |
| Installation | Bolts directly to the suspension knuckle with basic hand tools. | Requires a hydraulic press to fit it into the knuckle or hub. |
| Sealing & Lubrication | Factory-sealed for life and pre-lubricated. No maintenance needed. | Requires separate seals and manual packing with fresh grease. |
| DIY Skill Level | Moderate. Achievable for experienced DIYers with a good toolset. | Advanced. A shop-level job requiring specialized press equipment. |
| Common Application | The standard for most modern passenger cars, SUVs, and light trucks. | Found in older vehicles, trailers, and many heavy-duty trucks. |
As you can see, the choice isn't just about the part itself but also about the tools, time, and expertise required for the job.
Mechanical Setup Comparison
The genius of the hub bearing assembly is its integrated design. The bearings are perfectly spaced and sealed in a clean factory environment, which all but eliminates the risk of contamination from dirt or moisture during installation. This is a major factor in their longevity.
With traditional wheel bearings, the installation process itself is a critical failure point. If the races aren't pressed in perfectly straight or if any debris gets into the grease, the bearing's lifespan will be cut short. It takes a skilled hand to get it right.
Market Evolution Insight
It's not just about mechanics; it's also big business. The way vehicles are designed has pushed the market heavily toward hub assemblies. The global hub unit bearing market hit USD 1.19 billion in 2024 and is expected to surge to USD 2.44 billion by 2033.
The broader wheel hub assembly market, which also includes the components for traditional setups, was valued at a massive USD 5.9 billion in 2024 and is projected to reach USD 13.36 billion by 2032. You can dive into the full analysis on Straits Research. These numbers show a clear industry trend toward the convenience and reliability of pre-assembled units.
Practical Tip: No matter which type your vehicle has, always consult the manufacturer's service manual. You'll need it for critical torque specs for the axle nut and mounting bolts. Getting the preload right is non-negotiable for safety and performance.
A Look at Mechanical Design and Engineering
To really get to the bottom of the hub bearing vs. wheel bearing question, we have to look at how they're built. The traditional press-in wheel bearing is a classic piece of engineering—a collection of precision parts that have to work together perfectly. You can think of it as a kit that requires careful assembly.
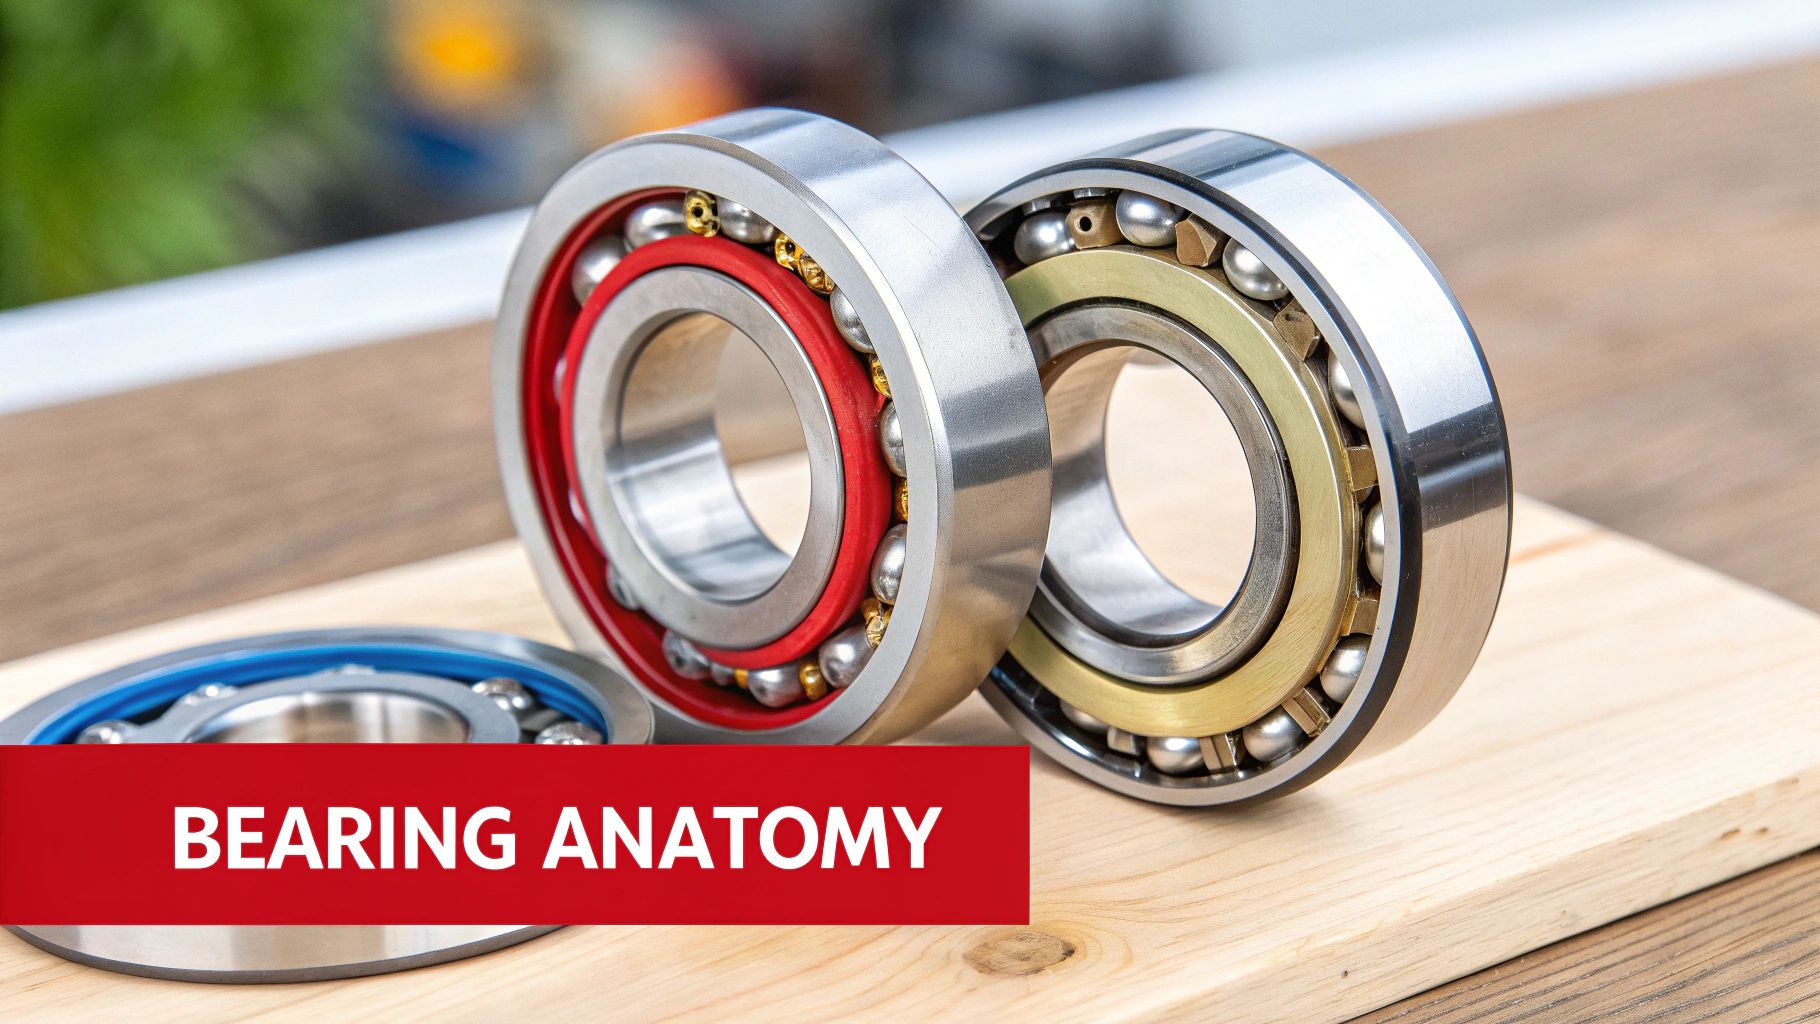
This setup involves separate inner and outer races, the rolling elements (which can be balls or tapered rollers), a cage to keep everything spaced correctly, and seals to keep grease in and dirt out. Every single piece has to be handled and installed just right. If anything is misaligned or gets contaminated while being pressed into the knuckle, it's a recipe for early failure.
The Anatomy of a Modern Hub Assembly
Now, contrast that with a modern hub bearing assembly. This isn't just a part; it's an engineered solution. It’s a single, self-contained unit that bundles multiple components into one pre-assembled, pre-lubricated, and sealed package, ready to go right out of the box.
The hub assembly design combines the hub flange (where your wheel bolts on), the bearing itself, and the mounting points all into one solid component. Because it's a simple bolt-on affair, the alignment and bearing preload are already set perfectly at the factory, which dramatically cuts down the risk of installation mistakes.
Key Engineering Insight: The sealed, pre-assembled nature of a hub assembly is its biggest advantage. By setting the preload and sealing the unit from the elements at the factory, manufacturers can confidently deliver a lifespan of 75,000 to 150,000 miles in normal driving conditions. That's a level of consistency that's tough to replicate when pressing in individual bearing components by hand.
The Evolution to Integrated Systems
The design of hub bearings didn't stop there; it has evolved right alongside modern vehicle technology. This progression is often broken down into "generations," with each step bringing more components into the fold.
- Generation 1 (Gen 1): This is the most basic hub unit. It's essentially a double-row bearing cartridge that's more contained than traditional bearings but still needs to be pressed into the steering knuckle.
- Generation 2 (Gen 2): Here's where things got a lot easier. This generation added a mounting flange, making it a true bolt-on part and simplifying the installation process for technicians and DIYers alike.
- Generation 3 (Gen 3): This is the standard on most cars today. Gen 3 units take it a step further by integrating a second flange for mounting directly to the suspension knuckle. More importantly, they often house the Anti-lock Braking System (ABS) sensor ring or magnetic encoder right inside the assembly.
This integration of the ABS sensor is a huge deal. When a Gen 3 hub assembly starts to fail, it doesn't just make a humming noise. It can send faulty speed signals to the ABS control module, directly impacting your vehicle's safety systems. This can set off warning lights on your dash and mess with your traction and stability control, turning a simple mechanical part into a critical piece of your car's electronic safety network.
How to Diagnose a Failing Bearing
A failing wheel bearing rarely just gives up without a fight. It almost always sends out some clear warning signs first—usually through sounds and vibrations. If you learn to recognize these signals early, you can stay ahead of the problem and ensure a safe repair.
The classic giveaway is a noise coming from one of the wheels. It often starts as a faint hum but can escalate into a growling, roaring, or even a grinding sound that gets louder with speed. A great way to pinpoint which side is failing is to pay attention during turns. When you steer, the vehicle's weight shifts, putting more load on the outside wheel. If the noise gets louder when you turn right, the problem is likely on the left side, and vice versa.
Listening for Clues
Beyond just noise, a bad bearing can make the whole car feel "off." You might notice a subtle vibration that travels up through the steering wheel or floorboards. This vibration can be constant or only show up at specific speeds, which can sometimes make it tricky to diagnose.
Another hint can show up on your tires. A worn-out bearing introduces play or "wobble" into the wheel, which can mess with your alignment. Over time, this causes the tire to wear down unevenly on one edge. If you spot this during a regular tire check, a bad bearing could very well be the root cause.
One telltale sign specific to modern vehicles is a lit-up ABS light. Since many hub assemblies have the wheel speed sensor built right in, a failing bearing can damage the sensor or its magnetic ring, sending bad data to the ABS computer and triggering a fault.
The Physical Wheel Shake Test
Once you have a suspect, a quick physical test can confirm your diagnosis. This is the go-to method for mechanics and DIYers alike to get a definitive answer before breaking out the tools.
- Safely Lift the Vehicle: Start by jacking up the corner with the suspect wheel. Always secure it with a jack stand before you do anything else.
- Grip the Wheel: Grab the tire with one hand at the 12 o'clock position and the other at 6 o'clock.
- Push and Pull: Firmly try to rock the wheel in and out, pushing with one hand while pulling with the other. If you feel any play, movement, or hear a clunking sound, you've found your worn bearing.
- Repeat the Test: For good measure, move your hands to the 9 and 3 o'clock positions and repeat the rocking motion. Play in this direction often points to a worn tie rod end, but if it’s significant, it can also confirm a bad bearing.
Knowing how to diagnose these issues is crucial for anyone working on cars. This hub bearing versus wheel bearing debate is also shaped by global manufacturing trends. The Asia-Pacific region, for example, is a powerhouse, controlling a massive 32.5% of the global wheel hub assembly market, thanks to manufacturing centers in China and India. This has led to a flood of high-quality aftermarket options, especially for popular trucks and SUVs. You can find more details in this report on the global wheel hub assembly market on maximizemarketresearch.com.
Comparing the Replacement Process
When you get down to the nuts and bolts of it, the real difference between a hub bearing and a wheel bearing is crystal clear when it's time for a replacement. This is where the modern, all-in-one hub assembly really shines, turning what used to be a tough, specialized job into something a capable DIYer can tackle on a Saturday afternoon.
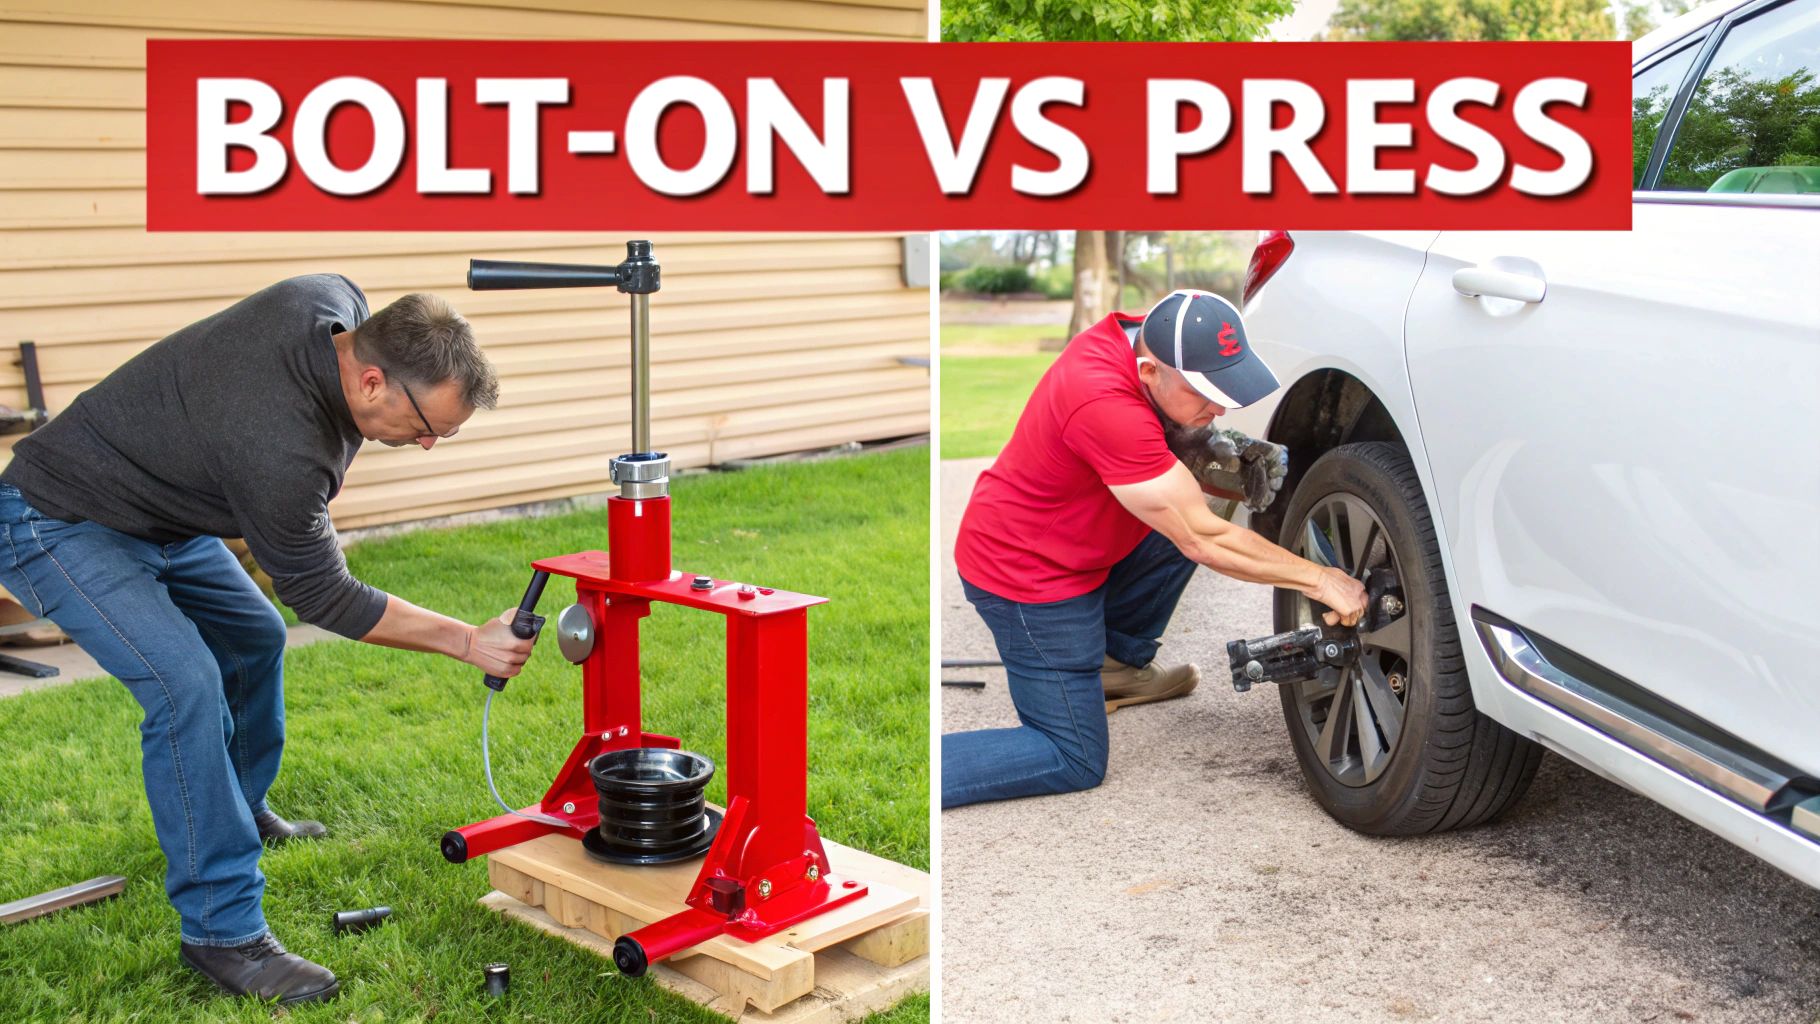
On most cars and trucks built in the last couple of decades, the hub assembly is a simple bolt-off, bolt-on part. You lift the vehicle, pull the wheel, and get the brake caliper and rotor out of the way. From there, you just have to unbolt the old assembly from the steering knuckle and bolt the new one in its place. Sure, you'll need a solid socket set and a good torque wrench, but you won't need a garage full of expensive, specialized equipment.
The Press-In Bearing Challenge
Now, swapping out an old-school press-in bearing? That's a different beast entirely. We're not talking about a simple parts swap; this is a serious mechanical operation that demands precision, brute force, and some very specific tools.
First off, the whole steering knuckle has to come off the car. That means disconnecting tie rods, ball joints, and popping the axle shaft out—a hefty job in itself. With the knuckle on your workbench, the real fun begins.
Getting the old bearing out requires a hydraulic shop press that can generate thousands of pounds of force. You need that power to overcome the incredibly tight interference fit holding it in the knuckle. Then, you have to carefully press the new bearing and seals back in, making sure everything is perfectly aligned. If you're off by even a fraction of a millimeter, you can ruin the new bearing or even damage the knuckle, which is a mistake that gets expensive fast.
Critical Distinction: The need for a hydraulic press is what puts this job out of reach for most home mechanics. It’s not a standard garage tool. Trying to get by with a hammer is the quickest way to destroy a brand-new bearing and the knuckle, turning a repair into a much bigger and costlier problem.
DIY Job Comparison Hub Assembly vs Press-In Bearing
To put it in perspective, let's break down what each job actually entails. This quick comparison shows why one is a manageable home project and the other is usually best left to the pros.
| Requirement | Hub Bearing Assembly | Press-In Wheel Bearing |
|---|---|---|
| Specialized Tools | Basic hand tools, torque wrench, and a large axle nut socket. | Hydraulic press, bearing drivers/adapters, and snap ring pliers. |
| Estimated Time | 1-2 hours per side for an experienced DIYer. | 3-5 hours per side for a professional with the right equipment. |
| Skill Level | Intermediate. Requires mechanical confidence and attention to torque specs. | Advanced/Professional. Demands expertise in suspension work and press operation. |
| Work Location | Can be done in a home garage or driveway. | Requires a professional auto shop or machine shop with a press. |
At the end of the day, a hub assembly replacement is a job you can tackle over a weekend. For a detailed guide, check out our walkthrough on front wheel bearing replacement. A press-in bearing, on the other hand, usually involves pulling the knuckle yourself and taking it to a machine shop to have them do the press work, which adds extra cost, time, and hassle to the project.
The True Cost of a Wheel Bearing Job
When you’re weighing the cost of a hub bearing versus a wheel bearing, just looking at the part's price tag is a classic mistake. That press-in bearing might look like the cheaper option on the shelf, but it can quickly become the more expensive headache once labor and specialized tools enter the equation.
The real story unfolds in the shop. A professional technician is going to bill for several hours to replace a single press-in bearing. Think about the process: they have to pull the entire suspension knuckle off the car, take it over to a hydraulic press, force the old bearing out, and then painstakingly press the new one in without damaging it.
On the other hand, swapping out a complete hub bearing assembly is a whole different ballgame. It's a much cleaner, faster job. An experienced mechanic can often get it done in about an hour per corner, which means your labor bill is going to be a fraction of what it would be for a press-in job.
Breaking Down DIY Expenses
For those of us turning wrenches in our own garage, the math becomes even more lopsided. Unless you happen to have a 20-ton hydraulic shop press sitting in the corner, that press-in bearing comes with a lot of hidden costs.
Your options are to either rent a press (which is a hassle) or, more commonly, take your knuckle to a local machine shop to have them do the press work. That little side quest adds time, frustration, and an extra bill that can easily run you $50-$100.
It's a bit of an irony in auto repair: the less expensive part often leads to a more expensive total job. The higher upfront cost of a hub assembly is almost always erased by the huge savings in labor, the lack of a need for specialized tools, and a much lower chance of a botched installation.
This is where the aftermarket has really stepped up. The automotive wheel hub bearing aftermarket is on track to grow from USD 1,068 million in 2024 to a projected USD 1,602.12 million by 2032. This isn't just about making more parts; it's about innovating. We're seeing advanced, integrated units that are lighter, more compact, and designed to work with modern ABS and traction control systems. This boom ensures there are plenty of high-quality, reliable options out there. You can dig into more automotive aftermarket trends on credenceresearch.com.
Ultimately, the hub assembly simplifies the job so dramatically that its higher part cost makes perfect sense. It transforms a complex, precision-press operation into a straightforward bolt-off, bolt-on procedure. This saves real money for customers paying a shop and saves a world of time and frustration for the DIYer. For a durable and dependable fix, it’s almost always the smarter, more economical choice in the long run.
Making the Right Choice for Your Repair
When you're staring down a noisy, failing bearing, the choice between replacing the entire hub assembly or just the press-in bearing boils down to a few key things: your vehicle's design, your budget, and how comfortable you are with a wrench.
For most modern cars, trucks, and SUVs on the road today, the decision is actually pretty simple. The complete hub bearing assembly is the hands-down winner in nearly every situation.
Its all-in-one, pre-sealed design makes the installation a breeze, significantly cutting down on labor time. More importantly, it nearly eliminates the risk of an early failure caused by dirt getting in or an improper press job. Whether you're a professional tech trying to be efficient or a DIYer looking for a manageable weekend project, the bolt-on simplicity of a hub assembly offers real value and peace of mind.
Situational Recommendations
Even though hub assemblies are the norm now, the old-school press-in bearings definitely still have their place.
- Older or Classic Vehicles: A lot of vehicles built before hub assemblies became common will only have a press-in bearing option. In that case, the choice is already made for you.
- Heavy-Duty and Trailer Applications: You'll still find serviceable, press-in tapered roller bearings in some heavy-duty trucks and trailer axles because they can handle massive loads and can be maintained.
The real takeaway is this: if your vehicle came from the factory with a hub bearing assembly, you should always replace it with another complete assembly. It's the only way to stick to the original engineering and guarantee a safe, long-lasting repair.
This decision tree gives you a great visual on how the costs stack up, whether you're tackling the job yourself or handing the keys to a pro.
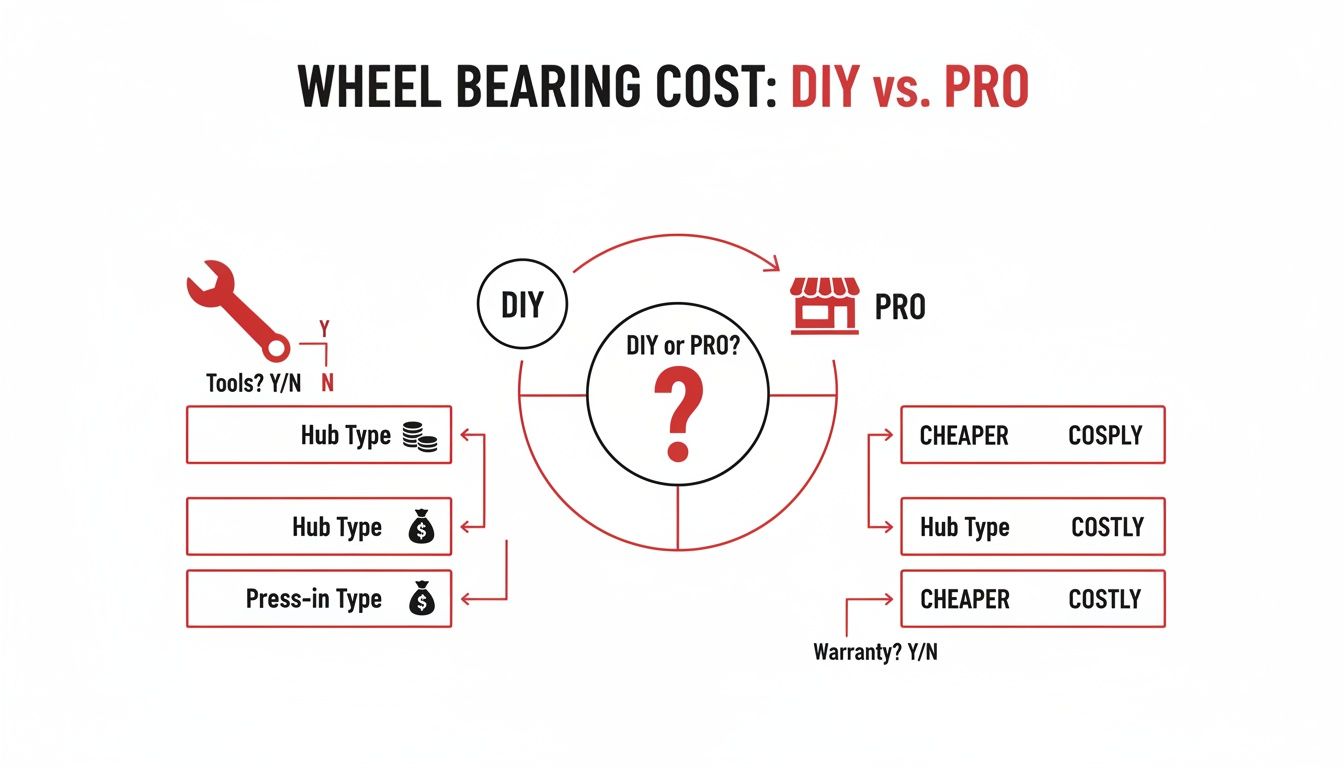
As the flowchart shows, going the hub assembly route almost always leads to a more predictable, and often lower, total cost. This is because you slash the labor hours and don't need access to specialized shop presses.
Of course, choosing the right replacement part is just as critical as choosing the right type of repair. If you're weighing a factory part against a top-tier aftermarket option, our detailed guide comparing OEM vs aftermarket parts can help you find that sweet spot between quality, performance, and value for your ride.
Common Questions About Wheel Bearings
When it comes to wheel bearing jobs, a lot of practical questions come up, whether you're a seasoned tech or a weekend warrior. Here are some straightforward answers to the most common things we hear.
How Can I Differentiate a Hub Bearing Assembly from a Traditional Wheel Bearing?
The easiest way to tell them apart is by looking at them. A hub bearing assembly is a pre-assembled, sealed unit that you simply bolt onto the steering knuckle. It's an all-in-one solution.
A traditional wheel bearing, on the other hand, consists of separate components—individual bearing races and rollers. These pieces have to be pressed into the knuckle using a hydraulic press. Think of it as bolt-on simplicity versus press-in complexity.
How Do I Identify The Correct Component for My Vehicle?
First, always check your vehicle's service manual. It's the most reliable source for factory specifications.
If you have the old part handy, a visual inspection is a dead giveaway.
- A hub assembly will have wheel studs and often an integrated ABS sensor ring built right in.
- If your vehicle uses traditional wheel bearings, you'll see separate bearing cartridges or individual components once you take the hub apart.
What Symptoms Signal Impending Failure?
You'll almost always hear a bad bearing before you feel it.
A deep growling or humming noise that gets louder as you speed up is the classic sign of a worn-out bearing.
Other common warning signs to watch for include:
- Vibrations you can feel through the steering wheel.
- Unusually uneven tire wear, especially on one side.
- The ABS warning light popping up on your dashboard.
When Should I Consult a Professional?
If you don't own a hydraulic press or a high-quality torque wrench, this is a job best left to a professional shop. Replacing press-in bearings is a tricky process that requires completely disassembling the steering knuckle and ensuring perfect alignment afterward. Getting it wrong can be dangerous.
What Tools and Expertise Are Required for DIY?
For a hub assembly, the job is pretty straightforward. You'll need basic hand tools, a good torque wrench, and the correct size axle nut socket.
For a press-in bearing job, the tool list gets much more specialized. You're looking at a hydraulic press, a set of bearing drivers, and snap ring pliers at a minimum.
Why Choose Certified Replacement Parts?
The quality of the parts you use makes a huge difference in how long the repair lasts. For a deeper dive into what makes a quality part, check out our guide on CAPA Certified Parts.
Can I Reuse Old Hardware When Swapping Bearings?
Never. Always replace the axle nut and any other one-time-use fasteners. These parts are designed to stretch when torqued to spec, and reusing them is asking for trouble. It can lead to improper torque and, eventually, a catastrophic failure.
By replacing worn components with premium aftermarket parts, you can often push the service life to 100,000 miles or even more.
What Is The Lifespan Of A Bearing?
Under normal driving conditions, you can expect a modern hub bearing assembly to last anywhere from 75,000 to 150,000 miles. Older-style traditional wheel bearings, especially those in harsh environments, might need to be inspected and repacked with grease as often as every 30,000 miles.
How Much Does Replacement Cost?
The cost really comes down to the type of part and whether you're paying for labor. Here's a rough breakdown of what you can expect:
- Hub assembly parts: $80 to $200 per unit.
- Press-in bearing kits: $20 to $50 for each bearing/race set.
- Shop labor or machine shop fees: $100 to $200 for pressing services or full installation.
Shop T1A Auto now at https://t1aauto.com today
