


You've finished the install, the image is sharp, and the camera works perfectly in the driveway. Then summer arrives, the truck goes through a wash, or the liftgate gets opened a few times, and the picture starts cutting out. Often, the camera isn't the problem. The rear view camera mount, its position, and the cable path are what failed.
A reliable installation has to survive vibration, water, heat, flexing panels, and repeated movement around the tailgate or hatch. The camera should sit in a predictable position, the bracket should remain rigid, and the wiring should move only where the vehicle itself moves. Treat the job as a vehicle-body installation, not just an electronics upgrade.
Table of Contents
- Why Rear View Camera Mount Placement Controls Long-Term Reliability
- How to Choose the Best Rear View Camera Mount Location and Bracket Type
- Surface Prep and Secure Fastening for a Lasting Rear View Camera Mount Install
- Wiring Routing, Sealing, and Weatherproofing Strategies That Actually Work
- Alignment, Aiming, and Quick Troubleshooting for Rear View Camera Mount Setups
- Weather, Heat, and Glass Condition Risks for Interior Rear View Camera Mounts
Why Rear View Camera Mount Placement Controls Long-Term Reliability
A high-quality camera can still produce a poor result when the mounting point is wrong. A low bumper position may expose the lens to road spray and stones. A hatch-mounted camera can give an excellent view while the hatch is closed, then pinch its cable every time the hatch opens. An adhesive pad may hold well on clean glass but release after repeated heat cycles if the surface was contaminated.
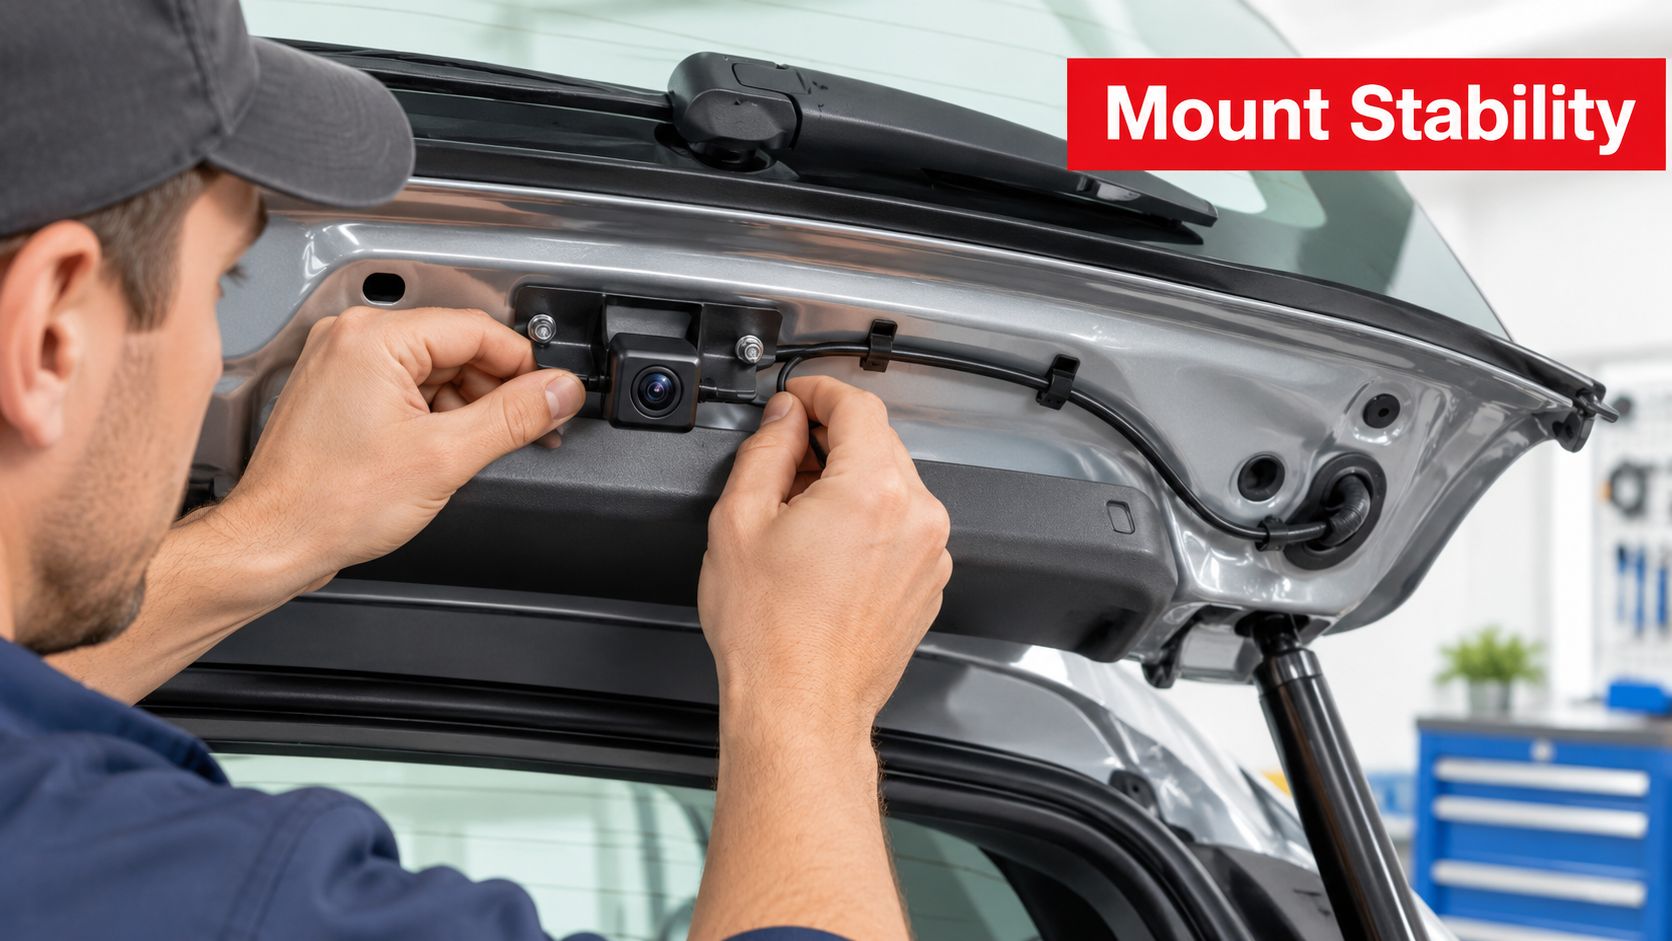
Factory cameras usually sit where the body provides a stable reference, a protected cable route, and a repeatable view behind the vehicle. Retrofitting a camera means recreating those advantages. Before drilling or peeling an adhesive liner, inspect the surrounding sheet metal, trim, hinges, hatch gaps, bumper contours, and likely spray path.
Start with the vehicle, not the camera
A centered position near the rear extremity usually gives the most useful perspective because the image corresponds naturally with the vehicle's centerline. That doesn't mean the center of the bumper is always the correct location. A tailgate handle, reinforcement beam, license plate recess, or factory wiring pass-through may dictate a slightly different solution.
The installed base shows how thoroughly rear cameras have moved into ordinary vehicle design. A 2026 industry summary estimates that about 78% of newly manufactured passenger vehicles globally include rear-view cameras, with regulatory coverage across 62 countries, annual shipments exceeding 45 million units, and approximately 120 million vehicles worldwide already equipped. The same summary estimates about 26 million active vehicles in the United States use these systems. These figures are reported in the automotive rear-view camera market summary, and they reinforce a practical point: factory-style placement is now a mass-market engineering standard, not a luxury feature.
Practical rule: If the proposed mounting point moves, flexes, traps water, or forces a sharp cable bend, reject it before you evaluate the camera image.
A good location also leaves room for service. You should be able to remove the camera, access the connector, and inspect the cable without dismantling half the rear trim. If the lens gets dirty, follow a controlled cleaning routine such as this backup camera lens cleaning guide, but remember that frequent contamination may indicate the mount sits too close to the spray path.
How to Choose the Best Rear View Camera Mount Location and Bracket Type
Choose the mounting location in the same order an installer checks a new body repair: geometry first, hardware second, cosmetics third. A neat-looking camera that points too high, sits off-axis, or flexes with the panel won't remain useful.
Start with the centerline. Mark the vehicle's center using the bumper, hatch latch, license plate recess, or another symmetrical body reference. Hold the camera or bracket in place and check whether the lens, rather than only the bracket housing, is centered. An offset mount can work, but the display may show more of one side and make backing guidance less intuitive.
GM guidance for certain trailer and vehicle applications places the camera within 2 inches, or 50 mm, of the vehicle centerline, and between 24 and 48 inches, or 610 to 1220 mm, above ground when meeting the relevant FMVSS 111 visibility requirements. The same guidance indicates that a supplied bracket can allow as little as 8 inches of rear setback while still satisfying the rule set. Check the applicable vehicle and camera documentation before treating those dimensions as universal. The installation details are set out in GM's camera mounting guidance.
Match the bracket to the body
A bolted bracket is generally the stronger choice on a rigid metal panel, especially on a truck that sees vibration, towing, or frequent off-road use. It requires drilling, corrosion protection, and careful sealing, but it gives you a defined mechanical connection and makes future adjustment straightforward.
An adhesive mount avoids drilling and can suit clean interior glass or a smooth, rigid trim surface. It isn't a good answer for every exterior panel. Textured plastic, dusty paint, curved glass, and surfaces exposed to strong heat or water make adhesive retention less predictable. A bracket that feels solid by hand can still shift when the panel flexes or the cable pulls against it.
Use a bracket with enough adjustment to set the lens level without forcing the camera to sit at an extreme angle. Avoid placing the camera so low that the bumper fills the lower image or so high that the display shows excessive sky and loses the area immediately behind the vehicle. The camera mounting bracket reference can help when comparing bracket styles, but the vehicle's body structure should make the final decision.
Surface Prep and Secure Fastening for a Lasting Rear View Camera Mount Install
Most mount failures begin before the bracket is attached. Adhesive doesn't bond to dirt, wax, silicone residue, or moisture, and a bolt won't compensate for a distorted trim panel. Clean the area with isopropyl alcohol, allow it to dry fully, and inspect the surface under strong light.
For an adhesive installation, place the mount temporarily with masking tape and watch the camera image before committing. Check that the lens is centered, the cable can leave without a sharp bend, and the hatch or trunk clears the mount through its full travel. On a questionable surface, test the adhesive on a small, hidden patch first. Don't use a general household cleaner that leaves a gloss or detergent film behind.
Fastening without creating a new failure
Drilled mounts need a controlled sequence:
- Mark the holes carefully. Confirm what's behind the panel before drilling. Keep clear of harnesses, airbags, reinforcement, and water channels.
- Protect the opening. Remove burrs, treat exposed metal against corrosion, and apply suitable automotive sealant around the pass-through or fastener area.
- Use washers on thin material. A washer spreads the load and reduces the chance of pulling a bolt through thin stamped metal or cracking plastic.
- Tighten gradually. Use the manufacturer's torque specification when one exists. If no specification is provided, tighten only enough to seat the bracket firmly, then stop before the panel bows.
- Add strain relief. Secure the cable close to the bracket so connector movement doesn't load the camera socket.
Overtightening is a common DIY mistake. A plastic bracket can crack immediately, while a thin metal panel can deform and leave the camera pointing in a different direction after the hardware settles. A locknut or suitable thread-locking method can prevent loosening, but don't apply thread locker where the manufacturer prohibits it or where future service requires a specific fastener.
The bracket should hold the camera. It shouldn't be carrying the weight of a dangling cable.
Run your hand around the finished mount and look for sharp edges, trapped trim, or a cable that rubs against the bracket. The installation should feel boring and immovable. If the camera shifts when you pull gently on the cable, fix that before routing the harness through the vehicle.
Wiring Routing, Sealing, and Weatherproofing Strategies That Actually Work
A rear camera harness fails where the vehicle moves, rubs, heats, or collects water. The cable route must account for the entire body, not just the short distance between the camera and the nearest trim opening. On a pickup, that may mean protecting the harness along the bed and tailgate. On an SUV, it may mean passing through a liftgate hinge area where the cable bends repeatedly.
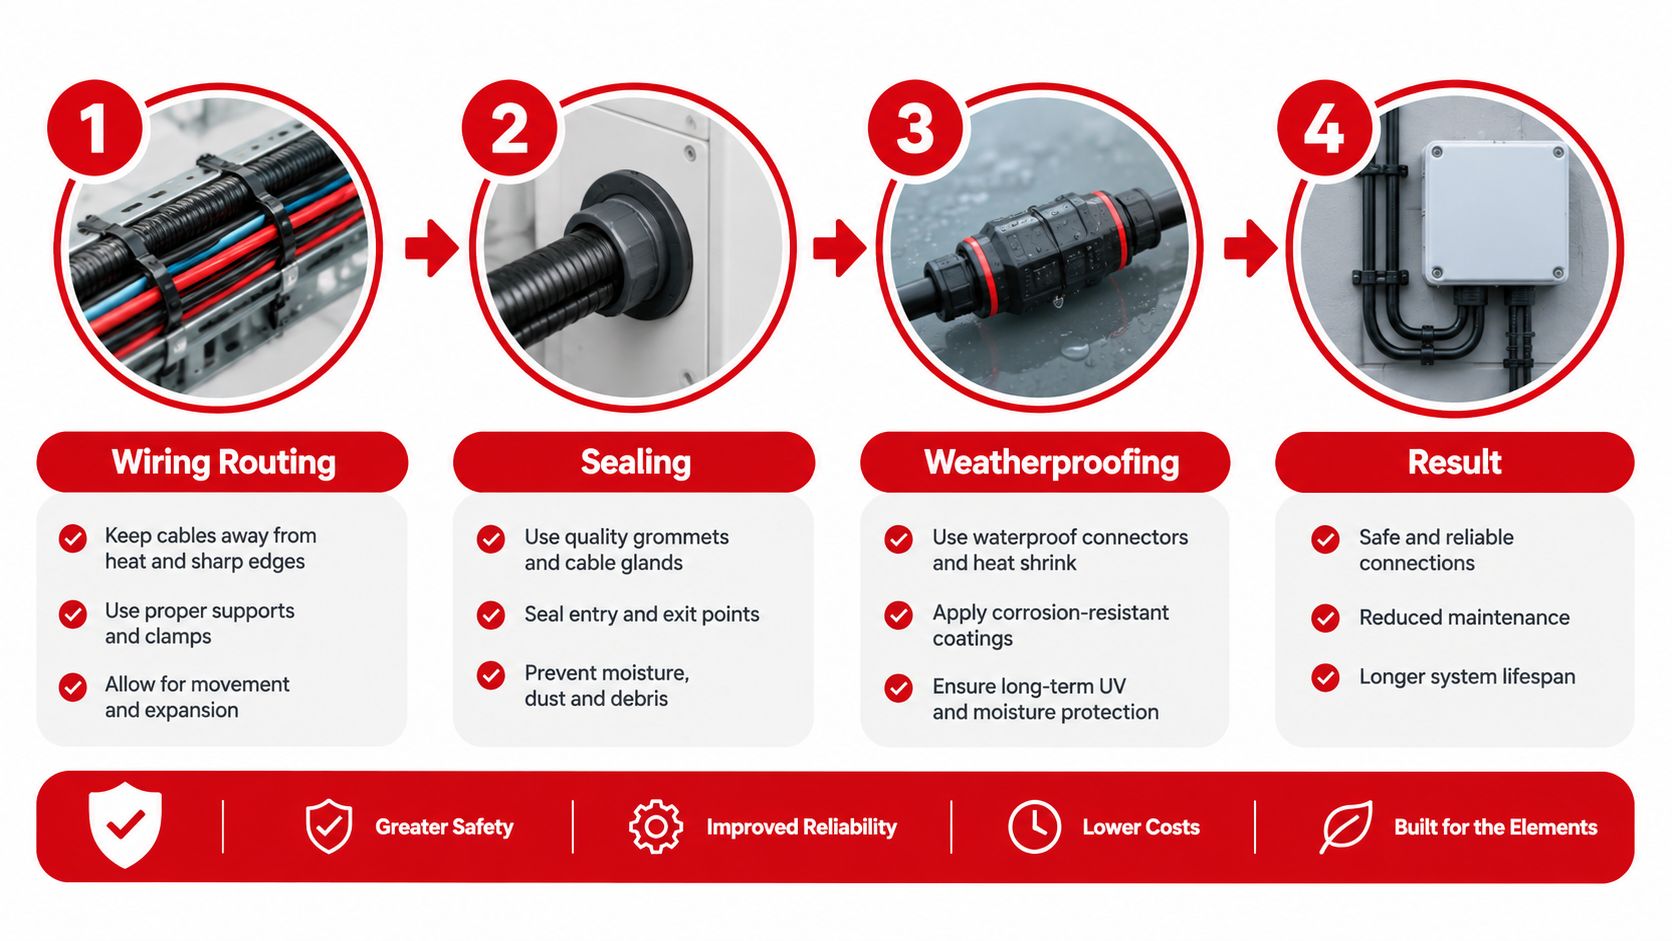
Ford's trailer camera instructions place the camera on the trailer centerline, specify a mounting height no lower than 31 inches, or 787.4 mm, above ground, and use a 45-degree default bracket angle. Other OEM-aligned installation instructions call for a 20 mm cable pass-through hole, a split grommet, and sealant around the grommet. These details appear in Ford's trailer camera installation guide, but the broader lesson applies to vehicle retrofits: cable protection, geometry, and sealing have to work together.
Build the route around movement
Before securing anything, open and close the hatch, tailgate, or trunk repeatedly while watching the cable. Keep it away from hinges, latch mechanisms, exhaust heat, sharp brackets, and defroster wiring. A split grommet should fit the pass-through snugly, and sealant should close the gap around the grommet rather than just covering the cable.
Use clamps or clips to prevent the harness from becoming a pendulum. Leave a controlled flex loop where the hatch moves, but don't leave a long loose section that can catch on trim. A small drip loop outside the connector can help water run away from the plug instead of following the cable into it.
Route the cable so the hinge moves the protected loop, not the connector.
Inspect the upper liftgate trim and rubber accordion boot closely. Cable pinch points, hatch flex, and moving parts are recurring causes of intermittent video, as highlighted in vehicle-specific rear camera routing guidance. If the image cuts out only while the hatch moves, suspect the route before replacing the camera.
This backup camera wiring diagram guide can help you map the signal and power path before you hide the harness.
Alignment, Aiming, and Quick Troubleshooting for Rear View Camera Mount Setups
A camera can be firmly mounted and still be functionally wrong. Start the final check with the vehicle on level ground, the tires at normal pressure, and the hatch or tailgate in its normal closed position. Center the lens, not merely the bracket, then verify that the horizontal reference is level.
Use a fixed object behind the vehicle to check the view. The camera should show the area immediately behind the bumper without making the ground disappear under the vehicle or pushing the useful scene too high. If the display has guide lines, treat them as a calibration aid, not proof that the camera is correctly aimed.
Test the vehicle in motion
Run this sequence before reinstalling every trim panel:
- Static check: Confirm the lens is clean, the bracket is rigid, and the image is stable with the engine running.
- Movement check: Open and close the hatch or tailgate while someone watches the display.
- Vibration check: Tap the nearby panel lightly and look for image shake or a changing horizon.
- Lighting check: Test direct sun, shade, and low-light conditions. A washed-out image may result from angle or glare rather than a failed camera.
- Route check: Inspect every place where the harness passes through a hinge, grommet, clip, or trim edge.
If video cuts out during hatch movement, flex the harness gently at each transition point. A change in the image identifies a wiring or connector problem. If the signal remains stable but the picture shakes, the bracket or its panel is moving. If the image is consistently too high, too low, or visibly off-center, relocate or re-aim the mount instead of chasing electrical faults.
A camera that works in the driveway has passed only the easiest test.
Vehicle-specific failures often come from an overlooked pinch point rather than a defective camera. Complete the mechanical and movement checks before sealing the trim permanently.
Weather, Heat, and Glass Condition Risks for Interior Rear View Camera Mounts
A glass-mounted rear view camera may look secure during installation, then shift after a few hot days, a cold soak, or repeated hatch movement. Interior mounting avoids drilling, but it exposes the adhesive, bracket, and cable to sun-heated glass, condensation, curved surfaces, dirt, and defroster-grid constraints.
Prepare the glass with isopropyl alcohol and let it dry fully before applying the mount. Keep the adhesive pad away from defroster wires, damaged tint, contamination, and sharply curved areas where the pad cannot sit flat. Center the lens itself, not just the housing. A centered bracket can still leave the optical center off-axis if the glass or bracket bends the camera angle.
Why interior mounts fail later
The first drive proves very little. Repeated heating and cooling can weaken a marginal bond, while moisture entering a dirty edge can lift the pad. A poorly seated mount or a cable pulling sideways adds load that the adhesive was never meant to carry. The guidance for installing wireless backup cameras also covers surface cleaning, defroster-grid clearance, lens centering, and angle checks.
Support the cable independently from the glass mount whenever possible. The adhesive should hold the camera and bracket, not the weight of the entire harness. Leave enough slack for trim and hatch movement, then secure the cable so vibration cannot tug on the camera. Check every transition for a pinch point before reinstalling the trim.
An exterior bracket can last longer on vehicles with heavy vibration, frequent hatch movement, or unsuitable glass. A sealed, bolted mount requires more preparation, but it provides a stable reference and usually improves service access. If the camera shifts, rattles, develops an intermittent signal, or repeatedly loses adhesion, vehicle-specific replacement hardware from T1A Auto includes rearview cameras and direct-fit options based on factory mounting locations.
Before closing the trim, clean the lens, inspect the seal, press the bracket by hand, and repeat the hatch movement test. A camera that works in the driveway has passed only the easiest test. This final inspection helps distinguish a dependable rear view camera mount from one that survives only until the next heat cycle or vibration event.
T1A Auto offers vehicle-specific rearview backup cameras, park assist cameras, and direct-fit replacement parts using factory mounting locations on Toyota, Ford, Chevrolet, and GMC vehicles. Visit T1A Auto to match the camera and mounting solution to your vehicle before you start drilling or routing the harness.
