


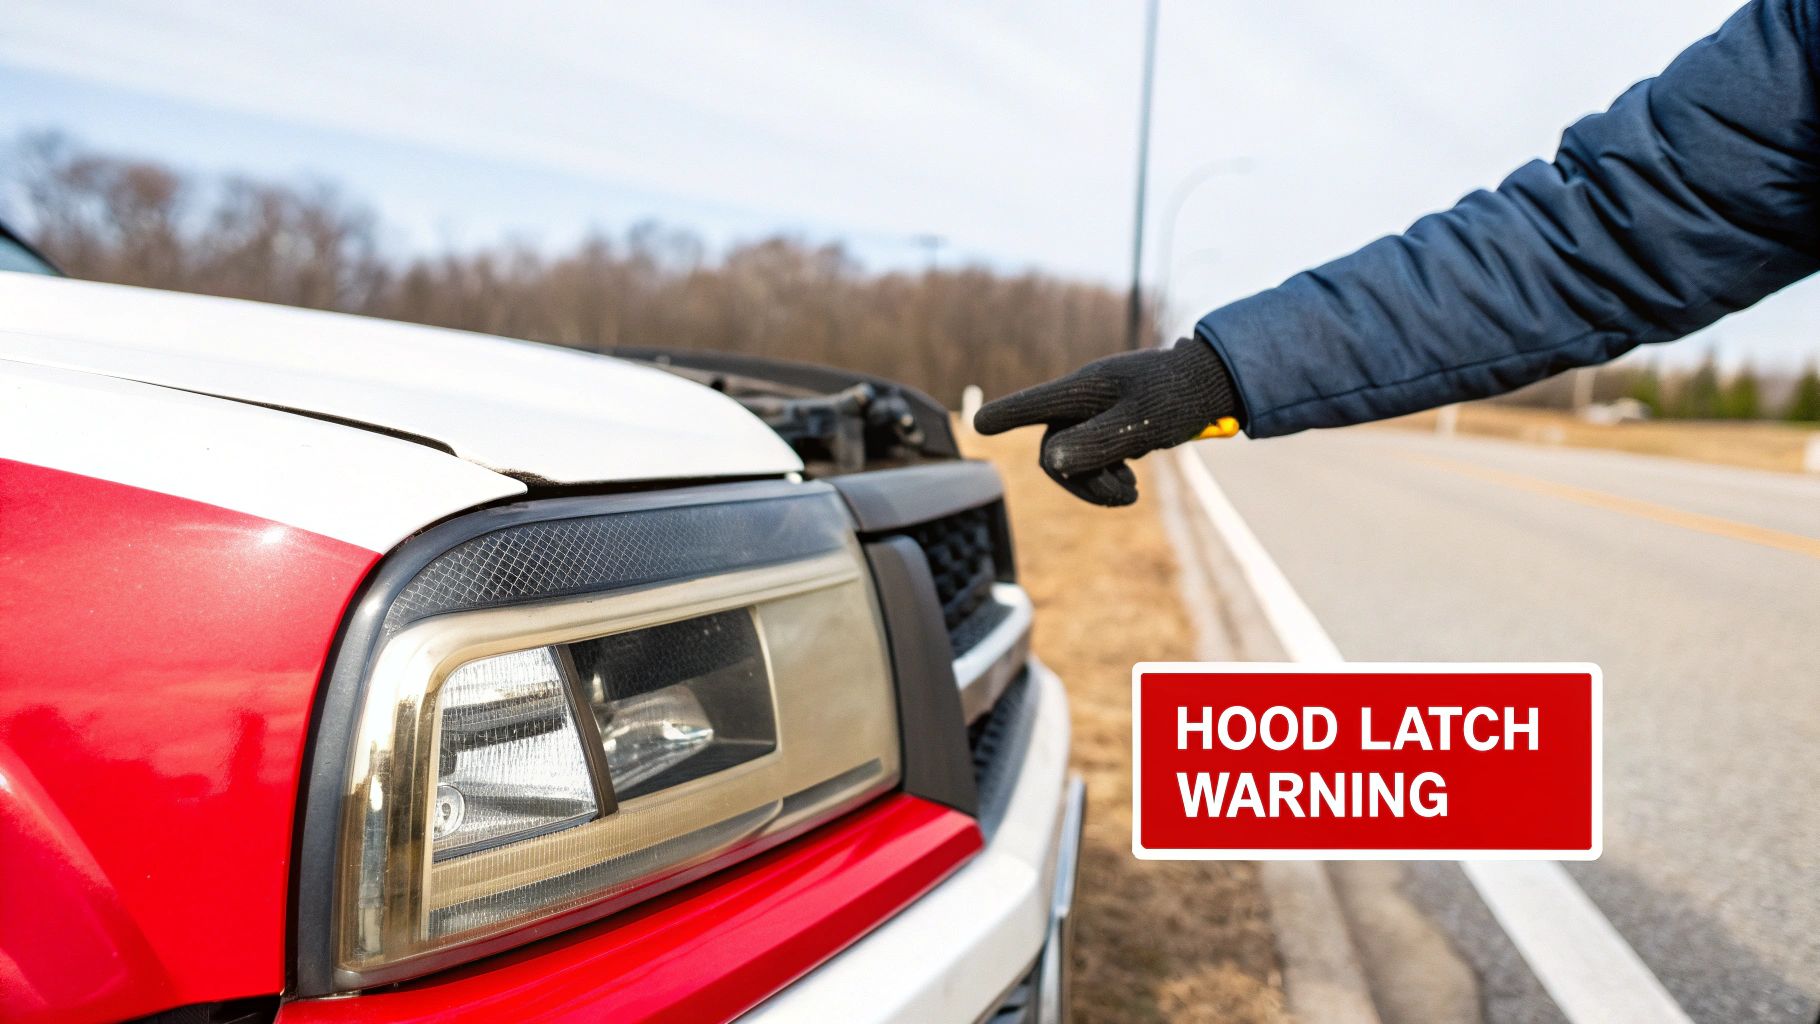
That moment your hood starts to flutter on the highway is terrifying. Equally frustrating is the limp, lifeless feel of a release lever that does nothing. These aren't just minor annoyances; they're your car's way of telling you the hood latch is in trouble. Ignoring it is a gamble you don't want to take.
Signs Your Hood Latch Is Failing
A hood latch rarely fails out of the blue. It usually gives you plenty of warning signs, moving from subtle issues to outright mechanical failures. Catching them early can save you from a dangerous situation down the road.
Maybe you've noticed the hood on your Toyota Tacoma seems to vibrate a little more over bumps, or the latch on your Ford F-150 is a real bear to get open on a cold morning. These aren't just vehicle quirks—they're classic signs that the latch assembly is wearing out.
Common Failure Symptoms
The most frequent signs all point to one thing: the latch isn't holding or releasing the way it should. Keep an eye out for these classic symptoms:
- Hood Won't Close Securely: You find yourself having to slam the hood repeatedly for it to catch. Even when it does, you can feel a bit of play or movement when you press down on it.
- Release Lever Feels Loose: You pull the handle inside the car and get nothing but slack. That "mushy" feeling means the cable is likely stretched, broken, or has come disconnected from the latch.
- Hood Pops Open While Driving: This is the big one. If the hood suddenly pops up to the secondary catch while you're moving, the primary latch has completely failed.
Crucial Safety Note: The secondary latch is an emergency backup, not a primary restraint. If you suspect your main latch has failed, avoid driving at high speeds. The wind force alone can be enough to rip a weak secondary catch loose, sending the hood flying into your windshield.
Understanding the Mechanics of Failure
For safety, cars use a two-stage system. The primary latch is the main lock operated by the cable from inside your car. The secondary latch is that little lever you have to feel for under the edge of the hood to open it all the way. The problem can be with either part, but the culprit is often simple wear and tear.
Many original latches are made with plastic parts that just don't stand up to years of engine heat, moisture, and road salt. They get brittle and crack. This is a top reason why you eventually need to replace hood latch assemblies. Corrosion is another killer, causing the mechanism to seize up. Add in the daily stress of opening and closing, and it's easy to see how things wear out.
By learning to spot these tell-tale signs, you can diagnose the problem with confidence and tackle the repair before it leaves you stranded.
Choosing the Right Replacement Hood Latch
So, you've diagnosed a bad hood latch. Now comes the real decision: what do you replace it with? This choice is a lot more critical than most people realize, directly affecting your vehicle's safety and your own peace of mind down the road. You've got two main paths—sticking with an Original Equipment Manufacturer (OEM) part or going with a high-quality aftermarket alternative.
While grabbing an OEM part from the dealer guarantees a perfect match to the factory original, that’s not always a good thing. Think about it. The original part failed, didn't it? Many factory latches, especially on popular trucks like the Chevy Silverado or Ford F-150, have plastic components that just don't stand the test of time. They get brittle from constant heat cycles and eventually crack, leaving you right back where you started. Buying another OEM latch often just resets the clock on the same inevitable failure.
Upgrading from OEM Plastic to Aftermarket Metal
This is where a premium aftermarket part, like the ones we offer at T1A Auto, really shines. Instead of just copying the original design flaws, we engineer them out. The most important improvement usually comes down to the materials.
- Material Durability: We replace those failure-prone plastic bits with reinforced metal components. This one simple change dramatically improves strength and resilience against the daily grind.
- Cost-Effectiveness: Aftermarket parts almost always offer major savings compared to the dealership price tag, and you don't have to sacrifice quality. In this case, you're actually getting a stronger part for less money.
- Warranty and Support: We stand behind our parts. A lifetime warranty gives you the confidence that you won't be dealing with this problem ever again.
This isn't just about the initial purchase; it’s a strategic move for the long-term health of your vehicle. Investing in a metal-reinforced aftermarket latch is a smart way to prevent a repeat headache, especially for a workhorse vehicle that you rely on every day. For a deeper dive, check out our guide on the differences between OEM and aftermarket parts.
What to Look for in an Aftermarket Latch
Let's be clear: not all aftermarket parts are made equal. When you’re ready to replace hood latch components, you need to look for signs of quality. The single most important thing to look for is CAPA certification.
CAPA (Certified Automotive Parts Association) is a completely independent, non-profit group that puts aftermarket parts through the wringer. They test them to make sure they fit, perform, and last just as well as—or even better than—the original factory part. A CAPA-certified latch has passed tough tests for its mechanical strength and material quality. That seal is your guarantee that you're buying a safe, reliable part.
The global demand for these parts highlights how common this issue is. The car hood latches market was valued at a massive USD 13,450.75 million and is only expected to grow. It’s no surprise that dependable mechanical latches still hold 56.4% of that market. For DIYers and professional shops, this means there are more great aftermarket options than ever before—parts specifically designed to fix common factory flaws for good.
Here's a quick look at how the options stack up.
OEM vs T1A Auto Aftermarket Hood Latch Comparison
| Feature | OEM Hood Latch | T1A Auto Aftermarket Hood Latch |
|---|---|---|
| Material | Often uses plastic components prone to cracking and failure. | Engineered with reinforced metal for superior strength and longevity. |
| Cost | Typically more expensive due to brand name and dealer markup. | More affordable, providing better value without compromising quality. |
| Durability | Prone to the same failure modes as the original part. | Designed to correct original flaws, ensuring a longer service life. |
| Warranty | Usually limited (e.g., 12 months or 12,000 miles). | Backed by a lifetime warranty on metal components for ultimate peace of mind. |
| Certification | Meets factory standards at the time of manufacture. | Often CAPA-certified, guaranteeing equivalent or better performance. |
At the end of the day, choosing a premium, metal-reinforced, and CAPA-certified aftermarket hood latch isn't just a repair. It's a permanent upgrade that solves the root problem, ensuring your hood stays locked down securely for years to come.
Getting Your Tools and Preparing for the Job
A smooth repair job starts long before you ever pop the hood. Honestly, getting properly set up is the difference between a frustrating afternoon of hunting for tools and a clean, successful fix. Taking just 20 minutes to get organized will save you a world of headache when it's time to replace the hood latch.
Think of it like cooking a meal—you get all your ingredients out on the counter first, right? Same logic applies here. Having the right socket or pliers within arm's reach means you won't have to stop what you're doing and dig through a messy toolbox.
Your Essential Tool Checklist
You don't need a full professional setup for this, but a few key tools will make the job go from a chore to a breeze. You probably have most of this stuff in your garage already.
- Socket Set with Extension: This is a must-have. Most hood latch bolts are 10mm or 12mm. A deep socket and a decent extension are your best friends here, especially for getting to those recessed bolts on trucks like a Toyota Tundra, where the latch is often tucked way behind the grille.
- Trim Removal Tool: Seriously, don't use a flathead screwdriver for this. A cheap plastic trim tool will let you pop off radiator covers and grille clips without scratching the paint or snapping those brittle plastic retainers.
- Needle-Nose Pliers: These are perfect for getting a grip on that small, finicky retainer clip holding the release cable to the latch itself.
- Penetrating Oil: If you live anywhere that sees salt or rust, this stuff is a lifesaver. Give the bolts a good spray the night before, and you'll turn a potentially seized fastener into a non-issue.
- Paint Marker or White-Out: Here’s a pro tip that saves so much time later. You'll use this to trace the outline of the old latch before you unbolt it, giving you a perfect template for lining up the new part.
Pro Tip: Don't underestimate the power of good lighting. A simple headlamp or a strategically placed work light makes all the difference when you're trying to see the cable connection or line up bolts in a shadowy engine bay.
Pre-Job Prep and Safety
Once you’ve got your tools laid out, there are a couple of final prep steps. First off, always wear gloves. Engine bays are filthy and full of surprisingly sharp edges.
It's not always necessary, but I often recommend disconnecting the negative battery terminal if you're working near any wiring or sensitive electronics. It’s a quick, simple precaution that prevents any accidental shorts.
Next, and this is important, take a second to mark the old latch’s position. Use that paint marker to trace around the bolts and the body of the latch. This little step creates a visual guide that makes aligning the new latch almost foolproof.
Finally, for those stubborn bolts, hit them with some penetrating oil and let it do its magic. If you're swapping out the hardware too, think about putting a dab of anti-seize on the new bolt threads. It’ll stop them from corroding and make them easy to remove years down the road if you ever have to. For more on that, check out our article explaining the benefits of copper anti-seize.
With your workspace prepped and tools ready, you’re all set to get started on the removal.
How to Remove and Install a New Hood Latch
Alright, you've got your tools laid out and the workspace is clear. Time to dive in. This is where the real work begins, but honestly, it’s a very manageable job for most DIYers. We'll go through the whole process, but I'm going to focus on the little details that separate a frustrating Saturday from a successful repair you can be proud of.
Think of this as me looking over your shoulder, giving you tips as we go, not just a dry list of instructions.
First, let's talk prep. Getting these three simple things done upfront is a pro move that sidesteps common headaches and saves you a ton of time down the road.
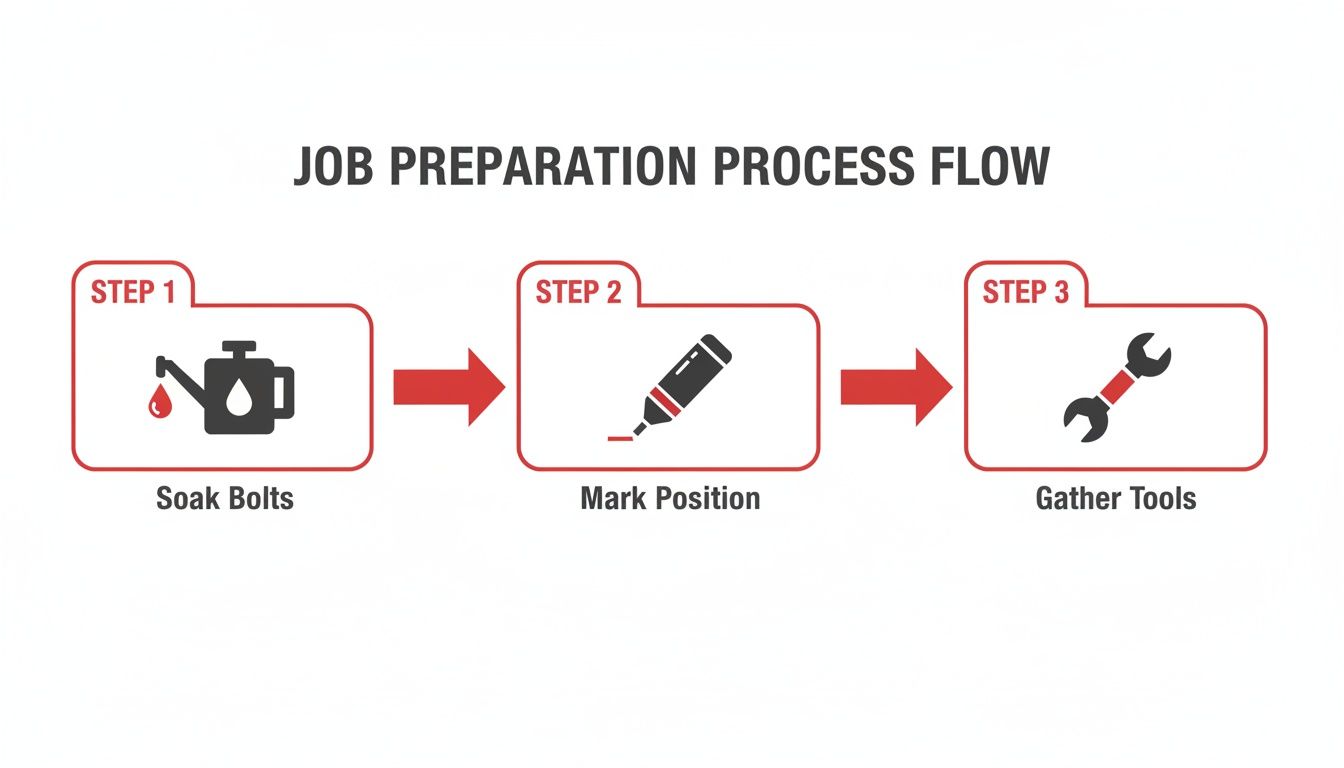
This little workflow—soak, mark, gather—is exactly how a seasoned tech would approach the job to make it go smoothly.
Gaining Access to the Old Latch
First things first, you need a clear shot at the latch assembly. On most cars, this means getting the plastic radiator cover or shroud out of the way. It’s that big piece of plastic sitting right behind the grille. Grab your trim removal tool and carefully pop out the clips holding it down. Go slow and use even pressure; those clips love to get brittle and snap.
Now, if you're working on a truck like a Toyota Tundra or a Chevy Silverado, you might have to pull part of the grille itself. Don't let that intimidate you. It's usually just a few bolts up top and some clips at the bottom. A quick search for your model year will pinpoint exactly where they are. Once the cover and any grille pieces are off, the old hood latch should be staring right at you.
Disconnecting the Release Cable
This is the part that hangs people up, but it's pretty simple once you see it. The release cable has a small lead barrel on the end that sits in a slot on the latch. A plastic retainer clip is what holds the cable housing in place.
Take your needle-nose pliers or a small flathead screwdriver and gently pry that retainer clip open. Seriously, be gentle. If it's old, it'll be fragile. With the clip loose, you can slide the cable housing out of its bracket. Then, just turn the mechanism a bit to line up the cable with the open part of the slot and lift the barrel right out. It's free.
Pro Tip: Stop and take a quick photo of how the cable is routed with your phone. This takes five seconds and can save you a ton of guesswork when you're hooking up the new latch.
Unbolting the Old Latch Assembly
Remember that paint marker from the prep stage? This is its moment to shine. You should see the perfect outline of the old latch’s position on the radiator support.
Grab your socket wrench with the right size socket—usually a 10mm or 12mm—and get those mounting bolts out. There are typically two or three of them. If you hit them with penetrating oil earlier, they should break free without a fight. Once the last bolt is out, just lift the old latch assembly out and set it aside.
Installing the New Hood Latch
Putting the new one in is basically the reverse of what you just did, but the key here is alignment. The market for these parts is huge—it stood at USD 2.30 billion and is still growing—so quality aftermarket replacements are easy to find. In fact, the hood design on 48% of popular trucks like the F-Series and Silverados makes this a surprisingly simple swap.
Start by setting the new latch inside the outline you traced. This trick alone will get you about 90% of the way to a perfect alignment from the get-go.
- Start the bolts by hand. This is non-negotiable. It prevents cross-threading and ensures everything is sitting flush before you apply any torque.
- Snug the bolts down, but don't crank on them just yet. You want the latch to be secure, but with just enough play left for fine-tuning.
- Reconnect the release cable. Pop the barrel end into its slot on the new latch, guide the cable housing back into its bracket, and snap that retainer clip shut. Give the cable a light tug to make sure it’s seated properly.
It's worth noting that some vehicles, like the Jeep Wrangler, use a totally different external rubber latch design. The principle is the same, though—unbolt the old, bolt on the new. If that's what you're working on, you might find our guide on replacing the left and right side Jeep Wrangler hood latch set helpful.
With the new latch loosely in place and the cable connected, you're ready for the most important part of the entire job: the final alignment and safety checks.
Final Adjustments and Safety Checks
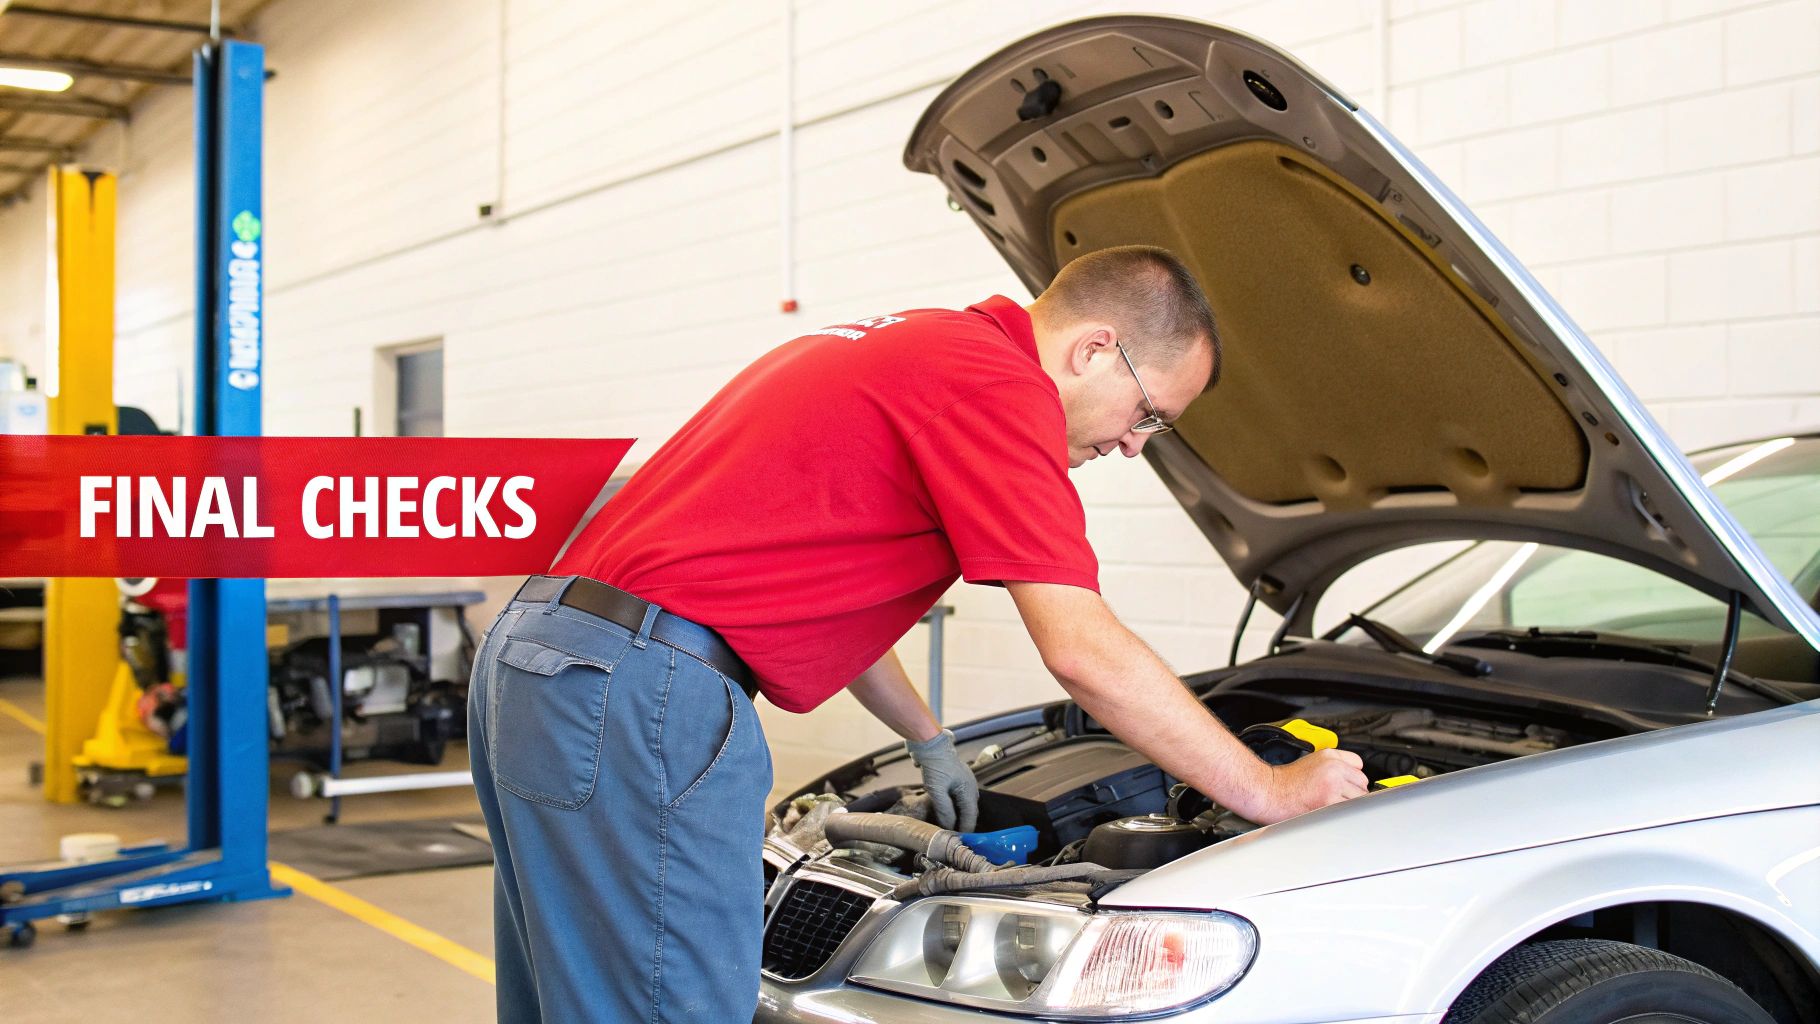
Getting the new hood latch bolted in feels like the finish line, but don't close your toolbox just yet. This next part—fine-tuning the alignment and running safety checks—is easily the most important step of the whole job. A misaligned latch is just as bad, if not worse, than a broken one.
Think of it like hanging a new door. The best hinges in the world don't mean a thing if the door doesn't sit square in the frame. Same deal here. You need the latch to perfectly grab the striker on the hood for a solid, rattle-free lockup. A little patience now will save you a world of headaches later.
Dialing In the Perfect Alignment
Remember leaving those mounting bolts just a bit loose? Now you’ll see why. That small amount of play is exactly what you need to nudge the latch into the perfect spot. The outline you traced gets you in the ballpark, but this is where you dial it in.
The process is all about small, careful movements. Gently lower the hood, but don't latch it. Leave it open by an inch or so. Now, get down at eye level and peer into the gap to see how the hood's striker is lining up with the opening on the new latch. Is it dead center? Leaning left or right?
- Nudge and Check: Lift the hood and give the latch a tiny push in the direction it needs to go. We’re talking millimeters here.
- Repeat the Test: Lower the hood again and check your work. Keep doing this little back-and-forth until that striker is perfectly centered.
Once it looks right, carefully tighten down the mounting bolts for good. Get them nice and snug, but don't go crazy and strip the threads.
Pro Tip: Resista a tentação de apenas bater o capô para "forçá-lo" a alinhar. Isso é uma ótima maneira de danificar o novo trinco ou o próprio atacante do capô. Leve o seu tempo e deixe a gravidade mostrar-lhe exatamente onde o trinco precisa estar.
Performing Critical Safety Verifications
With the latch locked down, it's time for the moment of truth. We need to confirm that everything is working exactly as it should. This isn't just about the hood closing; it's about making sure both the primary and secondary safety latches are engaging properly.
First, test the main latch. Lower the hood all the way and give it a firm press with both hands on the front edge. You should hear a solid, satisfying "CLICK." Now, try to lift the hood. It shouldn't budge at all. If there’s any play or it pops back up, you’ll need to revisit the alignment or check the height of the rubber bump stops on either side of the engine bay.
With that confirmed, let's make sure you can get it open again.
Testing the Release and Secondary Catch
Jump back in the car and pull the interior hood release handle. You want to feel a firm, responsive pull, followed by the "pop" of the hood releasing to the secondary catch. If the handle feels mushy or is incredibly hard to pull, the release cable might be binding or installed incorrectly.
Now for the final, and most critical, safety check. With the hood popped open a few inches, you need to test the secondary safety catch—that little lever you have to feel for under the hood's front lip.
- Find the Lever: Slide your hand under the hood and locate the secondary release lever.
- Work the Lever: It should move smoothly and allow you to lift the hood completely.
- Check its Spring: While the hood is open, manually flick the secondary catch on the latch mechanism itself. It should move without any binding and spring right back into its resting position.
This last check is absolutely non-negotiable. The secondary latch is the only thing stopping your hood from flying up into your windshield at 60 mph if the primary latch fails. Knowing it works gives you the peace of mind that your replace hood latch project was a success and your car is safe to drive.
Wrapping Up: Common Questions After Replacing a Hood Latch
Even after a seemingly successful repair, a few questions or hiccups can pop up. That's perfectly normal. Let's walk through some of the most common issues people run into after swapping out a hood latch, so you can finish the job with total confidence.
My Hood Still Won't Close Right After Installing the New Latch
This is hands-down the most frequent headache, and trust me, 99% of the time, it's just an alignment issue. You didn't break anything. The new latch simply needs to be perfectly lined up with that U-shaped striker on the hood.
Here’s the fix: slightly loosen the mounting bolts—just enough so you can nudge the latch assembly around. Carefully lower the hood and watch where the striker meets the latch. Adjust it side-to-side or front-to-back as needed. It's a game of small, incremental movements.
Also, take a look at the rubber bump stops. These are the little adjustable rubber cones on the radiator support. If they’re screwed out too far, they'll hold the hood up and stop it from latching. A little patience here goes a long way.
How Do I Know if the Release Cable is Bad, Too?
The cable is the other half of this equation, and it absolutely wears out. You can get a good feel for its condition before you even unbolt the old latch. Does the release handle inside the car feel spongy, super stiff, or does it just flop around without springing back? Those are tell-tale signs of a problem.
The definitive test? Disconnect the cable from the old latch while it's still on the car. With the cable detached, try working the latch mechanism by hand. If it moves easily now but was stiff before, the cable is your culprit. On older cars, it's often smart to just replace the cable and latch together to avoid having to tear everything apart again in six months.
Give the cable itself a quick visual inspection. If you see any obvious fraying, kinks, or gnarly rust, it's time for a new one.
Is It Okay to Drive if the Secondary Latch is Busted?
No. Absolutely not. This is a massive safety risk. That secondary latch is your fail-safe. It's the only thing stopping the hood from flying up into your windshield if the main latch gives out on the highway.
If you know that little safety catch is broken, the car isn't safe to drive at speed. Period. A bungee cord or some zip ties are strictly for a low-speed limp to a shop or your garage for an immediate repair. Do not treat it as a real fix.
How Much Will I Save Doing This Myself? (DIY vs. Shop Costs)
This is one of those jobs where going the DIY route saves you some serious cash. A solid aftermarket hood latch assembly typically runs between $30 and $80, depending on your car or truck. Beyond that, the only cost is your time and a few basic hand tools you probably own.
Take it to a shop, and you're looking at a bill anywhere from $150 to over $300. That price tag includes the part (usually with a markup) plus labor, which mechanics will bill for at least an hour or an hour and a half. For a repair this manageable, the DIY savings are significant and definitely worth the effort.
For a guaranteed fit and a part engineered to last, explore the premium aftermarket hood latches at T1A Auto. Our components are designed to correct common factory flaws, ensuring your repair is a permanent upgrade. Find the perfect part for your vehicle at https://t1aauto.com.
