


That awful grinding sound, or the stomach-dropping thud of a window suddenly vanishing into the door—it's a sound every car owner dreads. When your window starts acting up with jerky movements or just stops responding altogether, the culprit is almost always a failed power window regulator. The good news? This is a repair you can absolutely tackle yourself.
Diagnosing Your Broken Power Window
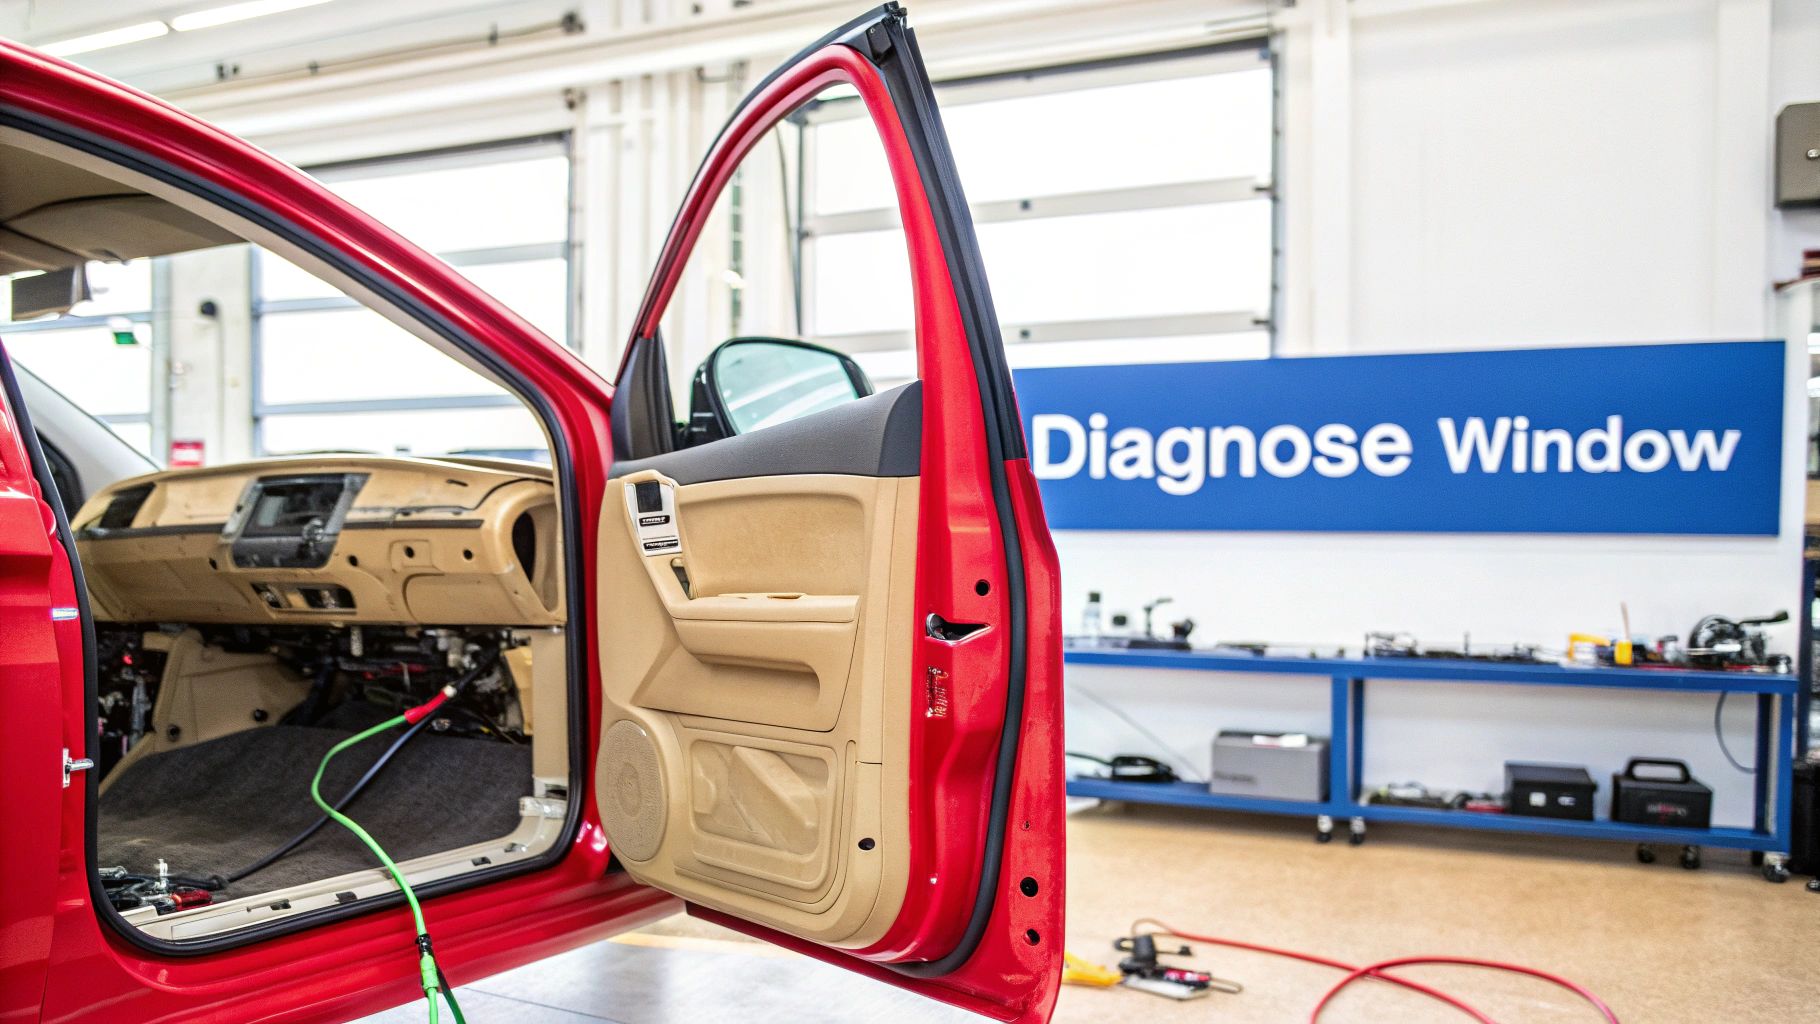
Before you start pulling things apart, let's make sure you've got the right diagnosis. A little bit of detective work now will save you a headache later. The most obvious clues are often what you hear and see.
If you hit the switch and hear a nasty grinding, clicking, or crunching noise coming from inside the door panel, that's a tell-tale sign. It usually means the regulator’s cables have snapped or jumped their pulleys.
Another dead giveaway is a window that plummets into the door, sometimes with a loud bang. That's a catastrophic failure of the lift mechanism, plain and simple. Other symptoms can be more subtle, like a window that moves way slower than it used to, or one that cocks to one side on its way up or down.
Understanding the Common Failure Points
A window regulator is a simple device, but it lives a hard life under constant tension. After thousands of up-and-down cycles, something is bound to give. From my experience, the failure almost always comes down to one of these weak spots:
- Frayed or Snapped Cables: The steel cables that do the heavy lifting are the number one failure point. They can rust, fray, and break, which is usually the source of that grinding sound.
- Broken Plastic Parts: To save money, many original regulators are built with plastic pulley wheels and clips. Over time, they get brittle and crack, letting the cables go slack.
- Worn Out Motor Gear: It's less common for the motor to die than the regulator itself, but the internal plastic or nylon gear can strip out, leaving the motor to spin uselessly.
A broken window isn't just an inconvenience—it's a security risk. A window stuck open is a welcome mat for thieves and rain. Getting it fixed quickly is more than just about comfort.
Why This is a Great DIY Project
Taking on a window regulator replacement might sound daunting, but it's one of the most straightforward and satisfying jobs you can do on your car. You only need basic hand tools, and you won't be messing with any complex engine systems.
By installing a quality T1A Auto replacement assembly—which often beefs up the weak points with better materials—you can get the job done right and be confident you won't have to do it again anytime soon. If you're not totally sure how these parts work, our guide on what exactly a window regulator is and does is a great place to start.
This is a common problem, too. The market for these parts was valued at around USD 7.39–7.79 billion in 2023–2024, and it's only getting bigger as more cars with power windows get older. You can see the full breakdown in this in-depth automotive window regulator market report.
Gearing Up: The Tools You'll Need for a Flawless Repair
Jumping into any car repair unprepared is a recipe for a headache. Trying to replace a window regulator without the right tools on hand? That’s a whole different level of frustrating. Taking a few minutes to gather everything you need first will turn this job from a potential struggle into a straightforward, methodical process.
Before a single screw comes out, your first move is always safety. Go ahead and disconnect the negative terminal on your car’s battery. This isn't an optional step—it kills the power, preventing the window motor from accidentally catching your fingers and protecting all the electronics from a costly short circuit.
Your Essential Toolkit
With the battery disconnected, let's get your tools lined up. While cars love to have their little quirks, this core set of tools will get you through almost any window regulator replacement. You don't need a top-of-the-line professional setup, just the right basics.
- Socket Set with an Extension: The bolts holding the door panel and regulator in place are almost always metric, usually in the 8mm to 13mm range. Trust me, you'll need that extension to reach the bolts buried deep inside the door.
- Screwdriver Set: You'll want a variety of Phillips and flat-head screwdrivers. A small flat-head is incredibly handy for gently prying open the little plastic covers that hide screws on armrests and door handles.
- Plastic Trim Removal Kit: This is your secret weapon. Using a metal screwdriver to pry off your door panel is the fastest way to scratch your interior and break a bunch of expensive plastic clips. These purpose-built tools are designed to pop clips without causing damage.
- Needle-Nose Pliers: Invaluable for wrangling stubborn electrical connectors and maneuvering tiny clips in those tight, hard-to-reach spots.
- Strong Tape: Don't skip this one. Good old painter's tape or some heavy-duty masking tape is non-negotiable for holding the window glass in the 'up' position after you've unbolted it from the regulator.
A Pro Tip From Experience: Don't underestimate how dark it is inside a car door. A simple headlamp or a small magnetic LED work light will feel like a lifesaver when you’re trying to see what you’re doing in there.
Setting Up Your Workspace for Success
An organized workspace is just as important as the tools themselves. As you start pulling off bolts, screws, and clips, they have a magical ability to get mixed up or vanish into thin air. A simple magnetic parts tray or even just a few labeled yogurt cups will save you a world of pain during reassembly.
Before you start, lay an old blanket or a big piece of cardboard down next to the door. This gives you a safe spot to rest the door panel without scratching it or your garage floor. It’s a simple trick that keeps everything clean and makes putting it all back together that much easier.
Having the right gear ready to go is the key to a smooth repair. This table breaks down what you'll need and why it's so important.
Essential Toolkit for Window Regulator Replacement
| Tool Category | Specific Items | Why You Need It |
|---|---|---|
| Safety Gear | Safety Goggles & Gloves | Protects your eyes from debris and your hands from sharp metal edges inside the door. |
| Disassembly Tools | Socket Set, Screwdrivers, Trim Tools | Essential for removing all fasteners and clips holding the door panel and regulator in place. |
| Glass Handling | Strong Painter's or Masking Tape | Securely holds the window glass up, preventing it from crashing down inside the door during removal. |
| Organization | Magnetic Tray or Labeled Containers | Keeps all your screws and small parts sorted, ensuring nothing is lost and reassembly is straightforward. |
Laying all this out before you touch the car is what separates a frustrating four-hour ordeal from a focused, two-hour job. This prep work means that once you dive in, you can focus on one thing: getting that new T1A Auto regulator installed perfectly.
Diving In: From Door Panel to Old Regulator
Alright, with your tools at the ready and the battery disconnected, it's time to get into the door itself. This is where patience pays off. Don't rush it. We'll walk through it piece by piece, starting with the biggest hurdle for most people: getting that door panel off without a scratch.
Every car is a little different, and manufacturers love to hide fasteners in clever spots. Think of it as a small puzzle. Your first job is to hunt down every last screw before you even think about pulling on the panel.
This quick diagram is a great final check before you start pulling things apart. It covers the essentials we just went over.
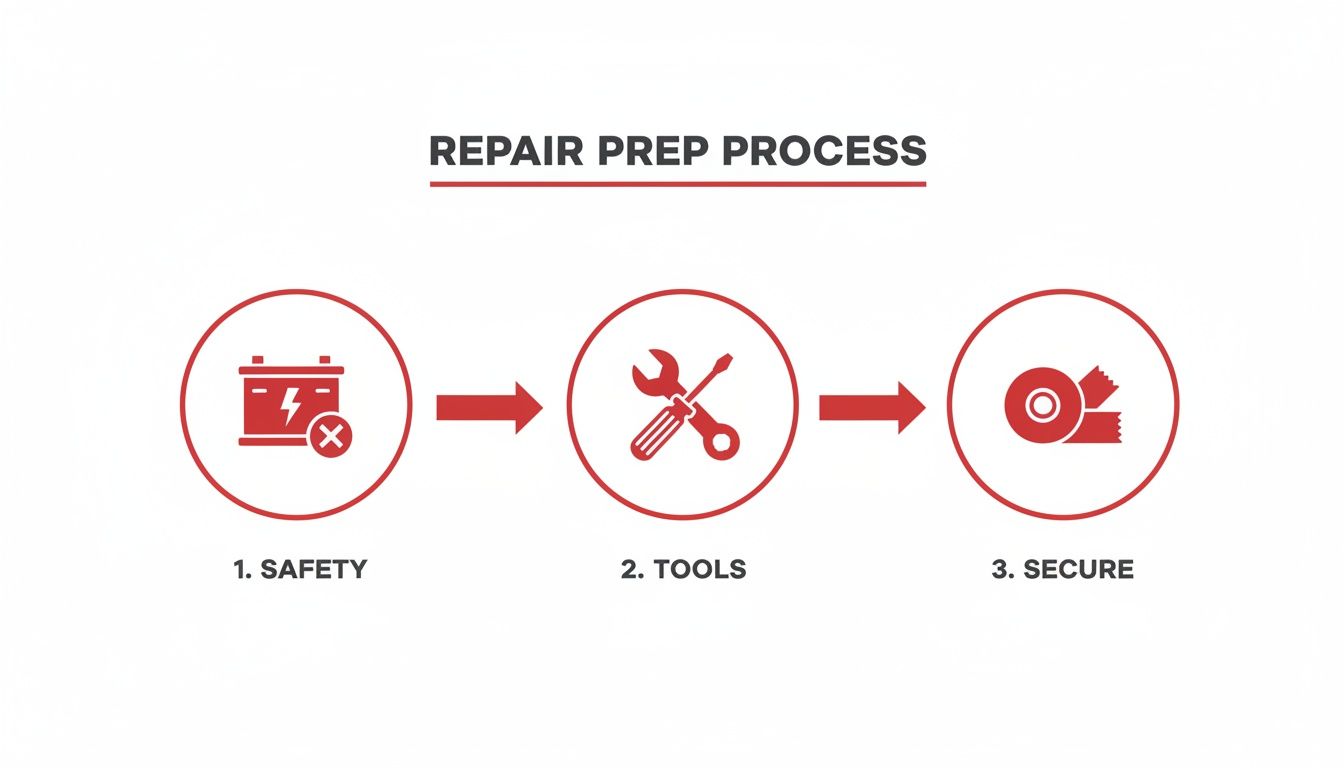
It’s your sanity check: battery off for safety, tools laid out, and window glass taped up. Nail these three, and the rest of the job will go much smoother.
Locating Hidden Panel Fasteners
Give the whole door panel a good look-over. You're searching for small, discreet plastic covers or plugs that blend in with the trim. Those are almost always hiding screws.
I've found they're usually in a few common places:
- Inside the Door Handle Bezel: Grab a small flat-head screwdriver or a pick and gently pop off the trim around the interior handle. You'll almost certainly find a screw or two hiding back there.
- Under the Armrest: Feel around inside the little pocket where you'd pull the door shut. Many have a small rubber or felt mat at the bottom. Lift that out, and you’ll likely find more screws.
- Behind the Window Switch Panel: This is another favorite hiding spot. Your plastic trim tools are your best friend here. Carefully pry the switch assembly up, unplug the wiring harness, and look for screws underneath.
Once you’re positive all the screws are out, you can move on to the clips. If you want a more detailed breakdown, check out our guide on how to remove a car door panel, as it gets into specific clip types you might run into.
Releasing the Door Panel Clips
Now, the panel is only held in by a series of plastic clips around its edge. I always start at a bottom corner. Slide your trim removal tool between the panel and the metal door frame.
Pry out gently until you hear a "pop"—that's the first clip letting go. Just work your way around the bottom and up both sides, releasing one clip at a time. It takes a bit of force, but the right tool spreads the pressure and keeps you from snapping those fragile plastic clips.
Technician's Insight: Whatever you do, don't just yank on the panel after you get a couple of clips loose. That's the #1 way to break them, and you'll be chasing down a rattle forever. Be methodical. Pop, move, pop.
After all the side and bottom clips are free, the panel will feel loose, but it's still hanging on a lip along the window sill. Lift the whole thing straight up and pull it slightly toward you to unhook it. Don't just let it drop—it's still connected!
Disconnecting Everything and Getting Inside
Hold the panel and peek behind it. You'll see a few electrical connectors for the speakers, maybe a light at the bottom of the door, and the main window switch harness if you didn't unplug it earlier. Squeeze the little release tabs and pull them apart.
You'll also see the cable for the door handle. It's usually held by a small plastic clip. Unclip it, and the cable end will slide right out of its retainer. Now you can finally take the panel and set it safely on that blanket you laid out.
What you're looking at now is a plastic sheet, the weather barrier. It’s sealed on with a sticky black goo.
- Peel it Back Carefully: I like to use a utility knife to gently slice through the adhesive around the edges. Don't just rip the sheet off. Peel it back slowly, only exposing enough of the door's guts to get to the regulator.
- Save That Seal: Your goal is to stick this barrier right back where it was. If you tear it, you're asking for water leaks and wind noise. If the adhesive is old and crusty, it's smart to have some fresh butyl tape or an all-weather sealant ready for reassembly.
Take a second to appreciate what’s going on in here. That simple window motion is the result of some pretty sophisticated engineering, driven by safety. Modern systems require anti-pinch technology, which is a big reason why the top three global manufacturers control over 35% of the market. When you replace a power window regulator, you’re putting a key safety feature back in working order.
Securing the Glass and Yanking the Old Regulator
Okay, there it is—the window regulator assembly. Before you touch a single bolt, you must secure the glass. If you forget this step, the window will come crashing down inside the door the second you unbolt it.
Get a few long strips of strong painter's tape or duct tape. Run them from the outside of the glass, over the top of the door frame, and stick them firmly to the inside. Pull the tape tight so the window is held all the way up.
Now, with the glass secured, find the two bolts that clamp the glass to the regulator's lift plate. You might need to plug the window switch back in for a second to jog the regulator up or down until those bolts line up with the access holes in the door. Once you can reach them, loosen and remove them. The glass is now completely free.
Finally, it's time to get the old assembly out.
- Unplug the Motor: Find the electrical connector going to the window motor and disconnect it.
- Unbolt the Assembly: Locate all the bolts holding the regulator rails and motor to the door frame. You're typically looking for four to six of them.
- Wiggle It Out: This part can feel like a game of Tetris. You'll have to tilt, turn, and carefully guide the whole clunky assembly to snake it out through one of the larger access holes.
Go slow here, there's no prize for speed. Once the old regulator is out on the floor, give the inside of the door a quick inspection. Clean out any debris you find—I've pulled out plenty of broken plastic bits and frayed cable pieces over the years. A clean workspace is a happy workspace.
Installing Your New T1A Auto Regulator
Alright, the old, busted regulator is out. Now for the satisfying part: putting in the new one. Getting your new T1A Auto regulator installed is basically the reverse of the removal process, but paying attention to a few specific details will make this a smooth job instead of a frustrating one.
Before you even think about putting the new part inside the door, do the single most important sanity check of the whole job: compare the new regulator side-by-side with the old one. Trust me on this—it can save you a world of hurt.
The Critical Side-by-Side Comparison
Lay both the old and new assemblies down on a blanket or some cardboard. Take a good look. This simple visual check confirms you've got the right part before you start wrestling it into the car door.
Here’s what you’re looking for:
- Mounting Points: Make sure every single bolt hole for the rails and the motor lines up perfectly.
- Electrical Connector: The plug on the motor needs to be an exact match to the old one in both shape and pin layout.
- Glass Clamps: The clamps or mounting holes that hold the window glass have to be in the same spots.
This is a non-negotiable step, especially when working with aftermarket parts. While T1A Auto parts are engineered for a guaranteed fit, this quick check is your final confirmation that everything is good to go. If you want to dive deeper into what separates a quality part from a cheap knock-off, our guide on aftermarket vs OEM parts is a great read.
Maneuvering the New Regulator into Place
Getting the new regulator assembly inside the door frame is a game of angles and patience, just like taking the old one out. Find the biggest access hole in the inner door panel and carefully feed one end of the assembly in first.
You’ll have to tilt it, rotate it, and gently snake it past the wiring and lock rods already in there. The last thing you want to do is snag a wire or pop a lock rod loose by accident.
Once the whole thing is inside the door, get it oriented so the mounting holes are roughly where they need to be. Don't worry about perfect alignment yet—just get it hanging in position.
Pro Tip from the Garage: Never force it. If the assembly gets stuck, yanking on it is not the answer. Back it out a little, change the angle, and try again. Sometimes a tiny rotation is all it takes to find the clear path.
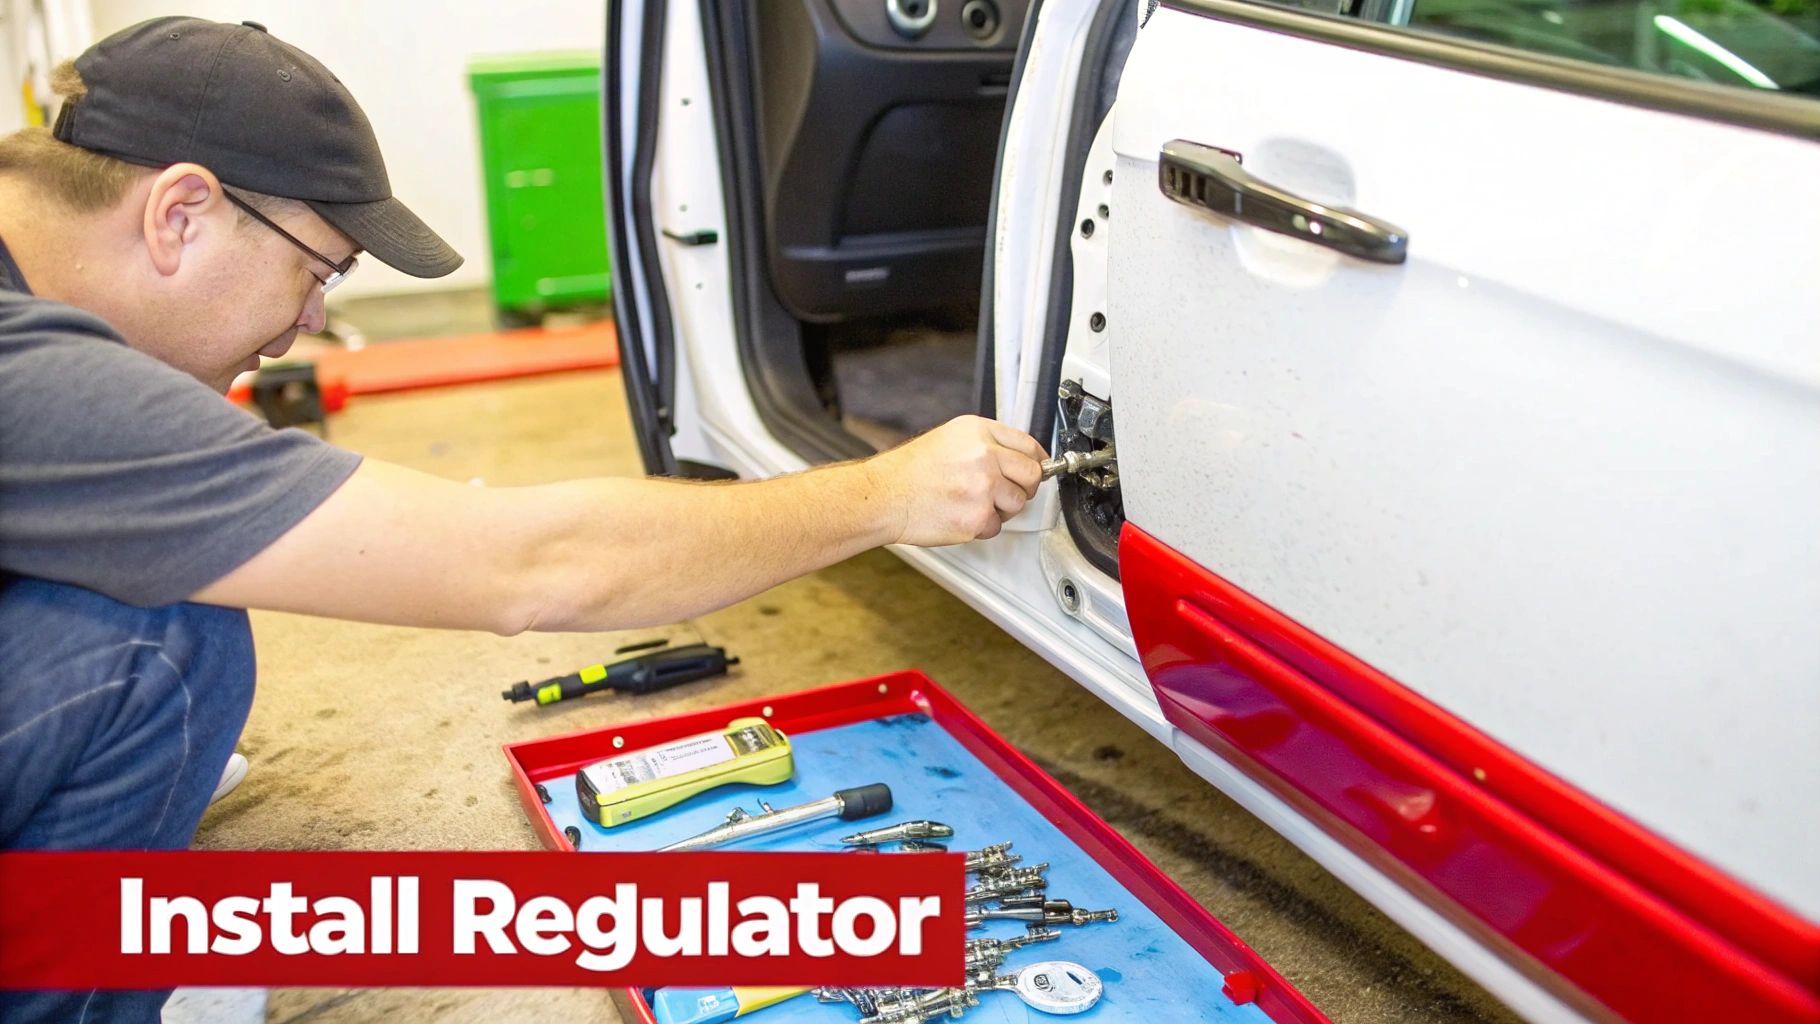
Securing the New Assembly
With the regulator hanging in place, you can start threading in the mounting bolts. The key here is to start every single bolt by hand first. Don’t tighten any of them down yet.
Leaving the bolts loose gives you just enough wiggle room to shift the whole assembly around, making it much easier to line up all the other bolts. I usually get a top bolt started to hold the weight, then a bottom one, and then work my way around.
Once all the bolts are threaded in by a few turns, you can go ahead and snug them up with a socket wrench. Just be careful not to overdo it. These little bolts don't need a lot of muscle—a firm "snug" is plenty. The torque spec is usually very low, around 4 Nm (or 3 lbs-ft).
Reattaching the Window Glass
This is probably the most delicate part of the whole job—connecting the glass to the new regulator. Your window should still be taped securely at the top of its travel.
Go ahead and temporarily plug the main window switch back into its harness. Then, reconnect the negative battery terminal, making sure you don't touch any other metal. Turn the ignition to the "on" position (don't start the car) and use the switch to run the new regulator's glass clamps up until they line up perfectly with the holes in the bottom of the window.
Now you can carefully lower the glass by hand, guiding it right into the clamps.
Aligning and Tightening the Glass
| Step | Action | Why It's Important |
|---|---|---|
| Initial Placement | Gently seat the glass into the clamp's channel or onto its mounting studs. | This properly supports the glass before you add bolts, which prevents stress cracks. |
| Start Bolts by Hand | Thread the glass mounting bolts in by hand until they are just touching the glass. | This prevents cross-threading and lets you make small adjustments for perfect alignment. |
| Alternating Tightening | Snug one bolt a little, then the other, going back and forth until both are secure. | This ensures the clamping pressure is distributed evenly, which is crucial for not cracking the glass. |
Once the bolts are tight—a common torque spec here is 7 to 9 Nm or 5-7 lbs-ft—you can finally cut away the tape that's been holding the glass up.
Final Connections and Sealing
Don't get ahead of yourself and throw the door panel back on just yet. There are a couple of final, crucial steps to make sure your repair is solid and doesn't cause new issues like rattles or water leaks.
Disconnect the battery one more time before you continue. Here's your final checklist inside the door:
- Reconnect the Motor: Plug the window motor’s electrical harness in. You should hear a solid "click" as it seats all the way.
- Secure All Wiring: Double-check that no wires are pinched or hanging where the window might rub against them.
- Reseal the Weather Barrier: Carefully press that plastic moisture barrier back into place. That black, sticky butyl adhesive needs to make a complete seal all the way around the perimeter. This is your only defense against wind noise and water getting into the cabin.
If that original adhesive is garbage, don't skip this step. A fresh bead of butyl tape or another all-weather sealant is a cheap and easy way to ensure a quality, professional-level repair. With everything buttoned up, you're ready for the final test.
Final Checks and Troubleshooting Common Issues
You’ve got the new regulator bolted in and the door panel snapped back on. Feels good, right? You're on the home stretch, but don't spike the football just yet. This final round of testing is what separates a finished job from a truly completed one.
First, go ahead and reconnect the negative battery terminal, making sure it’s snug. Now, put the key in the ignition and turn it to the "on" position. Take a breath and give that window switch a press.
Run the window through its full cycle—all the way down, then all the way back up. Do this at least two or three times. Just listen. What you want to hear is the quiet, confident hum of the new motor doing its job. Any grinding, clicking, or popping noises are big red flags telling you something is binding or loose inside that door.
The glass should glide smoothly, not stutter or strain. If it looks and sounds good, you’re in great shape.
What to Do When Things Go Wrong
Even when you do everything right, sometimes a new part just doesn't want to cooperate on the first try. If your window is acting up, don't sweat it. Most of these initial problems are surprisingly simple to sort out. Having a solid foundation in how things work always helps, and good general equipment repair guides can provide that broader mechanical wisdom.
The table below is a quick reference guide for diagnosing and fixing the most common snags you might hit after finishing an installation.
Common Post-Installation Issues and Solutions
| Symptom | Potential Cause | Recommended Fix |
|---|---|---|
| Window moves up when you press down (or vice versa). | The motor's electrical connector is plugged in upside down. | Pop the door panel back off, flip the connector 180 degrees, and plug it back in. It's a common and easy mistake. |
| Window doesn't move at all; no sound. | Poor electrical connection or a blown fuse. | Double-check that both the motor harness and the main switch harness are snapped in securely. If they are, check your fuse box for a blown power window fuse. |
| Window is slow, struggles, or makes straining noises. | Misalignment of the regulator or glass. | The regulator might be slightly crooked or the glass isn't seated perfectly in the channels. Loosen the main regulator bolts, adjust its position slightly, and retighten. |
| "Auto Up/Down" feature doesn't work. | The vehicle's window logic needs to be reset. | Perform the window reset/initialization procedure. See the steps below. |
Most issues you'll face fall into one of these categories. A little patience and methodical checking will almost always get you to the solution.
The All-Important Window Reset Procedure
Many modern cars require you to "re-teach" the window its limits after the power has been disconnected. This process, often called initialization or relearning, is what restores the auto up/down one-touch feature and the anti-pinch safety function.
Without this step, your window will still go up and down manually, but it won’t work like it did from the factory. The exact steps can vary a bit, but they almost always look something like this:
- Close the driver’s door and turn the ignition to the "on" position.
- Press and hold the window switch down. Keep holding it for 5-10 seconds after the window is fully open.
- Now, pull and hold the switch up. Keep holding it for 5-10 seconds after the window is fully closed.
- Listen for a faint click from the switch or door module—that’s often the signal that the system has been reset.
This simple procedure tells the car's computer where the window's top and bottom travel limits are. It's a critical final touch that a lot of people miss, but it's the key to a 100% complete repair.
Now, test the auto function. One solid press should send the window all the way down, and one pull should bring it all the way back up. If that works, you can officially call this job a success.
Common Questions We Hear About Window Regulator Jobs
Even with the best guide in hand, you’re bound to have a few questions before you start tearing into a door panel. I’ve been there. Getting these answers sorted out first will save you a ton of headaches later.
How Long Does This Job Actually Take?
Let's be realistic. If you've done this kind of work before, you can probably knock it out in 2 to 3 hours.
But if this is your first rodeo with a door panel, don't rush it. Plan for closer to 3 or 4 hours. Some cars have notoriously tricky panels, and it's better to go slow than to snap a plastic clip out of frustration.
Should I Replace the Motor and Regulator Together?
Absolutely. I always recommend replacing them as a single unit. Think about it—the motor has done just as much work as the regulator.
While it's usually the cables or plastic guides on the regulator that fail first, the motor isn't far behind. Swapping them both out now saves you from tearing the exact same door panel off again in six months when the old motor finally decides to quit. It’s the smart move.
The two biggest hurdles in this repair are popping the door panel off without breaking anything and getting that heavy window glass lined up perfectly with the new regulator. Go slow and be patient here.
A good trim tool kit is your best friend for the panel. As for the glass, do yourself a huge favor and tape it securely in the fully raised position before you unbolt anything. This trick makes reassembly so much easier and safer.
Once the mechanicals are sorted, don't forget the outside. Keeping your car's finish in good shape is just as important. If you're into DIY projects, learning how to remove car scratches can keep your ride looking as great as it runs.
Ready to get started with a part that won't let you down? T1A Auto builds premium aftermarket window regulators with better-than-OEM materials. They’re designed for a perfect fit and built to last. Shop now at t1aauto.com and do the job right the first time.