


You switch on the indicator, and the front and rear lamps flash normally, but the strip in the mirror stays dark. The replacement looks simple until you notice the heated glass, extra connectors, and blind-spot warning symbol sharing the same housing.
A successful side mirror turn signal replacement restores more than a flashing light. The lamp must fit correctly, remain visible to nearby traffic, and work without damaging the mirror's other functions. Start by identifying what's replaceable, then decide how much of the mirror needs to come apart.
Table of Contents
- Identify the Lamp Type and Match the Part
- How to Replace the Side Mirror Turn Signal Step by Step
- Fixing Hyperflash, Dead Signals and Intermittent Flashing
- Checking Visibility and Legal Compliance After Installation
- When a Lamp Swap Becomes Calibration Work
Identify the Lamp Type and Match the Part
Match the year, make, model, trim, and mirror side first. A photograph that looks close is not enough on its own. Mirror housings can look identical while using different connectors, lighting modules, or feature packages. Confirm whether you're ordering the left-hand or right-hand part, especially when a listing covers vehicles sold in different markets.
Record the original part number printed on the lamp or mirror base. Compare connector shapes, locating tabs, mounting points, and populated terminal positions along with the outside dimensions. If the original number has been superseded, verify the replacement through a vehicle-specific parts reference. A similar number is only a starting clue.
Mirror turn signal types and what each one needs
| Lamp type | How to identify it | Replacement approach | Main risk |
|---|---|---|---|
| Replaceable bulb | Socket twists out of the mirror housing | Swap the bulb and match the original rating and color | Wrong bulb can cause hyperflash |
| Integrated LED module | No bulb socket, sealed lens, electrical connector | Replace the module or complete lamp unit | Module may not match the expected electrical load or flash behavior |
| Lamp in mirror with heater or blind-spot wiring | Extra connectors behind the glass | Replace the lamp assembly where separately serviceable and test every mirror function | Connector damage or blind-spot faults after reassembly |
| Full mirror assembly with built-in signal | Lamp is incorporated into the mirror cover or housing | Replace the complete mirror if the lamp isn't separately serviceable; transfer glass only when specified | Requires exact configuration matching and may need initialization or calibration |
A heated mirror can still contain a separately replaceable signal module. Check the parts breakdown before paying for motors, glass, and a housing you don't need. I recommend matching the full feature package before ordering a complete housing, because a lamp-only failure can turn into programming and calibration once the mirror is replaced.
Before disconnecting anything, photograph the connector positions and lamp orientation. Count the connectors behind the glass once you have safe access, and label similar-looking plugs. Leave the glass in place when a part number or service diagram already identifies the lamp.
Match function, electrical load, and installation
The Federal Register discussion of the federal vehicle-lighting standard explains that replacement lighting falls within the regulatory framework and that supplemental lamps mustn't impair required lighting. Treat wiring compatibility and correct installation as part of the buying decision.
An aftermarket lens still has to produce light suitable for the vehicle. A matching connector only confirms the plug shape.
Buying rule: Replace only the failed serviceable component, and use a lamp whose mounting and electrical design match the original.
Our OEM versus aftermarket parts guide can help you weigh replacement options. At T1A Auto, we offer new powered and manual door mirrors and produce OEM replacement parts; most of our parts come with installation instructions.
How to Replace the Side Mirror Turn Signal Step by Step
Gather a plastic trim tool, the correct screwdriver or bit, masking tape, a towel, and a labeled fastener tray. Read the vehicle-specific removal procedure first: some lamps come out through the mirror cap, others require glass removal, and complete mirror replacement may require access inside the door.
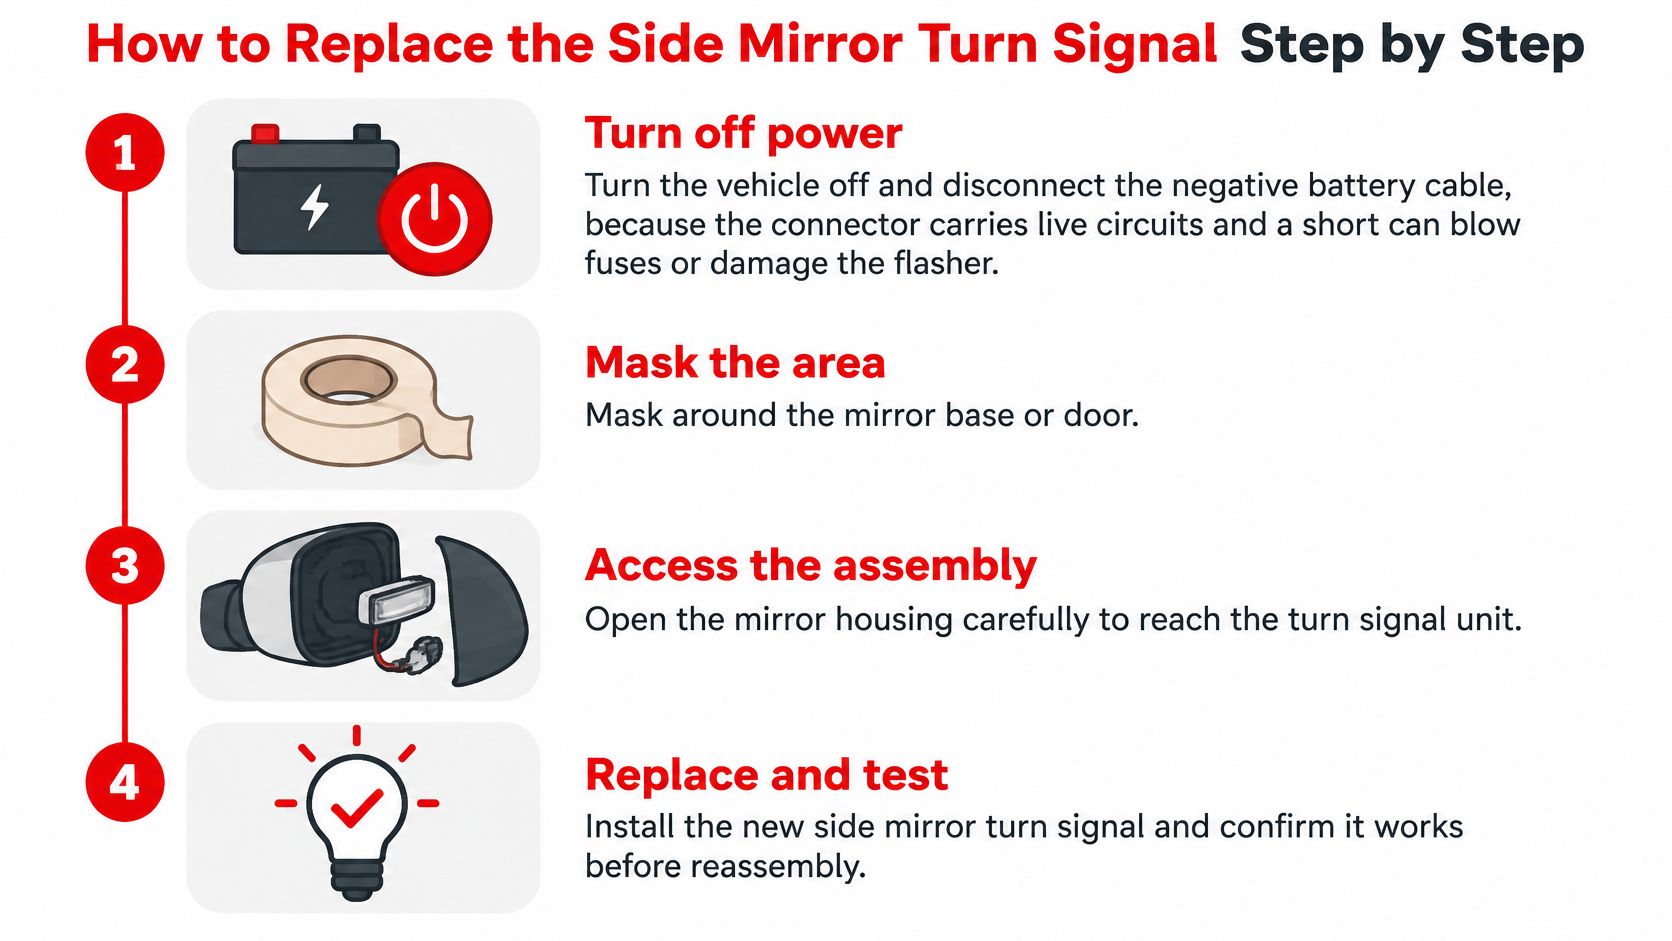
Use this process overview to organize the job before releasing any clips.
Remove and install without damaging the mirror
- Isolate the electrical supply. Turn the vehicle off, keep the key away, and disconnect the negative battery cable using the vehicle's battery-disconnection procedure before unplugging the mirror. Don't work on energized connectors or overlook any shutdown instructions for the vehicle's electronics.
- Protect the surrounding finish. Apply automotive masking tape around the mirror base, cap seam, or door opening where tools could touch paint. Tape won't make a metal screwdriver safe for prying, so use a plastic trim tool and avoid levering against the painted edge.
- Open only the access you need. Remove the mirror cover, interior sail trim, or door panel specified by the service procedure, and sort fasteners by location. If you're replacing the complete mirror, support it before removing the final mounting fastener; otherwise, its weight can pull on the harness or damage the door.
- Release the glass carefully if required. Position the glass as directed, support its backing plate, and use a plastic trim tool at the specified release points before disconnecting heater or indicator leads. Never pull the glass away by its wires or concentrate force on a corner, and place the removed glass on a towel.
- Remove the old signal unit. Release its retaining screws or clips, unlatch the electrical connector, and compare the lamp's position with your photographs. Pull the connector body rather than the wires, and stop if a hidden clip still holds the lens instead of twisting it free.
- Install the lamp and route its harness. Seat the replacement in the original mounting position and return the wiring to its molded channel, clear of the folding pivot and glass-adjustment mechanism. Don't trap the harness under the lamp flange or overtighten screws into plastic bosses.
- Secure connections before restoring power. Inspect terminal alignment, engage each connector lock, and install the glass and cover according to the release-and-refit procedure. Reconnect the battery only after the electrical connections are secured, keeping fingers and tools clear of powered mechanisms.
- Test before closing the final access panel. Check both indicators, hazards, parking lamps, glass adjustment, heating, and folding if equipped, then confirm the blind-spot display hasn't developed a fault. Don't snap the door panel back on until you've checked the accessible wiring and confirmed the glass and housing clips are properly seated.
Check the hidden details before closing up
Look closely at the lamp gasket. It should sit flat without folds, trapped wiring, or debris underneath, and the housing's intended drain paths must remain open. A cracked mounting boss or distorted lamp flange needs attention before reassembly, not an extra turn of the screw.
The federal vehicle-lighting standard includes visibility requirements that vary with lamp application, so a driveway flash check isn't proof of compliance. Treat the initial powered test as a functional check, then assess the finished installation's visibility separately.
Watch the removal sequence as a visual reference, but follow your vehicle's service procedure where its clips or access points differ.
Fixing Hyperflash, Dead Signals and Intermittent Flashing
Fast flashing after replacement usually points to a compatibility problem, so check the load before replacing another mirror. A lower-draw LED module can make the flasher treat a good lamp as a failed bulb. Check the other indicators on that side too. An unrelated failed bulb can make the new mirror lamp look responsible.
A completely dead signal needs a different approach. Confirm supply, connector seating, and ground before you condemn a fresh part.
Post-install symptoms, likely causes and fixes
| Symptom | Likely cause | Fix |
|---|---|---|
| Fast flashing on one side only | Lower load than the original bulb, so the flasher reads a fault | Match the original bulb or module specification; check flasher compatibility before considering an approved load resistor |
| Signal dead on one side | Blown fuse, open connector, or incorrect harness connection | Check the fuse, reseat the connector, and verify the ground circuit |
| Signal flashes only when the mirror moves | Pinched or broken wire near the fold pivot | Restore the original harness route and repair the damaged section |
| Signal works but heater or blind-spot warning appears | Connector not fully seated or a bent terminal | Inspect and reseat connectors, then scan the affected system |
| Water inside the lens after installation | Unseated gasket or cracked housing | Dry and inspect the unit; replace the gasket or damaged housing and restore the intended seal |
| Left signal blinks on the right side | Incorrect side-specific harness or assembly | Confirm the lamp and harness application rather than swapping wires by trial and error |
| Intermittent signal after rain | Corroded terminals or weak ground | Clean serviceable terminals, repair damaged contacts, and check the ground point |
Isolate the fault before changing more parts
Work through fuse, connector, ground, then lamp. Check the correct fuse against the wiring diagram and replace it only with the specified rating. If it blows again, find the short. A larger fuse hides the short and can overheat the harness.
Inspect connector locks and terminal tension before you measure the circuit. Use a multimeter and suitable back-probing leads without spreading the terminals. Continuity testing belongs on a de-energized circuit. A ground voltage-drop test under load can expose resistance that a simple continuity check misses. Our guide to diagnosing car electrical problems covers that broader approach.
Don't add a load resistor to hide an unidentified fault. Resistors generate heat and require the correct application and a safe mounting location away from plastic and wiring.
Dielectric grease doesn't repair corrosion or loose terminals. Use it only where the connector's sealing design calls for it, and only after the contact problem is repaired.
The same connector fit and ground-testing principles apply on a passenger-car mirror and on heavier commercial electrics, so the failed part and exact application still come first. For commercial-vehicle sourcing, DAF Marketplace's used DAF truck electrical parts category is a resource to check after you have identified that component. A used electrical part still needs connector and condition checks.
After a short drive, recheck operation, dashboard warnings, moisture, and signs of connector overheating. Stop using the circuit if you find melting or a burning smell.
Checking Visibility and Legal Compliance After Installation
Treat a flashing lamp as unfinished until its visibility is checked from outside the vehicle. A tinted replacement lens, a poorly seated module, or the wrong mirror cover can leave the circuit working while nearby drivers lose the signal.
I treat that outside check as part of the repair. The lamp has to sit on the mounting surface the way the original design intended, so the light leaves the housing on the original path. Power, heat, and a blind-spot sensor do not change that requirement. A cocked housing aims the lamp somewhere else.
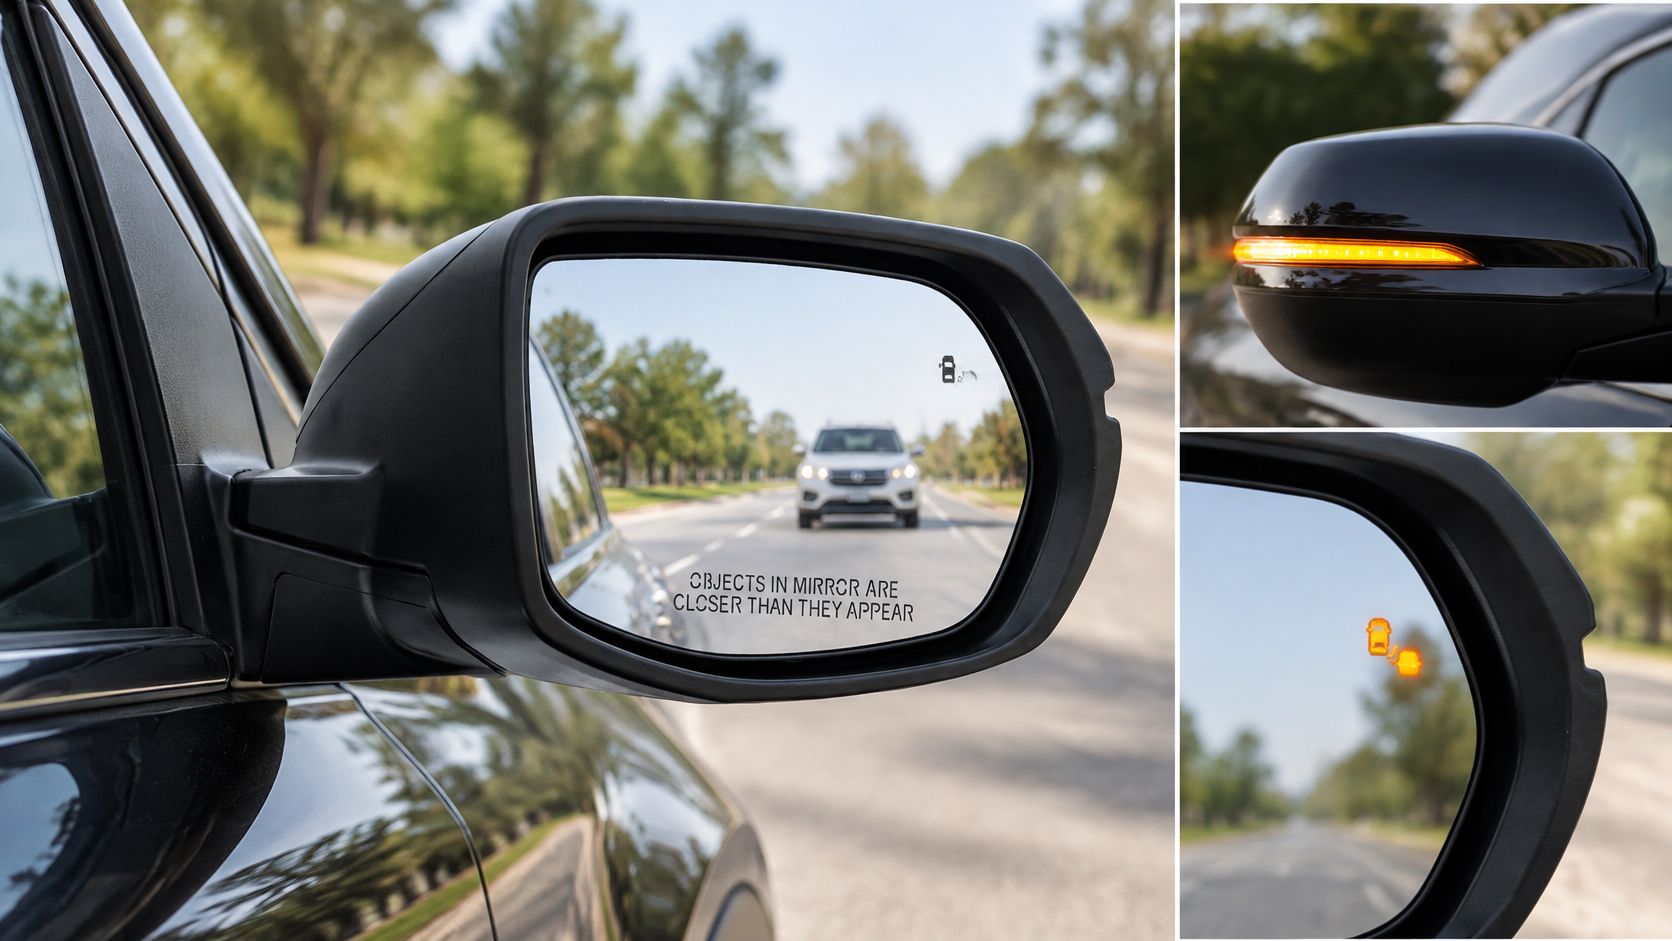
A feature-packed housing makes seating mistakes easier to miss. This Passenger Side Mirror Replacement for the 2017-2022 Honda CR-V, OEM 76208TLAA31 combines powered adjustment, manual folding, heat, a turn signal, and blind-spot detection. It still has to land flush. If you force the cover or leave a gap so the lamp will show, the part or the mounting is wrong.
Visibility and compliance check after installation
| Check | Pass condition | If it fails |
|---|---|---|
| Side and direction | On a U.S. left-hand-drive vehicle, driver-side lamp flashes left and passenger-side lamp flashes right | Verify the side-specific assembly and harness |
| Viewing angle | Intended visible portion can be checked from the driver's position, and the external signal remains visible during an oblique walk-around | Check seating, housing alignment, and obstructions; fit the correct lamp |
| Lens color and output | Emitted color and apparent brightness are consistent with the original specification | Install a matching lamp rather than accepting reduced output |
| Flash rate and warnings | Normal operation with no hyperflash or dashboard warning after a short drive | Diagnose the electrical fault before considering the job complete |
Have a helper operate the controls while you walk around the vehicle. Check the signal from alongside and from a rearward oblique position, not only straight in front of the lens. Compare matching lamps under the same ambient light. Sunlight and reflections can hide a weak output.
Separate a useful check from certification
A walk-around shows obvious problems. It cannot certify a lamp's photometric performance. Keep the replacement's application information and fit a correctly specified part. Do not trim the housing, modify the mirror arm, or expose more lens to compensate for an incorrect assembly.
The blind-spot symbol and the external turn signal do different jobs. Our explanation of side mirror blind spots can help you judge mirror coverage. Neither a warning icon nor a working indicator replaces correct mirror adjustment and a shoulder check.
Before the mirror stays on the door, confirm lens color, correct flash direction on each side, and a clear path past the cover. If reaching the lamp meant moving a camera or sensor, follow the vehicle-specific setup procedure before you call the repair finished.
When a Lamp Swap Becomes Calibration Work
A lamp repair that disturbs a camera or sensor carries a verification cost that the part price does not show. If reaching the signal means moving a camera, a damaged harness, or an integrated electronic assembly, diagnosis and initialization can outweigh the lamp's purchase price.
I treat that as a cost check before the housing comes apart. When only the serviceable lamp changes, and the housing, sensor mounting, and unrelated wiring stay put, the repair is generally a lamp replacement. When a camera or sensor-related component must move, check vehicle-specific service information first and identify any required calibration or initialization. Water in the mirror means inspecting connectors, grounds, and harness condition before ordering a lamp. A complete assembly means confirming the electronic setup and which components transfer. Warnings after the repair mean scanning the affected modules and diagnosing the codes rather than repeatedly disconnecting the battery.
Distinguish initialization from calibration
Initialization teaches a system an operating state or position. Calibration verifies or establishes the required relationship between a sensor and the vehicle. Do not assume either step applies to every mirror. Complete the procedure the service information specifies.
CCC's Crash Course report projects that more than half of registered vehicles will have lane-departure and/or blind-spot-monitoring capability by 2028. That projection doesn't mean every mirror contains a detection sensor. A mirror may carry only the warning display while the sensing hardware sits elsewhere on the vehicle.
A working turn signal shows that the signal circuit operates. Camera view, warning display, and driver-assistance readiness still need their own checks before the mirror returns to service.
The Fixing table already covers a signal that works while a heater or blind-spot warning remains. Read the fault information, inspect anything disturbed during removal, and arrange a qualified shop check when the required procedure exceeds your tools or workspace. If the job disturbs an integrated mirror, budget time for verification, not just removal and refitting.
T1A Auto offers new powered and manual door mirrors for replacing assemblies that can't be repaired with a serviceable lamp alone. Visit T1A Auto with your vehicle details, original part number, and mirror feature list to check the correct replacement before taking the old assembly apart.
