


You pull the tailgate handle, the trim lifts away from the panel, and the tailgate still won't open. A new tailgate handle bezel looks like the obvious fix, but the broken trim may be hiding a disconnected rod or damaged latch clip. Before buying anything, find out whether the handle moves the latches.
Table of Contents
- Find the Real Cause Before You Replace the Bezel
- Repair the Linkage When the Bezel Is Not the Fault
- Match the Bezel to Your Year, Model and Cab
- Tools and Parts to Have Before You Start
- How to Remove the Old Bezel Step by Step
- Prepare the Finish and Corrosion Before Reinstalling
- How to Install the New Bezel Without Cracking It
- Confirm the Repair and Decide Your Next Step
Find the Real Cause Before You Replace the Bezel
The bezel is the trim surround around the handle. It covers the opening around the mechanism, but it doesn't replace the rods, clips, or latches that make the tailgate work.
Tailgate handle symptoms, likely causes and first checks
| Symptom | Likely cause | First check |
|---|---|---|
| Handle feels loose and the bezel rocks | Broken plastic clip or disconnected rod inside the tailgate | Pull the handle while watching rod movement through the access opening |
| Handle has no resistance or doesn't pull the latch | Disconnected rod or failed latch | Operate the lock from inside and outside where accessible, and check rod travel |
| Tailgate won't latch or keeps opening | Latch or linkage failure; the bezel may only be the visible symptom | Check latch engagement and rod travel before buying a bezel |
| Cracked bezel edge but handle still works | Impact damage or plastic deterioration | Confirm normal handle and lock operation, then inspect the crack |
| Rust bubbling around the handle area | Water trapped inside the tailgate shell | Inspect the inner panel and mounting sheet metal for corrosion |
| Uneven gap between bezel and tailgate | Bent mounting area or loose fasteners | Check for distortion and carefully check fastener seating by hand |
Go-Parts' tailgate repair guidance identifies broken plastic clips and disconnected metal rods as causes of loose or stuck handles, and notes that trapped water can cause internal rust. These are diagnostic starting points, not proof that every loose handle needs the same repair.
Make the free checks first
With the tailgate supported, have someone pull the exterior handle while you observe the linkage through the access opening. Keep fingers clear of moving latch parts. Where the mechanism permits, compare exterior-handle operation with direct operation from inside.
Close the tailgate normally and listen for clean latch engagement. Don't keep slamming it to overcome resistance. With the handle released, gently move the bezel by hand and determine whether only the trim moves or the handle mounting moves with it.
Decision rule: Replace the bezel when the handle, lock, and latches work correctly and the trim itself is cracked, loose, or worn. Repair faulty linkage or damaged mounting metal first.
A tailgate that won't stay latched isn't ready for driving. Stronger trim won't correct a latch that can release cargo onto the road.
Repair the Linkage When the Bezel Is Not the Fault
Start at the rod-retaining clips, not at the trim. Remove the access panel using the removal procedure below, then use a flashlight to follow each rod from the handle to its latch connection.
Restore the connection without changing its geometry
- Inspect each clip. Look for cracks, stretched retaining sections, and missing locking tabs. A clip can appear attached while no longer holding the rod securely.
- Install the matching replacement. Match its design, orientation, and side. Many clips require the rod to enter the pivot opening before the retaining arm snaps around it, so don't force the entire clip over the rod.
- Check the rod ends. Reconnect any end that has slipped out of its pivot. Don't bend a rod to make it reach, because that changes latch travel.
- Observe the latch arm. Operate the handle and lock while watching the connection. The rod should move the arm through its intended travel without slipping, binding, or remaining under tension after release.
If the handle moves but the latch arm doesn't, isolate the disconnected or broken connection. If the arm moves correctly but the latch still won't engage or release, inspect the latch assembly before ordering trim. Our tailgate latch repair guide provides a separate repair path for that fault.
Clear obstructed drain paths if you find water inside the shell. Check the surrounding metal before closing the panel, and leave the mechanism accessible until you've confirmed the repair.
Match the Bezel to Your Year, Model and Cab
Two bezels can look identical in a listing photo and still mount differently. Locating tabs, retaining clips, and the handle opening all vary, so appearance alone never confirms fit. By this point the handle, rods, and latch have already been tested, which means the trim is the only variable left to match.
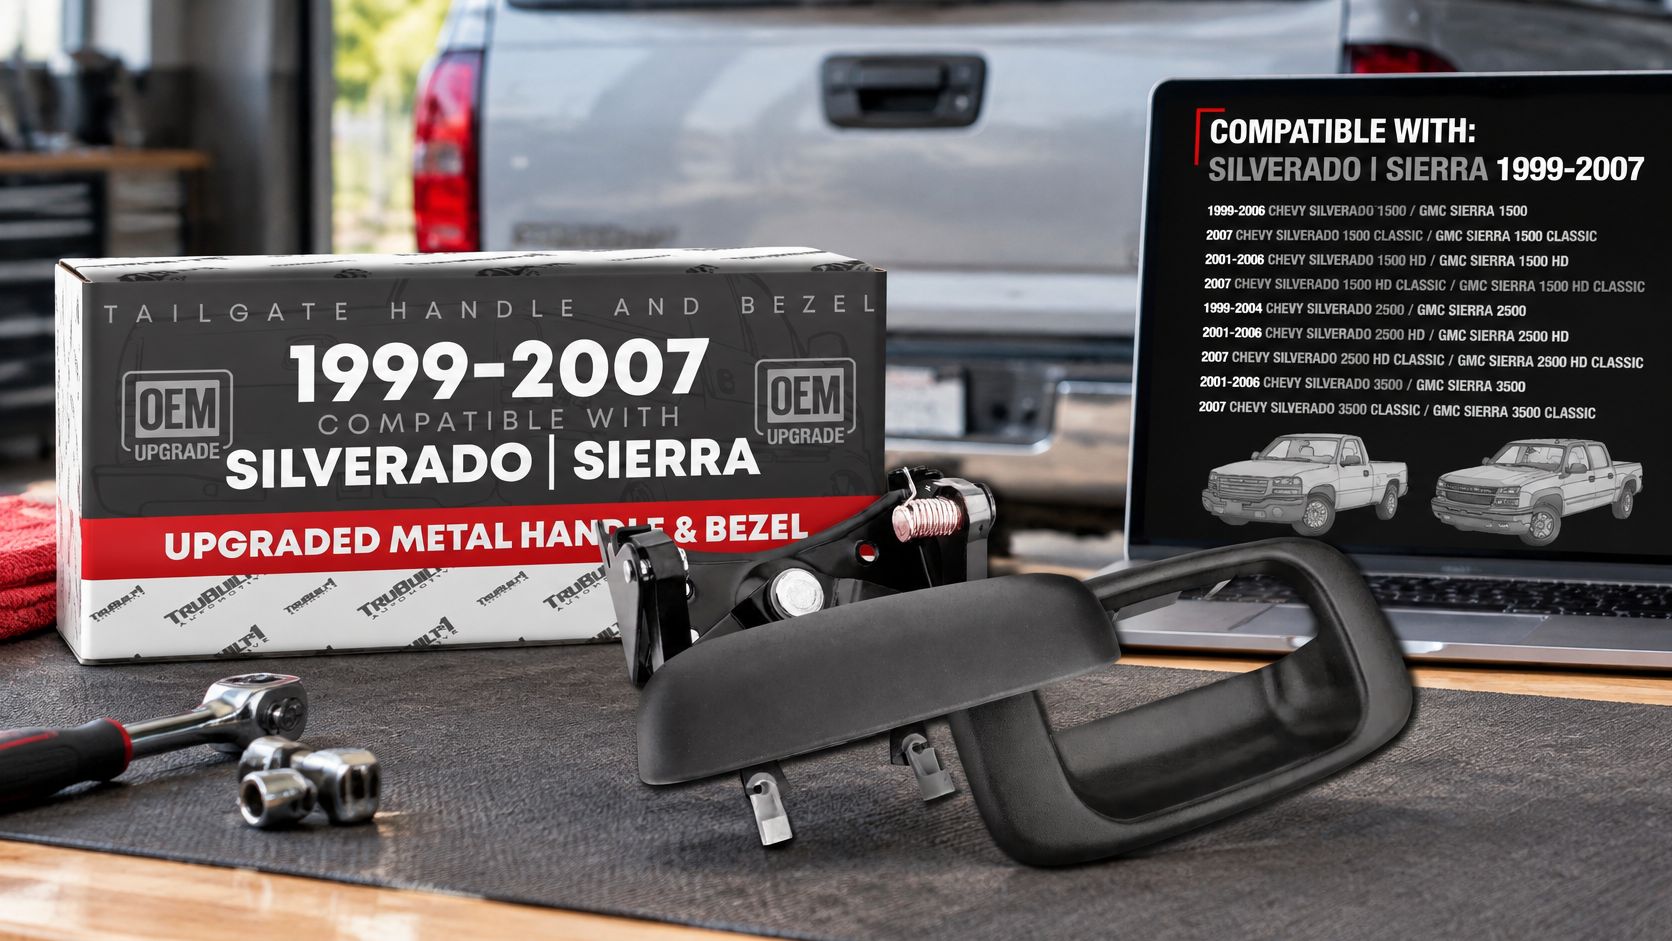
Tailgate handle bezel fit by vehicle and part number
| Vehicle | Years | Part numbers | Notes |
|---|---|---|---|
| Silverado 1500, 2500, 3500 | 1999-2006 catalog family | 15228539, 76106, GM1916102 | Metal clip bezel version |
| Sierra 1500, 2500, 3500 | 1999-2006 catalog family | 15228539, 76106, GM1916102 | Metal clip bezel version |
| Silverado and Sierra 1500, 2500, 3500 | 1999-2007 catalog family | 15228539 | Metal-handle latch assembly with improved bezel |
| Cab and bed configuration | Match the individual truck | Confirm against old part and VIN | Record extended or crew cab and bed length |
| Power or manual tailgate lock | Match installed equipment | Match the existing lock provision | Compare locking equipment with the old part |
Treat these as catalog-family references, not blanket coverage of every truck within each range. The listed Tailgate Handle Latch w/Improved Bezel Trim with Rod Clips - Upgraded Metal Handle Compatible with 1999-2007 Chevy Silverado GMC Sierra 1500 2500 3500 - OEM 15997911, 15228539, 15228541, 15228540 - Metal Handle + Improved Bezel combines a metal handle, bezel, and rod clips for its specifically listed applications.
Confirm before ordering
Read the number molded or stamped into the old part. Record cab and bed configuration, then identify manual or power locking equipment, since the lock provision changes which bezel accepts your cylinder. Use our parts cross-reference guide to compare identifiers against the listing. An unmatched number means fit remains unconfirmed, and guessing here is how a cheap trim piece becomes a return shipment.
Equipment differences reach further than trim. NHTSA's 2018 Ram recall document covered approximately 1,429,000 model-year 2015–2017 Ram 1500, 2500, and 3500 pickups, with configuration-specific coverage, for an actuator fault that could release the tailgate. A replacement bezel does nothing for that defect, which is why the mechanism gets checked before any trim gets ordered.
Tools and Parts to Have Before You Start
Lay out tools before opening the tailgate. Searching for a socket while the handle hangs from its rods makes an otherwise straightforward job harder.
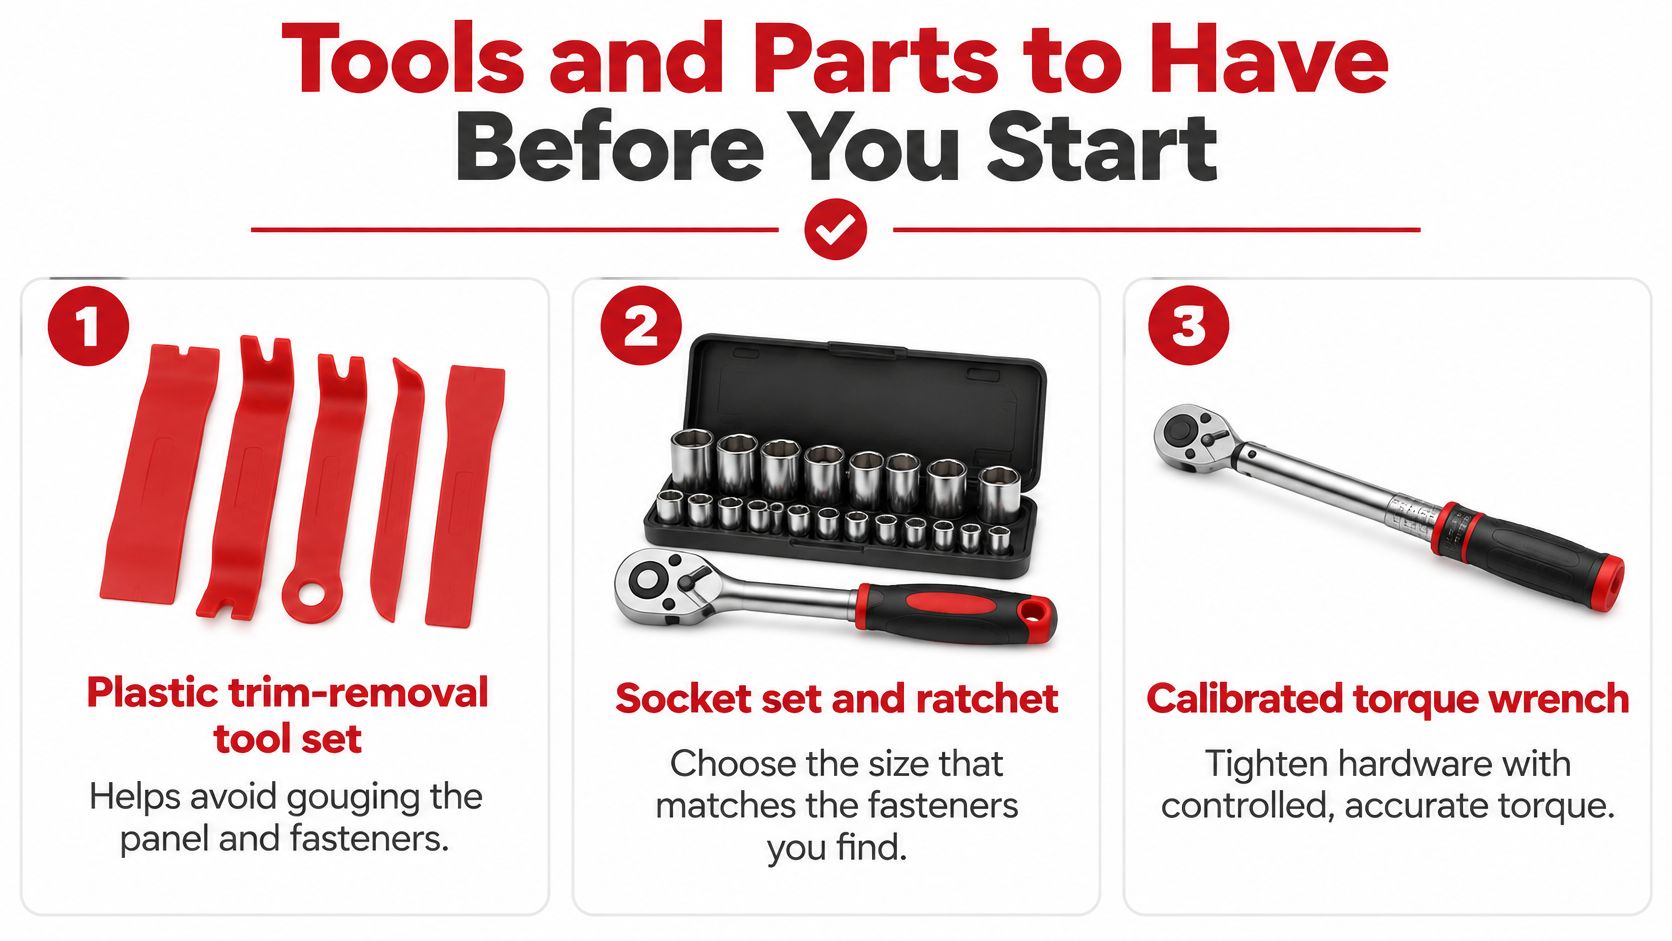
Tools that protect the panel and hardware
- Plastic trim-removal tools release trim without using a steel screwdriver against painted edges.
- Socket set and ratchet should match the actual fasteners. Stop if a socket rocks on the head.
- Calibrated torque wrench must cover the specified tightening range.
- Flat screwdriver or small pick helps release accessible retaining tabs without pulling on the rods.
- Painter's tape, marker, and phone camera protect edges and record fastener locations and clip orientation.
- Wire brush, scraper, and approved refinishing materials prepare exposed metal where the repair procedure permits treatment.
Parts to buy after diagnosis
Buy a correctly matched bezel, damaged rod clips, and replacements for stripped or corroded fasteners. Order a lock cylinder only when testing identifies a cylinder fault, not because you've exposed it.
Work on level ground with the parking brake applied and the tailgate properly supported. Check its support cables before leaning over it, and have a helper hold the handle or trim when releasing the last attachment.
The torque wrench isn't optional for specified bolted joints. Get the tightening values from vehicle service information, not from the apparent size of the bolt.
Keep your service procedure beside the tools. Clip location, access direction, and handle-removal requirements aren't universal.
How to Remove the Old Bezel Step by Step
Don't start by prying the visible edge. First determine whether the bezel releases from outside, through the access opening, or only after the handle has been loosened.
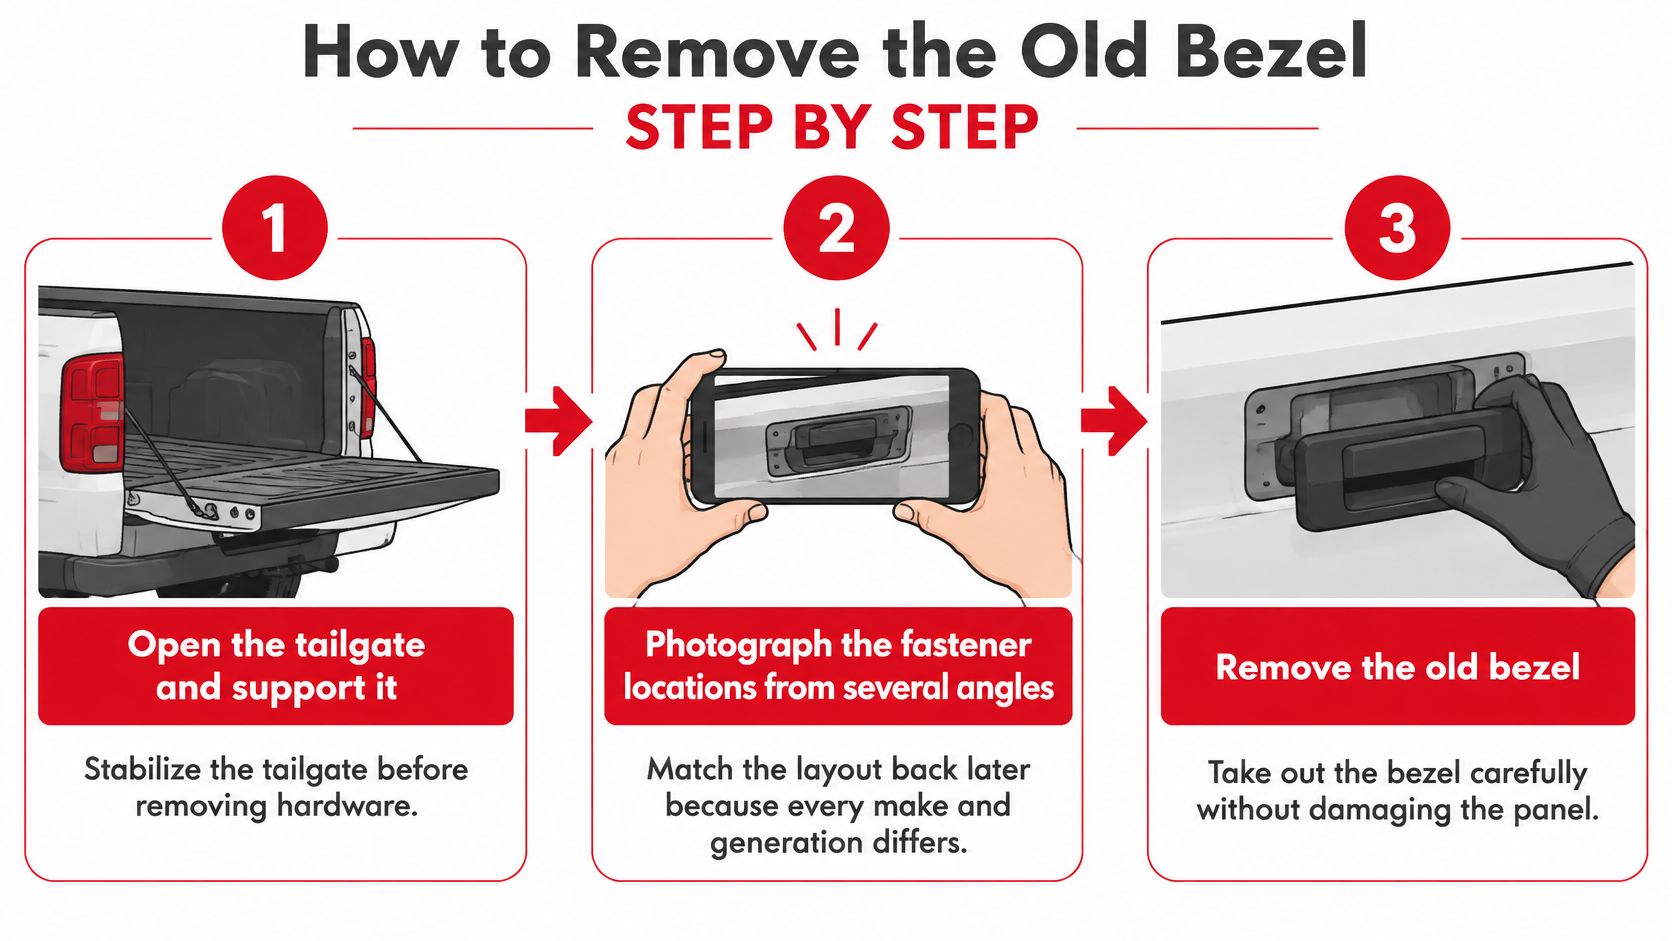
Keep the layout intact
- Open and support the tailgate. Photograph the fasteners, handle mounting, and visible linkage from different angles. Those pictures preserve details that become difficult to remember after everything is loose.
- Sort fasteners by location. Use labeled bags or push screws through labeled cardboard. A longer screw installed in the wrong location can damage plastic or interfere with the mechanism.
- Remove the access panel where fitted. Release its screws and retainers without twisting the panel around an attachment that's still engaged. If it won't lift, look for a hidden fastener rather than increasing force.
- Disconnect the required rods or lock parts. Photograph clip orientation before releasing each connection, and support the handle as needed. Move rods clear so they can't become trapped behind the replacement.
- Release the bezel's retainers. Depress accessible clips and pull evenly in the specified direction. Avoid levering one corner outward while the opposite locating tab remains hooked into the sheet metal.
- Inspect the exposed mounting area. Look for rust scale, bare steel, distorted mounting lips, damaged threads, and elongated holes. A new bezel can't sit square against a bent or weakened mounting surface.
Know when to stop
If a fastener turns without loosening, inspect the attachment behind it before continuing. A spinning insert or broken plastic boss needs attention; pulling harder usually enlarges the damage.
Keep broken clip pieces out of the tailgate shell. Compare the removed bezel's tabs with the replacement while both are on the bench, where a missing retainer or different mounting feature is easy to spot.
A controlled removal leaves the rods free, the mounting surface visible, and the surrounding paint intact. If the assembly still needs force to separate, something remains attached or the removal direction is wrong.
Prepare the Finish and Corrosion Before Reinstalling
A textured black bezel may look better immediately, but the metal underneath determines whether it stays securely mounted. Check the finish against the tailgate in daylight before installation.
Inspect and prepare the exposed panel before covering it.
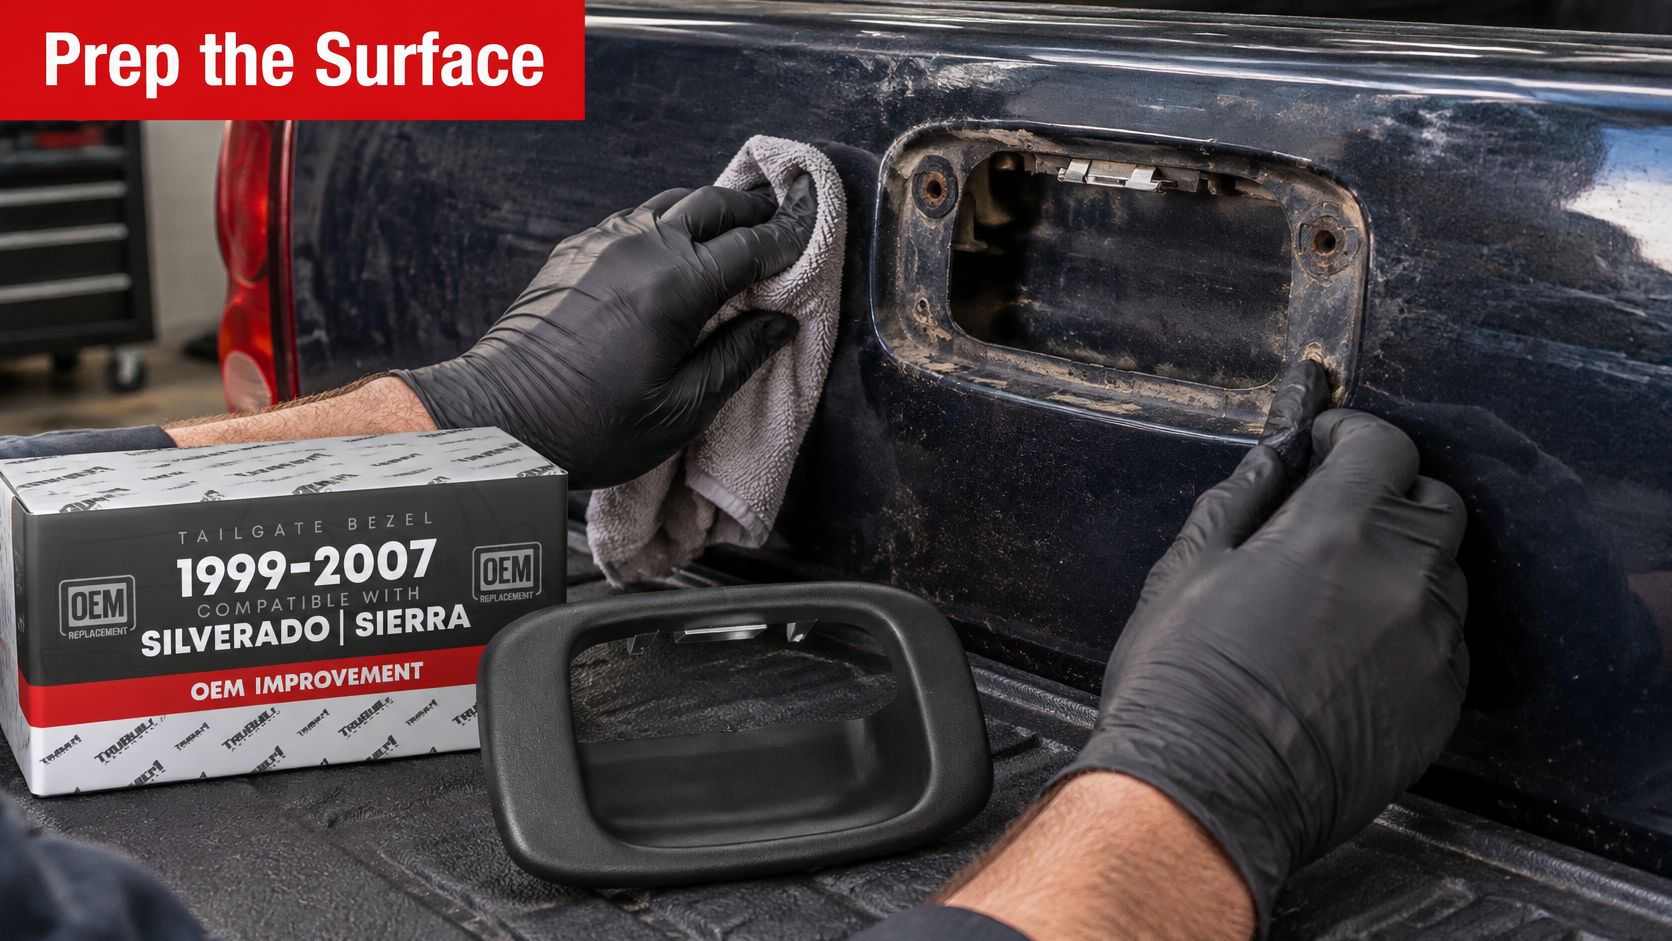
Treat the metal, not just the appearance
- Remove unstable corrosion with a scraper and wire brush, then inspect the remaining metal. Perforation or severely thinned mounting edges require structural repair.
- Prepare the paint edge without unnecessarily stripping sound surrounding finish.
- Restore protection with the approved primer and topcoat system, allowing proper curing before fitting trim.
- Replace damaged hardware rather than trying to compensate with extra tightening.
Electrical grounds need separate care. GM's ground-repair bulletin requires secure, stable, corrosion-free connections and approved conductive-finish fasteners for applicable ground repairs. Don't paint a conductive contact surface or substitute ordinary hardware at a ground connection.
Our corrosion prevention guide provides broader maintenance guidance. Keep primer, overspray, and abrasive debris away from latch pivots, rod clips, lock interfaces, and electrical contacts.
Use the video as a visual companion, while following the procedure for your particular truck.
Plastic care comes after mechanical repair and refinishing. Nanak Car Wash's guide to protect your car's plastic trim is useful for maintaining the exposed surround, but trim dressing won't repair a cracked mounting tab.
How to Install the New Bezel Without Cracking It
Dry-fit before tightening. The replacement should locate against the panel without using bolts to pull it into position.
The PartCatalog bezel replacement guide emphasizes vehicle-specific service instructions, correct locating-tab engagement, hand-started fasteners, and manufacturer torque specifications. Treat the sequence below as an alignment workflow, not permission to override your truck's instructions.
Locate the parts before applying clamping force
- Seat the handle and lock components as specified. Where the design allows bench assembly, fit them into the bezel before mounting. Check that the handle pivots freely and the cylinder retainer is fully engaged.
- Engage fixed locating features first. On designs with fixed lower tabs and upper spring clips, hook the lower tabs before pressing the upper clips home. Reversing that sequence can load a rigid tab sideways.
- Hand-start every bolt. Each should turn freely through its initial engagement. If one won't start, realign the assembly instead of reaching for the ratchet.
- Follow the applicable assembly order. A documented GM sequence installs the bezel, lowers the tailgate, inserts the handle bolt, and then reinstalls the panel and screws. Complete required linkage connections and inspections before closing access.
Tighten without distorting the surround
Use the manufacturer's specified torque and tightening sequence. If the procedure doesn't prescribe a sequence, bring multiple attachments down progressively and evenly, working from central attachments outward where the layout permits.
Don't fully tighten one corner while the opposite side is floating. That can twist the bezel and create an edge gap even when the part is correct.
- Reconnect and retain the rods. Make sure each rod follows its original path and every retaining arm closes completely. Check that the handle returns to rest without leaving either rod preloaded.
- Check clearance before closing access. Move the handle and lock while observing the mechanism. Nothing should scrape the bezel, catch the panel, or pull a rod against the edge of the opening.
Fit check: A stubborn gap calls for inspection, not more torque.
There's no defensible universal torque value for a tailgate handle bezel. Bolt-head size doesn't reveal thread engagement, mounting material, or the allowable load on a plastic boss.
If a clip won't engage with controlled hand pressure, remove the part and inspect its alignment. Check for a folded retainer, trapped rod, paint buildup, or mismatched locating feature.
Before testing, the bezel should sit flat with no rocking or edge lift. The handle should return cleanly without moving the trim surround.
Confirm the Repair and Decide Your Next Step
Test the assembly repeatedly before calling the job complete. Use the handle and lock through full operating cycles, watching for inconsistent resistance or incomplete return.
Confirm that both latch sides release together, then check the key or power-lock function. Close the tailgate normally and inspect its alignment. Run a finger around the bezel edge to find raised corners or interference.
Use the result, not the appearance
Test result and next action
| Test result | Next action |
|---|---|
| Handle works, both latch sides release, bezel doesn't rock | Repair complete; keep the old part number for future orders |
| Handle still loose after tightening | Return to the symptom checks and inspect the rod clips |
| One side fails to release | Stop; inspect the rod connection and latch before re-tightening |
| Bezel rocks or lifts at the edge | Recheck the mounting surface and fasteners; don't guess torque |
| Tailgate misaligned or rattles on rough pavement | Recheck fastener sequence and bezel seating, then inspect latch, striker, and support hardware |
Check that water can drain from the shell, especially if the tailgate was exposed to rain during the repair. Only after confirming secure latch engagement should you make a short drive over uneven pavement to listen for rattles.
Don't use extra tightening to chase a loose handle or a failed latch release. Those symptoms require another inspection, whether you replaced the bezel or repaired only the linkage.
Keep the removal photos, original part number, and repair notes together. They'll make the next diagnosis or parts comparison more reliable than a visual guess.
T1A Auto offers replacement tailgate handles, bezels, rod clips, and related latch hardware for vehicle-specific repairs. Visit T1A Auto to compare your truck's application and original part number, then choose the components your diagnosis calls for.
