


You're lifting the driver door by the handle every time you close it. It catches, it drops, then it finally slams if you swing it hard enough. That's where most XJ door hinge repair jobs go wrong, because the next move is usually ordering pins before anyone checks what's moving. A sagging door can be pivot wear, a separated weld, or a bent bracket, and those three failures don't take the same repair.
Table of Contents
- Diagnose the Sag Before You Order Parts
- Tools, Parts and Model-Year Checks You Need
- How to Take the Door Off Without Damaging It
- Replace the Hinge or Rebuild the Pin and Bushings
- How to Align the Door and Set Final Torque
- Weld Repairs and Post-Weld Alignment
- Confirm the Repair Holds Before You Close the Job
Diagnose the Sag Before You Order Parts
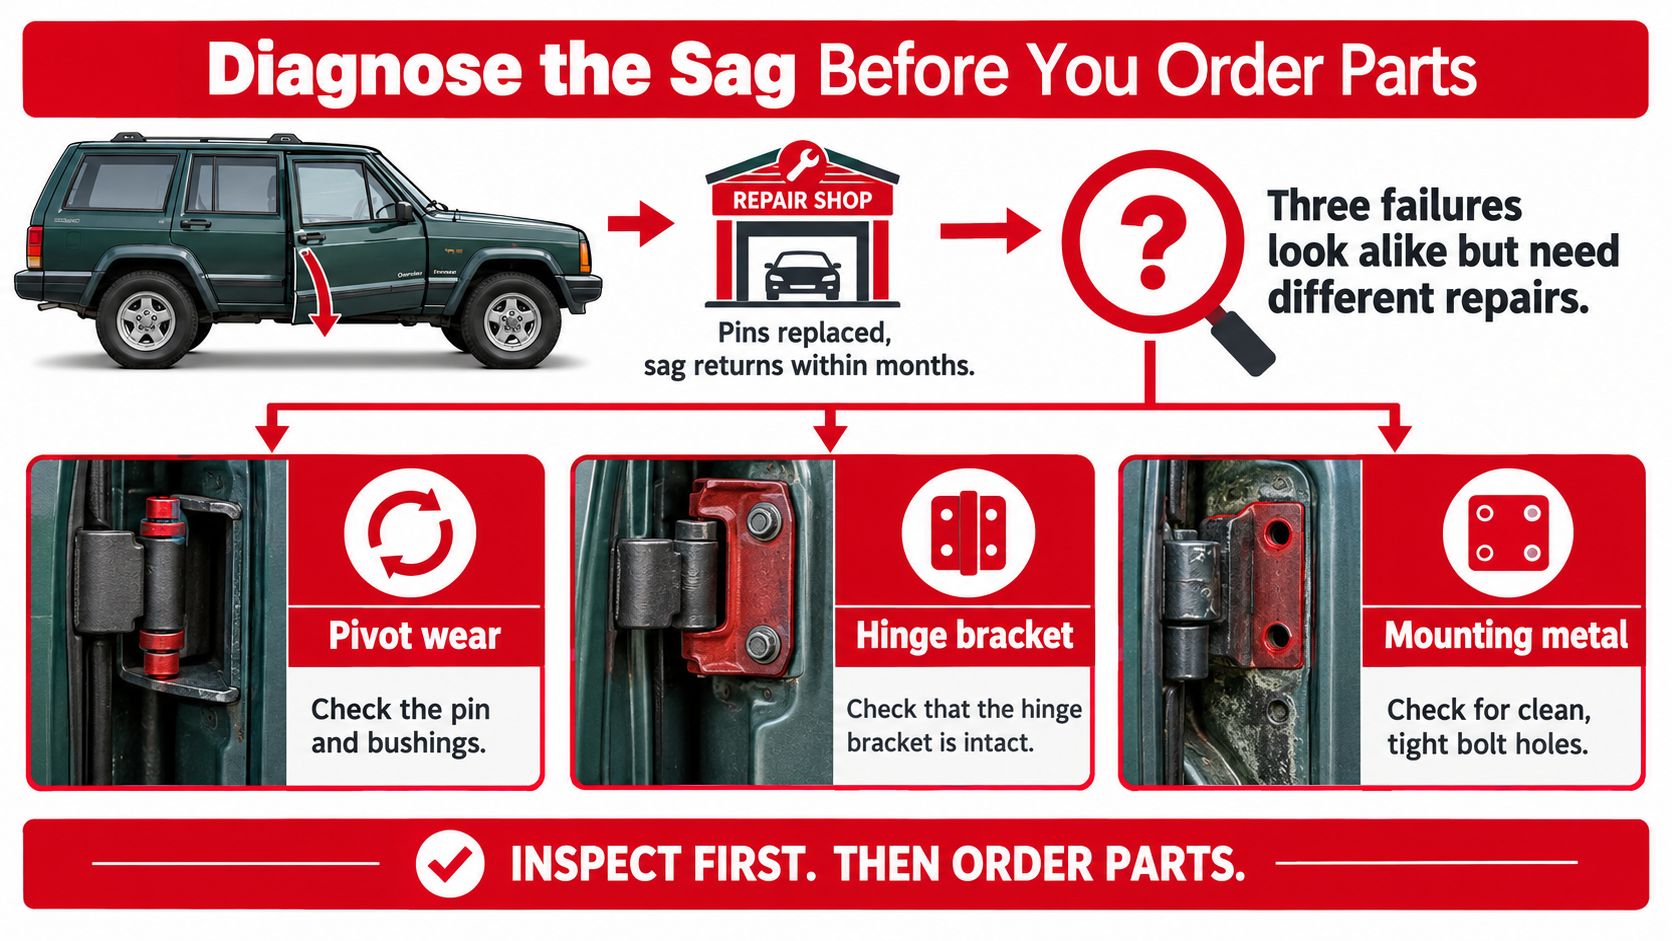
A familiar story in the shop is a 1990s XJ that comes in with a drooping driver door, gets new pins, and returns within months with the same sag. The pins weren't the whole problem. The upper hinge had started pulling away from the A-pillar, so the fresh pivot just moved more cleanly on a failing mount.
Three failures look alike from the driver seat. Upper hinge weld separation at the A-pillar lets the whole hinge shift under load. Pin and bushing wear lets the door rock at the pivot while the bracket stays put. A bent or shifted hinge bracket changes the gap pattern even when the pin feels tight. You can't separate them by how hard the door slams.
Run the Checks in Order
Don't name the repair until you've watched the door move. Work through these checks with the door supported, not hanging free.
- Open the door about 10 cm and support it: Get a helper or a padded jack under the door so its weight isn't pulling on the hinge while you test.
- Lift at the handle and watch two places: Watch the rear edge for rise and watch the A-pillar weld for movement. If the hinge itself moves against the pillar, that's structure, not just a worn pin.
- Note whether it closes without being lifted: A door that needs a lift to latch is telling you the hinge position has shifted, not just that the striker needs a nudge.
- Rock the door by hand at the hinge line: Feel for play right at the pivot. Movement there, with a still bracket, points to pin and bushing wear.
- Measure the gap top and bottom with feeler gauges: A gap that's wider at one end than the other suggests a bent bracket or a shifted door, not even pivot wear.
- Close slowly and watch the latch: If the door travels fine and binds only at the very end, don't jump to the striker. Hinge sag often pushes the latch out of line last.
For 1993 to 1997 Cherokees, there's a specific threshold to respect. A technical bulletin for 1993 to 1997 Cherokee models on upper driver door weld separation identifies that separation as a cause of sag and creaking, and the repair method changes depending on whether less or more than 75% of the weld has separated and whether the door can close without being lifted. That distinction matters because a mostly separated weld isn't a candidate for a quick pin swap.
If the hinge moves against the pillar when you lift, stop ordering pivot parts. You're looking at a mounting failure.
Early XJs also carry a related trap. Insufficient hinge weld area combined with an overly long check strap can load the hinge every time the door swings to its stop, while later models used a strap with an integrated bump stop. Check strap travel while you're at the hinge, because a strap that lets the door overextend will keep stressing a repaired weld.
| Symptom | Check | Likely Cause | Repair Path |
|---|---|---|---|
| Rear edge drops or door sags | Lift at handle and watch rear edge and A-pillar weld | Upper hinge weld separation | Weld repair if more than 75% separated, reweld or reinforce if less |
| Creak or clunk at hinge line | Rock the door by hand and feel for play at the hinge | Worn pin or bushing | Rebuild pin and bushings if mounting metal is solid |
| Gap wider at top than bottom | Measure gap at both ends with feeler gauges | Bent bracket or shifted door | Straighten bracket or fit a new hinge |
| Door binds only at the latch | Close slowly and watch striker engagement | Hinge sag pushing latch out of line | Correct the hinge first, then the striker |
| Bubbling rust around hinge | Probe with a pick around reinforcement | Corrosion in hinge reinforcement | Cut out and weld reinforcement, pins alone will not fix it |
| Closes only when lifted or slammed | Test a gentle unlatched close | Structural shift or wrong check strap length | Check strap and weld before adding shims |
The rule that closes this diagnosis is simple. A door binding only at the striker needs the hinge corrected first, because striker position is a symptom of hinge position. Move the striker to chase a sagging hinge and you'll wear the latch while the underlying failure keeps spreading.
Tools, Parts and Model-Year Checks You Need
Before ordering a hinge, confirm which XJ is in the bay and what has failed. The Jeep Cherokee XJ production history from the 1984 model year through 2001) spans an 18-year U.S. model run, international production, a 1997 facelift, and two-door and four-door bodies. Hinge dimensions and mounting details can differ, so a listing that says “XJ” is not enough to establish fitment. First confirm whether the problem is a worn pivot, a bent bracket, or a hinge pulling away from the body. A pin kit will not repair separated welds or a distorted bracket.
Check the model year, body style, door side, and upper or lower hinge position against the vehicle and the part listing. Compare the hinge's shape, bolt pattern, and mounting points with the old part or a clear photo. A damaged hinge can still provide a useful reference, but do not use a bent bracket as the only fitment check. A guide to search parts by VIN number can help confirm the vehicle configuration before you compare listings. For an overseas order, importing American car parts with DreamBid is relevant background for planning fitment checks before the parts ship.
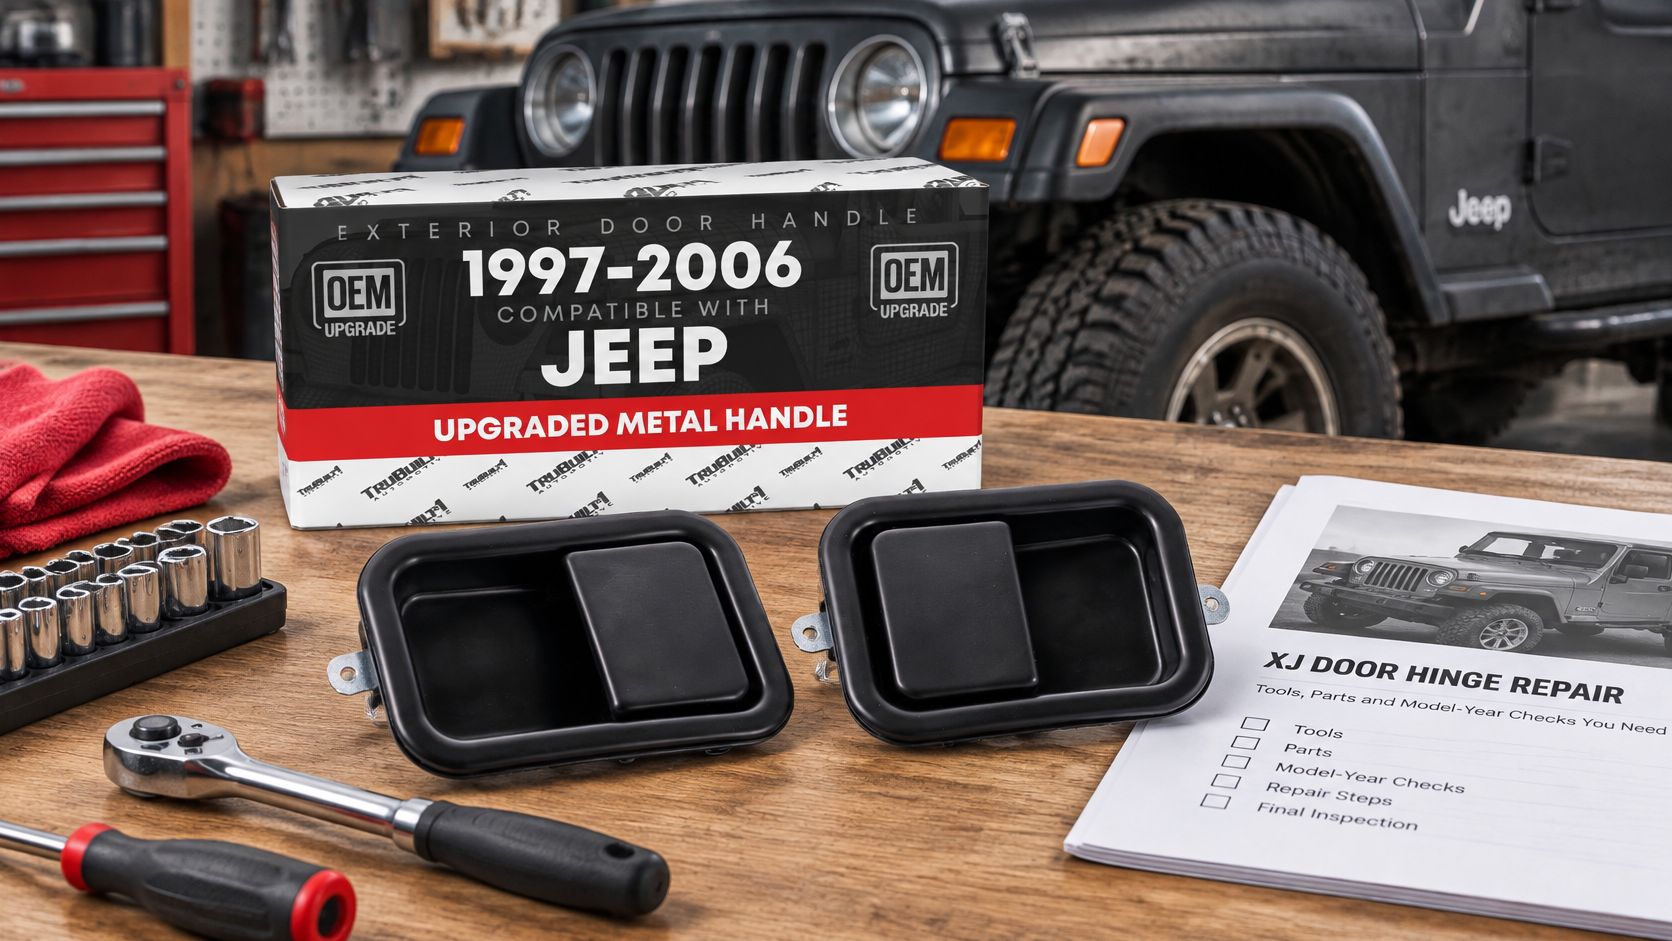
T1A Auto lists hinge and latch hardware, but verify the specific listing before ordering: match its OEM numbers to the numbers on your part, and confirm the hinge side, upper or lower position, model year, and body style. Related door hardware may also come up during the job. The Exterior Door Handle Set, Front Driver + Passenger Door Handle - Compatible with 1997-2006 Jeep Wrangler, Full Door Type - Black, Metal, 55176382AE, 55176382AB, 55176383AE, 55176383AB, 79398, 79399 - Front Driver + Passenger Door Handle is a metal front-left and front-right set listed as a replacement for OEM parts 55176382AE, 55176382AB, 55176383AE, 55176383AB, 79398, with 1 variant. It is for a different Jeep application. Do not assume Wrangler parts fit an XJ; confirm the application on the listing. Check current price and stock there as well.
Stage Everything Before the Door Comes Off
| Item | Purpose | What to Check |
|---|---|---|
| Floor jack with padded block | Supports the door at working height | Use padding to protect the paint |
| Helper | Steadies the door while fasteners are started | Arrange help before removing the door |
| Painter's tape and scribe | Records original hinge and striker positions | Mark before loosening bolts |
| Feeler gauges | Measures gaps around the door | Record top, bottom, and side gaps |
| Torque wrench | Tightens hinge bolts to service-manual values | Confirm its range covers the specified torque |
| Pin press or drift set | Removes and installs hinge pins | Choose a tool that will not mushroom pin ends |
| Hinge pin and bushing kit | Rebuilds the pivot when mounting metal is sound | Match the year and hinge side |
| Replacement hinge, upper or lower | Replaces a bent or separated hinge | Confirm body style and side |
| Check strap | Limits door swing | Confirm the strap matches the XJ |
| MIG welder and wire | Repairs a hinge or reinforcement | Set up for thin sheet metal and use sound wire |
| Wire wheel and seam sealer | Prepares and seals the weld area | Remove rust and paint before welding |
Price the complete repair kit against what the diagnosis shows you need. A pin-and-bushing kit suits a worn pivot with sound mounting metal; a replacement hinge or weld materials are separate needs, not automatic additions. Stage the torque wrench, seam sealer, and body sealant before work begins. If inspection reveals a cracked bracket after the door is off, having the right materials ready prevents an unnecessary parts run.
How to Take the Door Off Without Damaging It
Removal is where paint, wiring, and A-pillar threads get hurt. The door is heavy, awkward, and still connected on the hinge side. Work slowly and keep its weight supported from the moment the first bolt loosens.
Numbered Removal Sequence
- Open the door fully and disconnect the battery: Door wiring and the window switch run through the hinge side, so you don't want power in the harness while you're pulling connectors.
- Unplug the door harness at the A-pillar connector: Feed it out of the way and secure it so it can't pinch or drag when the door moves. A stretched harness creates electrical faults that look unrelated later.
- Set the padded jack under the door and take its weight: Raise it just enough that the door sits neutral. If the door hangs from bolts, it loads threads and can crack the mounting area.
- Mark hinge position on door and body: Use painter's tape and a scribe on both sides of each hinge, then photograph the gaps. Those marks are your baseline if the replacement hinge needs adjustment.
- Remove the check strap bolt at the door, then the striker if it's in the way: The strap will fight you if it's still connected. Bag the hardware by location, because upper and lower fasteners shouldn't get mixed by guesswork.
- Loosen the door-side hinge bolts first, then the body-side bolts: Keep the jack tight and have your helper steady the rear edge. Removing body-side bolts first is the common slip, because the door can drop and shift before you control it.
- Lower the door slowly and set it on a padded surface: Move it straight away from the body, don't twist it off the last bolt. Lay it where the outer skin and mirror can't take a knock.
Shop rule: Never let an unsupported door hang from partially threaded bolts. That's how threads tear and fenders get chipped.
Inspect the Hinge as It Comes Off
Don't set the old hinge aside for later. Look at it now while the mounting faces are visible. Check for bracket cracks, elongated holes, pin wear grooves, and weld tears at the pillar side. Run a fingertip around bolt holes and feel for pulled metal. If you find distortion, your repair path changes before the new parts come out of the box.
Also inspect the body side. Clean the mounting face and look for rust swelling or cracked reinforcement behind the hinge footprint. A new hinge bolted to soft metal will move again, no matter how carefully you align it. Photograph anything questionable, then decide whether you're rebuilding, replacing, or repairing structure.
Replace the Hinge or Rebuild the Pin and Bushings
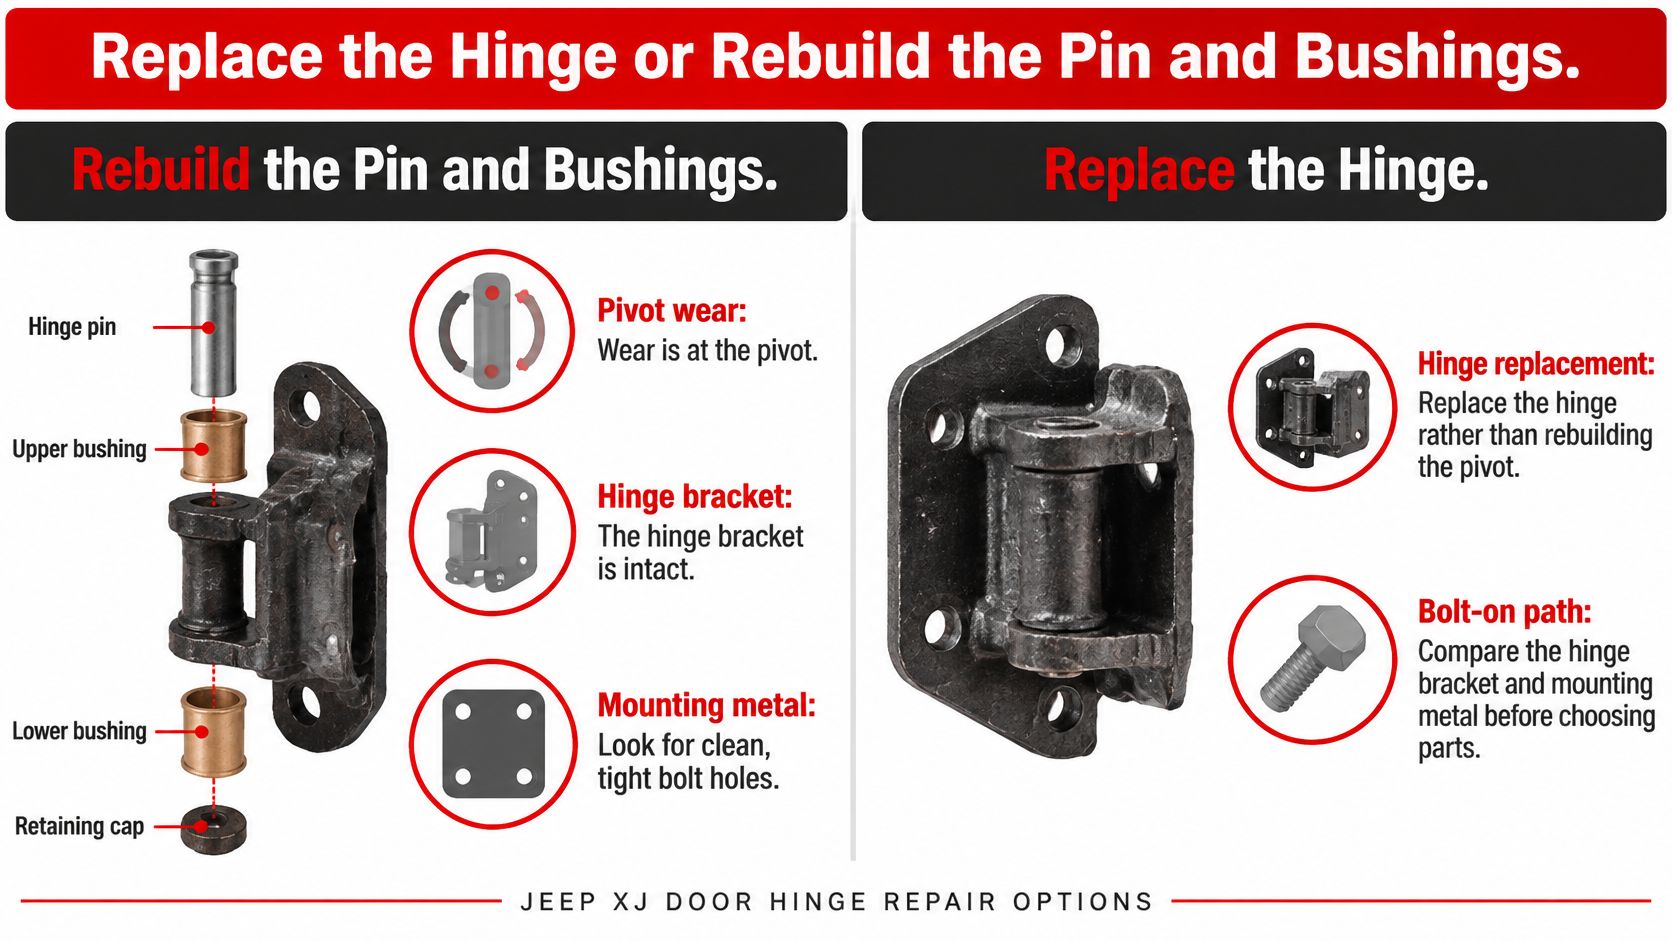
The decision starts with one test. Is the bracket and mounting metal intact, or is it bent, cracked, or pulled? That answer separates a pivot rebuild from a full replacement more reliably than how much the door sags.
The comparison below frames the two bolt-on paths before you spend on either one.
When a Rebuild Is Enough
Rebuilding pins and bushings works when wear lives at the pivot and everything around it is sound. You should see clean, tight bolt holes, no bracket distortion, and no movement between hinge and pillar during diagnosis. In that case, guidance on distinguishing hinge wear from a bent bracket or shifted striker notes that replacing the pin and bushings can preserve factory positioning if the mounting structure is intact, while a distorted bracket may need a complete hinge or structural repair.
Press the worn pin out squarely with a pin press or drift. Don't hammer the end until it mushrooms, because a flared pin will fight the bore and can crack an aged hinge ear. Drive in small, controlled steps, support the hinge close to the pin, and stop if the pin cocks sideways. Seat the new bushing square, not at an angle, so the pin doesn't bind or wear one side of the bore from the first swing.
When to Replace the Whole Hinge
Replace the hinge when the bracket is bent or cracked, when mounting holes are elongated, or when the hinge foot doesn't sit flat. A rebuilt pivot in a twisted bracket gives you a tight door in the wrong place. You'll chase gaps that can't repeat because the bracket geometry is wrong.
There's no defensible universal success rate to hide behind here. Outcomes depend on corrosion, collision history, and whether mounting metal is bent, so vehicle-specific service information should decide borderline cases. If you're unsure, compare the suspect hinge against the opposite side and against your baseline photos.
Watching a pin replacement performed helps you judge press direction and support before you try it on a hinge you need to reuse.
Install Rules for Either Path
- Start all fasteners hand-tight: You need movement left for alignment, so don't snug one corner and trap the door out of position.
- Keep the door supported: Never let it hang from partially threaded bolts while you reach for the next fastener.
- Don't force the door down: If it doesn't sit right, adjust the hinge. Forcing it bends parts and stores stress in the mount.
- Don't pull it into place with the striker: The striker centers the latch after alignment, it doesn't create alignment.
A hinge replacement without alignment only moves the problem. New hardware can still leave you with a tight front gap, a proud rear edge, and a latch that wears early. Treat installation and alignment as one job, not two separate tasks.
How to Align the Door and Set Final Torque
A door can latch while its panel lines remain wrong. Set the hinge position first, then adjust the striker to meet the aligned door. Work through fore and aft, vertical, and in and out adjustments one at a time, checking the gaps after each change. This sequence helps distinguish a hinge-position problem from a latch adjustment and prevents the striker from masking poor alignment.
The service procedure for installing a replacement hinge with fasteners hand-tight and adjusting it in three axes describes that sequence. Fore and aft controls the front and rear gaps, vertical aligns the beltline and body lines, and in and out sets the door flush with adjacent panels. Keep the striker removed or loose while establishing the door's natural position.
Adjustment Order
Set fore and aft first. This determines whether the door crowds the fender or leaves too much space at the rear. Move it in small increments, then check both ends because closing one gap changes the other. If the hinge has slotted holes or you are using shims, alter one hinge at a time so you can identify the effect of each adjustment.
Set vertical position next. Match the beltline and body lines to the fender and rear panel, then inspect the bottom gap. If the door sits low, correct its height at the hinge. Do not compensate by shifting the striker, and do not pry the rear edge upward by hand while tightening. Support the door and make small adjustments.
Set in and out last. This brings the door flush with the fender and rear panel and affects weather sealing and wind noise. Sight along the truck's side. If the top is flush but the bottom sits proud, adjust the hinges to correct the door's angle rather than forcing the striker to pull it inward.
For a broader explanation of gap checks and adjustment sequence, see this guide to how to adjust car door alignment. Once alignment is set, choose a lubricant suited to the hinge pivot and latch. The Evo Dyne Products lubricant buying guide covers lubricant options. Apply it sparingly; excess spray can collect dirt instead of improving hinge movement.
Numbered Alignment Steps
- Install the hinge with fasteners hand-tight: Keep the door supported at its normal height with a padded jack. Leave enough movement for adjustment.
- Remove or loosen the striker: This prevents latch pressure from pulling the door out of its natural position.
- Adjust one axis at a time: Use the slotted holes or shims, then check the gaps with feeler gauges after each change. Photograph the initial gaps so you can compare the final position.
- Check opening and closing: The door should latch and unlatch without lifting, slamming, or excessive effort. It should not spring back when unlatched.
- Torque the hinge fasteners to the factory specification: Get the value from the service manual for the exact XJ model year and hinge type. Do not use a torque figure from another vehicle; the correct XJ value must come from its service information.
- Refit and adjust the striker: Position it so the latch engages near its centre. Recheck the gaps, flushness, and closing effort after tightening.
If the striker has to pull the door into place, the hinge alignment is still wrong.
Apply sealant only after alignment is confirmed. Run a sealant bead around the door perimeter where the service information calls for it, and apply seam sealer at repaired joints. If adjustment is still needed, sealant can tear or shift. After sealing, close the door gently several times and check that the alignment has not moved.
Weld Repairs and Post-Weld Alignment
Shim it and force it closed is bad advice on a separated hinge. Shims can hide a gap for a week, but they don't reconnect a hinge to the A-pillar. The load goes right back onto weakened metal every time the door swings.
Welding is the right repair when the hinge weld has separated from the pillar and the surrounding sheet metal is still sound enough to hold a new bead. It's also used when an owner wants to permanently fix a pin in place, but that's a different job from structural reinforcement. Don't confuse a removable-door modification with an A-pillar repair.
When Welding Is Not Enough
If the reinforcement is rusted, torn, or pulled away from the pillar, a surface bead won't restore strength. You need reinforcement or sheet-metal reconstruction so the hinge load spreads into sound metal. Probe around the hinge footprint with a pick after wire wheeling. Soft, bubbling, or holed metal has to be cut back before you weld.
This is also where understanding what metal fatigue is and how it weakens parts helps you judge cracked bracket metal. A crack that keeps growing from a bolt hole or weld toe isn't fixed by covering it. You need to address the cracked section and the load path that cracked it.
Common guidance covers loosening bolts and adding shims, but welding oriented advice on checking gaps and using short intermittent welds emphasizes checking all gaps, particularly the rear gap, and using cooling periods to limit distortion. Those steps alone don't fully explain how to preserve latch engagement, weather sealing, and A-pillar alignment during welding, so your sequence has to do that work.
Weld and Recheck Sequence
- Photograph baseline gaps and mark normal door height: Tape marks on the body give you a target that memory won't.
- Support the door and confirm latch engagement: Set the door where it should live, not where the broken weld let it fall. Check that the latch meets the striker area cleanly before heat goes in.
- Tack-weld in two opposing locations: Opposing tacks hold position without pulling the hinge to one side. Recheck gaps after tacks, while correction is still easy.
- Weld in short intermittent beads: Let the metal cool between passes to limit heat distortion in thin, aged body metal. Long continuous beads warp the pillar face and change alignment as they cool.
- Remove the support and recheck every gap: Pay special attention to the rear gap and beltline. A door that drops when the jack comes out wasn't welded at true height.
- Seal the joint and recheck the striker: Apply seam sealer after alignment holds, then centre the striker to the latch.
A welded hinge that was aligned under jack pressure only is not aligned. It has to hold its gaps on its own weight.
Know the failure modes you're trying to avoid. A door can close and still seal poorly, rub the fender on opening, or sit under constant load on a weak weld. Each one shortens the life of the repair. If gaps move as the weld cools, stop, let it stabilize, and correct position before adding more bead. More weld on a misaligned hinge just makes the mistake permanent.
Confirm the Repair Holds Before You Close the Job
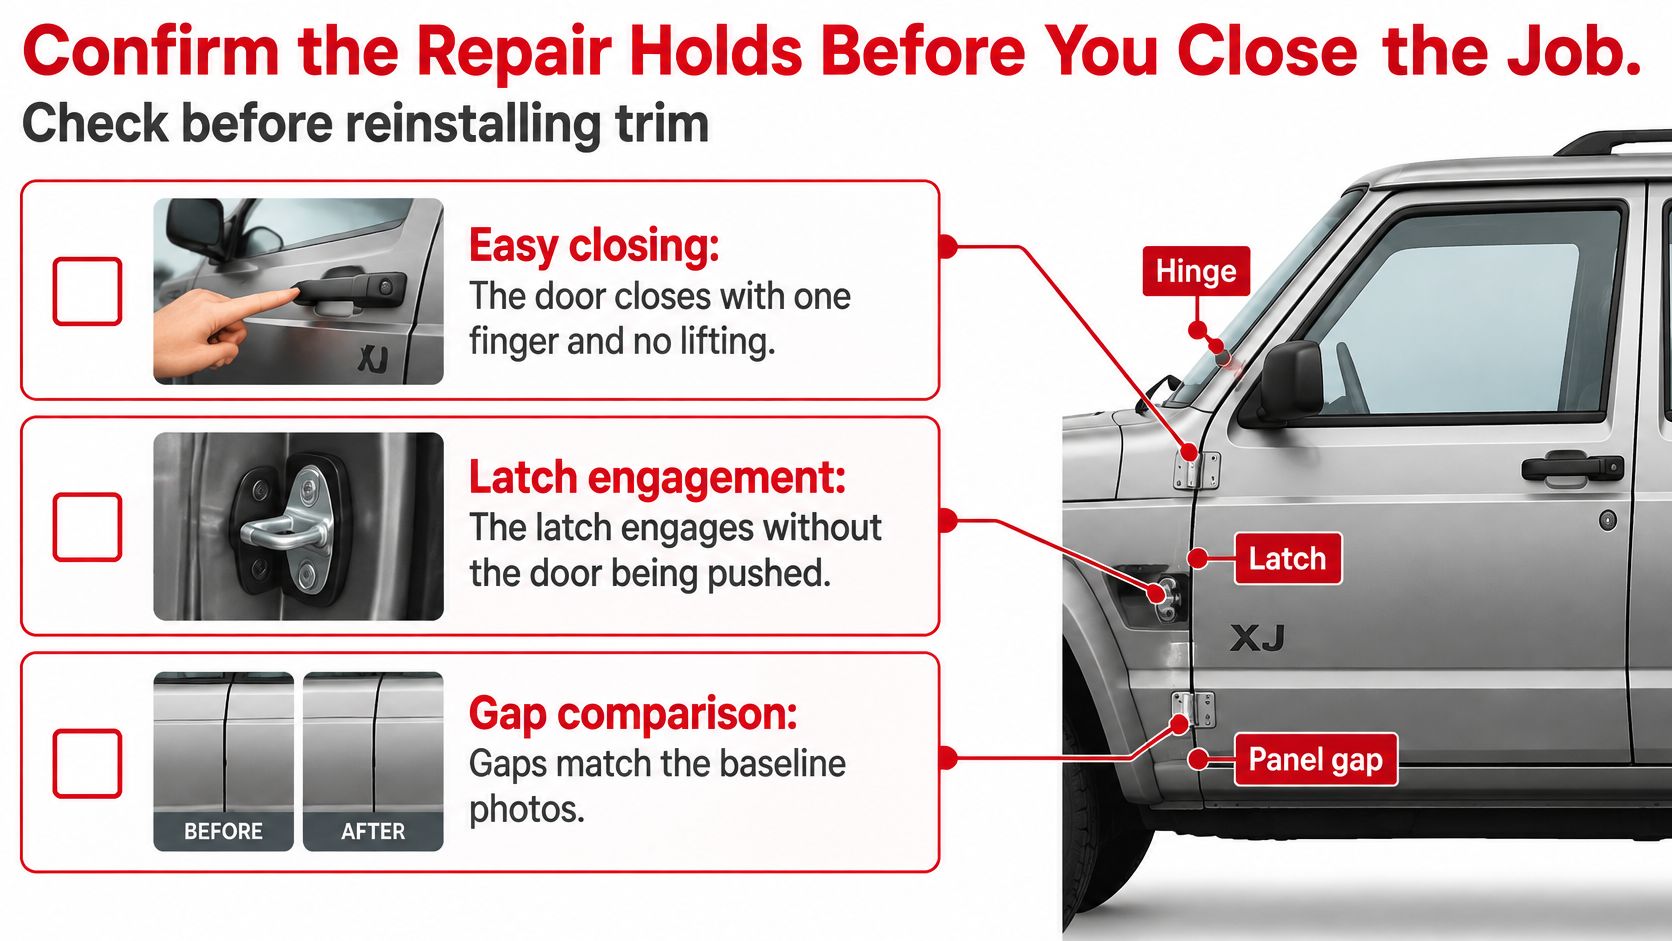
Don't reinstall trim until the door proves itself. Run this checklist with the baseline photos open on your phone, not from memory.
Pre-Trim Checklist
- One-finger close: The door closes with light effort and no lifting at the handle.
- Clean latch engagement: The latch engages without the door being pushed, pulled, or slammed into place.
- Gaps match baseline photos: Check all four corners, plus beltline alignment and flushness down the side.
- Striker sits near centre: The latch meets near the centre of striker engagement, not riding high or low.
- Wiring and window work: Test window operation, locks, and any door electrics before panels go back on.
- No fresh stress marks: Look for paint chips, cracked sealer, or bright metal around hinge bolts that suggests movement.
If any item fails, fix it now. Trim hides fasteners and wiring, and it makes a small correction feel bigger than it is. It's faster to loosen a hinge today than to pull a finished door apart next week.
Recheck Schedule and Two Overlooked Faults
Recheck gaps and fastener torque after the first week of driving. Vibration and door cycles will reveal whether hardware settled or a bracket is still moving. Check again after the first wet weather, because sealant curing and metal movement can shift closing effort and reveal leaks at the perimeter. Mark fastener positions with a paint pen after final torque so movement is visible at a glance.
Inspect two things the earlier steps don't cover. First, bolt threads damaged during removal may not hold torque, and a bolt that turns without clamping must be replaced rather than tightened harder. Second, a check strap that has stretched or bent can pull the top of the door out of position and reload the hinge at full swing. Replace a suspect strap instead of realigning around it.
End with a decision rule. If gaps still differ after two rounds of adjustment, stop adding shims and inspect the A-pillar and reinforcement. At that point the structure is the likely cause, and more adjustment only disguises it while the mount keeps failing.
If your diagnosis points to replacement hardware, T1A Auto stocks hinges, latches, door handles, and related fasteners you can search by vehicle to verify fitment before you order. Match the part to your XJ's year, body style, and door position, then finish the job with the alignment and recheck steps above so the repair holds.
