


Swapping a back bumper yourself can go one of two ways. On an older pickup with a simple steel bumper, it’s a job you can knock out on a Saturday. But if you're working on a newer truck packed with sensors and cameras, that same job can quickly turn into a lesson in patience and precision.
Deciding If a DIY Bumper Replacement Is for You
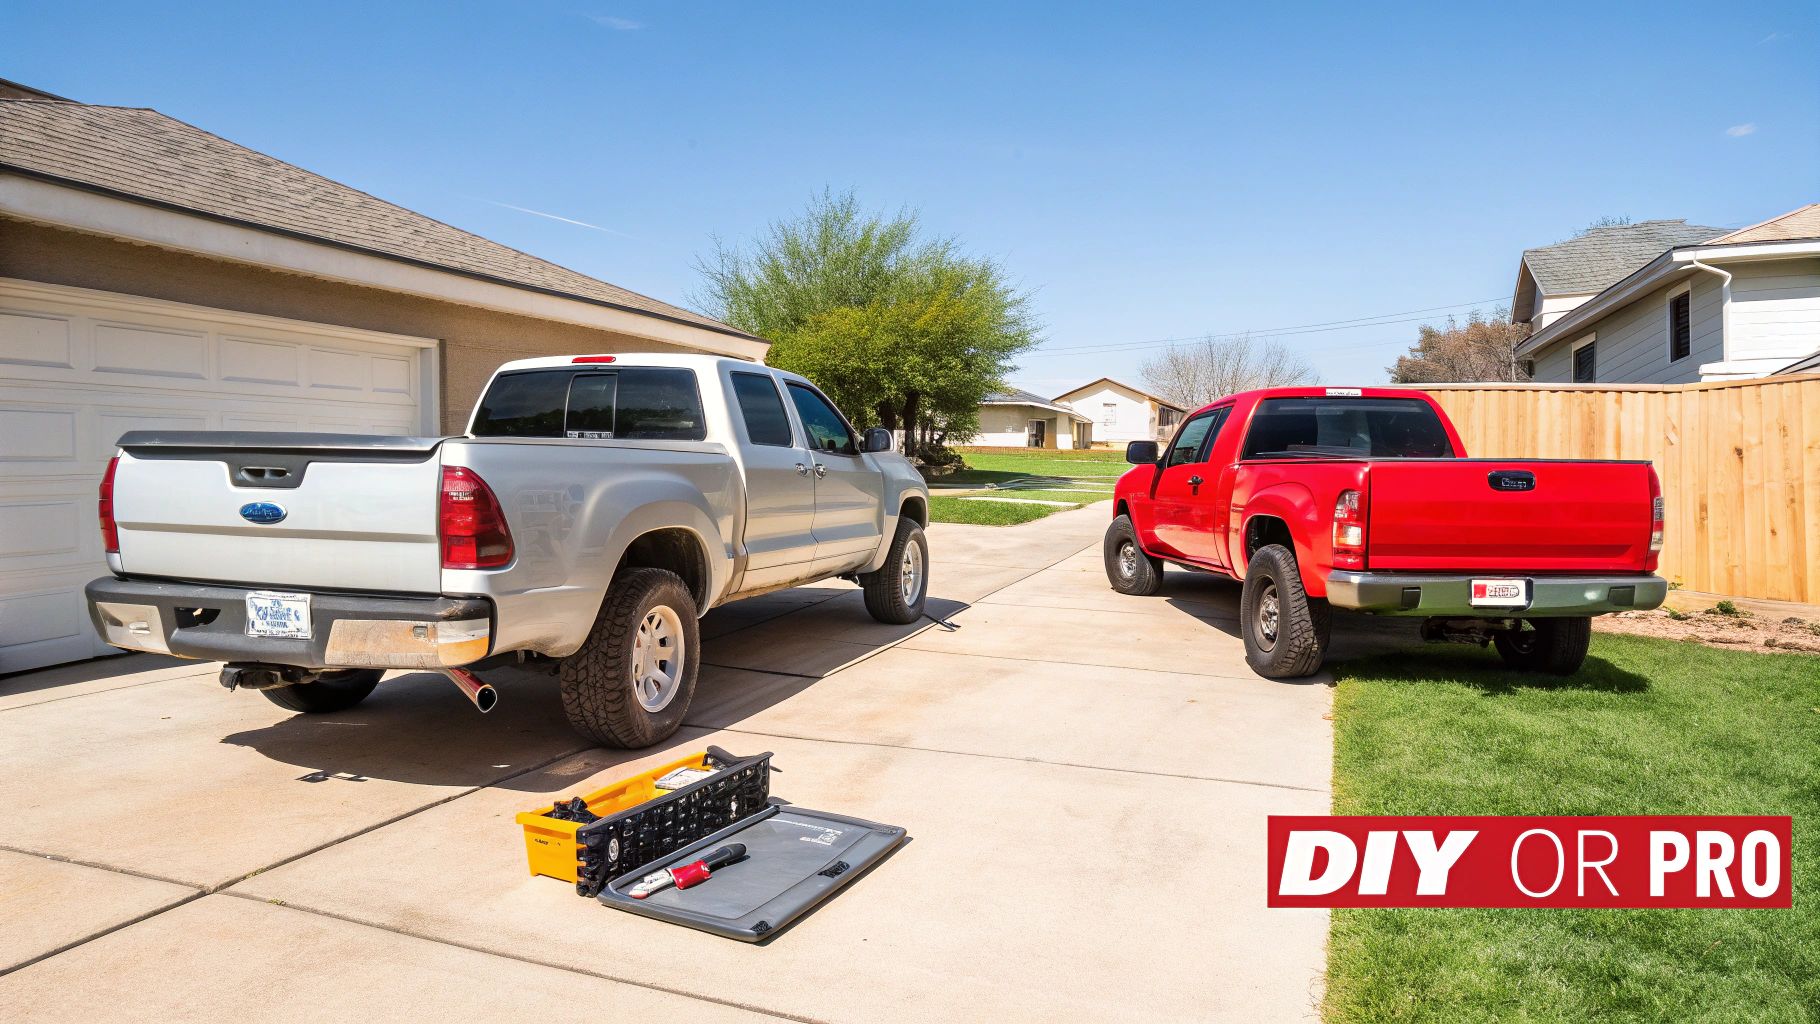
Before you even start shopping for parts, you need to have an honest chat with yourself about whether this is a job you should tackle. The reality is, the difficulty varies wildly depending on what you drive. A classic steel bumper on an old Ford F-150? That's usually just a handful of big, easy-to-reach bolts. It’s a great first-timer project.
Now, take a modern Toyota Tacoma. Its rear bumper is a multi-piece plastic affair, and it’s loaded with tech. You’re not just unbolting metal; you’re carefully unplugging wiring for parking sensors, backup cameras, and maybe even blind-spot monitors. These systems use tiny, brittle plastic clips and connectors that love to snap, turning your "simple" bumper job into an expensive wiring headache.
An Honest Look at Your Skills and Tools
Take a second to inventory what you're bringing to the table. A successful bumper replacement takes more than just the will to do it.
A solid mechanical aptitude and the right gear are non-negotiable. Ask yourself:
- Got the right tools? You'll absolutely need a good socket set with extensions, a torque wrench to tighten bolts correctly, and probably a set of plastic trim removal tools to avoid scratching things up.
- Have the space? You need a flat, stable spot to work where you can lay out the old and new bumpers side-by-side without tripping over them.
- Are you patient? Can you methodically unplug and replug sensitive electronics without getting frustrated? Rushing this part is the fastest way to get a dashboard full of warning lights.
The global automotive bumper market is ballooning, projected to hit USD 26.4 billion by 2035, thanks to more cars on the road and tougher safety rules. For those of us with popular trucks like the Chevy Silverado or Ford F-Series, this means parts are plentiful, but the repairs are getting more complicated. Since parking lot bumps and minor rear-enders make up nearly 30% of minor insurance claims, more owners than ever are weighing a DIY fix against a trip to the body shop. For a closer look at these market forces, you can explore more data on the automotive bumper market.
Key Takeaway: The biggest mistake you can make is underestimating a modern bumper. What seems like a simple cosmetic piece often involves complex sensor wiring and calibration. Get it wrong, and you could knock out safety features you rely on.
Time Commitment vs. Professional Help
Finally, be real about how much time this will take. A basic steel bumper swap might be a two-hour job. A complex modern bumper with sensor transfers could easily eat up your whole afternoon, especially if you run into a seized, rusted-on bolt.
Now, weigh that time against paying a professional. Yes, body shop labor rates can be steep, but you're paying for their experience, specialized tools, and a warranty on their work. The real goal here is to avoid ending up with a truck you can't drive, half-disassembled in your driveway. If you're at all nervous about messing with wiring or just don't have the setup, handing the job over to a pro is often the smarter and less stressful call.
How to Choose the Right Replacement Bumper
Getting the right part is, without a doubt, the most critical decision you'll make when replacing a rear bumper. I've seen it countless times—the wrong choice leads to a world of frustration with terrible fitment, ugly body gaps, and even potential safety issues.
Let's walk through your options so you can feel confident you're buying the right piece for your vehicle.
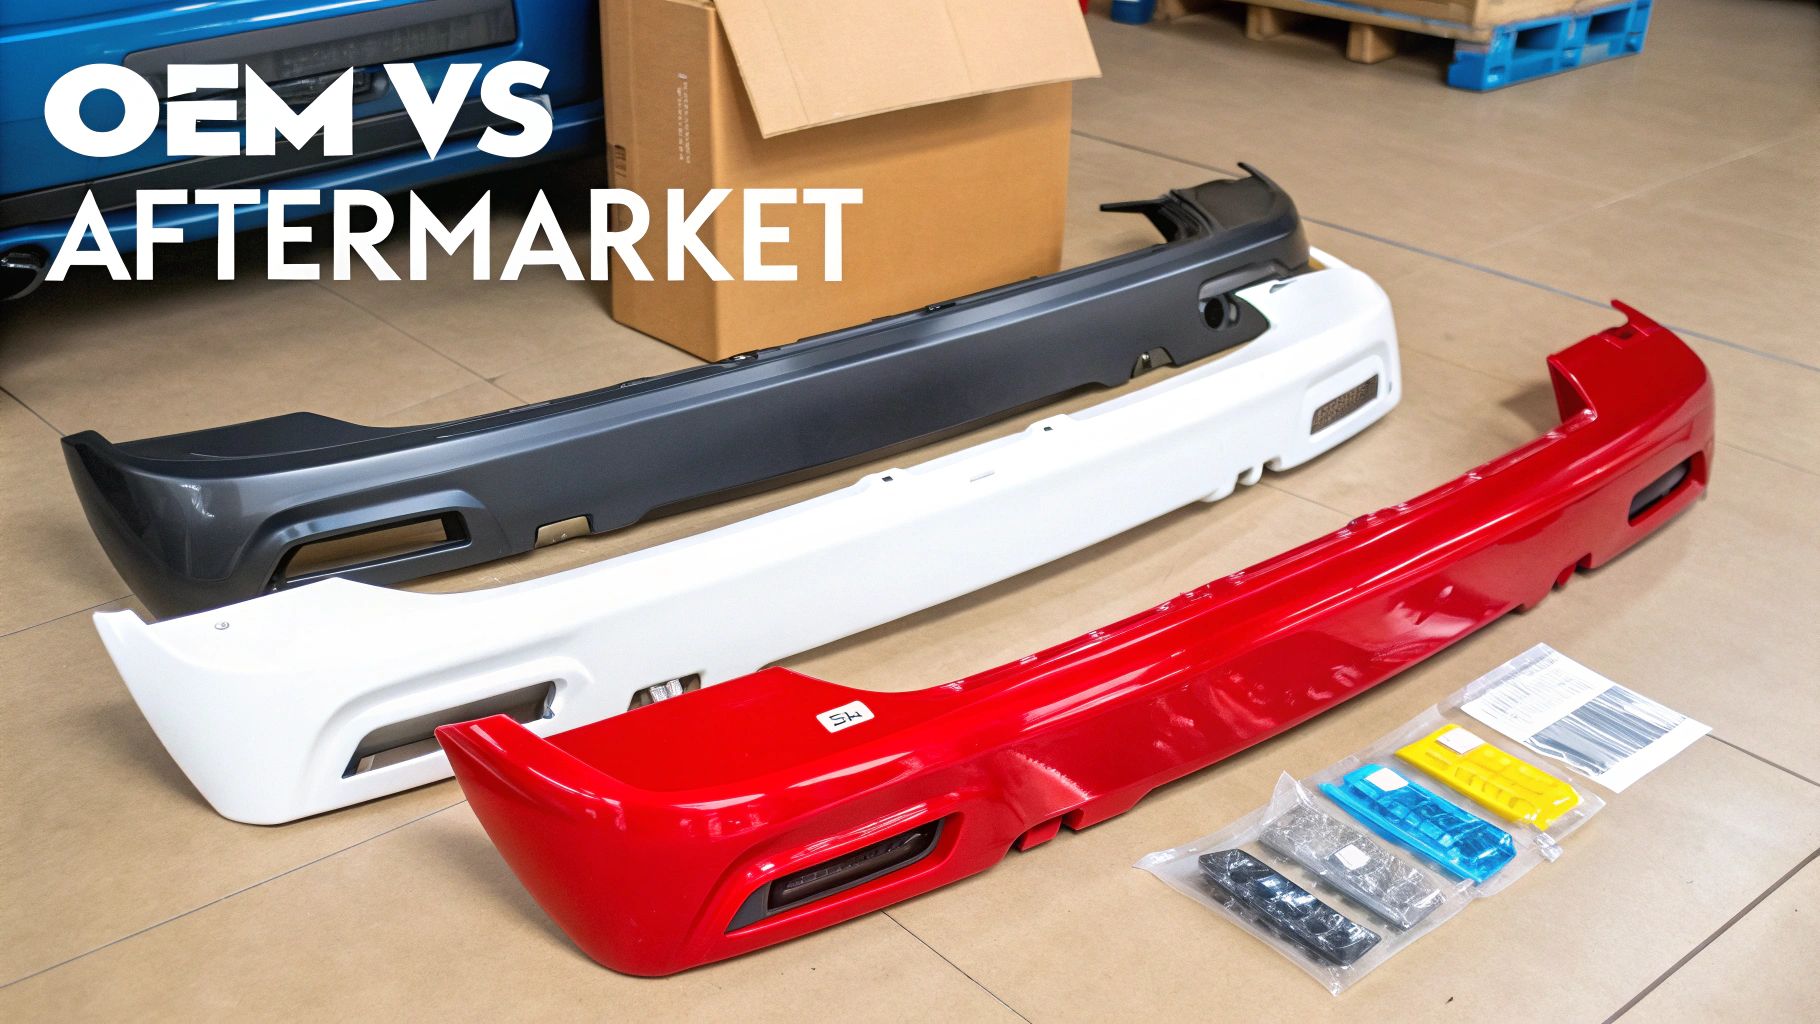
OEM vs. Aftermarket Bumpers
Your first big decision comes down to three main categories: OEM, standard aftermarket, and CAPA-certified aftermarket parts. Each has its own place, depending on your budget and quality expectations.
Original Equipment Manufacturer (OEM) parts are the real deal, made by the same company that built your car or truck. They guarantee a flawless fit and match the original quality perfectly. The catch? You're definitely paying a premium for that brand name and the peace of mind that it will bolt on without any fuss.
Aftermarket parts, on the other hand, are made by third-party companies. They're designed to do the same job as the original but almost always come at a much friendlier price point. The quality, however, can be a bit of a gamble, ranging from surprisingly good to downright awful.
Understanding the nuances here is key. For a deeper dive, check out our complete guide on OEM vs. aftermarket parts. Making the right call can save you hundreds without compromising on a quality repair.
My Two Cents: Before you click "buy" on any bumper, grab your vehicle's VIN (Vehicle Identification Number). This 17-digit code is your golden ticket to ensuring the part you get matches your specific trim level, sensor cutouts, and exhaust style. Don't skip this step!
The CAPA Certification Difference
Look, not all aftermarket parts are created equal, and that's where the Certified Automotive Parts Association (CAPA) comes in. CAPA is an independent, non-profit watchdog that puts aftermarket parts through the wringer to certify they meet—or even beat—OEM standards for quality and fit.
When you spot that CAPA seal, you know the bumper has passed some serious tests:
- Fit and Finish: The part has been physically installed on a vehicle to ensure every bolt hole lines up and all the gaps are just right.
- Material Quality: The steel or plastic is tested for strength, thickness, and durability to make sure it matches the original specs.
- Safety Compliance: The part has been verified to perform as intended in a low-speed impact, protecting your vehicle's underlying structure.
Honestly, choosing a CAPA-certified part is the sweet spot for most DIY projects. You get the quality and fit of an OEM part at a much more reasonable aftermarket price, taking all the guesswork out of the equation.
Matching Materials to Your Needs
The bumper's material is just as important as its certification. A daily driver sedan simply doesn't have the same demands as a workhorse pickup truck.
For trucks like a Silverado or Sierra, a steel bumper assembly is almost always the way to go. It’s built tough and can handle the dings and scrapes from towing trailers or tossing gear in the bed. This is a huge segment of the automotive bumper market, which is expected to climb from USD 23.81 billion in 2025 to USD 33.41 billion by 2033. Standard bumpers dominate with a 49.6% market share, driven largely by truck owners.
Many high-quality aftermarket steel bumpers even use upgraded metal components that resist cracking far better than the plastic bits on OEM bumpers—a common failure point after five to seven years.
For most cars and SUVs, a plastic bumper cover is standard. These are designed for looks and aerodynamics and typically come either primered (ready for you to paint) or pre-painted to match your car's color code.
To make things even clearer, I've put together a quick comparison table to help you weigh your options based on what matters most to you.
Bumper Type Comparison OEM vs Aftermarket vs CAPA-Certified
| Bumper Type | Average Cost | Fitment Guarantee | Material Quality | Typical Warranty | Best For |
|---|---|---|---|---|---|
| OEM | High | Excellent | OEM Spec | 1-2 Years | Factory-perfect restoration, insurance repairs. |
| Aftermarket (Standard) | Low | Varies | Can Vary | 90 Days - 1 Year | Budget-conscious repairs on older vehicles. |
| Aftermarket (CAPA-Certified) | Moderate | Excellent | OEM Equivalent | 3 Years - Lifetime | The DIYer seeking quality, fit, and value. |
Ultimately, the choice comes down to balancing cost, quality, and your personal standards for the repair. For most people working in their own garage, a CAPA-certified part offers the ideal blend of value and guaranteed performance.
Taking Off the Old Bumper: A Step-by-Step Guide
Alright, now for the hands-on part: getting that old, banged-up bumper off your truck. This is where a little patience goes a long way. If you rush through this, you're almost guaranteed to snap a brittle plastic clip or yank a wire you shouldn't, turning a simple job into a headache.
Let's use a late-model GMC Sierra as our guinea pig. These trucks are a great example because they pack a lot into the bumper—parking sensors, license plate lights, and trailer wiring are all common. If you can handle this, you can handle almost any back bumper replacement.
Disconnect Everything First
Before you even think about grabbing a wrench, you need to deal with the electronics. Your first task is to get underneath the truck and locate the main wiring harness connector. It’s usually tucked up high on a frame rail, out of the way of road grime and water.
These connectors aren't meant to just pull apart. Look closely for a locking tab. You’ll likely need a small flathead screwdriver to gently press it in while you pull the two halves apart. Use a flashlight so you can see what you’re doing—forcing it is the fastest way to break the plastic housing.
With the main harness disconnected, you can work your way through the smaller plugs.
- Parking Sensors: Each sensor has its own little connector. They're held in place by delicate plastic clips that get brittle with age. A cheap set of plastic trim removal tools is your best friend here; they let you pry things apart without causing damage.
- License Plate Lights: These are often a simple twist-and-pull socket. Give them a gentle wiggle as you pull, and they should pop right out.
- Trailer Plug: This connector is beefier, but you still need to be careful not to bend any of the pins when you unplug it.
Wrassling with Stubborn Bolts and Hidden Fasteners
Once the wiring is free and safely tucked aside, it's time for the heavy hardware. The main bumper brackets on most trucks are secured to the frame with big bolts—usually 18mm or 21mm. This is often where the real battle begins: rust.
Don't even try to turn a rusty bolt without prepping it first. Grab a can of a good penetrating oil (PB B'laster is a classic for a reason) and absolutely soak every nut and bolt you see. Let it sit for a solid 15-20 minutes to work its magic. This simple step can save you from the nightmare of a snapped-off bolt head.
My Go-To Trick: If a bolt is really seized after soaking, I try to tighten it just a hair before loosening it. That tiny reverse movement is often enough to break the bond rust has formed. An impact wrench is also a huge help here; the rapid hammering action shocks stubborn bolts free when pure muscle won't.
Now, look out for hidden fasteners. Carmakers love to hide bolts and clips where you least expect them, often inside the wheel wells or behind the plastic step pad on top of the bumper. Do a quick online search for a bumper removal diagram for your specific truck—it'll save you a ton of frustration.
The Final Lift and a Quick Inspection
This is not a one-person job. Seriously, grab a friend. A complete bumper assembly, even with plastic covers, is heavy and incredibly awkward to handle. Trying to wrestle it off by yourself is a great way to scratch your paint or throw out your back.
With your helper holding one side, remove the last of the frame bolts. Then, together, slide the whole bumper assembly straight back and away from the truck. Set it down on a piece of cardboard or an old blanket to avoid scratching it or your floor.
It’s no wonder so many people are tackling this job. The market for replacement bumpers is projected to explode from USD 54.7 billion in 2025 to USD 113.7 billion by 2035. This growth is fueled by all the new sensors and cameras being integrated into bumpers and the simple fact that rear-end collisions make up a staggering 29% of all crashes in the U.S. If you want to dive deeper, you can read more about these automotive bumper market trends.
With the old bumper finally off, take a minute to look at the exposed frame ends. Check for any hidden damage from the accident. This is also the perfect opportunity to clean up the area and hit any surface rust with a little paint before bolting on your shiny new part.
Getting the New Bumper Installed for a Perfect Fit
With the old, mangled bumper out of the way, you’ve reached the best part of the job: making your truck look whole again. This is where all that careful prep work really starts to pay off. A perfect installation comes down to being patient, precise, and doing things in the right order.
Transferring Your Tech Components
Before you even think about lifting the new bumper onto the truck, you need to swap over all the electronic guts from your old one. This typically means your parking sensors, backup camera, and any blind-spot monitoring modules. Take your time here—these parts are delicate and can be surprisingly expensive to replace.
- Parking Sensors: Gently pop each sensor out of its housing on the old bumper. Pay close attention to the little rubber O-rings or gaskets; they're critical for sealing out moisture. Make sure they're clean and seated correctly when you press the sensors into the new bumper.
- Backup Camera: The camera is usually held on by a small bracket and a couple of screws. Carefully remove it and install it on the new bumper, ensuring it’s oriented exactly the same way. Nobody wants a crooked view when they're backing up.
This is also the perfect time to give all the electrical connectors a quick shot of contact cleaner. A little spray now can save you from a major headache later by preventing corrosion and grime from causing weird electrical gremlins.
This infographic gives a simple overview of the removal process—which is basically what we're about to do, just in reverse.
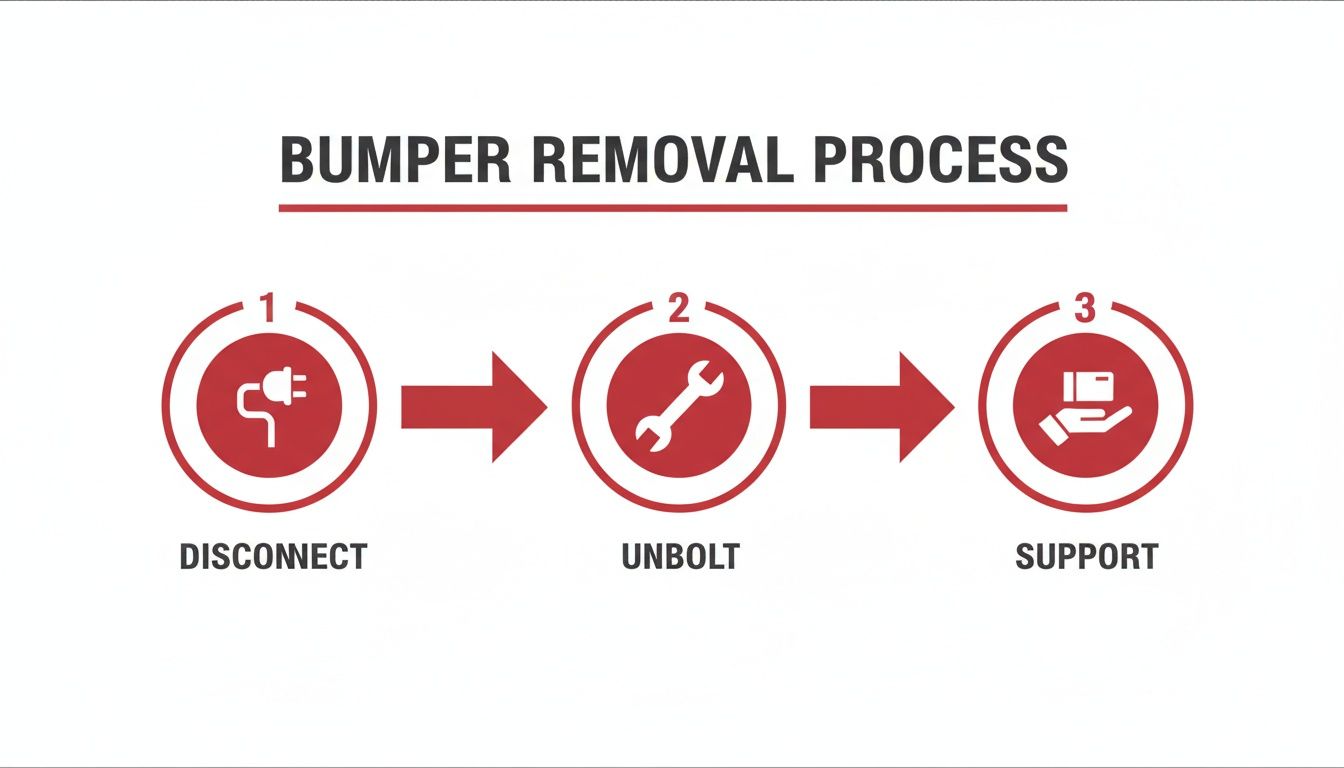
The logic is simple: disconnect electronics, unbolt hardware, and keep it supported. We'll just reverse that for a smooth installation.
Test-Fitting for Perfect Alignment
I can't stress this enough: never fully tighten a single bolt until you’ve test-fitted the bumper. This is without a doubt the most critical step if you want a professional, factory-looking finish. Rushing this will leave you with ugly, uneven gaps that scream "amateur job."
Grab a friend and carefully lift the new bumper into position, sliding it onto the frame mounts. Hand-thread the main mounting bolts just enough to hold the bumper’s weight, but leave it loose enough so you can shift it around for micro-adjustments.
Now, step back. Look at the gap between the top of the bumper and the bottom of the tailgate. Check the spacing where the ends of the bumper meet the rear quarter panels. You're shooting for a consistent, even gap of about 4-6 millimeters all the way around. Nudge it, lift it, and wiggle it until it looks perfectly centered.
My Go-To Trick: Use painter's tape to make a few reference marks on the truck's body and the bumper before you start. This gives you a clear visual guide to make sure everything is perfectly aligned side-to-side and top-to-bottom before you commit to cranking down the bolts.
The Final Tightening Sequence
Once you're happy with the alignment, it's time to lock it in. The order you tighten the bolts in really matters. If you just crank down one side while the other is still loose, you’ll pull the whole thing out of alignment.
Start by snugging up all the main frame bolts evenly. Move from side to side, gradually increasing the tightness. This ensures the bumper is drawn straight onto the frame, preserving those perfect gaps you worked so hard to set.
This is where a torque wrench is an absolute must-have, not a nice-to-have. Manufacturers specify the exact torque settings for these bolts to ensure they’re secure without stretching the threads or warping the brackets. For a full-size truck, you're often looking at a spec around 75-85 lb-ft, but you have to check your service manual for the exact number for your vehicle.
If you’re curious about the outer plastic shell specifically, our guide on bumper cover replacement has some great additional info.
Reconnecting and Testing Everything
With the bumper securely torqued down, the last real step is to plug everything back in. Reconnect the main wiring harness first, then move on to the individual connectors for the parking sensors, camera, and license plate lights. Make sure you hear and feel a solid "click" so you know each connection is fully seated.
Before you clean up, it’s time for a full systems check. Reconnect your truck's battery.
- Start the Engine: Shift into reverse. Check your infotainment screen to make sure the backup camera feed is clear, straight, and aimed correctly.
- Test the Sensors: Have someone walk behind the truck to make sure the parking sensors beep as they get closer.
- Check Your Lights: Flip on your headlights to confirm both license plate lights are working.
Taking a minute to verify that every single feature works now will save you the immense frustration of having to tear it all apart again to fix one loose plug. Once you get the all-clear, you can finally stand back and admire your flawless back bumper replacement.
Finishing Touches for a Professional Result
Getting the new bumper bolted on is a huge step, but don't call it a day just yet. The last few steps are what really separate a decent DIY job from one that looks like it rolled right out of a body shop. These finishing touches are all about the details—getting the look, the function, and the long-term durability just right.
Taking a little extra time to nail the paint, perfect the alignment, and double-check the electronics ensures your truck not only looks fantastic but that all its safety features are working as intended.
Achieving a Perfect Paint Match
Most aftermarket bumpers, especially the plastic covers, will show up either in a raw, unpainted finish or with a basic black primer. The first thing you need to figure out is how you're going to get it to match your truck.
If you’re working on a daily driver or a newer vehicle, an exact color match is probably non-negotiable. You'll need to find your vehicle's paint code, which is almost always on a sticker inside the driver's side door jamb. A professional auto body shop can take that code and mix a perfect batch of factory paint, giving you that seamless, fresh-off-the-lot look.
On the other hand, if this is for a work truck where function trumps fashion, you've got other solid options. A rugged, textured bed liner coating or a durable enamel paint can provide a tough, chip-resistant finish that's ready for anything you throw at it. For bumpers destined for a life of hard knocks, this is often the most practical and budget-friendly route.
Pro Tip: When you take your bumper to a paint shop, bring your truck's fuel door with you. It gives the painter a real-world sample of your vehicle's current color, accounting for any slight fading from sun exposure. This little trick helps them blend the new paint for a truly invisible repair.
After spending time and money on a great paint job, you'll want it to last. A smart next step is to learn how you can keep your vehicle's paint protected with paint protection film to keep it looking new for years.
Fine-Tuning Bumper Alignment
Even if you were meticulous with the test-fitting, a final alignment check is critical. Once the paint has cured and the bumper is fully installed, take a few steps back. Look at it from every angle. What you're aiming for are even, consistent panel gaps all the way around.
Check for a uniform space between the top edge of the bumper and the bottom of the tailgate. Then, inspect the gaps where the sides of the bumper meet the rear quarter panels. Most bumper mounting brackets are designed with slightly oversized bolt holes for this very reason—they give you a little wiggle room for minor adjustments. Just loosen the main bolts enough to nudge the bumper up, down, or side-to-side until every gap looks perfectly symmetrical.
Troubleshooting Common Post-Installation Glitches
It’s not unusual to encounter a few electronic gremlins after a back bumper replacement. Don't sweat it. More often than not, these are simple connection issues that are easy to fix.
Here are a few common hiccups and what they usually mean:
- Parking Sensor Constantly Beeping: This is a classic sign that one of the sensors isn't seated properly in its mount or that its wiring harness isn't plugged in all the way.
- Backup Camera Not Working or Aimed Incorrectly: A black screen almost always points to a loose connection. If the view is just crooked, the camera's mounting bracket might be upside down or not sitting flush.
- "Check Parking Assist" Warning Light: This is the car’s way of saying there's a general fault. The first thing to do is go back and double-check every single sensor plug. Make sure you hear and feel a solid "click" when you connect each one.
For a deeper dive into sensor problems, check out our guide on how to install parking sensors, which has more detailed troubleshooting advice. Tackling these little issues right away is the final piece of the puzzle to a successful and satisfying bumper replacement.
Answering Your Top Back Bumper Questions
When you’re staring down a back bumper replacement, you’re bound to have questions. It’s a project with a lot of moving parts, from picking the right components to getting everything bolted up correctly. Let's walk through some of the most common things people ask when they're getting ready to tackle this job.
How Much Is This Going to Cost Me?
This is always the first question, and the answer really depends on your approach. If you're doing the job yourself on a popular truck like a Ford F-150, you can usually find a quality aftermarket bumper for $200 to $500. This is easily the most wallet-friendly way to go.
On the other hand, taking it to a professional body shop will look a lot different. With labor rates anywhere from $50 to over $200 per hour, plus the markup on an OEM part and paint, the final bill can quickly jump to $800 to $2,000, sometimes even higher. This is especially true if you have a vehicle loaded with sensors and cameras that need professional recalibration after the swap.
Can I Just Reuse My Old Parking Sensors and Camera?
Absolutely! As long as they weren't damaged in whatever busted your bumper, you should definitely reuse your original electronics. This is one of the biggest money-savers in the whole project.
The trick is to be incredibly careful when you're taking them out. These components are usually held in by small plastic clips and connected with wiring that gets brittle with age. A good set of plastic trim tools is your best friend here. After you move them to the new bumper, double-check that they're snapped in tight and sealed up to keep moisture out. Test them before you put all your tools away!
What's the Difference Between a Bumper Cover and an Assembly?
Knowing this is key to making sure you order the right part for the job.
- A bumper cover is just the painted plastic part you see on the outside. It’s mostly for looks and aerodynamics.
- A bumper assembly is the whole shebang. It includes that outer cover along with the heavy steel reinforcement bar behind it, mounting brackets, step pads, and any hardware that bolts it all to the frame.
On many trucks, the bumper is a one-piece steel assembly that acts as both the structural and cosmetic part. For cars and SUVs, you might only need a new cover if just the plastic is cracked.
Crucial Safety Step: Before you start unplugging anything, always disconnect the negative terminal on your vehicle's battery. This one simple step prevents accidental electrical shorts that can fry expensive sensors, blow fuses, or even damage your vehicle’s main computer.
If your bumper replacement is the result of a collision, you probably have more on your mind than just the repair. It’s often helpful to understand who is at fault in a rear-end accident as you sort everything out.
At T1A Auto, we focus on providing top-tier, CAPA-certified aftermarket parts that fit just like the original, but without that OEM price tag. From complete steel bumper assemblies to the intricate sensors that make them smart, we have the durable parts you need to get your DIY back bumper replacement done right. Check out everything we offer at https://t1aauto.com.