


Adding a set of parking sensors is one of those practical, weekend upgrades that just makes daily driving better. It takes the guesswork out of tight spots and gives you a huge confidence boost. The whole process usually boils down to mounting the sensors on your bumper, running the wires to a small control box, and tapping into your reverse lights for power. With a few common tools, you can get this done in an afternoon and add a modern safety feature without the dealership price tag.
Your Guide to a Flawless Parking Sensor Installation
Whether you’ve been wrenching on cars for years or this is your first real modification, this guide will walk you through it. Installing sensors is genuinely one of the best ways to prevent those annoying low-speed scrapes and bumps in packed parking lots.
It’s no surprise that more and more new cars come with these features built-in. The global market for parking sensors was valued at roughly USD 10.26 billion back in 2023, and it's only growing. That tells you just how much people value that extra layer of safety.
Choosing the Right Kit for Your Vehicle
The first—and most important—step is picking the right sensor kit. The type you choose will dictate how the installation goes and how well the system works for you. There are a couple of main players on the market.
Parking Sensor Technology At a Glance
Here’s a quick comparison of the most common types of parking sensor kits you'll find on the market. This should help you choose the right one for your vehicle and budget.
| Sensor Type | Detection Method | Pros | Cons |
|---|---|---|---|
| Ultrasonic | Emits high-frequency sound waves that bounce off objects. | Very reliable, cost-effective, great for detecting solid objects. | Requires drilling holes in the bumper for a flush mount. |
| Electromagnetic | Creates a magnetic field and detects disruptions. | No drilling required; sensor is a continuous strip inside the bumper. | Can be pricier, sometimes less precise with non-metallic objects. |
For most people, especially if it's your first time doing this, ultrasonic sensors are the way to go. They hit that sweet spot of performance, price, and ease of installation.
My advice? Stick with an ultrasonic kit for your first DIY project. They are incredibly reliable, budget-friendly, and the installation, while it requires drilling, is very straightforward. It’s a proven technology that gives you a factory-like result.
This project is a fantastic entry point into the world of modern vehicle safety. You're seeing amazing advancements in this space, with things like sophisticated AI Pedestrian Detection Systems becoming more common every year.
And if you get the bug for upgrading your vehicle's safety, why stop here? Our guide on https://www.t1aauto.com/blogs/t1-auto-blogs/how-to-install-backup-camera is another great project that pairs perfectly with parking sensors to give you a complete view of what's behind you.
Getting Your Vehicle Ready for the Install
Trust me, a little prep work goes a long way. Before you get anywhere near your bumper with a drill, taking a few minutes to get your vehicle ready will save you a ton of grief. This is the difference between a quick afternoon project and a weekend-long headache. Think of it as your pre-flight check—nailing these details is the secret to getting a clean, professional-looking sensor system that works perfectly.
First things first, give that bumper a good, thorough cleaning. Any dirt or road grime will mess up your measurements and keep your marking tape from sticking where you need it to. Grab some quality car wash soap and a microfiber mitt, and scrub the whole area where the sensors will go.
Once it's sparkling clean and completely dry, you've got a perfect canvas. This isn't just about looks; it ensures your tape holds firm and your markings are spot-on.
The Tools You'll Actually Need
Nothing's worse than having to stop mid-project to hunt for a tool. Getting everything you need together beforehand is a game-changer. You don’t need a massive professional toolbox, but a few specific items are absolutely essential.
Here’s a quick checklist of the essentials:
- The Right Hole Saw: Your sensor kit should come with a hole saw bit made specifically for your sensors. Don't try to use a different size. One that's too big or too small will leave you with a sensor that's either rattling around or won't fit at all.
- A Good Drill: A cordless drill with a fresh battery is your best bet. It gives you the freedom to move around without getting tangled in a cord.
- Measuring Gear: I like using a flexible tailor’s tape measure because it wraps nicely around the curve of the bumper, but a standard tape measure works fine for the straight sections.
- Marking Tools: A roll of blue painter's tape and a permanent marker are the perfect combo for marking your drill spots without leaving a scratch on your paint.
- Basic Hand Tools: Make sure you have a set of plastic trim removal tools (pry bars), wire strippers, cutters, and some quality electrical tape.
Setting Up Your Workspace and Bumper
With your tools laid out, it's time to prep the car itself. Find a flat, well-lit spot to park—a garage or a level driveway is ideal. You’ll want plenty of space to move around the back of the vehicle.
Safety is always the number one priority. Before you touch a single wire, disconnect the negative terminal on your car’s battery. This simple step prevents accidental shorts that could fry your car's computer or other electronics. It usually just takes a 10mm wrench and less than a minute of your time.
Pro Tip: After you've disconnected the battery, go ahead and press the brake pedal for a few seconds. This little trick helps drain any leftover power from the electrical system, making it completely safe to get to work.
Now, grab that painter's tape and run a long, straight strip across the bumper right where you plan to install the sensors. The tape does two things: it protects the paint if your drill happens to slip, and it gives you a clean surface to write on. It’s a simple trick that really separates a professional job from a sloppy one.
As you source parts for this job, you'll find both factory (OEM) and aftermarket kits. While OEM is always an option, many high-quality aftermarket kits deliver the same performance and reliability for a fraction of the cost. If you're weighing your options, you can learn everything you need to know in our guide on OEM vs aftermarket parts. It'll help you make the right call for your budget and your car.
Mastering Sensor Placement and Bumper Drilling
This is the moment of truth. Getting the sensor placement and drilling right is what separates a clean, factory-looking installation from a sloppy one. It really all comes down to patience and precision here, so take your time. Measure twice (or even three times), and drill once.
Nail this part, and your parking sensor system won't just look great—it'll perform flawlessly.
The goal is to position the sensors for maximum coverage behind your vehicle, eliminating those tricky blind spots without triggering false alarms from the road surface. Most kits come with specific guidelines for placement, and it’s always smart to start there. Those recommendations are based on the sensor's detection angle and range, ensuring you get the performance you paid for.
The good news is that the technology in parking sensors has made installation far more accessible for the average DIYer. While sophisticated radar and camera systems are becoming more common, the widespread availability of reliable ultrasonic sensors means you can get effective parking assistance with a straightforward install. You can read more about the technology behind these systems and how they’ve developed over the years.
Finding the Sweet Spot for Your Sensors
Every car's bumper has its own unique curves and contours, so a one-size-fits-all approach just won't cut it. The real key is adapting the manufacturer's guidelines to your specific vehicle.
As a general rule, you’ll be aiming for a height of about 18 to 24 inches from the ground.
- Go too low, and the sensors might pick up the pavement on an incline, giving you constant false alerts.
- Go too high, and they could completely miss low-lying obstacles like curbs or parking blocks.
Once you’ve settled on the ideal height, it's time to figure out the spacing. For a standard four-sensor kit, the two outer sensors should be placed about 4 to 6 inches in from the sides of the bumper. From there, measure the distance between those two points and divide it by three to get the correct spacing for the two inner sensors. This method gives you even, overlapping coverage across the entire rear of your vehicle.
Here's a pro tip from my own experience: use a flexible tailor's tape measure. It follows the bumper's curves perfectly, giving you a much more accurate measurement than a stiff metal one. This simple tool can make a huge difference in getting your layout just right.
Marking and Prepping for the Drill
With your measurements locked in, grab a marker and mark the exact drilling locations on that strip of painter's tape you applied earlier. Create a clear "X" for each sensor.
Now, take a few steps back and just look at it. Do the marks appear level and symmetrical? This is your last chance to make adjustments before you make any permanent holes.
This prep work highlights the crucial steps you need to take before you even think about drilling.
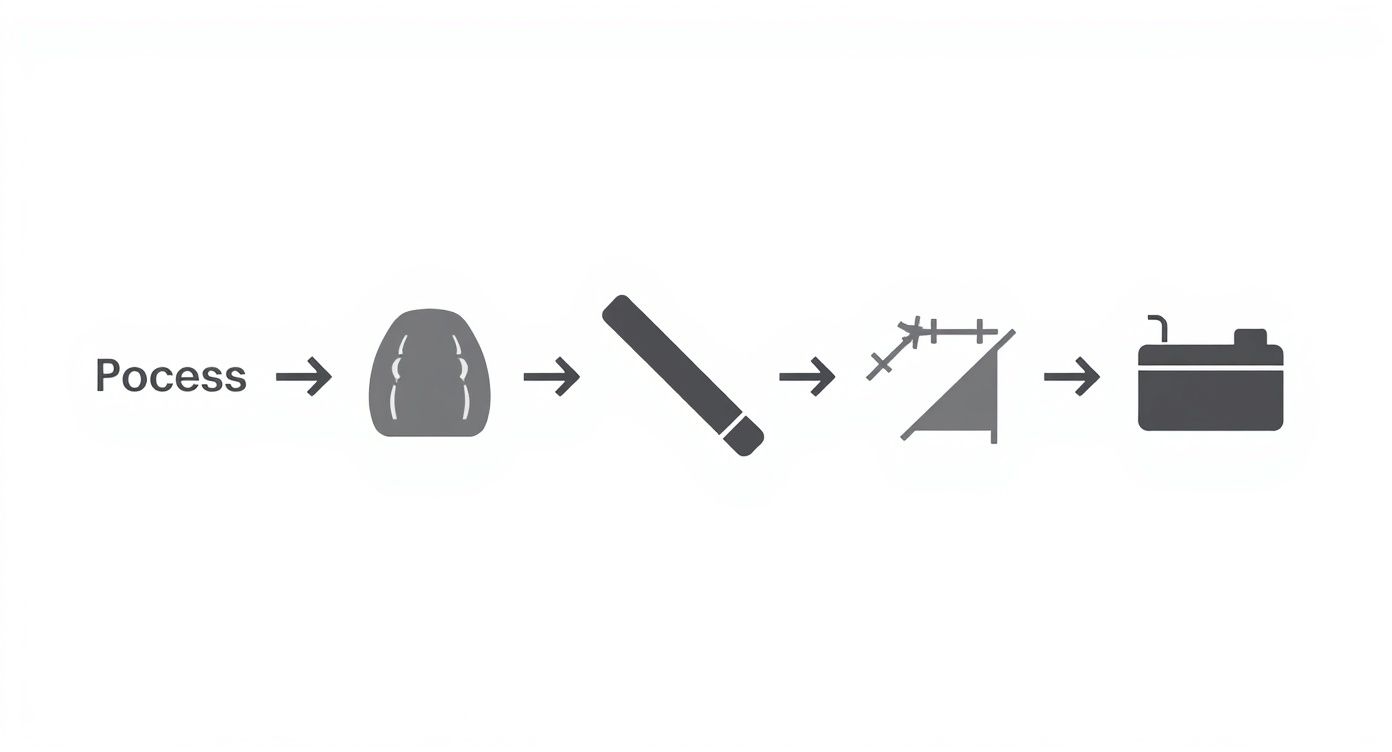
As the infographic shows, the process breaks down into three core actions: cleaning, measuring, and disconnecting power. Getting these right is essential for a safe and accurate installation.
Before you grab your drill, use a center punch or even a sharp nail to create a tiny indent in the center of each "X." This little dimple is a lifesaver—it guides the drill bit and stops it from "walking" across the bumper, which could easily scratch your paint or leave you with an off-center hole.
The Drilling Process: How to Get a Clean Cut
This is the part that makes most people nervous, but with the right technique, it’s surprisingly simple. The hole saw bit that came with your kit is designed specifically for this job, so attach it securely to your drill.
Here’s a trick: start by running the drill in reverse for a few seconds right on your pilot indent. This gently scores the plastic, creating a perfect starting groove without tearing into the material. Once you have that groove, switch the drill to the forward direction.
Apply steady, light pressure and just let the saw do the work. Don't force it. Pushing too hard can melt the plastic or create a messy, jagged edge. A medium speed is all you need for a clean, perfect circle. You'll feel a slight change when the bit cuts all the way through.
After drilling, you'll probably have some small plastic burrs around the edge of the hole. Just use a small file or a utility knife to carefully trim them away for a perfectly smooth finish. This final touch ensures the sensor will sit completely flush against the bumper.
Now, grab one of your sensors and test the fit. It should be snug, but not so tight that you have to force it in. A perfect fit is the final seal on a job well done.
Wiring Up the Brains of the Operation
Alright, with the sensors snug in your bumper, it's time to connect them to the control unit. This is the part that can feel a bit daunting if you're not used to automotive wiring, but trust me, it’s all about being methodical. We're going to walk through how to route the cables cleanly, find the right power source, and make solid connections that will last.
First things first, you need to get the sensor wires from the outside of the car to the inside. Before you even think about drilling, hunt for an existing rubber grommet in your trunk or rear cargo area. Car manufacturers use these to run factory wiring through the body, and they make a perfect, watertight entry point. Just pop the grommet out, carefully make a small slit in it, and feed your sensor cables through. Once they're all in, pop it back into place for a factory-like seal.
Tapping into the Reverse Light Circuit
The whole point of a parking sensor system is for it to turn on automatically when you shift into reverse. To achieve this, we need to power the control unit from the reverse light circuit. Getting this connection right is the most critical step of the entire wiring process.
You'll need to get to the wiring at the back of one of your taillights. This usually just means removing a small plastic or carpeted panel inside the trunk. Once you have access to the wiring harness plugging into the light, it's time to identify the right wires.
This is where a multimeter is non-negotiable. Set it to DC voltage and follow these simple steps:
- Turn the car's ignition on, but keep the engine off.
- Engage the parking brake firmly and shift the car into reverse.
- Touch the multimeter's positive probe to one of the wires in the taillight harness and the negative probe to a bare metal bolt or part of the chassis (this is your ground).
- The wire that gives you a reading of around 12 volts is your positive reverse light wire. To be absolutely sure, take the car out of reverse—the voltage should drop to zero. That's your winner.
The ground wire is almost always black, but it's good practice to find a dedicated ground screw on the car's chassis for the most reliable connection. For more in-depth guidance on connecting electrical components to a battery, you can find some great professional tips out there.
My Pro Tip: I highly recommend using T-tap connectors or Posi-Taps. They let you tap into the factory wiring without any cutting or soldering. It's a secure, reliable method that's also completely reversible if you ever need to remove the system.
Securing the Control Unit and Tidying Up
With your power source identified, you're on the home stretch. Plug each sensor wire into its labeled port on the control unit (they're usually marked A, B, C, and D). Then, connect the power harness you just wired up.
Now, find a good home for the control box itself. You want it somewhere in the trunk where it's out of the way and won't get kicked around or wet. Behind a carpeted trim panel or tucked into a side storage cubby is perfect. Use the double-sided tape that came with the kit or a couple of small screws to mount it securely.
Don't skip the last step: cable management. Take a few extra minutes to bundle the excess sensor wiring neatly with zip ties. A tidy installation isn't just for looks; it prevents wires from getting snagged or damaged by shifting cargo, which is the number one cause of system failure down the road. This small detail is what separates an amateur job from a professional one.
This demand for reliable safety add-ons reflects a much bigger trend. The global park assist system market is projected to skyrocket from USD 756.5 million in 2024 to an incredible USD 3,277.4 million by 2035, growing at a 14.4% CAGR. This massive growth is fueled by both safety regulations and drivers who simply want more confidence when maneuvering their vehicles. You can see more data on the park assist system market on futuremarketinsights.com.
Finalizing the Display and Testing Your System

Alright, the hard part is over. The sensors are in place, the control unit has power, and now it's time for the final piece of the puzzle: getting the system's feedback right where you can see it. Whether your kit has a simple beeper or a fancy LED display, the goal is a clean installation that looks like it belongs in your car.
This last major step involves running the display cable from the control unit in the trunk all the way up to your dashboard. It might sound a bit daunting, but with some patience and a good plastic trim tool, you can hide that wire so well it’ll look like it was installed at the factory.
Routing the Display Cable Like a Pro
The secret to a professional-looking job is a completely hidden cable. Start by plugging the display's wire into the control box in the trunk. From there, you'll snake it along one side of the car, tucked securely under the interior trim panels.
You'll almost always find a natural channel to follow. Pop up the edge of the trunk liner and start tucking the cable. The plastic door sill panels—the ones you step over—usually pry up with a bit of gentle force, revealing the perfect spot to run your wire alongside the car's existing wiring harness. A set of plastic pry tools is your best friend here; they'll save you from scratching your interior or snapping delicate clips.
Just keep working your way forward, from the back door sill to the front. Once you hit the driver's footwell, you can feed the cable up behind the kick panel and under the dashboard, completely out of view.
Choosing the Perfect Spot for Your Display
Where you stick the display really comes down to personal preference. The golden rule is to place it somewhere you can see with a quick glance, but that doesn't block your view of the road. It's supposed to help, not distract.
A few popular spots I've seen work well are:
- Top of the Dashboard: This is the go-to for a reason. It offers a great line of sight, but just make sure it’s not smack in the middle of your field of vision.
- Near the Rearview Mirror: Placing it on the headliner next to your mirror is a smart move. Your eyes are already going there when you back up, so it feels natural.
- On the A-Pillar: The pillar between the windshield and your side window is another solid option, but double-check that you aren't covering a side curtain airbag. Safety first!
Most displays have double-sided tape already on them. Before you peel and stick, give the spot a quick wipe with an alcohol pad. This cleans off any residue and ensures a rock-solid bond that won't fall off on a hot day.
Here's a pro tip: Before you permanently mount the display, temporarily power everything up and sit in your driver's seat. Make absolutely sure you can see it clearly and it's not creating a new blind spot. A five-minute check now can save you the headache of re-doing it later.
Comprehensive System Testing and Calibration
With everything wired and mounted, it's the moment of truth. Go ahead and reconnect your car's battery terminal. Turn the ignition on (but don't start the engine), set the parking brake, and pop the car into reverse. You should hear a quick beep or see the display light up, letting you know the system is alive.
Now for the real test. You need to see if the sensors are actually sensing. The easiest way to do this is to have a friend walk behind the car, but a big cardboard box works just as well in a pinch.
- Check Each Sensor: Start with one of the outer sensors and have your helper (or box) move slowly toward it. The display should register it, and the beeping should kick in.
- Confirm the Range: As the object gets closer, the beeps should get faster and the distance on the display should drop. Make sure you walk through this process for all four sensors to ensure they're all triggering correctly.
- Perform a "Clear" Test: Finally, with nothing behind the car, the system should be completely silent with no alerts on the display. If it's beeping constantly when the coast is clear, you likely have a faulty sensor or an installation snag that needs a second look.
Troubleshooting Common Installation Issues
Even the most meticulous installation can hit a snag. It happens to everyone. But don't worry, running into a little trouble is part of any DIY project, and figuring out the fix is half the fun. Let's walk through some of the most common issues that can pop up after you've installed your new parking sensors.
The usual suspects are a system that seems completely dead, a relentless, non-stop beep, or sensors that just don't seem to see anything. The good news? The solution is almost always something simple, and a little logical detective work will get you there.
Diagnosing a Dead System
So you shift into reverse, and... nothing. No lights on the display, no initial beep. Nine times out of ten, this is a power problem.
Before you start tearing everything apart, go check the simple stuff first. Did you remember to reconnect the car's battery terminal? It’s an easy thing to forget in the final stages of a project, so make sure it's tight and secure.
If the battery is connected, it's time to grab your multimeter. Head back to the control box in your trunk and check the power and ground wires you tapped into the reverse light circuit. With the car in reverse (and the engine off, ignition on!), you should get a solid 12-volt reading.
No voltage? You've probably tapped the wrong wire for your power source. If you do have 12 volts, the next thing to check is the in-line fuse on the sensor system's own wiring harness. There's a chance it blew when you first connected everything.
Dealing with a Constant Beep
A steady, unending beep is your system's alarm bell—it's trying to tell you something's wrong. This usually points to one of two culprits: a sensor thinks there's an obstacle right in front of it, or one of the sensors is faulty right out of the box.
First, give each sensor a good wipe with a clean cloth. A bit of dirt, a raindrop, or even a small piece of debris can be enough to trick it into thinking something is there.
If cleaning them doesn't do the trick, you likely have a bad sensor. You can figure out which one is the problem with a quick process of elimination.
- Unplug just one sensor from the control box.
- Put the car in reverse and see if the beeping stops.
- If it does, you've found your culprit.
- If the beeping continues, plug that sensor back in and repeat the process with the next one until you isolate the one causing the issue.
This methodical approach saves you from guessing and helps you pinpoint the exact problem. For a deeper dive into other potential issues, our guide on what to do when a parking sensor is not working has even more tips. By stepping through these checks, you'll get your new system running smoothly in no time.
Common Questions About Installing Parking Sensors
When you're tackling a parking sensor installation for the first time, a few questions are bound to pop up. It's totally normal. Getting these sorted out beforehand can make the whole project a lot smoother.
Will Aftermarket Sensors Mess with My Car’s Electrical System?
It’s a common concern, but no, they won't—as long as you install them correctly. A good parking sensor kit is designed to be a completely separate, standalone system.
It sips a tiny bit of power from your reverse light circuit, which means it only ever turns on when you shift into reverse. Because it's isolated, it won't interfere with your car’s computer or other sensitive electronics. The secret is just making sure your wiring connections are clean and secure.
Are Aftermarket Kits as Good as the Ones from the Factory?
Absolutely. In fact, a high-quality aftermarket kit can often perform just as well as, or even better than, the sensors that come straight from the dealership. The underlying ultrasonic technology is the same reliable tech used across the board.
The real win with an aftermarket system is having options. You get to pick the features you actually want, whether that's a simple audible alert or a fancy LED display showing the exact distance, all for a fraction of what a dealer would charge.
Can I Put Parking Sensors on a Metal Bumper?
You sure can. It just takes a little more patience and the right tools compared to working with a plastic bumper. The steps are pretty much identical, but you'll absolutely need a good quality hole saw bit that's made for cutting through metal.
If you're drilling into a metal bumper, keep these tips in mind:
- Use a Center Punch: This is a non-negotiable step. A quick tap with a punch creates a small indent that keeps your drill bit from "walking" and scratching your bumper.
- Add Cutting Oil: A little bit of cutting fluid makes a huge difference. It keeps the bit cool, which helps it cut cleanly and extends the life of the tool.
- Go Slow: Don't rush it. Use a low, steady speed on your drill. This prevents you from overheating the metal and burning out your drill bit.
Taking these extra few minutes ensures you end up with clean, perfect holes instead of a headache. A great installation is all about tailoring your approach to the vehicle you're working on.
For premium aftermarket parking sensors engineered for durability and guaranteed fitment, trust T1A Auto. Find the perfect parts for your vehicle and get the reliability you deserve at https://t1aauto.com.
