


Ever installed a new part on your car and just... hit the gas? We've all been tempted. But taking a little time for a proper break-in period is one of the smartest things you can do for your vehicle.
Think of it as the critical "getting to know you" phase for a new component. It's that initial window where you use the part in a controlled way, allowing all the moving surfaces to wear in and seat perfectly against each other. This isn't about babying your car; it’s about smart, intentional driving that sets the stage for long-term performance and durability.
What Is a Break-In Period and Why Does It Matter?
The best analogy is a new pair of high-quality leather boots. They feel stiff at first, maybe a little awkward. But after you wear them for a while, they soften up and mold perfectly to your feet. New car parts work the same way. They need a little time to align, settle, and sync up with the components around them.
This all comes down to basic mechanical engineering. No matter how precisely a part is made, its surfaces have microscopic high and low spots. The break-in period uses gentle, controlled friction to smooth out these tiny imperfections, creating a flawless fit and seal between moving parts.
The Foundation of Long-Term Reliability
Jumping the gun and skipping this process is like building a house without letting the foundation cure. If you push new components to their limits right away, you risk causing uneven wear, spotty performance, or even a total failure down the road. Take a new engine, for example. The piston rings need time to create a perfect seal against the cylinder walls to manage compression and keep oil where it belongs.
When you get the break-in right, you're rewarded with:
- Peak Performance: Your new parts will operate exactly as they were designed to, delivering the power and efficiency you expect.
- Better Durability: Properly seated components develop strong, wear-resistant surfaces that dramatically extend their lifespan.
- Fewer Headaches: You avoid the premature failures that lead to frustrating and expensive trips back to the shop.
The first 500 to 1,000 miles are absolutely crucial for a new engine. In that time, the gentle metal-to-metal contact smooths out the internal surfaces, which can slash friction by 30-50% in the first 600 miles alone. Even better, studies show that following proper break-in procedures can cut the rate of premature part failures by a massive 40%. That's real money saved.
The break-in period is the single most important step after installation. It’s a small investment of time that directly unlocks the full performance, lifespan, and reliability you expect from your new components.
It's More Than Just the Engine
While engines get most of the attention, the break-in concept applies to almost all T1A Auto parts, from something as simple as a tailgate cable to a more complex window regulator. It doesn't matter if you're installing a part straight from the factory or a top-notch aftermarket alternative—this initial period is essential for getting your money's worth. Figuring out which type of part is right for you is another big decision, and you can dive deeper into the differences between aftermarket and OEM parts in our detailed guide.
Ultimately, respecting the break-in period is about protecting your investment and keeping your vehicle running safely and reliably for years to come. And while you're focused on the mechanical health of your car, don't forget about its looks. Protecting your investment also means considering things like paint protection for new cars to maintain its value from day one.
The Science Behind Breaking In New Parts
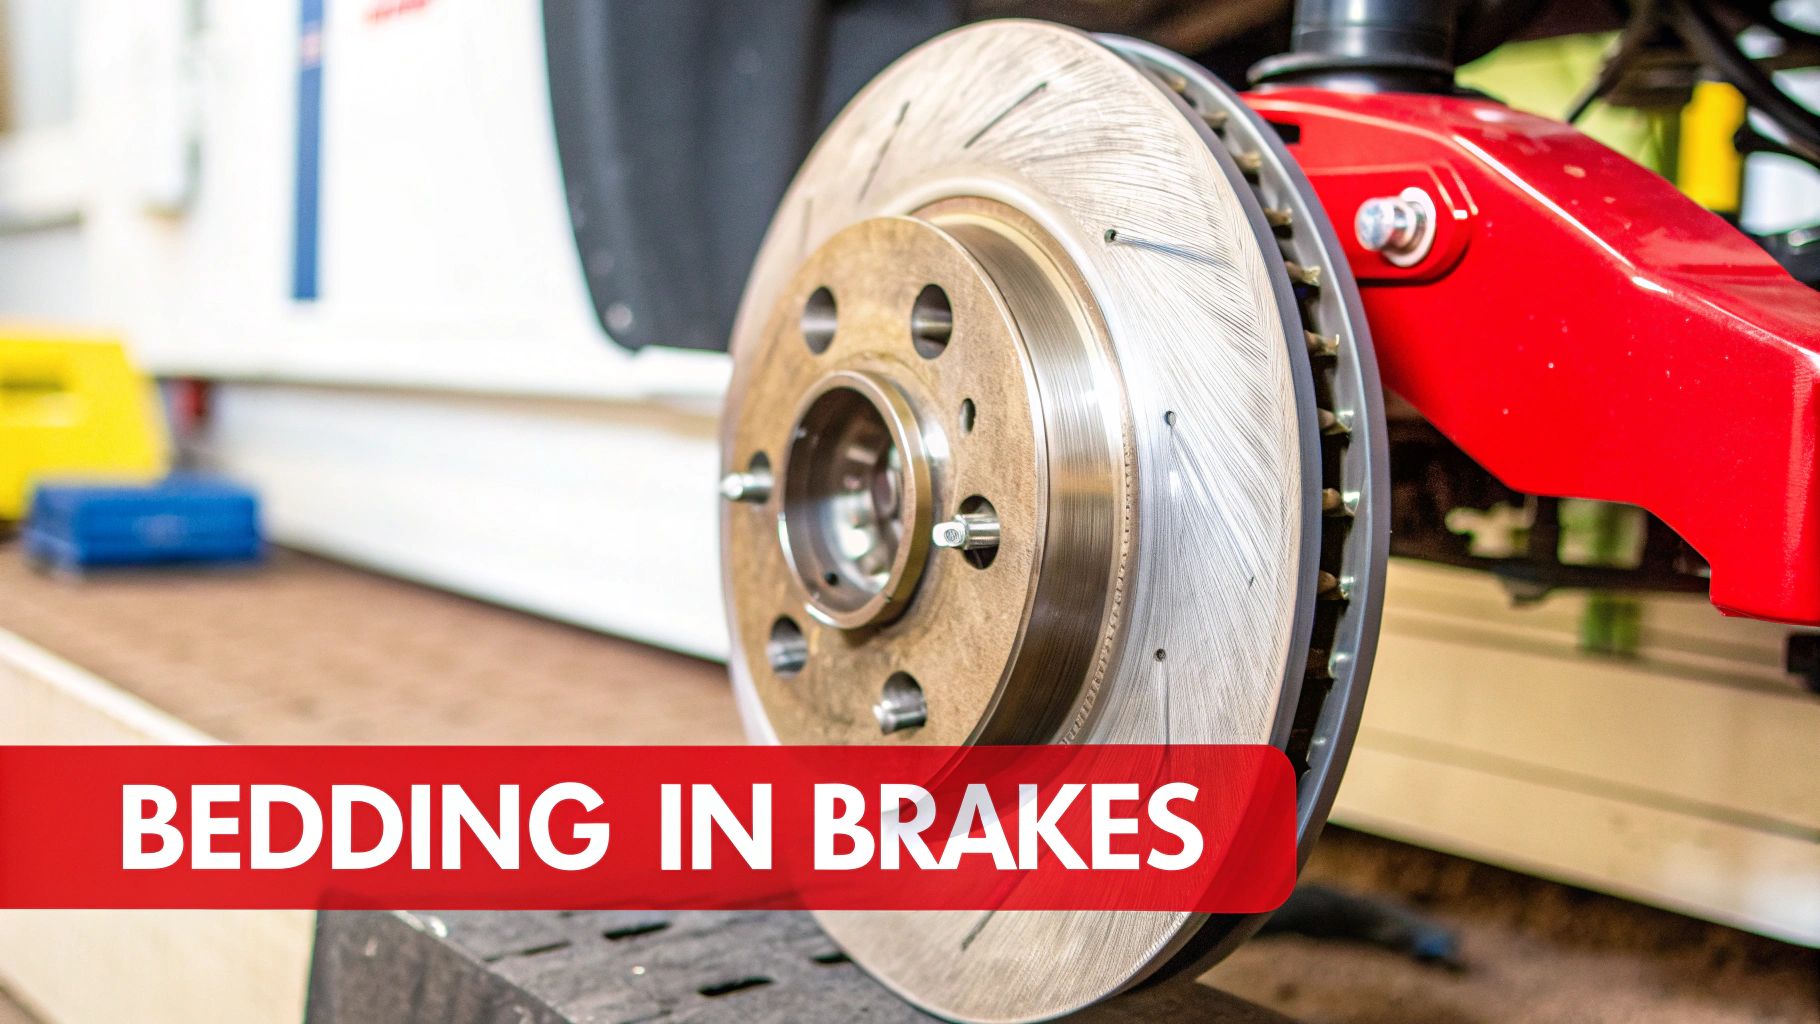
When you bolt on a new part, those first few miles or initial uses are more than just a shakedown cruise—they're a crucial phase of microscopic engineering. The break-in period isn't just about "taking it easy." It’s about creating the perfect conditions for specific physical and chemical changes that set your new parts up for a long, reliable life.
Think of it this way: there are two different principles at play. One is for parts that rely on friction, like your brakes. The other is for articulating parts that move, like hinges, latches, and handles. Both are absolutely vital to getting your money's worth out of a repair.
Mating Surfaces: The Magic of Bedding In Brakes
When we talk about new brake pads and rotors, the process is called "bedding-in." This isn't just about grinding down the high spots. It’s a carefully controlled heat-transfer process that actually transforms the surfaces. As you go through a series of moderate stops, you’re intentionally building up heat in the system.
That heat has a very specific job. It activates the adhesive resins mixed into the brake pad compound. A microscopic, even layer of that pad material literally transfers over and bakes onto the face of the rotor. This thin transfer layer is the secret sauce for great braking.
You’re essentially changing the dynamic from a rough pad grinding on a bare iron rotor to two perfectly matched friction surfaces gliding against each other. This is what gives you that quiet, smooth, and powerful stopping you expect.
If you skip this step, the pad never gets a chance to create that uniform layer. The result is uneven contact, which is the root cause of annoying brake squeal, vibrations you feel in the steering wheel, and a real drop in stopping power. A proper break-in is the single best thing you can do to prevent these common headaches.
Finding the Groove: Alignment and Lubrication in Mechanical Parts
For mechanical parts like T1A Auto door handles, tailgate latches, and window regulators, the science is less about heat and more about movement and lubrication. These parts are full of gears, levers, and sliding surfaces that need to operate without fighting each other.
Those first several uses are where the magic happens. The components settle into their final working alignment, finding the natural path of least resistance. Any tiny, microscopic burrs left from the manufacturing process are gently polished away, creating a perfectly smooth fit between all the moving pieces.
At the same time, the grease and lubricants packed inside the assembly get worked into every nook, cranny, and contact point. This ensures every gear tooth and pivot is coated, slashing friction and preventing the kind of premature wear that leads to a stiff or broken part. This initial wear-in is critical for just about any mechanical system—even highly specialized components like high performance golf cart motors need a proper settling process to perform their best.
A Small Step for a Huge Gain in Lifespan
Don't underestimate this initial phase—it has a massive impact on how long your parts last. For things like door handles and tailgate assemblies, the break-in period covers the first 1,000 to 2,000 cycles as everything settles. Simply using the part normally during this time can boost its longevity by a whopping 35-50%.
Ignoring it is a recipe for trouble. One study revealed that 22% of door handle failures on popular trucks happened before the vehicle even hit 10,000 miles, largely because they were never allowed to break in properly.
This same principle applies to tons of other components. To get a better sense of how wear-and-tear affects crucial rotating parts, have a look at our guide on https://www.t1aauto.com/blogs/t1-auto-blogs/front-wheel-bearing-replacement.
Breaking In Your Vehicle's Electronic Components
When you hear the term "break-in period," you probably picture mechanical parts—brake pads searing into rotors or piston rings seating in an engine. That’s true, but what about the sophisticated electronics running the show in a modern vehicle? It turns out that everything from your new rearview camera and parking sensors to the powered mirrors and window motors also benefits from a little time to settle in.
Unlike their mechanical counterparts, electronics don’t need to physically wear down surfaces. Their break-in is all about thermal cycling and calibration. It’s a lot like firing up a brand-new computer for the first time. It might feel a bit sluggish or warm initially as the software organizes itself and the hardware components get used to working together. Your car's electronics go through a similar adjustment period.
Thermal Cycling: The Key to Electronic Durability
Every time you drive your car, your new electronic parts warm up from the flow of electricity and the heat of the engine bay. When you park, they cool back down. This constant expansion and contraction is called thermal cycling.
During these first few cycles, the microscopic solder joints and internal connections inside the component settle into their final, most stable positions. This gentle conditioning helps head off those frustrating intermittent faults or connection problems that can pop up later. It’s a simple, passive way to build long-term reliability.
This is especially critical for electronics that see a lot of action. In fact, research shows that letting components like rearview cameras and parking sensors settle through normal driving over the first 500-1,000 miles can boost their long-term reliability by up to 45%. Digging into the data reveals that around 18% of early sensor failures in popular trucks trace back to a skipped or rushed break-in. You can explore more expert findings on this by checking out automotive industry analyses on Rolandberger.com.
Calibration for Peak Performance
Besides just settling physically, many new electronic parts need to "learn" their environment to work correctly. This is an active process where the component gathers data to figure out what’s normal. If you rush this phase, you’re setting yourself up for glitches.
Take a new rearview camera, for example. It needs to see a variety of lighting situations—from harsh midday sun to overcast gloom and total darkness—to properly set its exposure and white balance. Similarly, new parking sensors learn to tell the difference between a real obstacle and background noise like heavy rain or a few falling leaves.
The break-in for electronics is less about physical wear and more about electronic "learning." By allowing components to experience a range of real-world operating conditions, you enable them to calibrate for maximum accuracy and reliability.
Practical Tips for an Electronic Break-In
The good news is that breaking in new electronic parts is pretty simple. There are no complicated procedures—you just need to use them normally and consistently right after they're installed.
Here are a few quick tips for common T1A Auto electronic parts:
- Powered Window Regulators: Once the new regulator is in, run the window all the way up and down 5-10 times. This helps the motor learn the track's limits and ensures the lubricant inside the gears is spread evenly for smooth, quiet operation.
- Powered Mirrors: Take a moment to adjust the new mirror through its full range of motion—up, down, left, and right. Doing this a few times helps seat the tiny motors and gears, which prevents jerky movements down the road.
- Sensors and Cameras: Just drive. Seriously. Try to get out in different conditions during that first week. Mix in some daytime and nighttime driving, sunny and cloudy weather, and a blend of city traffic and highway cruising. This variety gives the components all the data they need to calibrate perfectly.
This initial period is all about helping these sensitive parts achieve the accuracy you rely on every day. To get a better handle on what these parts do, you can read our complete guide on the different types of automotive sensors. A little patience right after installation can save you from a whole lot of electronic headaches.
Your Step-by-Step Guide to a Proper Break-In
Alright, theory is one thing, but getting your hands dirty is where it really counts. Let’s walk through the right way to break in some of the most common parts you'll replace. Taking the time to do this right from the start is the key to getting the performance and long life you paid for.
The whole idea is pretty simple, really. You want to give the new parts a chance to get acquainted with their new home. For mechanical stuff, that means gentle, controlled movement. For electronics, it's about letting them calibrate themselves to your vehicle.
This visual shows the basic three-stage process you'll follow for most electronic components after you've bolted them in.
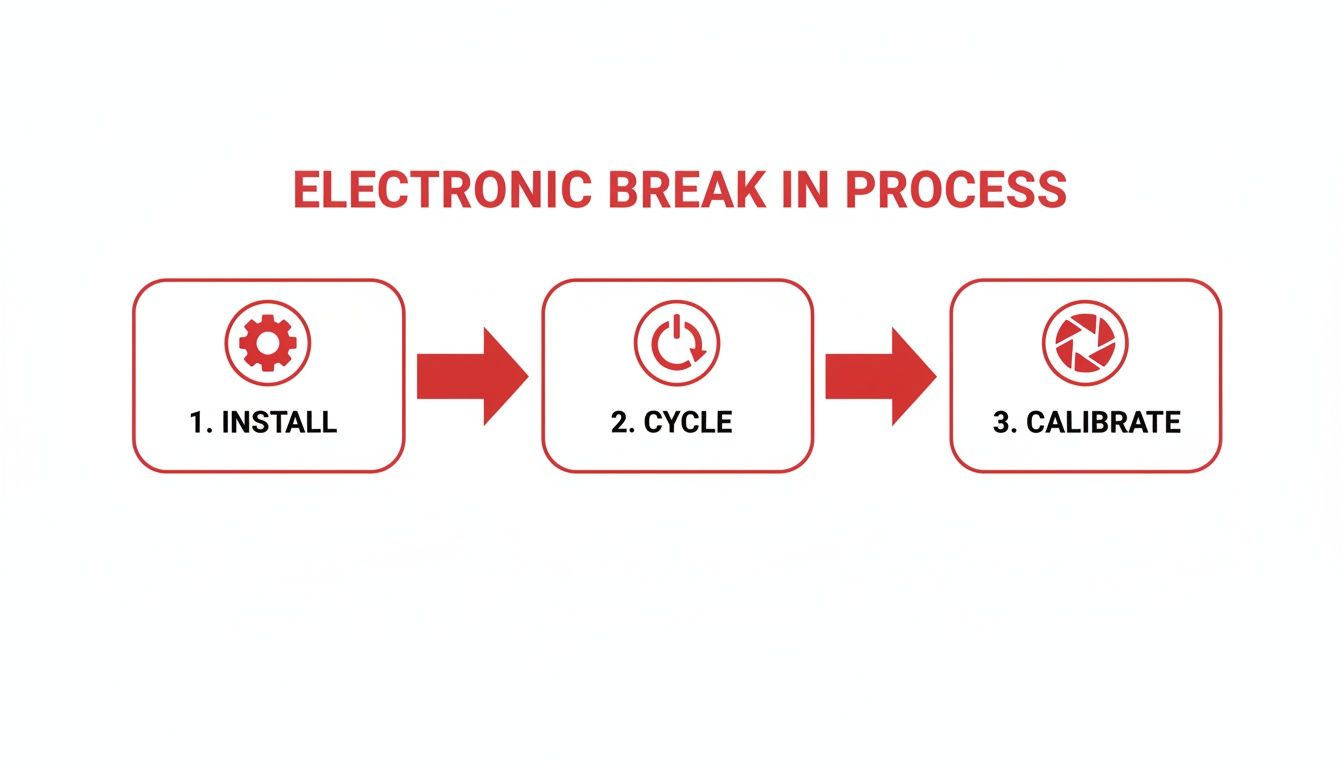
As you can see, a successful break-in for electronics isn't about some intense, complicated procedure. It's just a logical sequence: install the part, cycle the power, and then give it the time and input it needs to calibrate itself.
Breaking In Brakes: The "Bedding-In" Process
When you install new brake pads and rotors, your goal is to transfer a very thin, even layer of the pad material onto the face of the rotor. We call this bedding in, and it’s absolutely critical for getting quiet, smooth, and powerful braking. Skip this, and you're asking for annoying squeals and vibrations.
Procedure:
- Find a safe, empty road where you won't be a hazard. No traffic is key.
- Get the car up to about 35 mph and then apply firm, steady pressure on the brake pedal to slow down to 10 mph. The trick is not to come to a complete stop.
- Do this 5-6 times. You're gradually building up heat in the pads and rotors.
- Now, speed up to 50 mph and brake more aggressively down to 15 mph. Again, do not come to a full stop.
- Repeat this faster cycle 3-4 times.
- You're done with the hard part. Now, just drive around normally for a few minutes, trying to use the brakes as little as possible so they can cool down. Once you park, let them sit and cool completely for at least 30 minutes.
The single biggest mistake people make when bedding in brakes is coming to a dead stop while everything is hot. If you do that, the pad can literally "imprint" a patch of material onto one spot of the rotor, creating a high spot that will cause a vibration you'll feel in the pedal every time you brake.
Setting Up Mechanical Parts
Good news—mechanical parts like window regulators, door handles, and tailgate latches have a much simpler break-in. Here, you just want to cycle the part through its full range of motion a few times to help it settle in and get the internal lubricants spread around evenly.
Window Regulators:
- Once it's installed, run the window all the way down, then all the way back up.
- Repeat this full up-and-down cycle 8-10 times without stopping.
- This helps the motor learn its upper and lower limits and ensures the gears get coated in grease for smooth, quiet travel.
Door Handles, Latches, and Hinges:
- Gently open and close the door or tailgate 15-20 times.
- Think smooth, deliberate motions—don’t just slam it.
- This gives the latch a chance to align perfectly with the striker and lets the new hinges settle. You'll find that after about 5 hours of normal use, these parts will feel like they've been there forever.
Calibrating Electronic Components
For the smart stuff—cameras, sensors, and the like—the break-in is all about calibration. These components need to see a variety of real-world situations to learn their baseline and function accurately.
Rearview Cameras and Parking Sensors: This is probably the easiest break-in of all. Just drive your vehicle normally for the first week or so.
- Vary Your Driving Conditions: Make sure you drive in daylight and at night. Get out there on both bright, sunny days and on overcast ones.
- Mix Up Environments: The more data the parts get, the better. Drive on city streets with lots of objects, on open highways, and in parking lots. This gives the sensors a rich dataset to learn from.
Powered Side Mirrors:
- After you've got the new mirror installed, use the joystick to move it through its entire range of motion—all the way up, down, left, and right.
- Run through this full cycle 3-4 times. This seats the tiny internal motors and gears, which is what prevents you from getting that jerky, hesitant movement down the road.
To make it even easier, here's a quick-glance checklist for some of our most popular parts.
T1A Auto Part Break-In Checklist
| T1A Product Category | Recommended Break-In Procedure | Common Mistakes to Avoid |
|---|---|---|
| Brake Pads & Rotors | Perform a "bedding-in" cycle of 5-6 moderate stops from 35 mph and 3-4 firm stops from 50 mph. Allow a 30-minute cooldown period. | Coming to a complete stop while the brakes are hot. This can cause uneven pad deposits and lead to vibration. |
| Window Regulators | After installation, cycle the window completely up and down 8-10 times consecutively. | Forcing the window if it binds. Stop and check your installation for obstructions or alignment issues. |
| Door/Tailgate Latches & Hinges | Gently open and close the door/tailgate 15-20 times using smooth, controlled motions. | Slamming the door shut immediately after installation. This can misalign the latch and striker before they settle. |
| Powered Side Mirrors | Use the control switch to move the mirror through its full range of motion (up, down, left, right) 3-4 times. | Not cycling the mirror at all. The internal gears need this initial movement to seat correctly for smooth operation. |
| Backup Cameras & Sensors | Drive normally for the first week, ensuring you operate the vehicle in various lighting (day/night) and environments (city/highway). | Expecting perfect performance instantly. The system needs to gather data from different conditions to self-calibrate. |
Following these simple steps ensures that your new T1A parts perform flawlessly from day one and last for the long haul. It's a small investment of time that pays off big in reliability.
The Real Cost of Skipping the Break-In Period
So, you’ve just installed a new part. The temptation to just turn the key and get back to your life is strong, we get it. But what really happens when you skip the break-in period? This isn't just about blindly following instructions; it's about protecting your investment, keeping you safe, and avoiding the frustration of doing the same repair twice.
Ignoring this crucial first step is often the difference between a successful install and a part that fails way too soon. It can turn a simple weekend project into a costly headache, with consequences that go far beyond the single part you just replaced.
Warranty and Installation Errors
One of the biggest risks of skipping a break-in is what it does to your warranty. If a new component fails shortly after you install it, the manufacturer is going to investigate why. If they find evidence that the part was immediately put under extreme stress, they can classify the failure as an installation error, not a product defect.
That puts you in a bind. A warranty claim that should have been simple suddenly gets complicated, because the problem wasn't the part—it was the procedure. Following the proper break-in process is your best insurance policy. It proves the part was prepared correctly for the demands of everyday driving and protects your purchase.
Think of it this way: spending just 30 minutes to properly bed in a new set of brakes is a small 'cost' upfront. Skipping it could lead to glazed pads and warped rotors, a repair that can easily cost hundreds of dollars and several hours of your time to fix.
Tangible Costs and Safety Risks
The financial hit from skipping a break-in is very real. Beyond voiding a warranty, you're looking at the direct cost of replacing parts that should have lasted for years. This isn't just about the big stuff, either; even smaller parts can suffer.
Let’s look at a few real-world examples:
- Brake Systems: A panic stop with brand-new, un-bedded pads and rotors can superheat the resins in the pad material. This creates a hard, glassy surface—a condition known as glazing. Your stopping power plummets, and you'll likely need to replace both the pads and rotors all over again.
- Window Regulators: Forcing a new window regulator up against ice or an obstruction right away can strip the new gears before lubricant has had a chance to work its way in. Soon enough, you're dealing with a broken or stuck window, turning a simple fix into a recurring problem.
- Tailgate Latches and Handles: If you start slamming a new tailgate assembly right after installation, you can knock the latching mechanism out of alignment before it fully seats. The result? A tailgate that won’t latch securely or, even worse, won’t open when you need it to.
Maximizing Your Investment
At the end of the day, the break-in period is about getting your money's worth. You bought a quality replacement part because you wanted something reliable that performs well. By investing a little bit of time right after the install, you’re making sure you get the full service life you paid for.
This small step delivers a huge return. You get peace of mind knowing your vehicle is safe, your parts are working as they should, and you won’t be crawling back under the hood to fix the same thing next month. The real cost of skipping the break-in isn’t just measured in dollars—it’s measured in lost performance, compromised safety, and wasted time.
Common Questions About the Break-In Period
Even when you know the "why" and "how" behind breaking in new parts, questions always pop up during the actual installation. We've heard them all from seasoned mechanics and weekend warriors alike. Let's clear up some of the most common uncertainties so you can tackle every job with confidence.
Does Every Aftermarket Part Need a Break-In Period?
The short answer? Yep, pretty much. Just about every new mechanical or electronic part you install is going to work better and last longer if you give it a break-in period. This isn't some special rule for OEM parts; it's a universal principle for getting components to work together smoothly.
For mechanical parts—think brake pads, window regulators, or even door handles—the process lets two fresh surfaces wear into each other, smoothing out microscopic high spots until they mate perfectly. Even a simple tailgate cable needs to stretch just a little and settle into its job under a normal load.
It's a similar story for electronics like sensors and cameras. The first few uses are all about thermal cycling and calibration. This lets the internal connections settle and gives the software a chance to learn its new environment. It's always a safe bet to assume a new part needs a gentle, controlled introduction to its job. That’s how you unlock its full lifespan and reliability.
What Are the Signs I Messed Up the Break-In Process?
If you skipped or botched the break-in, the part will usually let you know. The symptoms will depend on the component, but they're all signs that something isn't seated, mated, or calibrated quite right.
Keep an eye (and an ear) out for these common red flags:
- Brakes: A telltale sign of improper bedding-in is a persistent squeal. You might also feel a vibration or shudder through the steering wheel when you brake, or the pedal might just feel soft and spongy.
- Window Regulators: Listen for grinding or clicking noises as the window goes up and down. If it moves slowly, stutters, or seems to get stuck in its track, the break-in probably didn't go as planned.
- Door Latches & Handles: A new latch that wasn't broken in might feel stiff, refuse to click securely shut, or make you fight to get the door open.
- New Engines: The two classic signs of a rough start for a new engine are excessive oil consumption (it's burning oil) or fuel economy that's way worse than it should be.
If a brand-new part feels "off" in any way, chances are good it points right back to a rushed or skipped break-in.
Key Takeaway: Don't just ignore strange noises, vibrations, or stiffness from a new part. These are often the first warnings that the break-in process was incomplete. Catching it early can prevent much bigger problems down the road.
Can I Completely Ruin a Part Without a Proper Break-In?
While it's tough to instantly kill a well-made part, you can absolutely shorten its life and torpedo its performance by skipping the break-in. That initial period is when a component is most vulnerable. Hitting it with extreme stress right out of the box can cause damage that’s hard, if not impossible, to undo.
For instance, slamming on brand-new brakes can glaze the pads and permanently warp the rotors, a mistake that often means replacing the whole set again. Similarly, yanking a new door handle against a jammed latch can strip the internal gears before they’ve even had a chance to mesh properly. Many mechanical parts really start to settle in and operate smoothly around the 5-hour mark of normal use.
The break-in period is designed specifically to avoid these high-stress situations while the part is getting conditioned. Following the procedure is the single best thing you can do to ensure you get the durability and performance you paid for.
I Forgot to Break In a New Part. Is It Too Late?
We get this question a lot. The answer is, it depends—but it’s never too late to start doing the right thing. While you can't go back in time and perfectly replicate that gentle, initial mating process, you can still salvage the situation.
If you've only used the part a handful of times under normal, low-stress conditions, you can usually just start the proper break-in procedure and get good results. For example, if you forgot to bed-in your new brakes but have only done a few miles of city driving, you can still find a safe, empty road and run through the bedding-in cycle.
However, if the part was immediately thrown into the fire—like taking a new engine straight to the track or towing a heavy trailer—some permanent wear may have already happened. In that case, the part will probably still work, but you may have sacrificed some of its peak performance and ultimate lifespan. Prevention is always the best cure, but if you do forget, just start the correct procedure as soon as you remember.
When it comes to getting the most out of your vehicle, every detail matters. Following the proper break-in period ensures your new components deliver the performance and durability you expect. For premium aftermarket parts engineered to last, trust T1A Auto. Find the guaranteed-fit components you need and protect your investment at https://t1aauto.com.
