


Fixing your car's window trim is often a straightforward job. It usually comes down to cleaning the area, using the right automotive adhesive, or swapping out some old, brittle clips. For most people, this is a totally doable DIY project that can stop water leaks and get your vehicle looking sharp again—all without a hefty bill from the body shop.
Why You Should Diagnose Window Trim Issues Early
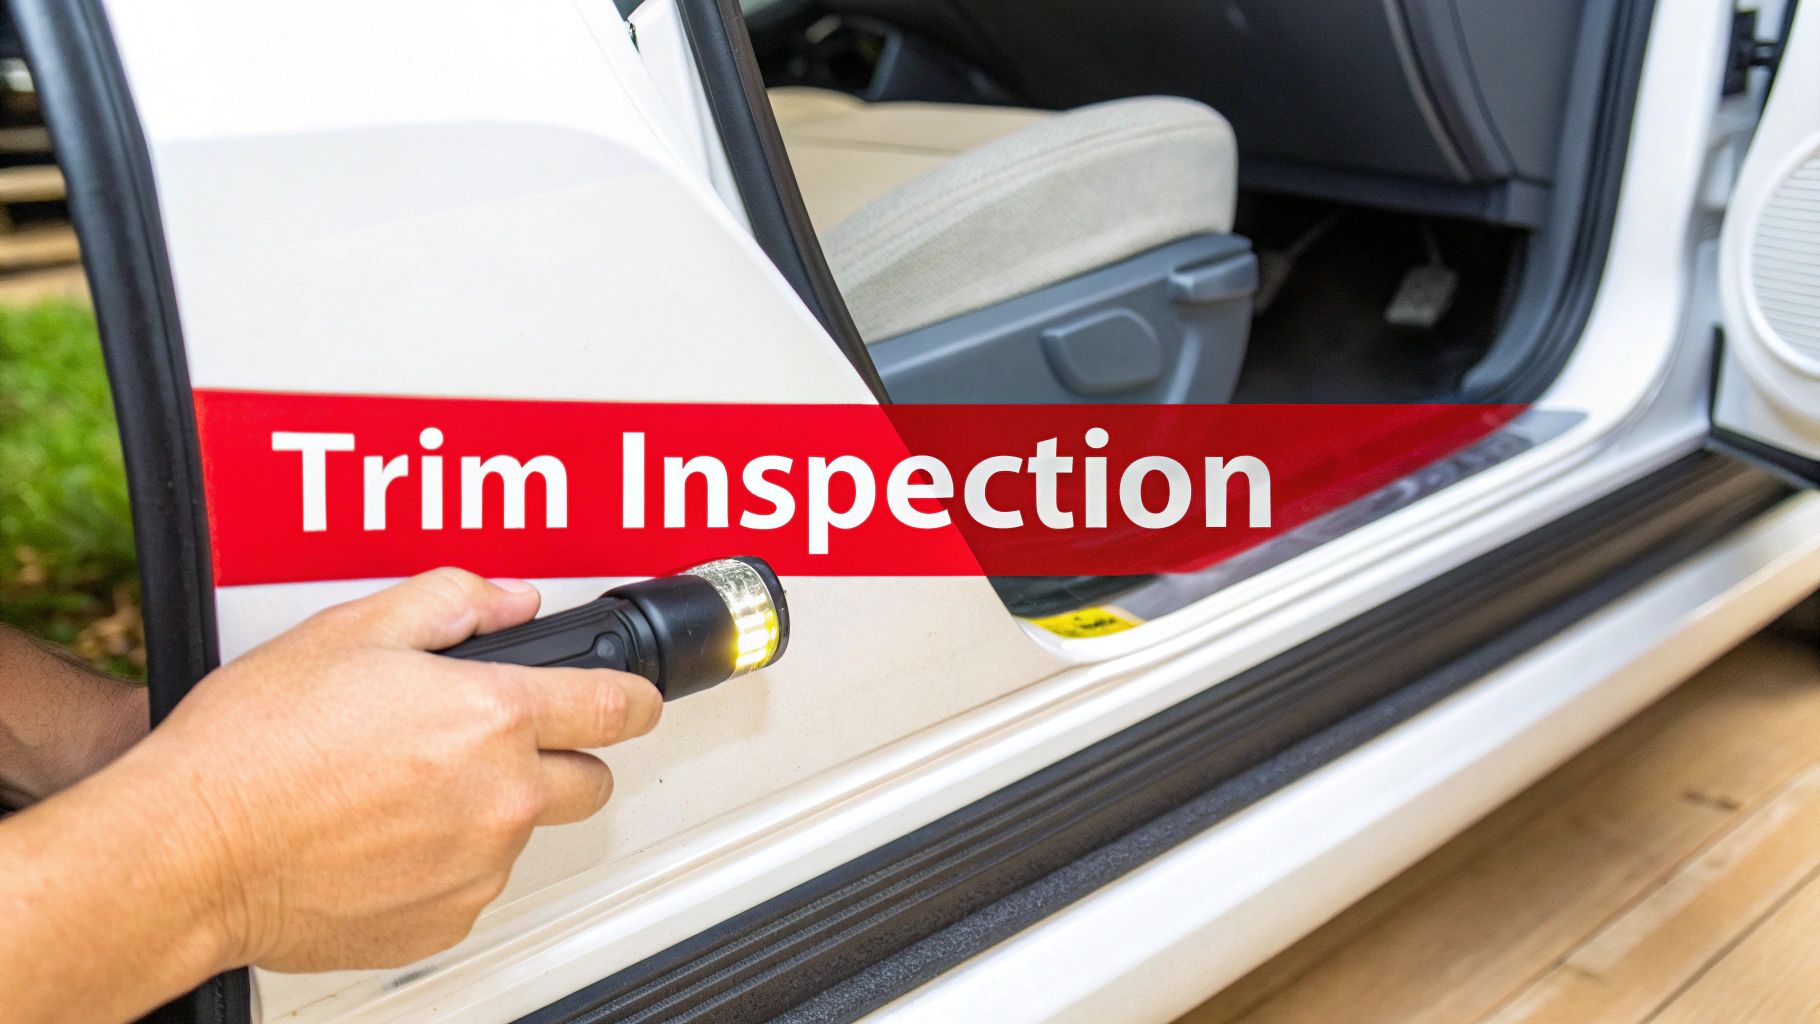
Before you even think about grabbing your tools, taking a moment to figure out exactly what's wrong is the most critical part of any car window trim repair. That loose piece of trim you hear flapping in the wind or that shrunken rubber seal isn't just an eyesore. It's an open door for annoying wind noise, water getting where it shouldn't, and eventually, rust.
A good inspection helps you nail down the root cause, so you can be sure you're buying the right parts and using the correct technique for the fix. Think of yourself as a detective for your car—the clues you uncover will tell you the real story and stop a simple repair from turning into a much bigger problem.
Common Symptoms to Look For
Start with a simple hands-on check. Run your fingers along all the window trim around your car, feeling for any wiggles, gaps, or spots that feel crunchy and brittle. I always pay extra attention to the corners and where two pieces meet, as that’s where things tend to fail first.
Keep an eye (and ear) out for these tell-tale signs:
- Audible Rattling: If you hear a rattle when you’re driving, especially on bumpy roads, that’s a dead giveaway. You've most likely got a loose piece of trim held on by broken or missing clips.
- Visible Gaps: Obvious gaps between the trim and the car’s body or the glass itself mean one of two things: either the adhesive has given up, or the rubber has shrunk and pulled away with age.
- Wind Noise: That high-pitched whistling sound you hear on the highway? That's a classic sign of a bad seal letting air sneak through.
- Cracked or Faded Material: Plastic or rubber that looks chalky, discolored, or has cracks is suffering from sun damage. It's lost its flexibility and can no longer seal properly.
A proactive approach here really pays off. A tiny gap you notice today can easily become a water-stained headliner or a rusty door frame down the road. Catching these problems early will save you a ton of time and money.
These components are a huge deal for both the look and function of a vehicle. The global market for automotive exterior trim was valued at around $24.5 billion recently, and window trims make up a whopping 25% of that. You can dig deeper into the automotive trim market trends on globalinsightservices.com if you're curious.
Here’s a quick-glance table to help you match what you're seeing with the likely cause and solution.
Common Window Trim Issues and Recommended Actions
| Symptom | Potential Cause | Recommended Action |
|---|---|---|
| Flapping or rattling sound | Broken or missing retaining clips | Remove the trim carefully and replace all damaged clips before reinstalling. |
| Visible gap along the edge | Failed adhesive or shrunken seal | Clean both surfaces and reapply with a high-quality automotive adhesive. If the seal is shrunken, replace it. |
| Whistling at high speeds | A small gap creating an air leak | Inspect for the source of the gap. Re-seat the trim or apply a thin bead of sealant if necessary. |
| Trim is brittle or cracked | UV degradation and age | The trim itself has failed. The only real solution is to replace the entire piece. |
| Discoloration or fading | Oxidation from sun exposure | This is often cosmetic. Try a dedicated trim restorer product first. If that doesn't work, replacement is the next step. |
Taking a few minutes to diagnose the problem correctly from the start is the best way to ensure your repair holds up for years.
Getting Your Tools and Parts in Order
Before you even think about touching the car, let's talk about what you'll need. Showing up to this job without the right gear is a surefire way to turn a simple fix into a frustrating, paint-scratching nightmare. Trust me, you don't want to be that person.
You don't need to roll out a professional mechanic's toolbox, but a few specific items are absolutely essential for doing this right.
- Plastic Trim Removal Tools: This is non-negotiable. If you try to use a flathead screwdriver, you will scratch your paint or break the plastic you're trying to save. A basic set of plastic pry tools is cheap and will save you a massive headache.
- Heat Gun or Hair Dryer: Old adhesive can be unbelievably stubborn. A little bit of gentle heat works wonders to soften it up, making removal a clean process instead of a brute-force mess. This is key to protecting your car's clear coat.
- Automotive-Grade Adhesive/Sealant: Step away from the super glue. You need a proper automotive adhesive designed to handle wild temperature swings, rain, and constant UV exposure.
Finding the Best Replacement Parts
With your tools laid out, it's time to find the new trim. This is where you can make a real difference in how long your repair lasts. Sure, you can go back to the dealership for an OEM part, but you'll often end up with the exact same brittle plastic clips or flimsy material that failed in the first place.
Why not make an upgrade? This is where quality aftermarket suppliers like T1A Auto really shine. They often look at why a part failed and re-engineer it to be better. A great example is the window trim for a Chevrolet Silverado or GMC Sierra; you can get replacements that come with sturdy metal clips instead of the original plastic ones that always snap.
Many of these superior parts even come with a lifetime warranty, so you know you won't be tackling this same repair again in a couple of years. To learn more, take a look at our breakdown of different car window parts and what to look for.
It's clear that drivers care about getting this right. The market for automotive decorative exterior trim was valued at $17.74 billion recently and is on track to nearly double. That's a huge number, and it shows just how much people value the look and durability of these components. You can read more about the growth in the automotive trim market on marketresearchfuture.com.
Opting for a well-made aftermarket part is a smart move. It saves you money compared to dealer prices and acts as a long-term investment in your vehicle's health and appearance. When you get a perfect fit with better-than-original materials, the repair looks professional and is built to last.
Getting the Old Window Trim Off Without Causing Damage
This is the part of the job where a little patience pays off big time. Ripping off old, brittle trim without scratching your paint—or worse, cracking the glass—can feel a bit like surgery. But with the right technique and a steady hand, you'll get it done cleanly. A clean removal is what sets you up for a perfect installation later.
The golden rule here is simple: never use metal tools like a flathead screwdriver to pry on your trim. That’s the quickest way to put a deep, heartbreaking scratch in your paint. Your best friend for this task is an inexpensive set of plastic pry tools. They give you the leverage you need without the risk.
This chart shows the key things you should have laid out from the previous step. Being prepared means you can focus on the task at hand.
With your tools, sealant, and new parts organized, you won't have to stop mid-job to go searching for something.
How to Handle Different Trim Fasteners
Car manufacturers don't all use the same method to attach trim, so you need to know what you're up against. On many sedans and older cars, the trim is often held on by a series of hidden clips. The trick is to gently slide a plastic pry tool under the edge and feel for where it snags. Once you find a clip, apply slow and steady pressure to pop it loose. Don’t yank or twist—that’s how you break the clip or the trim itself.
On the other hand, a lot of modern trucks and SUVs use a combination of clips and some seriously strong automotive adhesive tape. This is where your heat gun or hair dryer earns its keep.
- Applying Heat: Use a low heat setting and keep the gun moving, holding it about 6-8 inches from the surface. The goal is just to warm up the adhesive and soften its grip, not melt anything.
- Prying: As you heat a section, carefully work your pry tool underneath. You’ll feel the adhesive begin to release. Just keep working in small, manageable sections, heating and then prying.
Here's a pro tip I swear by: lay down a border of blue painter's tape on the paint right alongside the trim. It acts as a buffer, giving you an extra layer of protection if your tool happens to slip.
Dealing With Stubborn Leftover Gunk
After you get the old trim off, you're almost guaranteed to find a bunch of old adhesive residue left behind. If you don't clean this off completely, your new trim won't sit flush or seal properly against the weather.
To tackle the cleanup, grab a good adhesive remover. Make sure it’s specifically marked as "automotive safe" so it doesn’t damage your car's clear coat. Apply the remover to a microfiber towel (not directly on the paint) and gently rub the gunk away until the surface is perfectly clean.
In some situations, you might have to remove an interior panel to get to the trim fasteners from the inside. If you need to pop off the door card, our guide gives you a full breakdown on how to remove a car door panel without snapping any of those delicate plastic clips. Spending the extra time to do a thorough cleanup now is what makes the new trim look like it was installed at the factory.
Installing New Trim for a Factory-Fresh Finish
Alright, you've done the hard part. The old, beat-up trim is gone, and you’ve got a clean surface to work with. This is the moment where all that prep work pays off, giving you a secure, weatherproof seal that looks like it just rolled off the factory line.
Think of it like putting a new screen protector on your phone—you really only get one good shot at it. That's why a "dry fit" isn't just a suggestion; it's a mandatory step in my book.
Before you even think about peeling off adhesive backing or squeezing out sealant, lay the new trim piece in place. Step back, look at it from a few different angles, and make sure it sits perfectly flush with the car's body lines. This quick test run lets you spot any alignment quirks before they become a sticky, permanent problem.
Getting the Application Just Right
Once you're happy with the fit, it's time to lock it in. How you do this depends entirely on whether your trim relies on clips, adhesive tape, or a mix of both.
If you're dealing with clips, the process is pretty direct but calls for a gentle hand.
- Line It Up: Carefully align each clip with its designated hole on the vehicle's frame. It's best to start at one end and work your way across.
- Press, Don't Pound: Use the palm of your hand to apply firm, even pressure directly over each clip. You should hear a solid click as it snaps securely into place.
- No Hammers Allowed: Seriously, never use a hammer or mallet. If a clip refuses to go in, it’s almost always misaligned. Just pull the trim back off and reset it.
For trim that uses adhesive, your technique is what separates a pro job from a messy one. You want a thin, consistent bead of adhesive, not a big glob. Too much glue will just ooze out, making a mess and actually creating a weaker bond.
A mistake I see all the time is people rushing the curing process. You can't just stick it on and drive off into the rain. Automotive adhesives need time to set, and cutting that short is the fastest way to have your brand-new trim peeling off a week later.
Curing Times and Final Checks
Patience is a virtue, especially when you're waiting for adhesive to cure. This is what makes for a durable, long-lasting car window trim repair. Every product is different, so always read the instructions on the tube. What feels dry to the touch in an hour might need a full 24 hours or more to reach its maximum bond strength.
To give you a better sense of timing, here's a quick guide to what you can generally expect from common automotive products.
Adhesive and Sealant Curing Times
This table is a handy reference for the time you'll need to let your new trim set properly. Remember, these are estimates—always defer to the manufacturer's specific instructions for the product you're using.
| Adhesive Type | Tack-Free Time | Handling Time | Full Cure Time |
|---|---|---|---|
| Urethane Sealant | 30-60 minutes | 3-6 hours | 24-48 hours |
| Silicone Sealant | 1-2 hours | 8-12 hours | 24 hours |
| Epoxy Adhesive | 5-15 minutes | 1-2 hours | 12-24 hours |
| Acrylic Foam Tape | Immediate | 1 hour | 72 hours |
After your trim is in place, a few strips of painter’s tape are your best friend. Use them to hold the trim securely against the body while the adhesive works its magic. This simple step prevents any sagging or shifting, locking it into that perfect position you found during your dry fit.
Once the full cure time is up, peel off the tape, give it a final wipe-down, and step back. You've just saved yourself a trip to the body shop and restored that clean, finished look to your car. Job well done.
Protecting Your New Trim for the Long Haul
Alright, you've done the hard part—the new trim is on, and it looks sharp. Now, let’s talk about keeping it that way. Protecting your repair from the elements is just as critical as the installation itself. A little preventative maintenance goes a long way in making sure your work holds up for years, not just a few months.
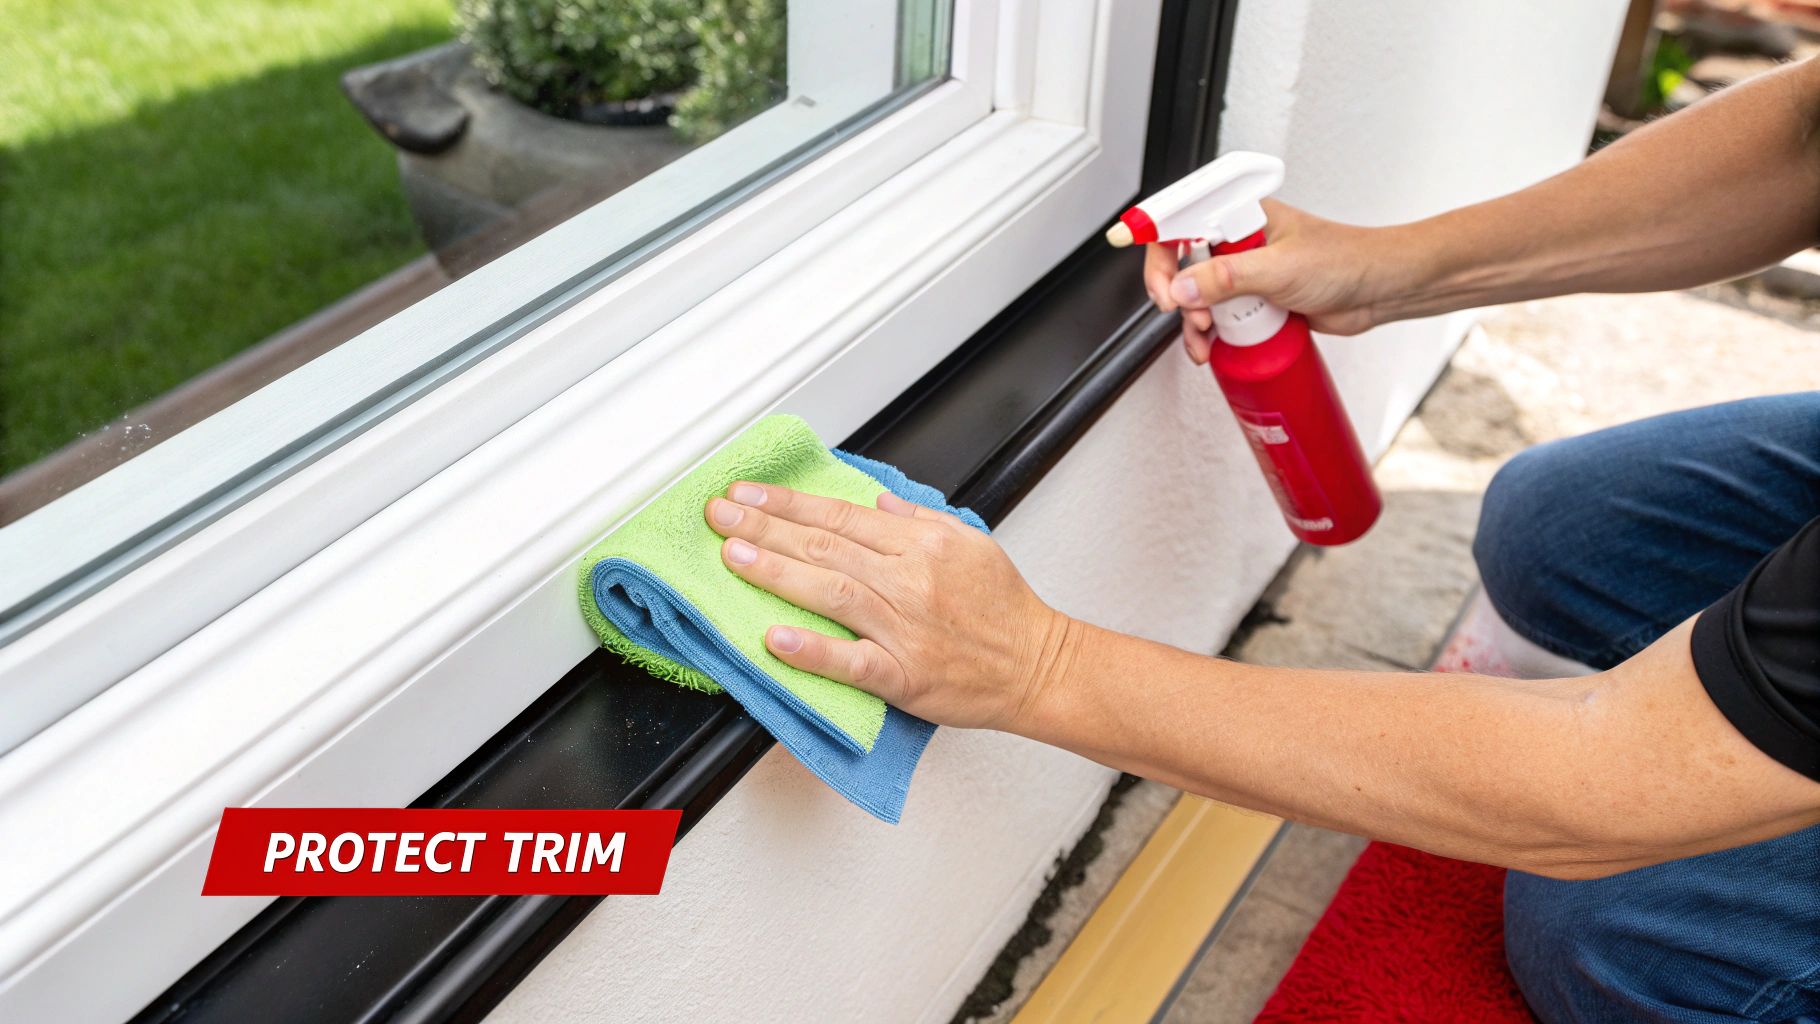
The biggest enemy of your car's plastic and rubber parts is, without a doubt, the sun. Day-in and day-out UV exposure is what breaks down the materials, causing the fading, cracking, and brittleness you just spent your time fixing.
Smart Cleaning and Protection Habits
You don't need a whole new routine, just a few small tweaks to your regular car wash. The biggest mistake I see people make is using harsh, all-purpose cleaners that strip away the trim's natural protection and speed up the aging process.
Here’s what you should do instead:
- Stick with pH-Neutral Soaps: When you wash the car, make sure you're using a gentle, pH-neutral car wash soap. It's strong enough to get the grime off but won't attack delicate rubber seals or plastic finishes.
- Use a UV Protectant: This is non-negotiable. Find a quality automotive UV protectant dressing made specifically for rubber and plastic. A quick application every few washes creates a barrier against sun damage—think of it as sunscreen for your car.
- No Abrasives, Ever: Stay away from abrasive polishes or rough sponges on your trim. A soft microfiber towel is all you ever need for cleaning and applying protectants. Anything more will just create tiny scratches.
Once the new trim is on, keeping it safe from environmental wear is key. For a broader look at safeguarding your vehicle's exterior, check out these expert tips on protecting car paint and other exterior surfaces; many of the principles apply here, too.
Give Your Adhesives Time to Cure
This is a big one, and it's where a lot of people mess up. If you used any kind of automotive adhesive or sealant, it needs time to fully cure without being disturbed.
Don't even think about hitting a high-pressure car wash for at least 48-72 hours. I can't stress this enough. Those powerful water jets can easily blast away a fresh bead of adhesive before it’s fully bonded, and you’ll be right back where you started.
It's no surprise that the demand for durable replacement parts is on the rise. In fact, the automotive trim market was valued at $41.63 billion recently, which tells you just how important these parts are to a vehicle's overall integrity and appearance. As more people look for reliable, long-term fixes, the market for high-quality aftermarket parts will only grow. By following these simple protective steps, you're making sure your quality repair stands the test of time.
Common Questions About Car Window Trim Repair
Diving into a window trim repair for the first time? It's natural to have a few questions. Getting the right answers upfront can save you a lot of headaches and help you sidestep common mistakes. Let's tackle some of the most frequent things people ask, so you can get the job done with confidence.
So, when can you get away with a simple repair, and when is it time to replace the whole thing? A tiny, hairline crack that's purely cosmetic might be patched with a specialized plastic epoxy as a temporary fix. But honestly, if the damage is big enough to affect the trim's structure or the seal underneath, replacement is your best bet. A bad seal is just asking for water leaks and that annoying wind whistle at highway speeds.
For a permanent solution that actually fixes the problem and looks right, installing a high-quality replacement part is the only way to go. It takes the guesswork out of the equation and guarantees you'll have a solid, weatherproof seal.
Cost and Leak Detection
Naturally, everyone wants to know what this is going to cost. The final bill can swing quite a bit. If all you need to do is stick down a loose piece of trim, you might get away with just $20-$30 for a good tube of automotive adhesive. If you need a whole new piece of trim, expect to spend anywhere from $50 to over $200 per window, all depending on your car's make and model.
The real money-saver here is doing it yourself. You're dodging the labor costs from a body shop, which can easily pile on a few hundred dollars. If you're weighing your options for parts, our guide on aftermarket parts vs. OEM is a great read—it breaks down how you can get top-notch quality without paying dealer prices.
Okay, but how do you know for sure the trim is causing that leak?
- Look for the evidence: Check for water stains or damp spots on your interior door panels and headliner, especially after a good rain.
- Do the hose test: Grab a friend and have them run a gentle stream of water from a garden hose over the window. You sit inside and watch closely for any drips. (Pro-tip: Don't use a pressure washer!)
- Follow your nose: If your car has a persistent musty, mildewy smell, that's a dead giveaway that water is getting in and hiding somewhere.
When to Call a Professional
Most trim jobs are totally doable for a weekend mechanic. But sometimes, it's smarter to hand the keys to a pro. If the window glass itself is chipped or cracked, or if the trim is part of a really complicated setup on a high-end or classic car, you risk turning a small job into a very expensive one.
If you're dealing with a situation like that, or if you'd just feel better having an expert handle it, you can always request a professional quote to see what your options are. Knowing when to call for backup is just as important as knowing how to turn a wrench.
For durable, factory-fit replacement parts engineered to last, explore the selection at T1A Auto. Find the exact trim, clips, and seals you need for a professional-quality repair at https://t1aauto.com.