


Most advice about door handle lock repair starts with “replace the handle.” That's often the wrong first move. On newer vehicles, a weak 12-volt battery, failed fuse, damaged wiring, control-module fault, or open safety recall can make a perfectly serviceable handle appear dead.
Treat the door as a safety and security system, not a decorative panel. A repair is successful only when the latch engages positively, the lock responds through every available control, the interior handle provides reliable egress, and the door-ajar system behaves correctly.
Table of Contents
- Why Your Door Handle Might Not Be Broken
- Decoding Common Door Lock and Latch Symptoms
- Safe Teardown and Precision Installation Steps
- Upgrading to Metal Components for Permanent Reliability
- The Non-Negotiable Post-Repair Safety Validation
- Knowing When to Stop and Escalate the Repair
Why Your Door Handle Might Not Be Broken
A powered door handle can fail without any broken mechanical part. This matters most on vehicles with flush exterior handles, electronic release buttons, or power-operated latches. If the 12-volt system is undercharged, the actuator may not receive enough power, the control module may disable a function, or the vehicle may produce no obvious warning before the handle stops responding.
NHTSA opened investigation PE25010 into electronic door handles on approximately 174,000 2021 Tesla Model Y vehicles after receiving nine reports of exterior doors becoming inaccessible. Four owners reportedly broke a window to regain entry. The preliminary assessment associated the condition with insufficient voltage from the vehicle's 12-volt battery, and available repair invoices cited low-voltage-battery replacement, even though owners reportedly hadn't seen warning messages beforehand. See the NHTSA preliminary assessment of the electronic door-handle investigation for the documented details.
Start with diagnosis, not trim removal
Before buying a handle or actuator, work through this order:
- Check 12-volt battery condition. Measure battery voltage with a suitable meter and inspect the terminals for looseness or corrosion. A battery can still power some vehicle functions while failing to support an electronic latch under load.
- Test the complete locking system. Try the key fob, interior lock switch, manual lock control, and any exterior touch or button release. A single failed input points toward a local switch or handle issue. Several failed inputs suggest power, fuse, wiring, actuator, or module involvement.
- Scan for diagnostic trouble codes. Modern body-control systems may record faults that a visual inspection won't reveal.
- Search the vehicle identification number for open recalls. Do this before removing door trim. A recall remedy may be free and may require a specific procedure or part revision.
A recall isn't the same thing as ordinary wear. Ford's door-latch investigation began in December 2019 with 235 owner questionnaires involving certain 2012–2014 Fiesta and 2013–2014 Fusion and Lincoln MKZ vehicles. The investigation ultimately referenced 4,494 reports, including suspected scope-related failures and repair or remedy issues. Ford responded with recall campaigns covering multiple models and prescribed replacement of affected latches, in some cases all four, at no charge. The NHTSA investigation report on the Ford door-latch issue shows why a loose handle, repeated closing attempts, or intermittent locking deserves prompt diagnosis.
When the electrical checks pass and no recall applies, use the correct guide to removing a car door panel. Remove trim only after you know what you're trying to inspect.
Decoding Common Door Lock and Latch Symptoms
The door's behavior usually tells you more than the broken-looking part. A loose exterior handle doesn't automatically mean the handle housing failed, and a silent actuator doesn't prove the latch assembly needs replacement. Compare what works, what doesn't, and whether the failure is mechanical, electrical, or both.
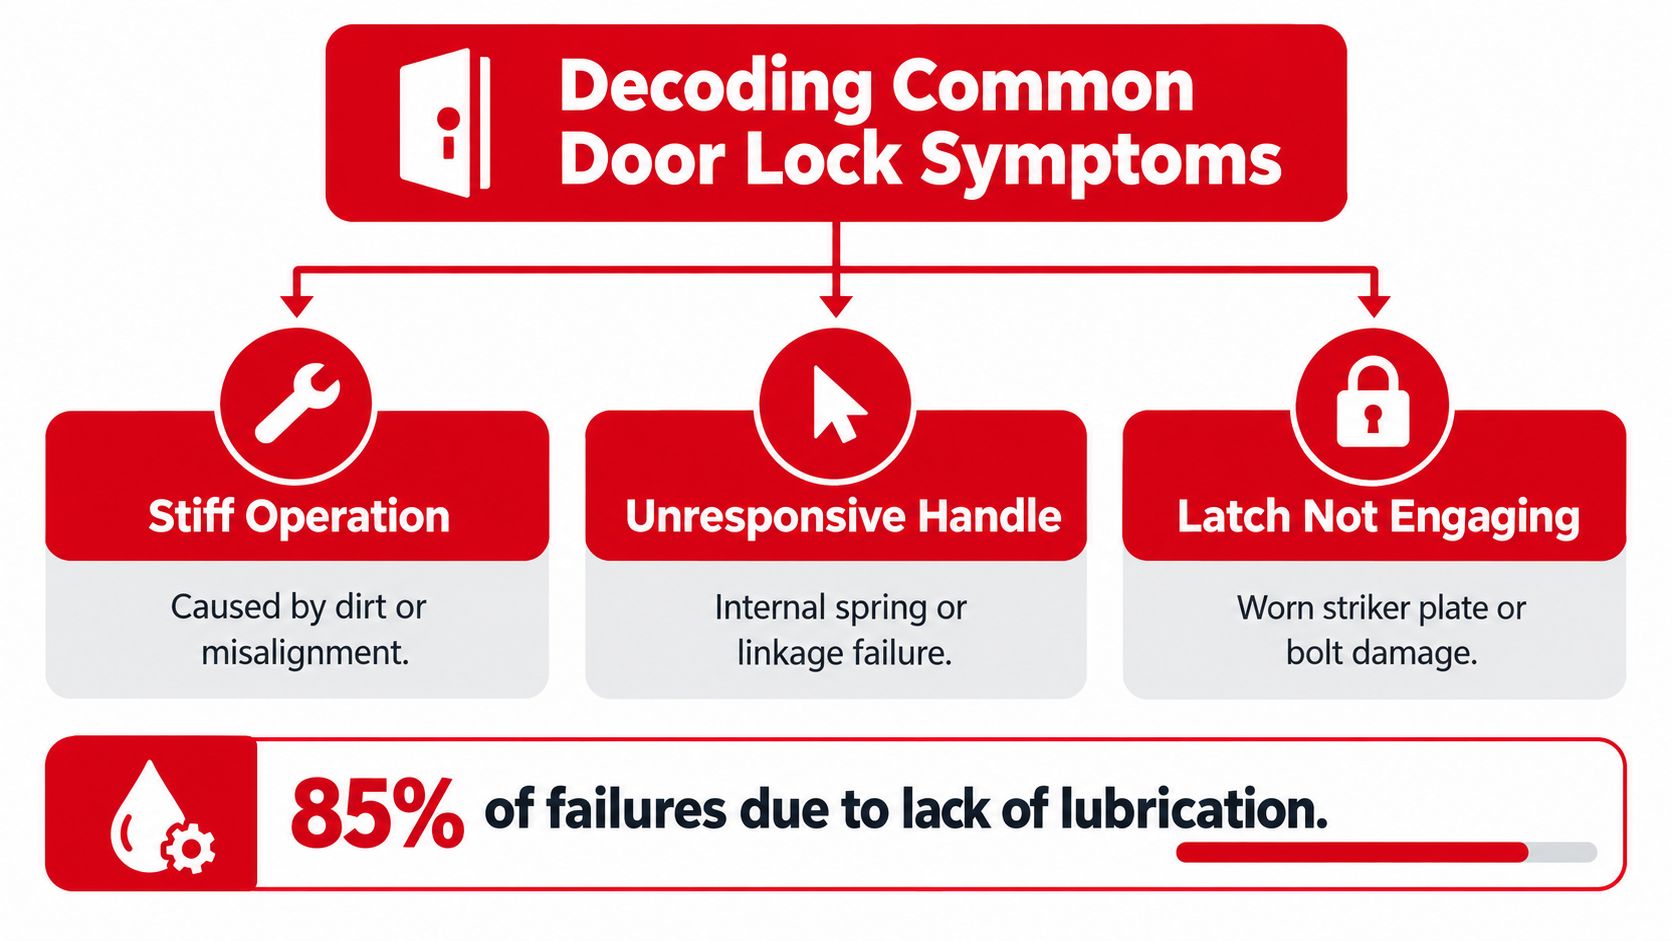
Match the symptom to the mechanism
| Observed symptom | Likely area to inspect | What to verify |
|---|---|---|
| Handle pulls with almost no resistance | Detached cable, broken rod, or failed linkage clip | Check whether the handle moves the latch lever |
| Handle feels stiff or fails to return | Binding handle pivot, contaminated latch, or distorted linkage | Inspect movement with the door open |
| Remote locks other doors but not this one | Local actuator, connector, fuse branch, or wiring | Test power and ground at the actuator |
| Key turns but doesn't lock or unlock | Worn cylinder, disconnected linkage, or latch fault | Compare key movement with interior control operation |
| Door needs repeated slamming | Striker alignment, latch contamination, or damaged latch | Check the latch position and contact pattern |
| Door-ajar warning remains active | Latch sensor, connector, wiring, or latch assembly | Confirm whether the warning changes when the latch is manually cycled |
A handle that pulls freely without moving the latch often has a broken or partially disengaged cable or rod clip. Don't order a complete latch until you've watched the linkage operate with the door open. Sometimes the clip is still present but no longer retains the cable housing, which creates a large amount of handle travel without useful latch movement.
A door that needs slamming points in a different direction. The striker may have shifted after an impact, the latch may be dirty or corroded, or the door may be sagging on its hinges. Forcing the door harder can worsen alignment and damage the latch. Adjust the cause instead of masking it with repeated impact.
Separate electrical and mechanical symptoms
A failed actuator often produces a click, partial movement, or no movement when the lock is commanded. Test its power and ground under command rather than relying only on sound. A loose connector, broken wire in the door jamb, or poor ground can imitate a dead actuator.
A mechanical lock fault usually remains present when you operate the mechanism manually. If the inside lock knob works but the remote doesn't, investigate the electrical side. If neither control moves the lock and the handle linkage is visibly disconnected, focus on the mechanical assembly.
Use the door-lock actuator testing guide for a controlled check before ordering parts. The useful result isn't a guess about which component is “probably” bad. It's a confirmed failure at the handle, linkage, actuator, latch, striker, wiring, or control input.
Practical rule: If the symptom changes when you switch between the key, remote, interior control, and manual handle, the system still needs diagnosis. Replace the failed interface, not every part attached to the door.
Safe Teardown and Precision Installation Steps
Once testing identifies the failed component, work methodically. Door hardware is packed into a confined space with sharp brackets, fragile clips, wiring, and a moisture barrier that protects the cabin from water intrusion. Rushing the removal often creates a second problem that costs more time than the original repair.
Prepare the vehicle and document the layout
Park on a stable surface, switch off the ignition, and keep the key away from the vehicle if the locking system can wake up automatically. Disconnect the battery when working near powered locks, powered handles, or airbag wiring, and follow the vehicle's factory procedure for waiting and reconnection.
Use plastic trim tools rather than a screwdriver against painted or visible surfaces. Before disconnecting anything, photograph the rod, cable, connector, and harness routing. Mark the location of retainers if the routing isn't obvious. A cable that looks correctly installed can bind if it passes on the wrong side of a bracket.
Remove the moisture barrier carefully. Peel it back rather than tearing it, and keep the adhesive surface clean. If the barrier no longer seals after installation, water can reach the trim, wiring, speaker, or carpet. Don't treat the barrier as disposable packaging.
Remove and install without creating new faults
Disconnect the electrical connector before forcing the actuator or latch from its mount. Release linkage clips with the correct pick or tool, and don't twist a plastic retainer until it cracks. If the original part failed because of binding, inspect the adjacent components before installing the replacement.
The installation sequence should be controlled:
- Retain the original orientation. Position the replacement handle, latch, actuator, and cable exactly as the original parts sat unless the factory procedure specifies another orientation.
- Route cables naturally. Avoid tight bends, contact with window tracks, and pressure from the moisture barrier or trim panel.
- Start every fastener by hand. This prevents cross-threading in captive nuts, thin brackets, and soft mounting points.
- Use the factory torque specification. Generic torque values are unsafe because fastener size, latch design, and model-specific procedures vary.
- Reconnect every connector fully. Confirm that each lock tab engages and that no wire is trapped beneath the assembly.
- Cycle the mechanism before reinstalling trim. Test movement while the door is open, then reinstall the barrier and panel only after the hardware works correctly.
NHTSA documented a separate latch investigation involving 207 reports, including 65 allegations of inadvertent opening while moving, two reported injuries from rebounding doors, and 1,079 related warranty claims reported by the manufacturer. Those figures are incident reports, not a repair success rate, but they show why a quick visual check isn't enough. The NHTSA door-latch investigation document supports treating final validation as part of the repair rather than an optional courtesy.
Installation standard: A replacement part isn't installed correctly until the linkage moves freely, the latch catches completely, and every fastener and connector is secure.
Don't lubricate blindly. Use only lubricant approved for the latch manufacturer and apply it sparingly. Excessive or incorrect grease can attract grit or interfere with pawl movement. If the latch still binds after cleaning and correct installation, stop and find the alignment or component fault instead of forcing it.
Upgrading to Metal Components for Permanent Reliability
A like-for-like replacement isn't always the most durable repair. Many door assemblies contain small plastic levers, clips, brackets, and handle supports that work well when new but become the weak link after repeated pulls, temperature changes, corrosion, or a stiff latch increases the load. Replacing only the visibly broken piece can leave the same failure point beside it.
A metal-reinforced replacement makes sense when the original part failed at a load-bearing lever, mounting bracket, or handle body. The upgrade should still match the vehicle's geometry, cable travel, connector arrangement, and latch interface. Metal alone doesn't compensate for poor fitment.
What to inspect before choosing an upgrade
Look for a replacement that provides:
- Vehicle-specific fitment. Confirm the make, model, year, body style, door position, and manual or powered configuration.
- Reinforcement at the stress point. The useful upgrade replaces the brittle lever or bracket that transfers handle force, not merely a decorative exterior cover.
- Correct cable and rod geometry. Small differences in travel can prevent the latch from fully releasing or fully returning.
- Secure mounting surfaces. The fastener locations should sit flush and allow the original hardware to start cleanly.
- Clear warranty terms. A durable component should have support that reflects its intended service life.
Metal doesn't make a misaligned door safe. If the striker is out of position, the latch is contaminated, or the cable is routed incorrectly, a reinforced handle may transmit more force into the surrounding door structure. Diagnose the system first, then choose the upgraded component that addresses the confirmed weak point.
When the upgrade earns its place
The trade-off is straightforward. A low-cost plastic replacement may restore operation quickly, but it can repeat the original design weakness. A metal-reinforced component may cost more or require closer fitment verification, yet it can reduce the chance of another teardown when the handle is used heavily or the latch offers resistance.
Review the metal door-handle replacement options alongside the original part before ordering. T1A Auto offers vehicle-matched aftermarket door hardware, including metal components backed by a lifetime warranty and standard items backed by a 3-year warranty, according to the publisher information supplied for this guide. Treat those warranty terms as a purchasing consideration, not a substitute for confirming compatibility.
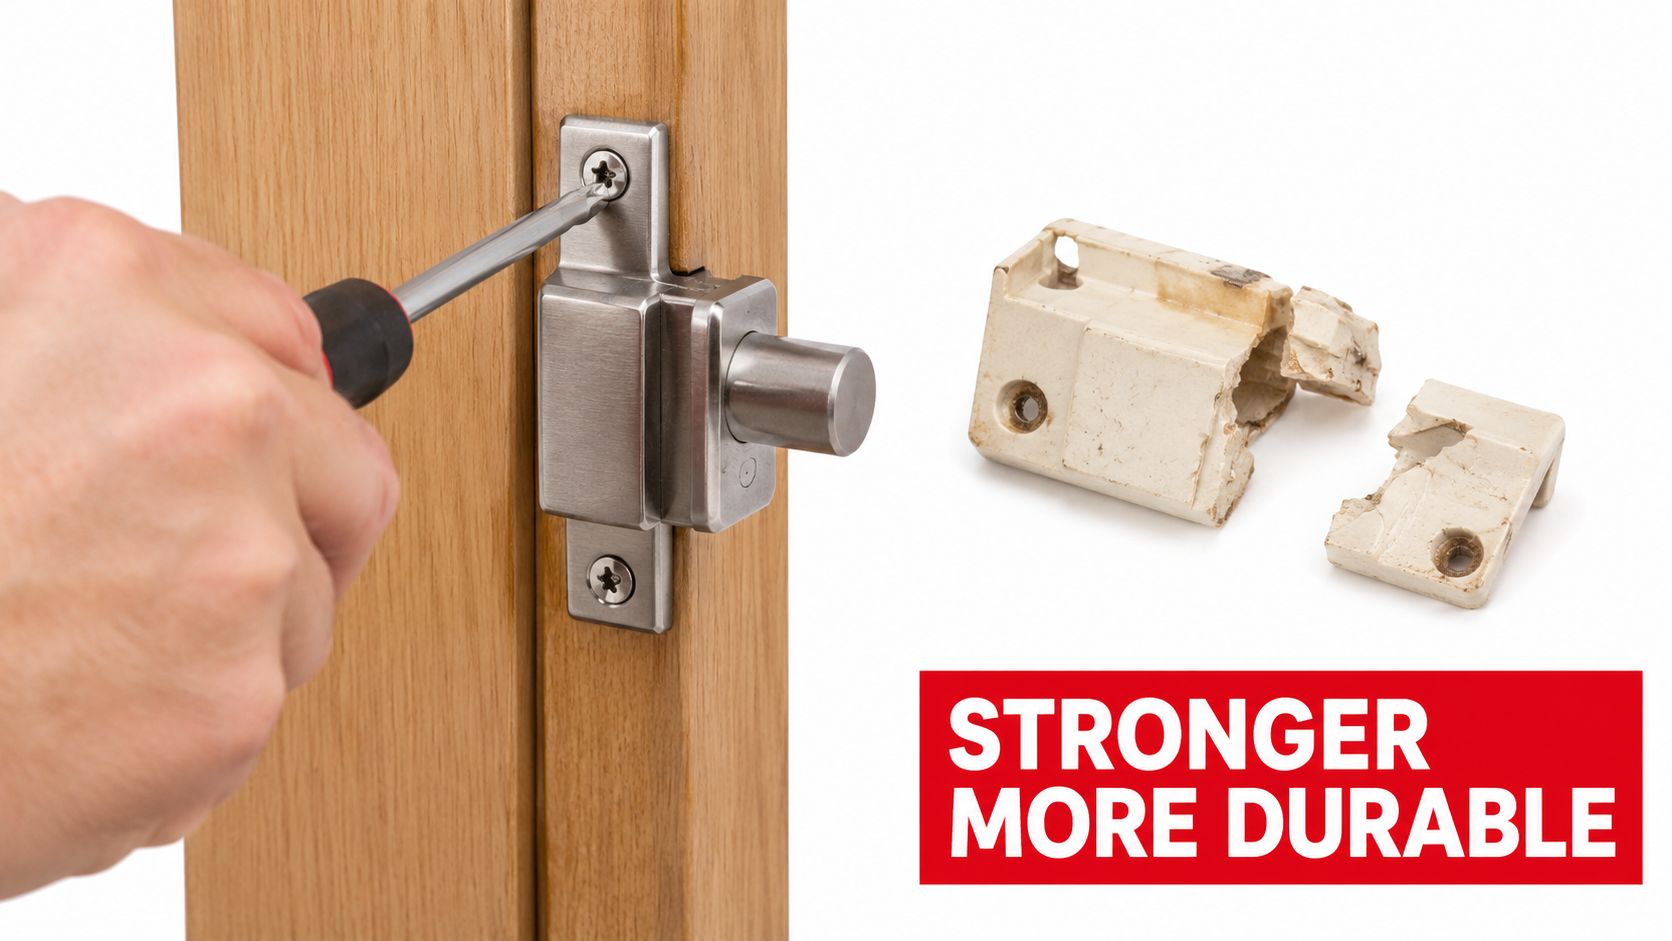
The permanent fix is the one that restores the complete load path. The exterior handle must pull the rod or cable, the linkage must move the latch through its full travel, and the latch must return to a secure position without binding. Upgrading one part while ignoring corrosion, poor alignment, or a failing actuator only moves the failure to another point.
The Non-Negotiable Post-Repair Safety Validation
Reinstalling the trim doesn't finish door handle lock repair. The door controls occupant retention, emergency exit, theft resistance, and the vehicle's warning system. Test it before the vehicle moves, and test it with the door open before asking the latch to manage the vehicle's weight or motion.
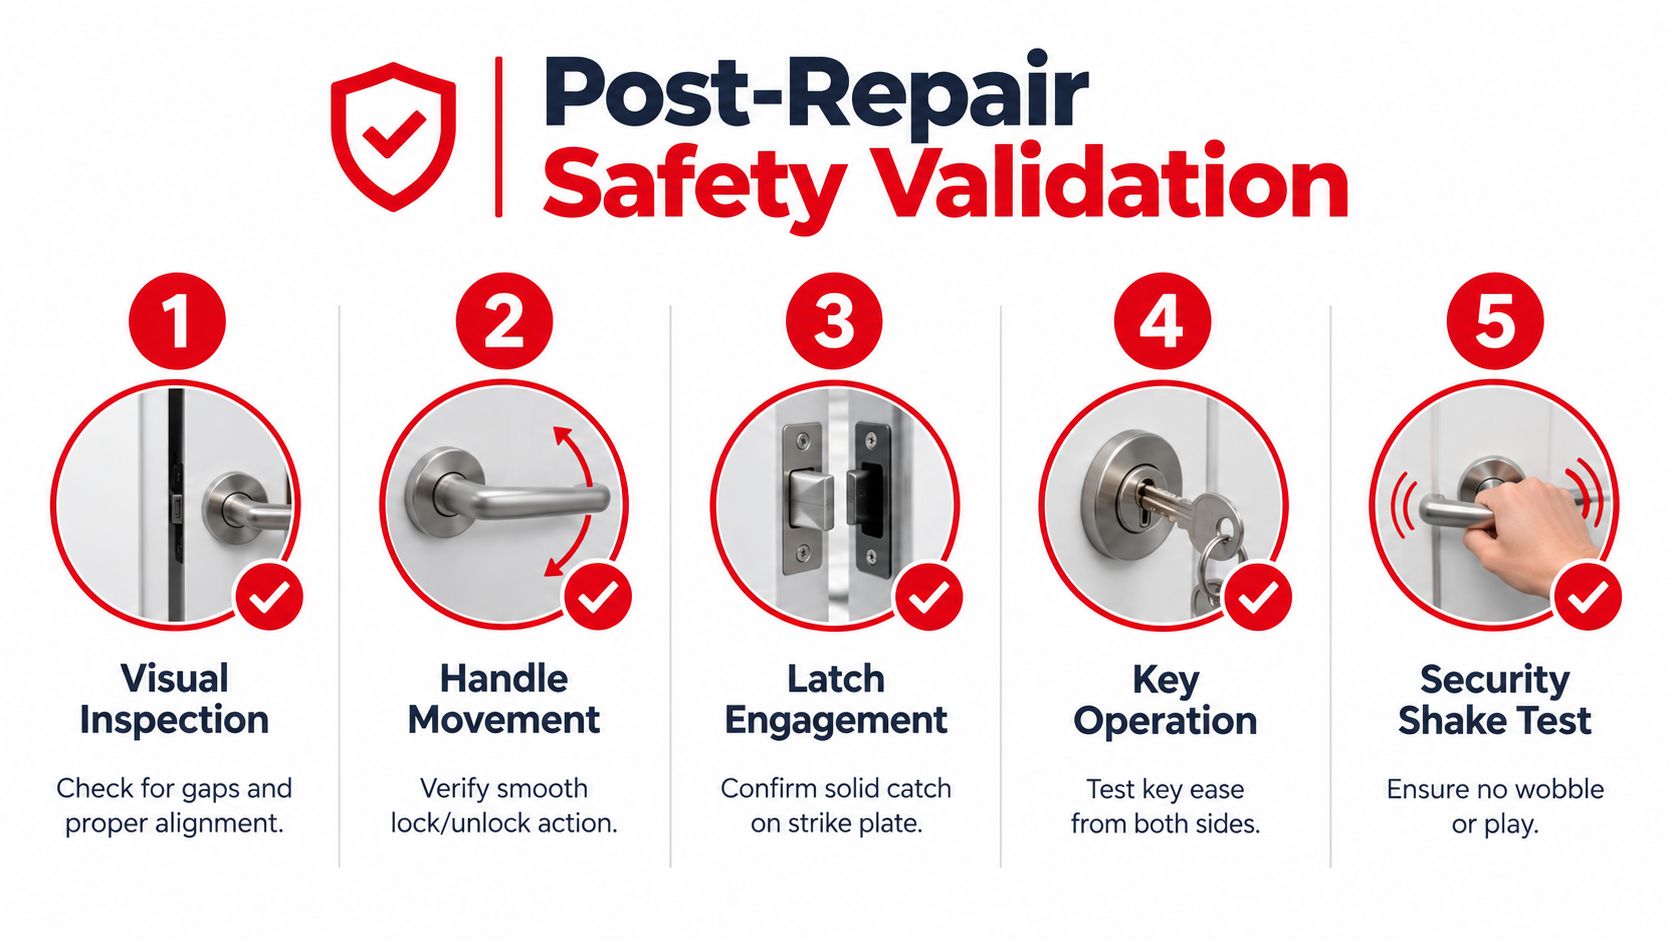
Run the complete function check
Use this sequence rather than testing only the button that originally failed:
- Visual inspection. Look for uneven gaps, trim interference, loose fasteners, exposed wiring, and a moisture barrier that isn't sealed.
- Outside handle. Pull the exterior handle several times. It should move smoothly, return fully, and release the latch without excessive travel.
- Inside handle. Open the door from inside and confirm that the handle provides normal release. This is an egress check, not merely a convenience test.
- Lock controls. Test the key, remote, interior lock switch, and manual lock knob. Verify both engagement and disengagement.
- Latch engagement. With the door open, operate the latch carefully and confirm full release. Then close the door gently and verify that it catches completely without rebounding.
- Warning system. Confirm that the door-ajar warning goes out when the door is fully closed.
- Rear-door functions. On applicable rear doors, test the child-safety lock and confirm that the interior and exterior behavior matches the vehicle design.
NHTSA reported that more than 1 million vehicles were stolen in the United States during 2023, an increase of 25% over the previous few years, or approximately one vehicle every 31 seconds. The agency also identified the Chevrolet Silverado 1500 and Ford F-Series among the most-stolen vehicles listed by the National Insurance Crime Bureau. These figures don't prove that a defective door lock causes theft, but the NHTSA vehicle-theft rate information explains why a lock that doesn't engage is a security-maintenance issue.
Test under realistic conditions
After the static checks, operate the door repeatedly from both sides. Check the key and fob from normal working positions, then confirm that the lock doesn't cycle partially or leave the handle in an unusual position. If the vehicle has a powered flush handle, verify that the handle presents and retracts as designed.
Don't perform a road test until the door latches securely with no warning indicator. During the first drive, listen for rattling and confirm that the door remains closed over normal bumps. Return immediately if the door-ajar warning appears, the handle feels loose, or the latch releases inconsistently.
A door that closes is not necessarily a door that latches. The pawl must engage the striker fully, the release mechanism must remain inactive while closed, and the occupant must be able to open the door normally when needed.
Knowing When to Stop and Escalate the Repair
Stop the repair and check for manufacturer involvement when the failure affects interior egress, electronic access, or a known latch campaign. A handle that moves with excessive slack, a cable that has separated from the latch, a door that opens only from one side, or a door that can't be opened from inside isn't a suitable target for adhesive, cable ties, or a reused retaining clip.
NHTSA recall 25V620 described certain Volvo New VN trucks where an interior-handle cable wasn't properly secured to the latch and could prevent occupants from unlatching the door from inside. Volvo reported 17 warranty claims involving 15 vehicles from April through August 2025, with no crashes or injuries reported at the time. The NHTSA Volvo recall report illustrates why a low incident count doesn't remove the need for escalation when emergency exit is affected.
Use this decision rule:
- Repair normally when diagnosis identifies ordinary wear, the recall search is clear, and the latch and egress functions remain intact.
- Pause and verify when voltage, wiring, actuator, module, or diagnostic-code issues could be imitating a mechanical failure.
- Escalate to the manufacturer when an open recall, interior-release defect, or safety-critical cable-retention fault is involved.
Record the vehicle identification number, symptom, failed function, diagnostic results, and photographs. Give that information to the dealer or manufacturer instead of improvising a temporary fix.
T1A Auto offers vehicle-matched replacement door handles, latches, actuators, cables, and related hardware, including metal upgrades for common high-wear applications. Visit T1A Auto to confirm fitment, review warranty coverage, and choose a replacement that addresses the diagnosed failure rather than guessing at the first visible part.
