


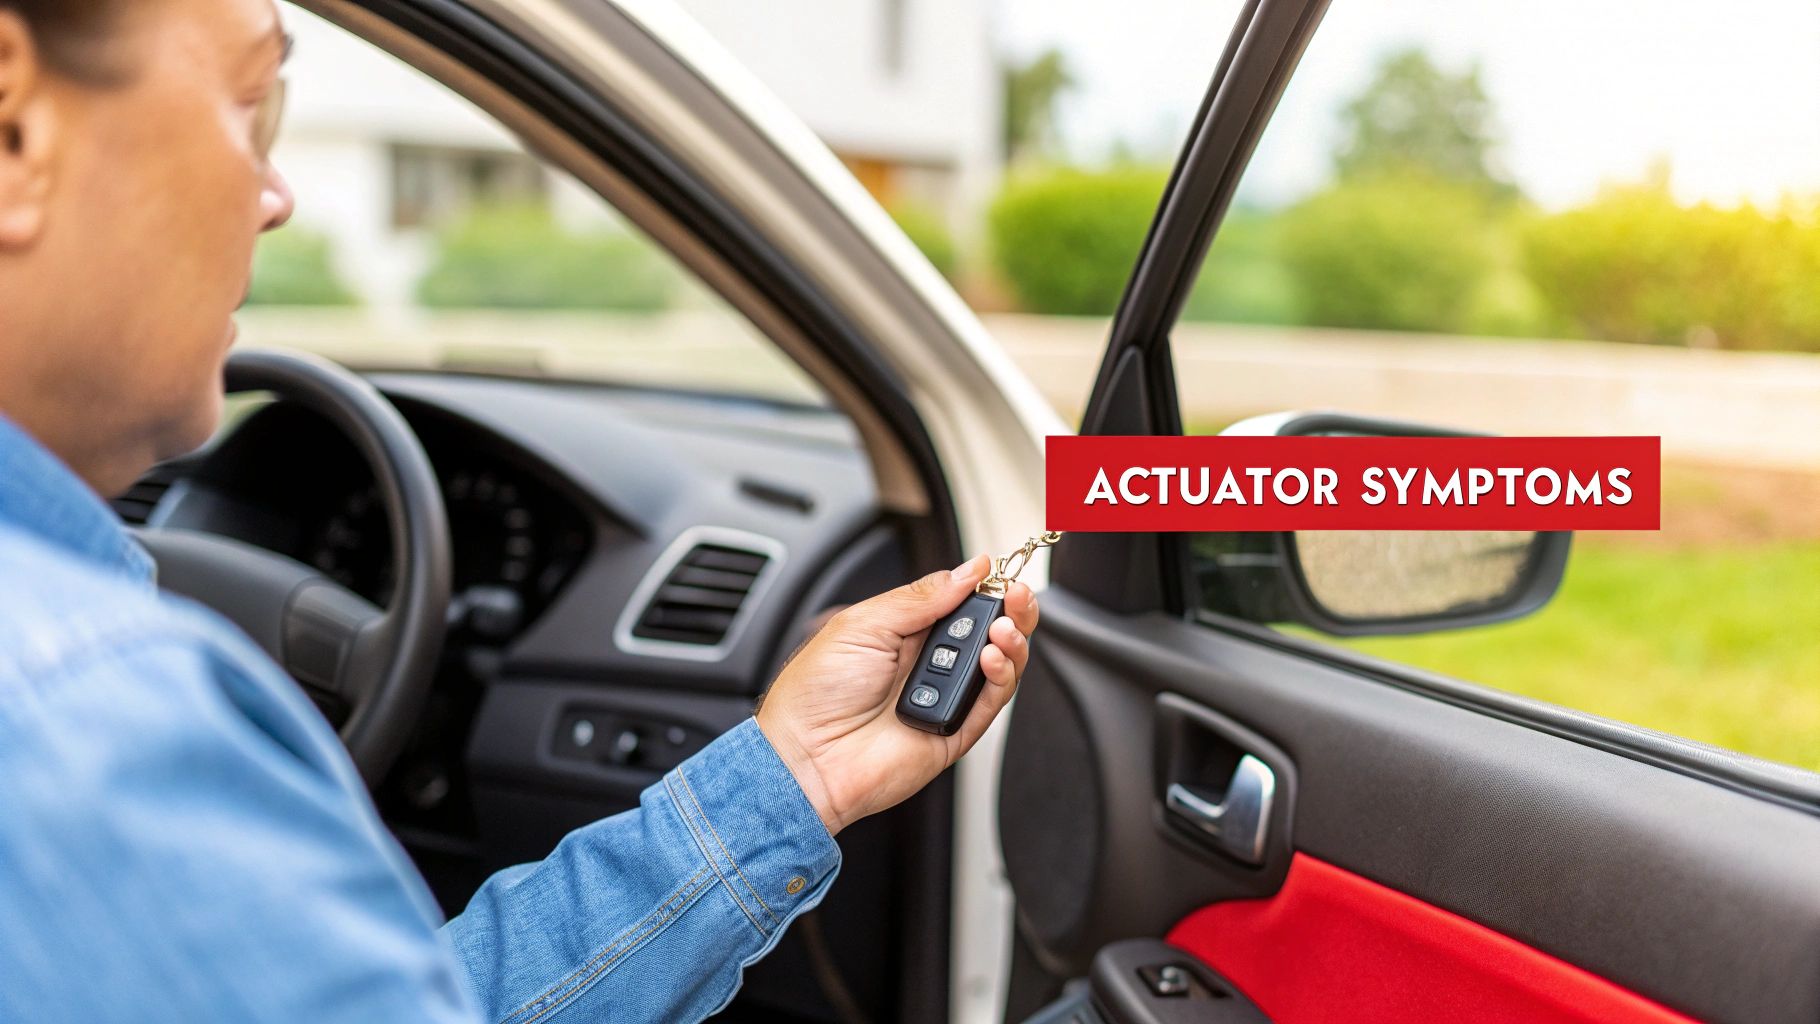
Before you tear into your door panel, let’s make sure you’re chasing the right ghost. Pinpointing the exact signs of a dying door lock actuator can save you a ton of time and headache, ensuring you're fixing the actual problem from the get-go.
Recognizing the Signs of a Failing Door Lock Actuator
Think of a door lock actuator as a small motor whose only job is to push and pull your door lock. Just like any motor, it gets tired and eventually quits. Learning to spot its specific failure symptoms is key to telling the difference between a bad actuator and other gremlins like a blown fuse, a fried relay, or a wiring problem.
Common Symptoms You Can Hear and See
Often, your ears will tell you what’s wrong before anything else. A healthy actuator makes a solid, satisfying clunk when it works. When one starts to go bad, the little motor and gears inside really struggle, and they make some pretty distinct noises you can easily hear from the driver's seat.
Next time you hit the lock or unlock button, listen closely for these tell-tale sounds:
- Buzzing or Grinding: This is the most common sign. If you hear a long, grinding buzz coming from inside the door, it usually means the motor is trying, but the plastic gears inside are stripped and can't finish the job.
- Rapid Clicking: A series of fast clicks suggests the actuator is getting power but doesn't have the strength or mechanical integrity to move the lock. It’s trying, but it just can’t do it.
- Total Silence: If one door stays completely silent while the others lock and unlock just fine, you've likely got a dead actuator motor or a clean break in the wiring leading to it.
Beyond the noises, you'll see the actuator acting up. The classic scenario is one door just stops playing along with the others. It might not lock with the key fob but still works manually, or maybe it won't unlock with the rest of the doors, making you reach for the physical key.
Expert Tip: If all your door locks stop working at the exact same time, the problem almost certainly isn't the individual actuators. Look for a central failure instead—a blown fuse, the master lock switch on the driver's door, or a body control module (BCM) fault are far more likely culprits.
Distinguishing Actuator Failure from Other Issues
It's way too easy to misdiagnose an electrical issue. Before you decide the actuator is toast, let's rule out the simple stuff. If it’s just one door misbehaving, it's probably not a fuse, since most cars run all the door locks on a single circuit.
Door lock actuator failures are incredibly common. In fact, 2024 AAA surveys found that 18% of all electrical complaints in U.S. shops were related to them, with most failing after around 75,000 cycles. Old-school testing methods, like the one shown in a popular YouTube video, often involved probing the actuator’s connector with a test light. In that scenario, a working system sends a pulse of voltage; getting no response points to a bad actuator over a wiring issue in about 70% of cases.
To help you narrow it down, I've put together a quick chart. It's a simple way to figure out if the actuator is the real problem or if you should be looking elsewhere.
Symptom Checker: Is It the Actuator or Something Else?
| Symptom | Likely Cause is Actuator If... | Consider Other Causes If... |
|---|---|---|
| A single door won't lock/unlock electronically | All the other doors are working perfectly. | All doors fail at once (check fuses, relays). |
| Strange noises (buzzing, grinding) from a door | The sound is isolated to the problem door. | The noises are coming from the fuse box or under the dash. |
| Lock works intermittently on one door | The problem is consistently with one door's lock. | The key fob itself is unreliable (try a new fob battery). |
| Lock works with the door switch but not the fob | The other doors lock and unlock fine with the fob. | None of the doors respond to the fob (fob battery, BCM issue). |
Think of this table as your first diagnostic step. If your symptoms point squarely to the actuator, you can move forward with testing it directly. If not, you’ve just saved yourself from taking a door apart for no reason.
Gathering Your Tools and Prioritizing Safety
Jumping into any car repair without the right gear is like trying to cook a gourmet meal with a plastic spoon—it’s just not going to work out well. To properly test a door lock actuator, you don't need a professional mechanic's entire toolbox, but a few key items are absolutely essential for an accurate diagnosis. Having the right setup from the start makes the job smoother and, more importantly, protects your vehicle from accidental damage.
Think of it as setting up your workspace before you start. Taking a few minutes to gather your tools before you even think about popping off a door panel will save you a ton of frustration later. It’s the best way to avoid those mid-job interruptions where you’re scrambling to find a socket, losing your momentum and probably a tiny screw in the process.
Assembling Your Diagnostic Toolkit
Your most important tool for this job is a digital multimeter. This is what will give you the definitive electrical readings, telling you whether the actuator is actually getting the power it needs to function. Any basic multimeter will do the trick, but one with a "peak hold" or "min/max" function can be a huge help in capturing the very brief voltage pulse sent when you hit the lock or unlock button.
Next up, you'll need a way to get the door panel off without destroying it.
- Plastic Trim Removal Set: Please, don't use a flathead screwdriver to pry off your door panel. You'll almost certainly leave deep scratches and break a few plastic clips. A cheap set of plastic pry tools is one of the best investments any DIYer can make. They're designed to distribute pressure evenly and are soft enough that they won't gouge your car's interior.
- Screwdrivers and Sockets: You’ll almost always need a Phillips head screwdriver and a small socket set. The most common sizes for door panels are 8mm, 10mm, or 12mm sockets to remove the screws holding the panel and handle in place.
Having these specific tools ready to go means you can move seamlessly from one step to the next without causing any collateral damage.
A Note from Experience: I always grab a magnetic parts tray and a good flashlight or headlamp before I start. Those little door panel screws have a knack for falling into the darkest, most impossible-to-reach corners of the door frame. A magnetic tray keeps them corralled, and a solid light source is non-negotiable for actually seeing what you’re doing in there.
Safety Is Not an Optional Step
Alright, let's talk about the most important part of the prep work: safety. Even though we're just working on a door lock, you're still dealing with your vehicle's electrical system, and that comes with risks. The single most critical safety measure is to disconnect the negative terminal of your car's battery.
This one simple action prevents two major headaches. First, it eliminates the risk of accidentally shorting a wire while you're poking around, which could blow a fuse or even fry a sensitive control module. Second, and this is the big one, it deactivates the airbag system. Many car doors contain side-impact airbags and their sensors. Trust me, you do not want to be anywhere near one if it accidentally deploys.
After you've disconnected the battery, give it about 10-15 minutes. This allows any residual power stored in the system's capacitors to fully discharge. Finally, throw on a pair of protective gloves. They'll keep your hands clean and save you from the surprisingly sharp metal edges you'll find inside a door panel. These simple precautions are what separate a safe, controlled diagnostic job from a trip to the emergency room.
Testing the Actuator in the Vehicle with a Multimeter
Alright, let's get to the heart of the matter. The most direct way to figure out what’s going on with your door lock is to test the actuator while it’s still in the door. We'll use a digital multimeter to see if the actuator is getting the electrical pulse it needs to work when you hit the lock or unlock button.
Think of this test as drawing a line in the sand. If you see the right voltage at the connector but the actuator is dead or just making a weak buzzing sound, you’ve found your culprit. On the other hand, if you get no voltage reading at all, the problem is somewhere else—maybe a bad switch, a wiring issue, or a control module. This simple check can save you from pulling out a perfectly good part.
Gaining Access to the Actuator Connector
First things first, you can't test what you can't reach. This means you’ll need to pop off the interior door panel to get to the actuator's wiring. Don't let that intimidate you; with a bit of patience and a set of plastic trim removal tools, you can do it without leaving a scratch.
Every car is a little different, but the basic steps are usually the same. You'll hunt down a few screws, which are often hiding behind the door handle trim, inside the armrest, or under the window switch pod. Once those are out, you can gently pry the panel away from the door frame to release the plastic clips. For a much more detailed guide, check out our post on how to remove a car door panel.
With the panel loose, carefully disconnect the wiring for your window switches, speakers, and lights. After you set the panel aside, you'll see a plastic sheet—the vapor barrier. Peel back a corner of it, and you'll expose the door's inner workings. The actuator's wiring connector is what you're looking for; it's a small plastic plug with two to four wires running to the actuator itself.
Before you stick any tools in there, always remember the basics of staying safe.

This simple three-step habit—disconnect the battery, protect your hands, and light up your workspace—is the foundation for any successful car repair.
Setting Up Your Multimeter for the Test
Now that you can see the connector, it’s time to grab your multimeter. Getting the settings right is crucial. The wrong setting will either give you a bogus reading or nothing at all, sending you on a wild goose chase.
Here’s how to set it up correctly for this job:
- Turn the dial to DC Voltage, which is often marked as VDC or a V with a straight line.
- Set the range to 20V. Since car batteries operate around 12V, this gives you the perfect window for an accurate reading.
- Plug the black probe into the COM (common/ground) port.
- Plug the red probe into the port labeled VΩmA (for voltage, resistance, and milliamps).
Pro Tip: If you’re working by yourself, a set of alligator clip attachments for your multimeter probes is a lifesaver. You can clip them onto the connector's pins, which frees up your hands to press the lock and unlock buttons while keeping your eyes on the meter.
Performing the Voltage Test
Ready for the moment of truth? First, unplug the actuator's wiring connector. You're going to be probing the side of the harness coming from the car, not the side going into the actuator. Most actuators are simple two-wire designs.
Carefully insert your red probe into one pin on the connector and the black probe into the other. Now, have a helper press and hold the "lock" button. You should see a quick pulse of around +12V on the multimeter.
Next, have them press and hold the "unlock" button. This time, you should see the reading jump to approximately -12V. The voltage reverses polarity to make the motor spin the other way. If you see both of these readings, you know for sure that the car's wiring and switches are doing their job and sending power to the actuator.
If you're interested in the nitty-gritty of electrical diagnostics, understanding voltage drop calculation formulas for DC circuits can take your skills to the next level. These actuators are built to last, but they don't last forever. In fact, some industry standards require them to survive 100,000 lock/unlock cycles during durability testing to meet the demands of modern vehicles.
Performing a Bench Test for a Definitive Diagnosis
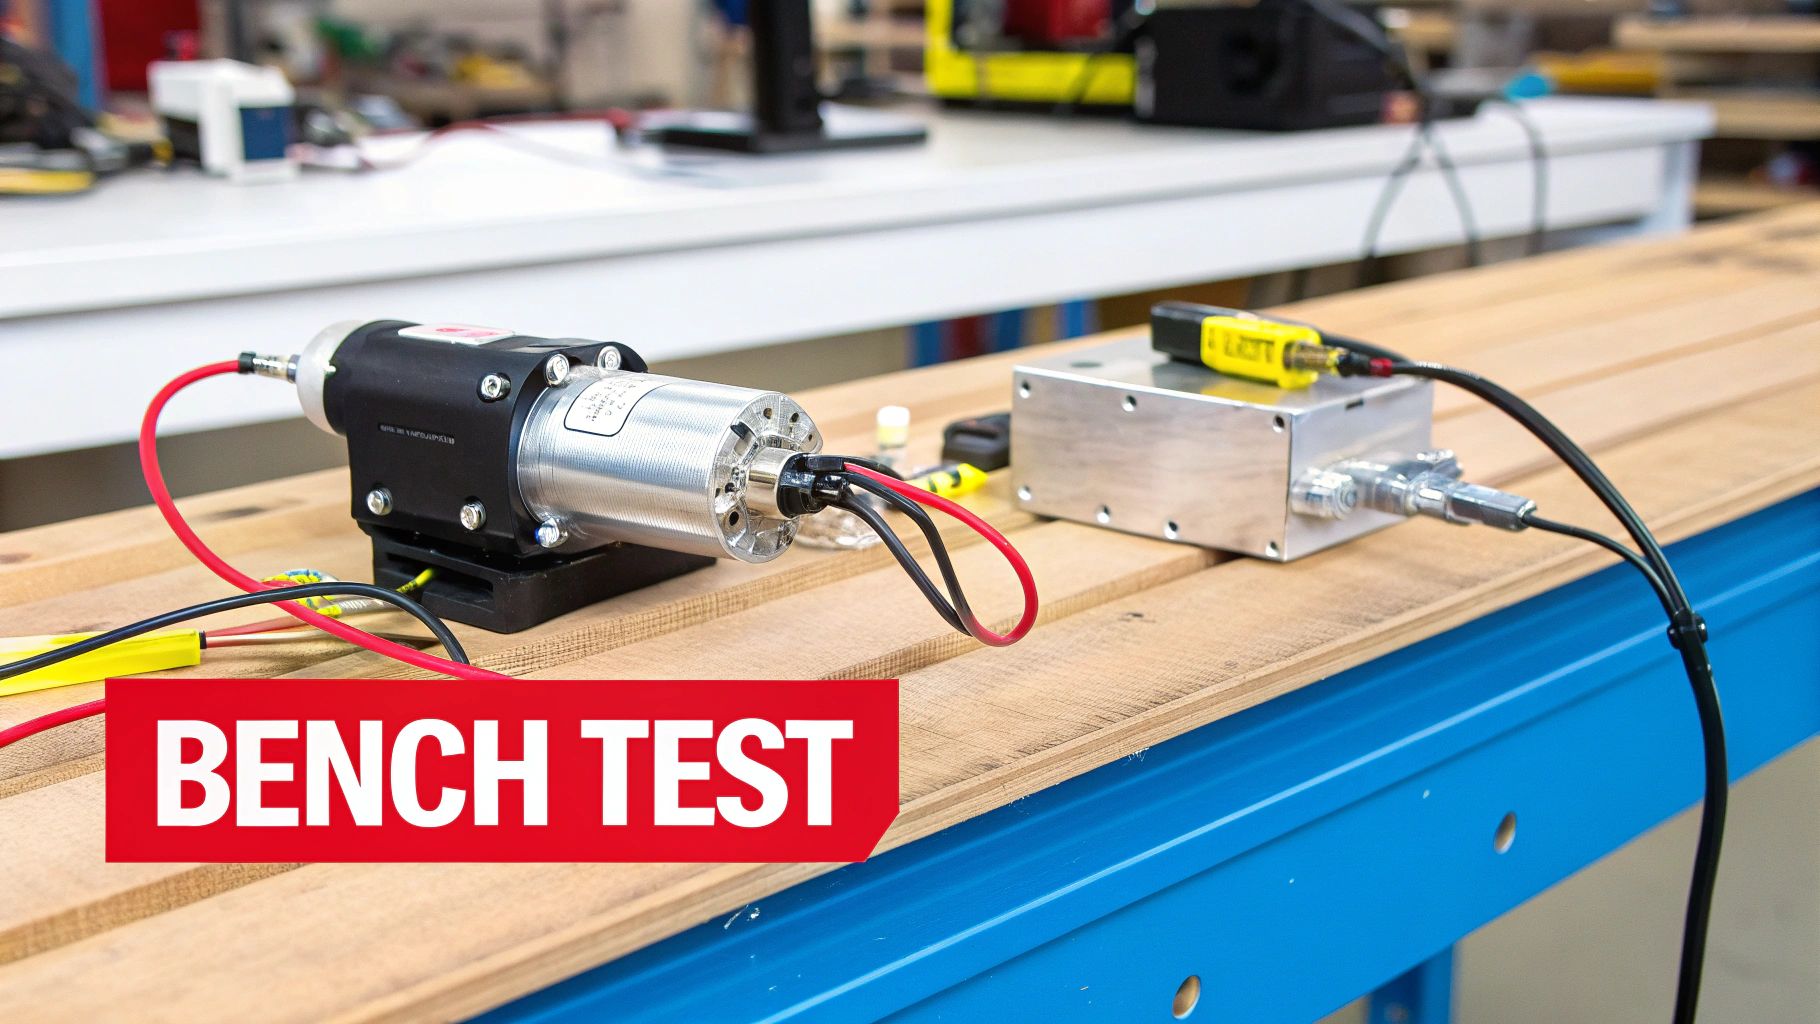
Sometimes, testing the actuator while it's still in the car doesn't give you a clear-cut answer. You might confirm you’ve got voltage at the connector, but the actuator is still dead or sluggish. When that happens, a bench test is your final, definitive step. This means pulling the actuator completely out of the door to test it directly, which cuts every other part of the system out of the equation.
By taking the actuator to your workbench, you’re bypassing all the vehicle's wiring, switches, and fuses. It's just you, a power source, and the part itself. This lets you confirm with 100% certainty whether the internal motor is good or bad. It's the most foolproof way to get a final verdict.
Getting the Actuator Out of the Door
Honestly, removing the actuator can be the trickiest part of the whole job, but it’s nothing you can't handle with a bit of patience. Since you already have the door panel off, you're halfway there. The actuator is usually bolted directly to the door latch assembly.
You’ll need to disconnect the mechanical rods or cables that link the actuator to the inside door handle and the outside lock cylinder. Pro tip: Snap a few pictures with your phone before you start disconnecting things. It's a lifesaver when it's time to put it all back together.
Once the linkages are free, unbolt the entire latch and actuator assembly from the side of the door. These are typically held in by three or four big Torx or Phillips head screws. Then you can carefully snake the whole assembly out through one of the access holes in the door frame.
A common roadblock here is the tight space. The window guide rail often gets in the way. On many cars, you'll need to loosen or even temporarily remove this rail to get enough clearance to pull the latch assembly out. It's a bit of extra work, but often necessary.
Setting Up the Direct Power Test
With the actuator on your workbench, the test itself is incredibly simple. All you need is a reliable 12V DC power source. You can use your car's battery with a set of jumper wires, a portable jump starter pack, or even a dedicated 12V power probe.
Take a good look at the actuator’s electrical connector. Your job is to find the two specific pins that drive the motor. In most cases, these will be the two largest pins on the connector, since they're designed to handle the most current. If you're not sure, a quick search for a wiring diagram for your vehicle's make and model can clear up any guesswork.
Running the Test and What to Look For
Okay, power source ready? Pins identified? Let's do this.
- Connect the positive lead from your 12V source to one of the motor pins.
- Briefly touch the negative lead to the other motor pin.
The second you complete that circuit, you should get an immediate, forceful reaction. A good actuator will snap its lock arm from one position to the other with a solid thunk. The movement needs to be quick and strong, with no hesitation, grinding, or buzzing.
Now, do it again, but reverse the polarity.
- This time, connect the negative lead to that first motor pin.
- Briefly touch the positive lead to the second pin.
The actuator arm should snap right back to its original position with the same speed and authority. Reversing the polarity is how the car's system tells it to unlock, so this confirms the motor works properly in both directions.
These little assemblies are tougher than they look. The components inside are engineered for surprising strength. For example, compliance testing for federal safety standards, as detailed in a 2022 MGA Research report, subjects latch components to massive forces. During one test, production latches were hit with hinge loads up to 10,000 lbs without failing, which really shows how durable these parts are designed to be. You can learn more about the design and implementation of latch testing machines to see the engineering involved.
Interpreting Your Test Results
Here’s a quick rundown of what you might see during both on-vehicle and bench testing and what it all means.
Interpreting Your Test Results
| Test Method | Test Result | Diagnosis | Next Step |
|---|---|---|---|
| On-Vehicle Test | 12V present at connector, but actuator is slow/unresponsive. | Possible faulty actuator or mechanical binding. | Proceed to bench test for confirmation. |
| On-Vehicle Test | 0V at the connector when switch is activated. | Problem is upstream (switch, wiring, fuse, or module). | Trace the electrical circuit; do not replace the actuator yet. |
| Bench Test | Actuator snaps sharply in both directions when power is applied. | Actuator is functioning correctly. | The problem is in the vehicle's wiring, switch, or control module. |
| Bench Test | No response, weak/slow movement, or grinding noises. | The actuator's internal motor or gears have failed. | The actuator is bad and needs to be replaced. |
The results from a bench test are black and white, leaving no room for doubt. This is why it’s the ultimate step when you need to know how to test a door lock actuator.
A healthy actuator will snap back and forth decisively. If that's what you see, your actuator is fine. The real problem is somewhere else in the car, and you'll need to go back to checking the wiring or switches for an intermittent fault.
However, if the actuator fails your bench test in any of these ways, you've found your culprit:
- No response at all: The internal motor is completely burned out.
- A weak or slow movement: The motor is dying and just doesn't have the muscle to work the lock anymore.
- A buzzing or grinding noise: The motor is trying, but the internal gears are likely stripped or broken.
- Works in one direction but not the other: There's an internal fault in the motor that's preventing it from reversing.
Any of these signs mean the actuator is shot and has to be replaced. With a definitive diagnosis in hand, you can confidently order a quality replacement part from a trusted source like T1A Auto, knowing you’re actually fixing the root of the problem.
Alright, you've done the diagnostic work and pinned the blame on a faulty door lock actuator. The hard part is over. Now for the satisfying bit: swapping in a new part and getting your door lock working like new again.
Getting this final step right is all about sourcing the correct replacement and following a few simple best practices. It's a straightforward job, but a little care here ensures you only have to do it once.
First things first, you need a replacement that's an exact match for your vehicle. Actuators are incredibly specific—they differ based on the car's year, make, model, and even which door it is (the driver's side front is different from the passenger's side rear). The only way to avoid a massive headache during installation is to use your vehicle’s specific information to find the right part.
Finding the Right Part Number
To guarantee you get a direct-fit replacement, your first job is to find the part number. Think of it as a unique fingerprint for that actuator. Getting the number right means every mounting hole, electrical plug, and linkage will line up perfectly, just like the original.
You can usually track this number down in a few ways:
- Look at the Old Part: Most of the time, the original part number is stamped or printed right on the housing of the actuator you just pulled out.
- Use an Online Catalog: Reputable suppliers like T1A Auto have tools where you can enter your vehicle's details and it will pinpoint the exact part you need.
- Call the Dealer: A quick call to your local dealership's parts department can get you the OEM part number. Just give them your VIN to be sure.
With that number in hand, you can shop with confidence, knowing you're getting something that will bolt right in without any fuss.
Why Choose a Quality Aftermarket Part?
When you go to buy the new actuator, you'll see two main options: an OEM part from the dealer or an aftermarket part from a company like T1A Auto. While you can't go wrong with OEM, a high-quality aftermarket part often delivers much better value.
Good aftermarket parts are engineered to meet or even exceed the original factory specs. Sometimes, they even fix the original design's weak points, like replacing a flimsy plastic gear with a more durable metal one. If you want to go deeper on this, we've got a great guide that breaks down the differences between aftermarket parts vs. OEM.
One thing is non-negotiable: the part must be a direct-fit replacement. Quality aftermarket brands focus on this, ensuring their parts install without any cutting, drilling, or modifying. It saves you a ton of time and frustration.
Installing Your New Actuator
The good news? Installation is just the removal process in reverse. Since you just took the old one out, the memory of how it all goes together should still be fresh. This is where those photos you snapped on your phone during disassembly become your best friend—they're your visual roadmap.
Start by carefully guiding the new actuator and latch assembly back into the door frame. Get the mounting screws started, but leave them a little loose for now. Next, re-attach all the mechanical rods and cables connecting the actuator to the handles and lock cylinder.
Before you even think about putting that door panel back on, there's one last crucial step.
The All-Important Pre-Installation Test
I can't stress this enough: never button up the door panel without testing the new part first. This one-minute check can save you from the agony of having to tear it all apart again.
With the actuator bolted in but the door panel still off, reconnect your car's battery. Now, plug in the actuator's electrical connector. Grab your key fob or use the power lock switch on the door and cycle the lock a few times.
You want to hear a solid, authoritative thunk and see the lock mechanism move smoothly and completely. Once you've confirmed it's working perfectly, you can disconnect the battery again, fully tighten the mounting screws, and reinstall the door panel with 100% confidence. Job done.
Common Questions About Door Lock Actuator Testing
Even after a successful test, you might still have a few nagging questions. It’s pretty common, especially when the symptoms you’re seeing don't perfectly match what you expected. Let's walk through some of the most frequent head-scratchers to get you across the finish line.
Getting these details straight will help you see the bigger picture of how the whole door lock system works together. From mysterious battery drains to weird key fob issues, having the answers makes you that much more confident for the next repair.
Can a Bad Door Lock Actuator Drain My Car Battery?
It’s not the first thing I’d check for a dead battery, but yes, it can absolutely happen. A failing actuator can get stuck in a loop, with its motor constantly trying to engage. This creates what we call a parasitic drain—a small, steady draw on your battery when everything should be off.
This usually happens because of a faulty internal switch or a short in the motor's circuit, which essentially tricks the system into sending power when it shouldn't. The draw might be tiny, but it's more than enough to kill a good battery over a night or two. If you've got a dead battery and one door lock that’s been acting up, the actuator should be high on your list of suspects once you've checked for the obvious stuff, like leaving the lights on. Learning how to diagnose car electrical problems is a game-changer for finding these kinds of hidden power leaks.
Why Do My Locks Work with the Switch but Not the Fob?
This is a classic one, and it almost never points to a bad actuator. Think about it: if you can lock and unlock the door using the switch on the door panel, you've just proven the actuator is working. The actuator, its wiring, and the fuse are all doing their jobs.
The real problem is almost certainly somewhere in the keyless entry system. The actuator is a pretty simple part; give it a jolt of electricity, and it works. It doesn't care if that signal came from the switch or the remote. The issue is likely one of three things:
- A dead battery in your key fob.
- The key fob itself has died.
- The car's remote receiver module has a fault.
Always start with the simplest fix: put a new battery in your key fob. This solves the problem more than 90% of the time.
Real-World Insight: Don't get fooled by the little red light on your fob. A weak battery can often have just enough power to make that light blink, but not enough to send a strong signal to the car. It’s a common trap.
Should I Replace All Door Lock Actuators at Once?
This really comes down to a trade-off between your budget and your time. All the actuators in your vehicle were installed at the same time, and they've all been through roughly the same number of lock/unlock cycles. When one fails from simple old age, it's a pretty good sign that its siblings aren't far behind.
Replacing them all at once is a great preventative move. It saves you from having to tear into another door panel in six months. On the other hand, if money is tight or if you know the failure was from something unique, like water getting into one specific door, then just replacing the one bad actuator is a totally practical choice.
When you need a replacement that fits perfectly and is built to last, trust T1A Auto. Our premium aftermarket parts are engineered for durability and guaranteed fitment, ensuring your repair is done right the first time. Find your direct-fit replacement actuator at https://t1aauto.com.
