


You hit the toll booth, parking gate, or drive-through, tap the driver window switch, and nothing worth having happens. Maybe the glass drops an inch and stops. Maybe it clicks, groans, or stays dead silent. Your first instinct is to order a motor and tear the door apart on Saturday. Don't. A driver side window motor replacement is a straightforward job when the motor has failed, and a frustrating waste of a weekend when it hasn't. Diagnose first, then open the door once, with the right part in hand.
Table of Contents
- When the Driver Window Stops Working
- Confirming the Motor Is Actually the Problem
- Tools, Parts, and Workspace Preparation
- Door Disassembly and Motor Swap From Start to Finish
- Why the Motor May Not Have Been the Real Problem
- Testing the Repair the Way the Regulators Require
- Fitment, Longevity, and When to Call a Shop
When the Driver Window Stops Working
It's usually a cold morning or the first heavy rain of the season. You press the switch to clear the fogged glass or flash a badge at a gate, and the window that worked fine last week moves an inch, tilts, or doesn't move at all. The driver window fails first on most vehicles for a simple reason. You use it far more than the other three, and every cycle wears motor brushes, gears, cables, guides, and switch contacts a little more.
That wear has a long history. Packard put hydraulic power window lifts on its 1941 Packard 180, Chrysler's 1951 Imperial is commonly credited with properly electric power windows, and the feature spent decades as luxury equipment before becoming standard on cars, trucks, and SUVs, as traced in the history of power window development. Modern electric systems dropped the leak prone hydraulics, but they added their own failure points inside a door that gets slammed daily and soaked every time it rains.
What silence and noise actually tell you
Treat the symptoms as information, not annoyance. They sort most failures into three buckets before you touch a screwdriver.
- Dead silent: No click, no hum, no movement. Think power delivery first, including fuse, switch, wiring in the door jamb, or a motor that has stopped entirely.
- Motor runs, glass misbehaves: You hear whirring or grinding while the glass tilts, binds, drops, or stays put. That points at the regulator, its cable, or its guides.
- Works one direction or intermittently: The glass goes down but not up, or it quits after a few tries and recovers later. Suspect switch contacts, a wiring fault, or a motor shutting itself down when it gets hot.
The motor is a suspect, not a verdict. The next twenty minutes of testing decide whether you're buying a motor, a regulator, a switch, or nothing at all.
Confirming the Motor Is Actually the Problem
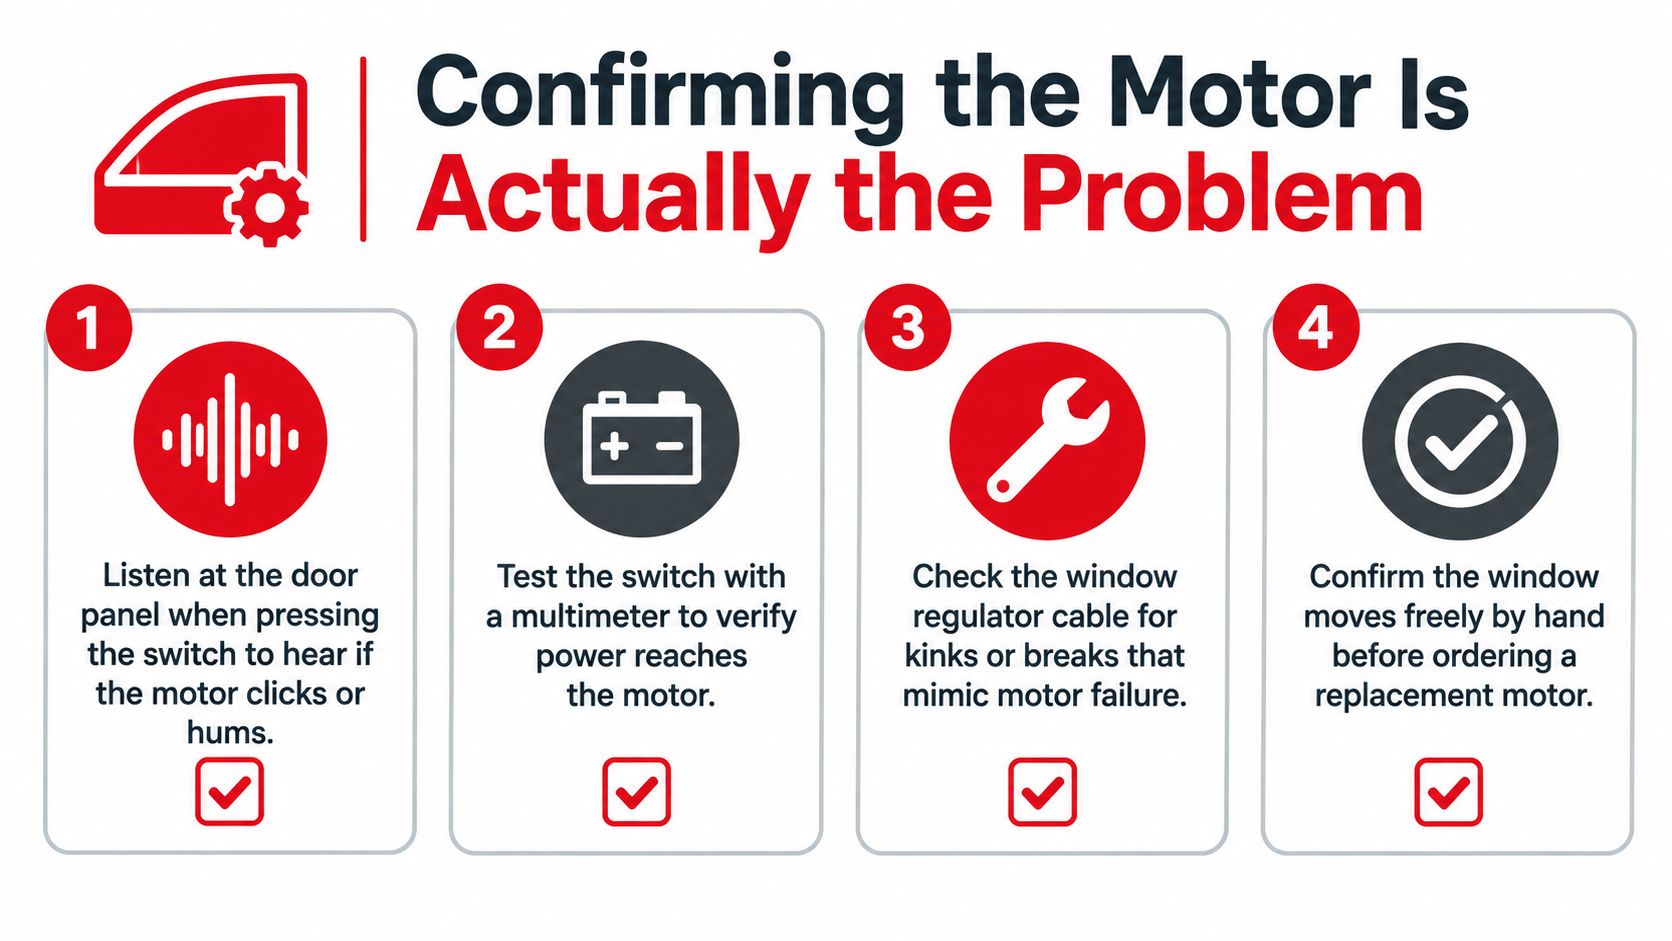
Start at the switch with the door still assembled. Key on, press down, then up, and listen with your ear near the trim panel. A click with no movement suggests the motor is trying against resistance. Complete silence suggests power never arrives. Try the passenger window from the master switch too. If several windows quit together, you're chasing a fuse, a shared ground, or a master switch problem, not one motor.
Check the fuse next, and don't just eyeball it. A fuse can look intact and still be open, so test it or swap in a known good fuse of the same rating. Then watch the glass itself. If you can rock it noticeably by hand, or it sits crooked in the frame, the regulator or its guides have likely let go regardless of what the motor does.
The power and ground test that settles it
With the trim panel off, back probe the motor connector with a multimeter while a helper works the switch. You want battery voltage across the two motor terminals, reversing polarity when the switch changes direction. Test under load, with the connector plugged in, because a corroded wire can show full voltage unloaded and collapse the moment the motor draws current. If power and ground are solid and the motor doesn't turn, you've convicted it.
If voltage is missing, move upstream to the switch and the harness where it flexes through the door jamb boot. Broken wires inside that boot are a classic intermittent fault, and they love to test fine with the door open and fail with it closed. A fused jumper lead lets you power the motor directly for a final check, separating a dead motor from a control problem. For meter setup and test positions, follow a proper power window motor test procedure rather than guessing at terminals.
Separate the motor from the mechanism
Unbolt nothing until you've checked whether the glass moves freely. With the motor disconnected, work the regulator through its travel by hand where the design allows it. Kinked cables, a jumped spool, bent arms, or a collapsed guide will mimic a weak motor perfectly. Photograph every connector and clip before you separate anything, because memory is unreliable once parts are on the bench.
Tools, Parts, and Workspace Preparation
Lay out everything before the first clip pops. Half the mistakes on this job happen mid task, with the glass unsupported, while you're hunting for a Torx bit. Disconnect the negative battery terminal before you start, consistent with lockout guidance for isolating vehicles from energy sources during maintenance. That protects you from short circuits and keeps an express up window from cycling while your fingers are in the door.
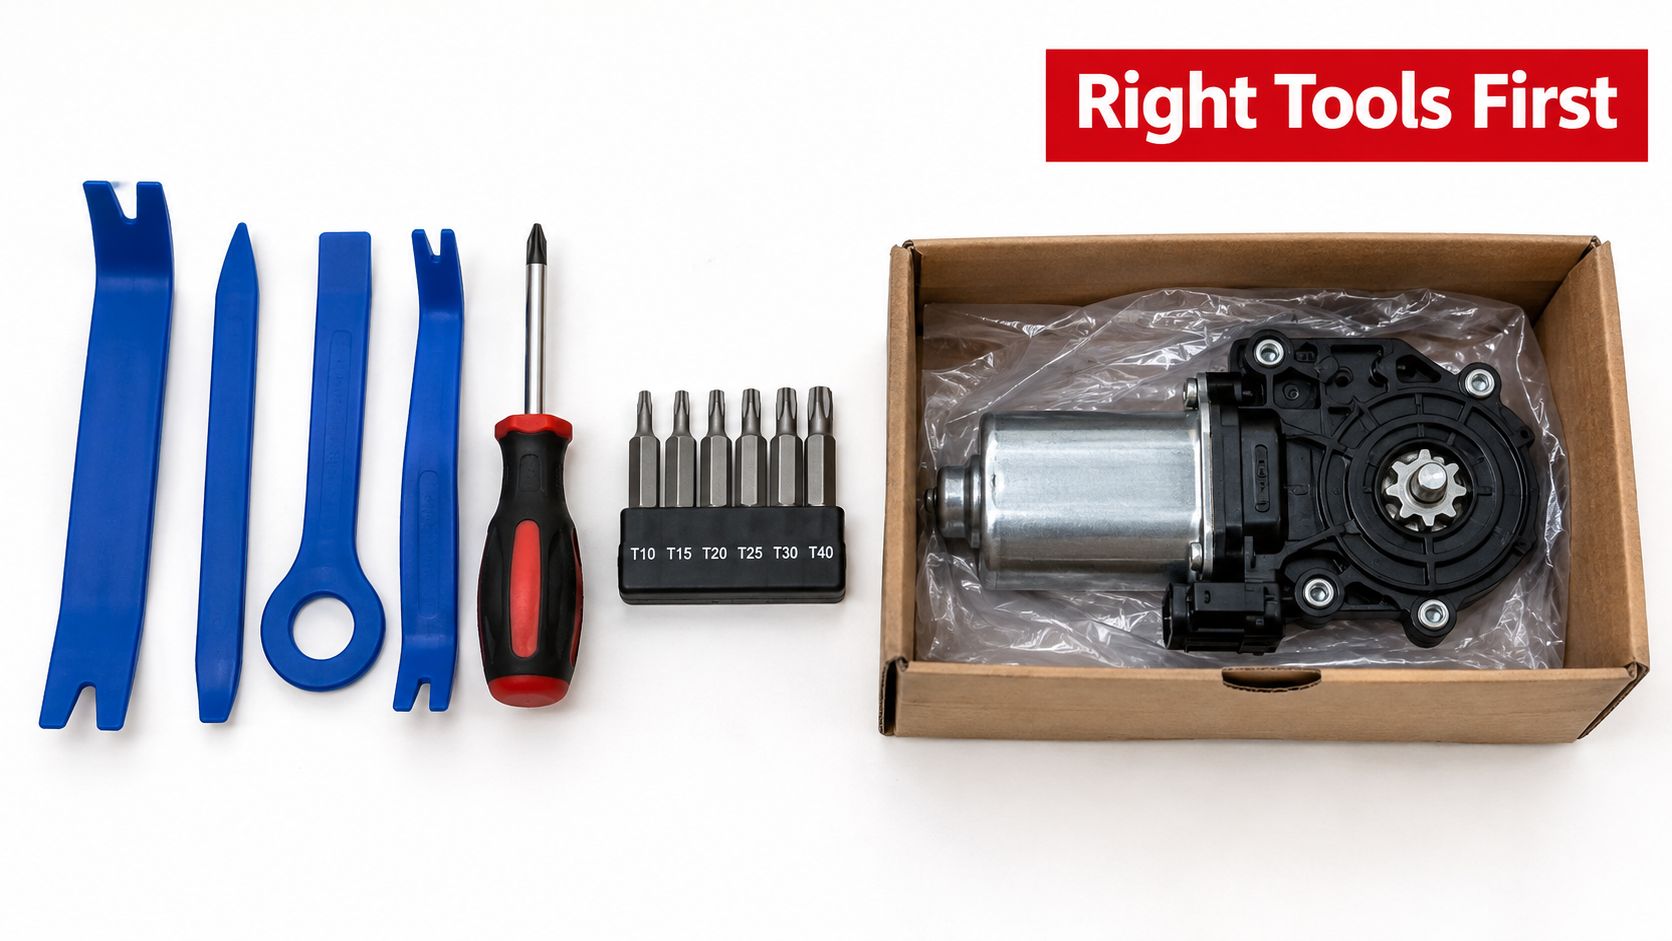
| Item | Purpose |
|---|---|
| Plastic trim and clip tools | Release door panel clips without gouging paint or snapping trim |
| Phillips and Torx drivers | Remove hidden fasteners in the pull cup, handle bezel, and sail panel |
| Small ratchet and socket set | Reach regulator and motor mounting bolts inside the door shell |
| Multimeter and fused test light | Verify power, ground, and switch polarity under load |
| Painter's tape or glass prop | Hold the glass fully closed while the regulator is unbolted |
| Magnetic tray | Keep screws and clips out of the door cavity |
| Nitrile gloves and safety glasses | Protect against sharp stamped metal edges inside the door |
Ordering the right part the first time
Verify the motor against your VIN, not just year and model. Mid year production changes alter connector pinouts and gear patterns, and driver side motors often differ from passenger side units in rotation and mounting. Decide now whether the regulator goes in the same order. If the cable is frayed or the guides are worn, a motor only repair sends you back into the door within the year.
Keep spare trim clips on hand, because a few will break no matter how careful you are, especially on an older truck that's baked in the sun. Work in dry weather with the door held open, a fender cover down, and a clean bench surface ready. You're about to lay the old and new motors side by side, and that comparison is easier on a bench than on gravel.
Door Disassembly and Motor Swap From Start to Finish
Door panels hide their fasteners on purpose. Look behind the pull cup, under the armrest, inside the handle bezel, and behind the sail panel near the mirror before you pry anything. Remove every screw first, then work your trim tool around the perimeter and pop the clips by prying close to each one, not by yanking the panel edge. If the panel fights you, you've missed a fastener. A vehicle specific walkthrough of removing a car door panel without breaking clips saves trim on unfamiliar models.
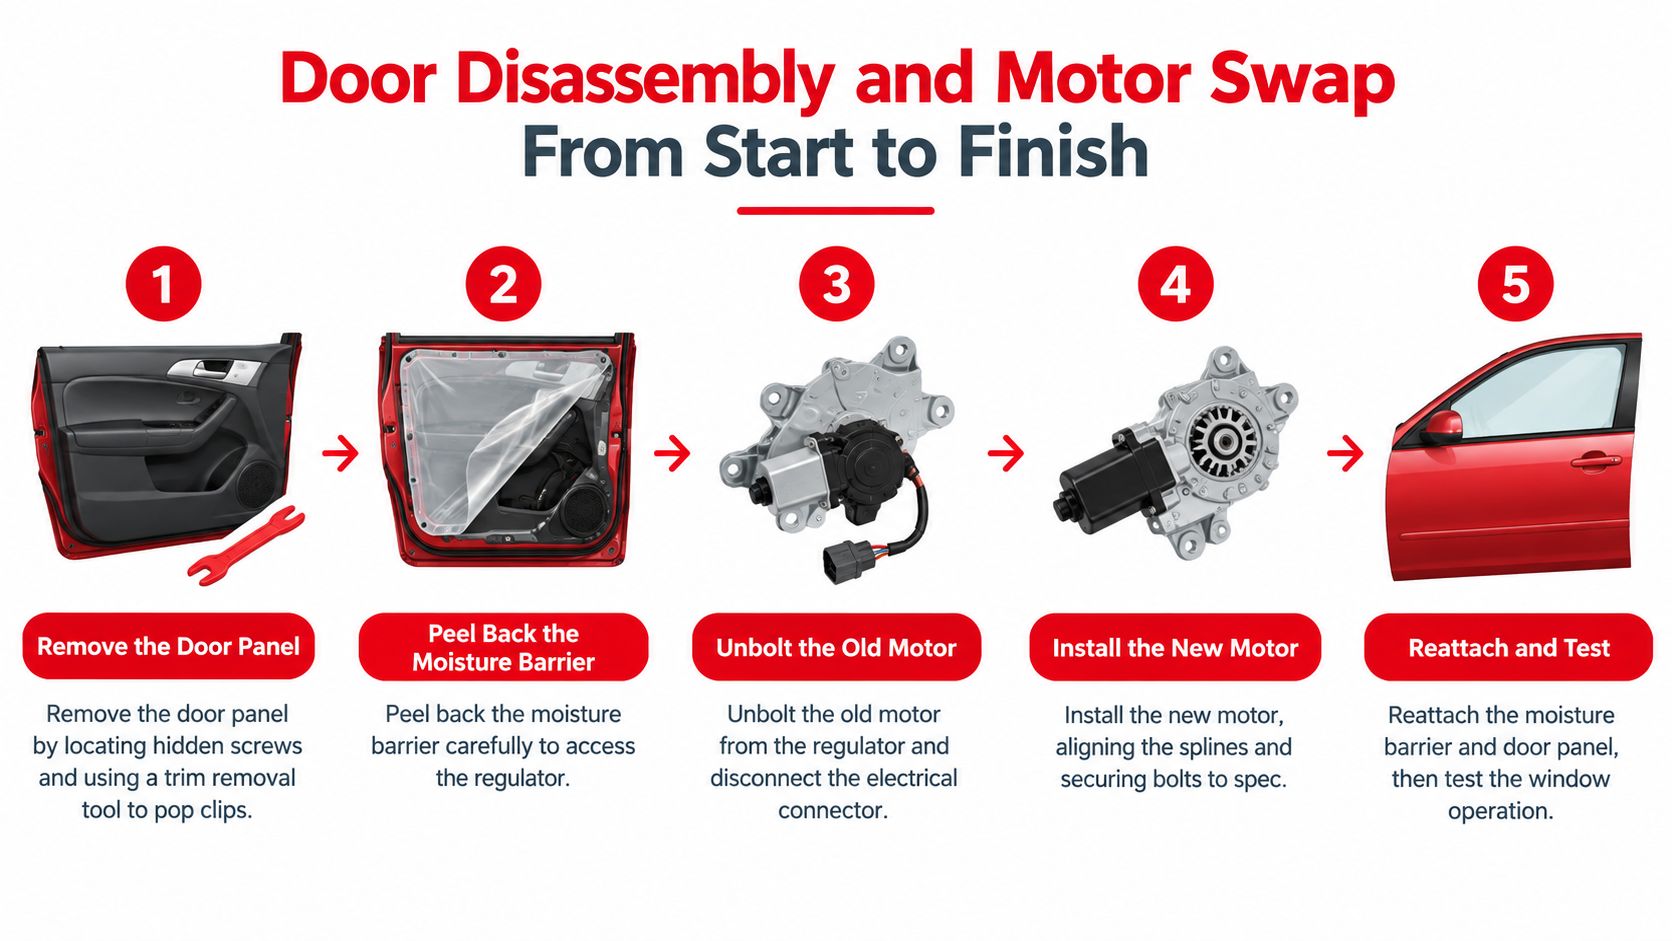
Lift the panel away slowly and disconnect the switch harness, lock rods or cables, and speaker leads before setting it aside. Behind it sits the vapor barrier, and you want that sheet off in one piece. Peel it back gently from one corner, keep the butyl sealant clean, and fold it out of your way rather than tearing it out. A torn or poorly resealed barrier is how a window repair turns into a wet floorboard two months later.
Support the glass before anything else moves
Run the glass fully up if it will still move, then secure it with wide painter's tape over the top of the door frame or a proper mechanical prop. Do this before loosening a single regulator bolt. An unsupported pane can drop the instant the mechanism releases it, and tempered glass doesn't give warnings. If the window is stuck down, reach in, free it from the regulator clamps, slide it up by hand, and secure it the same way.
Watching the sequence once before you start is worth a few minutes, especially the glass support and regulator handling.
Swapping the motor and setting alignment
Unplug the motor, unbolt it from the regulator, and maneuver it out through the access opening. On some models the regulator comes out with it as an assembly, which is fine. Bench the old and new units side by side and confirm the gear pattern, spline match, connector orientation, and mounting holes before anything goes back in. Transfer any adapter brackets or seals the new motor doesn't include.
Seat the replacement, mesh the gear fully, and snug the fasteners without final tightening. Cycle the glass through its travel by hand or with brief switch taps, watching for tilt, binding at the top corners, and even seal contact. Final torque comes from your vehicle's OEM service information, not a universal value, because fastener size and door construction vary too much for a generic number to be safe. Once travel looks true, torque everything to spec, reconnect the harness, and run several full cycles before the vapor barrier and panel go back on.
Why the Motor May Not Have Been the Real Problem
Here's the uncomfortable part. Shops see a steady stream of vehicles with brand new motors and the exact same complaint, because the original motor was never the failure. Manufacturer service information documents motors entering a fail-safe mode after detecting a diagnostic fault or excessive temperature, plus cases where trouble code checks and auto up and down relearning come before any hardware replacement, as described in a manufacturer service bulletin on window motor fail-safe behavior. A motor that's protecting itself looks identical to a dead motor from the driver's seat.
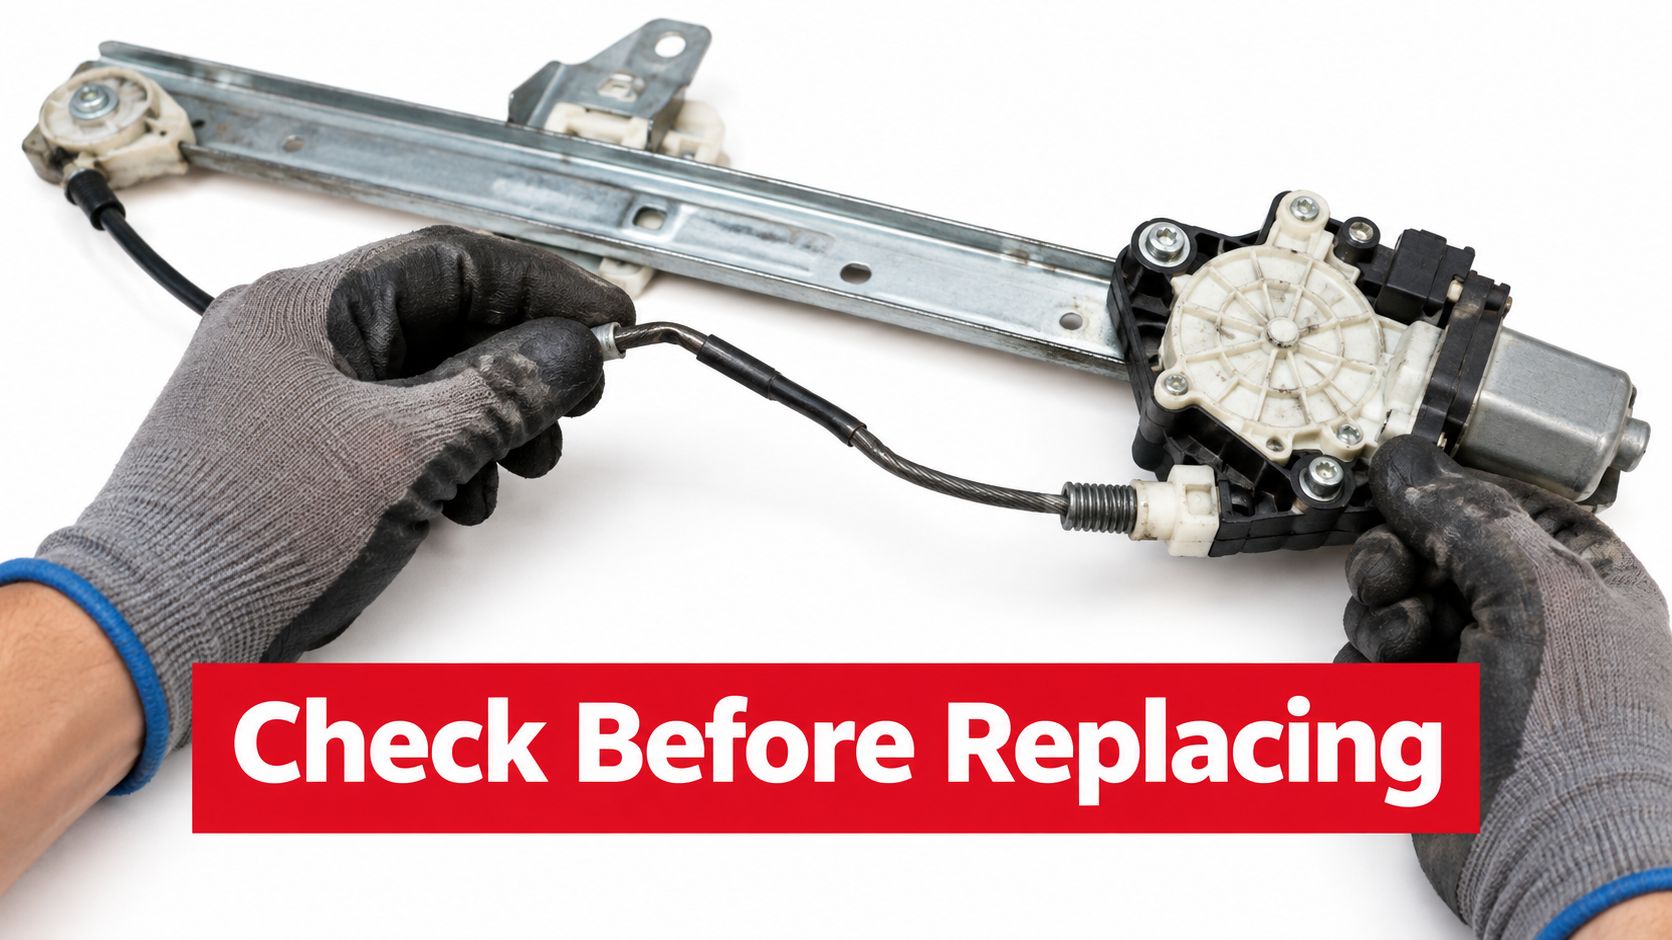
The glass run channel causes more false motor diagnoses than any other part. That rubber and felt channel swells, tears, loses its liner, or fills with grit until the glass drags hard enough to stall a healthy motor or trip its thermal protection. The window slows near the top, reverses for no visible reason, or stops and works again after a rest. Cleaning the channel, or replacing it when it's torn, fixes windows that owners were ready to throw motors at.
A decision tree worth taping to the toolbox
- Motor whirs, glass barely moves or tilts: Suspect the regulator, a stripped spool, or a jumped cable.
- Motor silent with verified power and ground: Suspect the motor itself.
- Everything works, then reverses or stalls randomly: Suspect a binding run channel, misalignment, or lost calibration.
- Dead after a battery replacement: Suspect lost upper and lower limits before suspecting parts.
Lost limits deserve emphasis. After a battery disconnect or module reset, many vehicles forget where full up and full down are, and express operation quits or reverses until you run the relearn sequence. The common pattern is full down, full up, then continued switch holding, but the exact procedure is vehicle specific and lives in the owner's manual or service information. A door module that's logged a fault can also hold the window in a restricted mode until codes are read and cleared with a scan tool.
Practical rule: If the problem started right after a battery job, a jump start, or a door module replacement, run the relearn and scan for codes before you order anything.
Testing the Repair the Way the Regulators Require
A window that travels up and down is not the same as a window that's safe. Federal Motor Vehicle Safety Standard No. 118 requires an unsupervised closing system to reverse when it meets an obstruction located 4 to 200 mm from the mating structure, before force reaches 100 N, per NHTSA guidance on FMVSS No. 118. That standard exists because express up and remote closing can trap a child's hand or neck, and your repair isn't finished until reversal behavior is verified.
Test with the manufacturer approved soft object or the procedure in your owner's manual. Keep hands, fingers, and people clear of the opening, run the window up in express mode, and confirm it stops and reverses on every attempt, not just the first. Never use a body part as the test object. If the window drives through the obstruction or fails to reverse, the vehicle doesn't go back into service until that's resolved.
Initialization and the final walk around
Run the initialization sequence for your vehicle so the module relearns its end stops, then confirm one touch up and down work smoothly through full travel. This matters more than it sounds. Recall documentation shows anti-pinch performance can be lost after a low voltage event or door module reset, with relearn expected within a couple of cycles and a software update needed in one case to prevent recurrence, as detailed in an NHTSA recall report on window anti-pinch relearn. If your window reverses immediately at the top after the repair, check glass alignment, channel condition, and calibration before blaming the new motor.
Finish with the unglamorous checks. Confirm switch polarity matches glass direction, test remote closure if your vehicle has it, inspect how the glass seats against the weatherstrip, and run water over the door to confirm the resealed vapor barrier keeps the cabin dry. Excessive resistance anywhere in the travel will shorten the new motor's life, so a slow or noisy final cycle means reopening the door now, while it's still apart in your mind.
Fitment, Longevity, and When to Call a Shop
Fitment is more than a part number that looks right on a screen. Verify connector pin count, gear pattern, mounting layout, and door position against your VIN and build date, especially on high volume trucks like Tacoma, Tundra, F-Series, Silverado, and Sierra where mid year running changes are common. Knowing the difference between OEM and aftermarket parts helps you judge where a quality aftermarket unit matches the original and where it improves on a known weak point.
Where the catalog offers upgraded metal components in place of failure prone plastic gears, pivots, and cable guides, take them. Those parts absorb the daily load cycles that kill the originals. T1A Auto, for example, sells powered window regulators and motors with vehicle based fitment lookup, a lifetime warranty on metal components, and a three year warranty on standard items, which takes most of the financial risk out of a careful DIY install.
Know the limits of the driveway
Plenty of capability exists when you need it. The Bureau of Labor Statistics counted roughly 163,200 automotive body and related repairer jobs in 2025, with employment projected to grow 4% from 2025 through 2035, alongside 316,910 automotive service technicians and mechanics in the motor vehicle and parts dealer sector, according to Bureau of Labor Statistics occupational data. Call on that workforce when the job turns into body control module coding, a scan tool relearn your equipment can't perform, stubborn water intrusion, or a door that's been opened for collision repair.
To make the repair last, keep the run channels clean and lubricated with a silicone safe product the rubber tolerates, clear the door drain holes so water doesn't pool around the motor, and avoid leaning on express up when the glass is frozen to its seal. That's the whole maintenance routine. Do it, and the window outlasts the next decade of door slams.
When your diagnosis does point to the motor or regulator, T1A Auto stocks powered window motors and regulator assemblies with vehicle specific fitment lookup, upgraded metal components, and warranty coverage that backs a home install. Search by your truck or car, confirm the driver side application, and order the part your testing proved you need.
