


You open the Ford Ranger tailgate, hear a sharp snap, and watch it drop farther than it should. The cable may be the obvious failure, but the cable is rarely the only part worth checking. Rust around the mounting points, worn hinges, loose latch hardware, and misalignment can turn a simple Ford Ranger tailgate cable replacement into a short-lived repair.
A proper driveway repair starts with controlled support and a full inspection. Replace the failed cable, then decide whether adjacent parts need attention before the tailgate damages itself or fails again under load.
Table of Contents
- Why Your Tailgate Drops and What to Inspect First
- Gathering Tools and Safely Supporting the Tailgate
- Removing the Old Cable and Installing the New One
- Navigating Model Year Variations and Recall Information
- Upgrading to Metal Parts and Replacing Adjacent Hardware
- Testing the Assembly and Final Adjustments
Why Your Tailgate Drops and What to Inspect First
A broken support cable changes the tailgate from a controlled panel into a heavy lever. If it drops onto the bumper, the impact can mark the paint, strain the hinges, or pull already-corroded mounting hardware out of alignment. Don't reach for a replacement cable until you know why the original failed.
Start with the failed side, then compare it with the opposite side. Look for broken strands, flattened cable ends, kinks, rust scale, and a mounting hole that has started to elongate. A cable that looks intact can still be unreliable if its outer coating has split or if the end fitting moves loosely on the stud.
Inspect the whole tailgate assembly
Open the tailgate only as far as you can control it, and have a helper hold it while you examine:
- Hinges: Check for excessive movement, cracked weld areas, distorted brackets, and rust that prevents the hinge from sitting square.
- Latch parts: Make sure both latches release and engage evenly. A stiff or crooked latch can load one cable and hinge more heavily than the other.
- Fasteners: Look for rounded Torx recesses, missing washers, damaged threads, and corrosion beneath the bolt head.
- Bed alignment: Compare the gaps at both sides. A crooked tailgate may point to collision damage or hinge wear rather than a cable problem.
- Wiring on newer Rangers: Modern tailgate work can involve frame connections and a tailgate harness, so inspect wiring before pulling the panel or forcing a connection. Ford's tailgate removal guidance shows why newer assemblies may require more than a cable-only step.
Off-road vibration, repeated heavy loading, road salt, and water trapped around the cable ends all accelerate wear. If the cable failed beside a rusty bracket or a loose hinge, replacing the wire alone treats the symptom, not the load path.
For latch-specific symptoms, use this Ford Ranger tailgate latch repair guide before ordering a cable. A latch that won't close cleanly can make a new support cable appear defective when the issue is alignment.
Gathering Tools and Safely Supporting the Tailgate
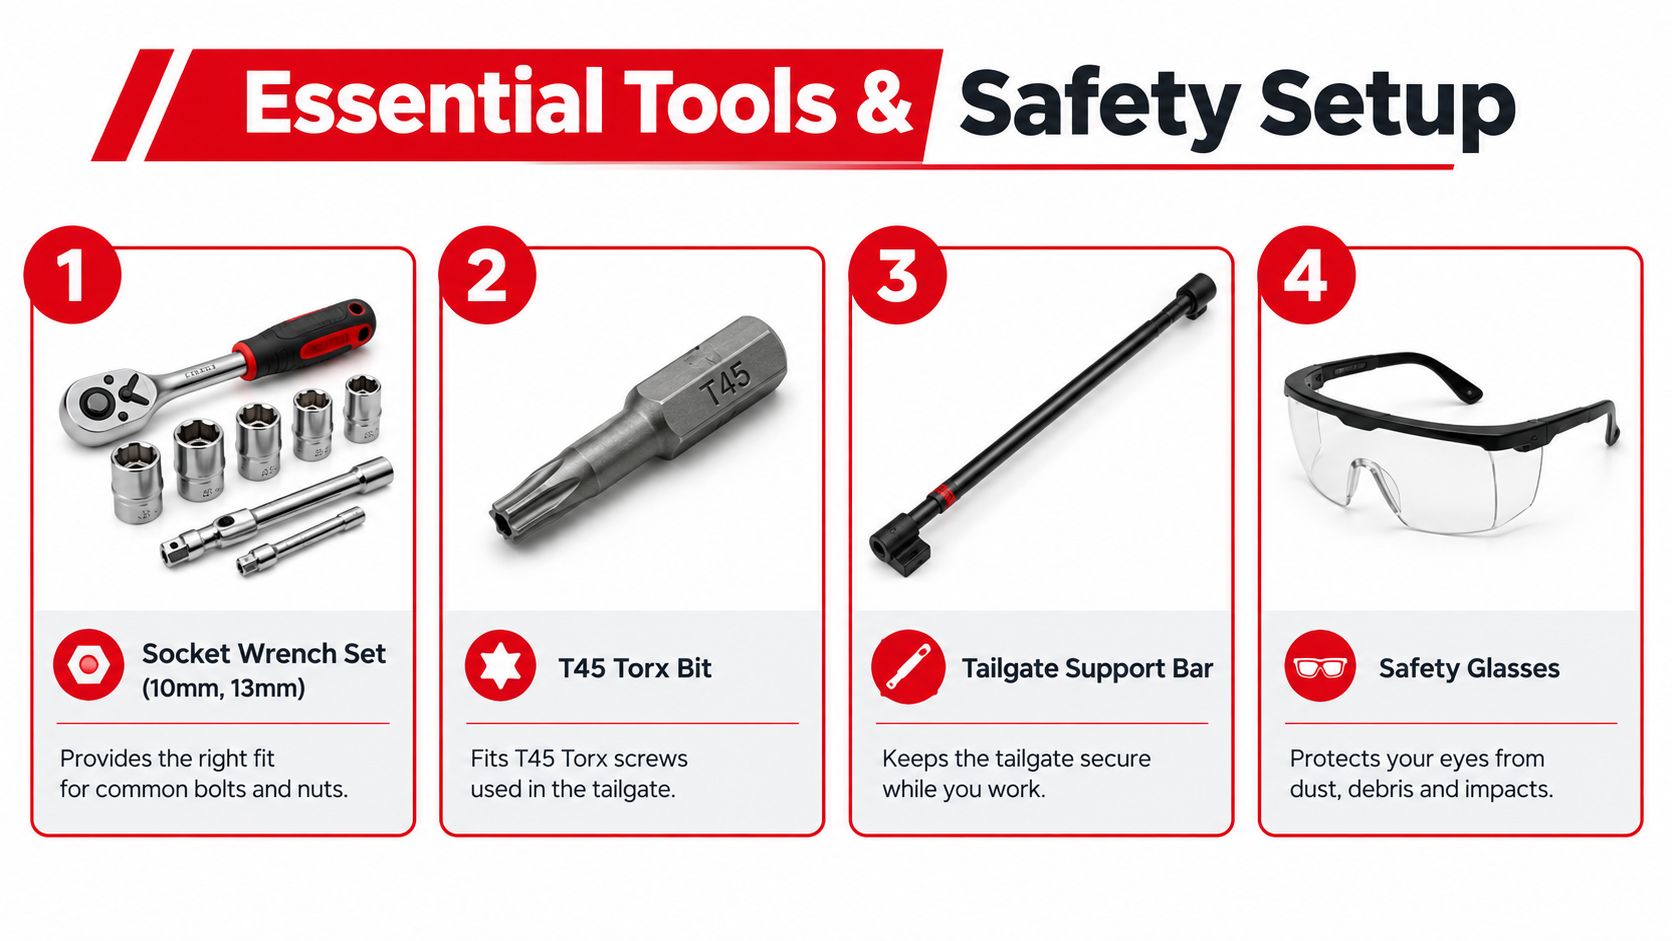
The support step comes before the first fastener. A Ranger tailgate is awkward to hold once one cable is disconnected, and the remaining cable may not safely carry the panel's weight. Support the tailgate with a padded support bar or a stable stand, and use a helper whenever the panel is difficult to control.
Prepare the work area
Park on level ground, set the parking brake, and keep the bed clear. You need enough room to stand behind the truck and reach the lower cable fastener without twisting beneath an unsupported tailgate.
Gather:
- Socket wrench set: A 10mm and 13mm socket set covers common nearby hardware, though your specific Ranger may use additional sizes.
- T45 Torx bit: The lower cable fastener uses a T45 Torx head in the described replacement workflow.
- Support bar or padded stand: Place it under a strong, flat section of the tailgate, not against a trim edge or latch lever.
- Safety glasses: Wear them before brushing rust or applying penetrant.
- Penetrating oil: Useful on exposed, corroded threads, especially on older trucks.
- Small wire brush: Clean rust from the bolt head so the Torx bit seats fully.
- Trim tool and flashlight: Helpful when access is tight or wiring and clips are nearby.
- Replacement washers or fasteners: Keep them ready if the originals are damaged or heavily corroded.
Safety rule: Support the tailgate before removing either cable. A helper should steady the panel, but a helper's hands aren't a substitute for a secure support.
Set the tailgate at a workable angle
Lower the tailgate to its normal open position only if both sides remain stable. Slide the padded support into position so it carries the panel without pressing on painted outer surfaces. Test the support by applying gentle downward pressure before loosening anything.
If the tailgate is already hanging crooked, don't force it level by pulling on the cable. Raise it carefully with the helper while you position the support, then leave the weight on the support. Keep your fingers away from hinge gaps and latch openings.
Clean the visible fastener head with a brush. A T45 bit that sits fully in the recess is far less likely to strip the bolt than a dirty bit held at an angle. If the bolt resists, apply penetrating oil and let it work while you inspect the opposite side and prepare the replacement.
Removing the Old Cable and Installing the New One
A cable can break while the tailgate still looks usable. Once it is supported, inspect the upper stud, lower bracket, washers, and contact points for worn holes, bent metal, or rust. Replacing only the cable can leave damaged hardware to loosen the new part.
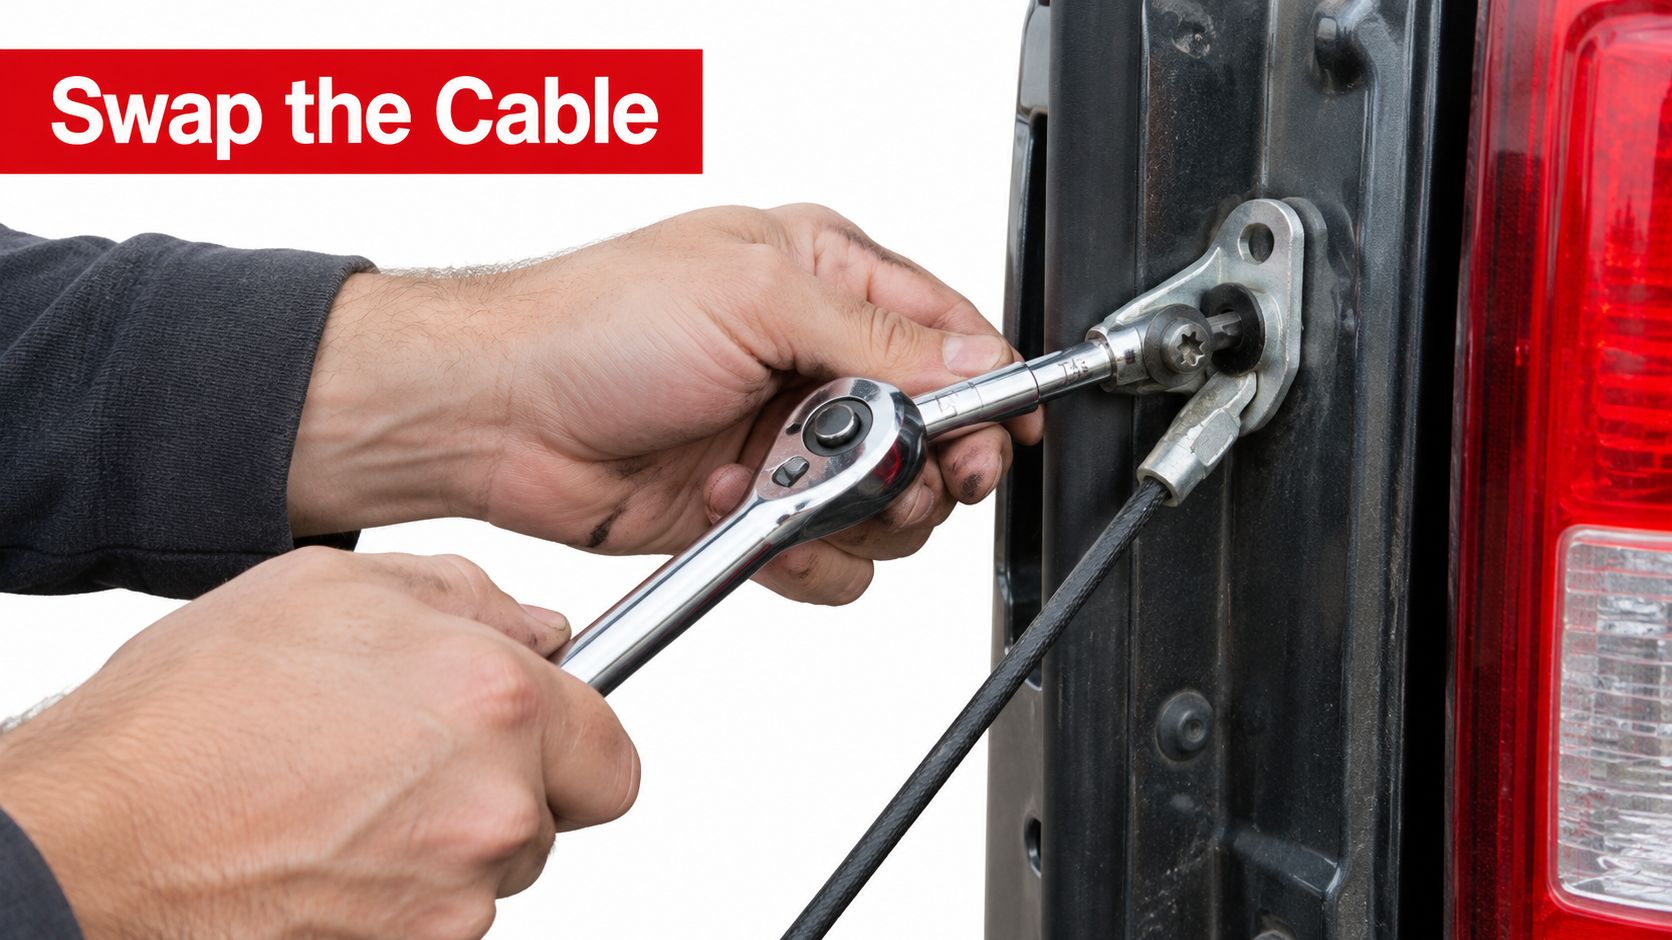
Remove the original cable
Use this sequence:
- Confirm support: Verify that the padded bar or stand carries the tailgate before loosening either connection.
- Release the upper connection: Remove the cable from the upper stud. Keep the washer and retainer with the old cable until the replacement layout is clear.
- Seat the T45 bit: Press the T45 fully into the lower fastener. Hold the wrench square to the bolt and apply steady force.
- Remove the lower fastener: Back out the lower T45 Torx fastener and remove the cable.
- Inspect the bracket: Check for elongated holes, cracked metal, heavy rust, or a loose stud. These faults can let a replacement cable shift under load.
- Compare parts: Match the replacement's end shape, hole position, length, and routing against the original before fitting it.
Rust can bond the fastener to the bracket. Brush the recess clean and apply penetrant before trying again. A hand-impact driver can help free the bolt while keeping the bit seated, but stop if the bracket begins to bend. A rounded head turns a simple cable job into drilling and extraction. The same fastener handling is shown in this tailgate cable bolt walkthrough.
Install in the correct sequence
Route the new cable along the original path, clear of the tire, latch movement, sharp bracket edges, and painted bed surfaces. Put the large hole over the upper stud first, then seat the lower tab fully until it clicks into place. Before fastening, compare the replacement's end shape and length with the Ranger tailgate cable listings to confirm the part matches your truck.
Start the lower T45 fastener by hand for several turns. The cable tab should lie flat against its bracket, with no cross-threading or visible gap. Tighten it securely, without guessing at a torque value when model-specific service information is unavailable. Excess force can distort thin metal, while insufficient tightening allows movement that wears both the cable and bracket.
Keep the support in place until both ends are secure. Inspect the opposite side for the same hidden wear, especially around the stud and mounting hole, before testing the tailgate.
Navigating Model Year Variations and Recall Information
A Ranger tailgate cable isn't automatically interchangeable across every generation. Older trucks often use straightforward support-cable hardware, while newer tailgates can include additional frame connections, integrated wiring, and different mounting geometry. Treat the model year, body style, bed configuration, and original cable shape as fitment information, not minor details.
Older parts have a documented fitment history
Aftermarket catalog records show Ranger-related tailgate-support applications reaching across 1983 to 1997 Ford Trucks, including specific coverage for 1983 to 1989, 1990 steel-box, and 1991 to 1992 Ranger configurations. One cataloged cable cross-references E4TZ9843052A and lists fitment for 10 vehicles, while another listing identifies a 21-1/8 inch cable for the broader 1983 to 1997 Ford Truck range. These details appear in the Ranger tailgate support cable fitment catalog.
That history tells you two things. First, tailgate cables are a long-running Ranger service part, not a one-off repair. Second, a similar-looking cable can still be wrong if its end fittings, mounting holes, or length don't match your truck.
Newer trucks need a broader check
On a newer Ranger, identify every connector and frame attachment before removing the tailgate. Don't pull on a harness to gain access, and don't assume a cable fault explains a warning light, latch problem, or camera issue. Those symptoms may require a wider inspection.
Recall coverage is separate from ordinary wear. Ford's current recall information lists the 2024 to 2026 Ranger in recall 26S30, and Ford states that recall parts and service are free through a local dealer when the safety-related condition is confirmed. Check the VIN and the official Ford recall record before paying for work that may fall under a manufacturer campaign. For a second practical explanation of the process, use this recall check expert advice.
A recall doesn't automatically cover a frayed cable, rusted hinge, or collision-damaged bracket. It does mean you should separate a safety campaign from a routine parts decision before ordering anything.
Upgrading to Metal Parts and Replacing Adjacent Hardware
A new cable won't stay reliable if it attaches to a weak bracket, corroded bolt, or worn hinge. The useful upgrade is not just buying the cheapest replacement. It's replacing the part that failed with a durable cable, then correcting the surrounding hardware that allowed movement, corrosion, or poor alignment to continue.
Choose the part for the actual load
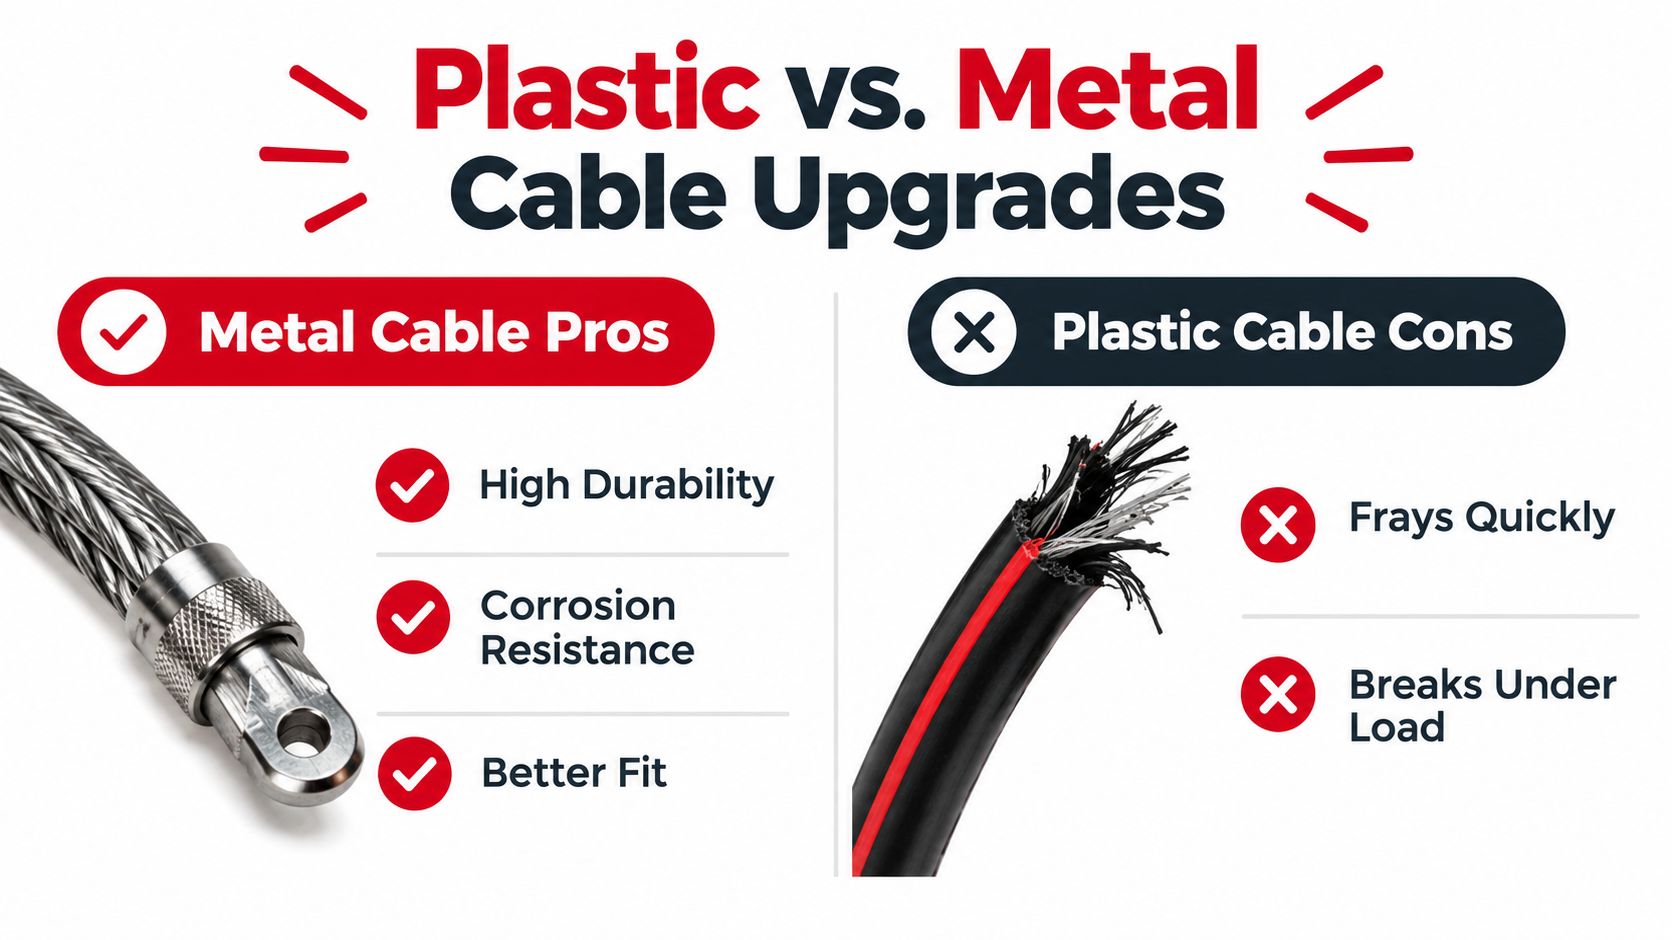
Plastic-ended components can work when they're correctly fitted and lightly used, but they leave less margin when the tailgate is loaded, dropped, or exposed to dirt and moisture. A metal replacement gives the cable end a more substantial interface with the stud and bracket. It won't repair a bent hinge or rotten mounting area, but it can remove a failure-prone material from the connection.
Look for:
- Correct fitment: Match the model year, bed style, cable length, and end configuration.
- Solid end construction: Avoid a cable whose end fitting feels loose, thin, or poorly crimped.
- Corrosion protection: Choose hardware suited to the truck's environment, then protect exposed fasteners during installation.
- Complete-side coverage: If both cables have similar age and corrosion, replacing the pair avoids leaving the older side as the next weak point.
- Warranty terms: A lifetime warranty on a metal component is useful only when the part is correctly installed and the surrounding structure is sound.
The cataloged Ranger cable history supports checking the full fitment range rather than ordering by a generic “Ranger cable” description. A part listed for older Ford Trucks may still require configuration verification before purchase.
Refresh what the cable depends on
Remove rust from the bracket and inspect the stud for a worn groove. Replace a fastener with damaged threads or a rounded Torx head instead of forcing it back into service. If the hinge has play, the latch sits unevenly, or the cable has been rubbing the bed, address that fault before final tightening.
A hinge and latch kit can make sense when the surrounding hardware has visible wear, but don't replace sound parts merely because the cable broke. This Ford Ranger hinge and latch set guide is useful for comparing the adjacent hardware that may need renewal.
T1A Auto offers Ford Ranger tailgate support cable sets and related tailgate hardware, with a vehicle compatibility checker for confirming fitment. Its catalog also distinguishes metal components with a lifetime warranty from standard items with a 3-year warranty, so read the exact listing before ordering.
Testing the Assembly and Final Adjustments
Keep the support in place for the first test. Check that the cable ends remain seated, the lower fastener stays flush, and neither cable touches the tire, latch mechanism, bed edge, or painted panel as the tailgate moves.
Open and close the tailgate slowly several times. The latches should engage without excessive force, and the panel should sit evenly when closed. If one corner hangs lower, stop and inspect the cable routing, hinge movement, and latch alignment instead of pulling harder on the handle.
Use this final checklist
- Cable seating: Confirm the upper hole is fully over the stud and the lower tab is locked into position.
- Fastener security: Verify the T45 fastener is tight and its head isn't beginning to strip.
- Movement: Lower the tailgate under control and watch for binding, scraping, or sudden slack.
- Alignment: Check the gaps and make sure the latches engage together.
- Adjacent hardware: Look again at hinges, studs, brackets, and wiring after movement has loaded the assembly.
- Load readiness: Don't put cargo on the tailgate until it opens, supports, and closes smoothly without unusual movement.
Final check: A cable replacement is complete only when the tailgate operates squarely and predictably, not when the last bolt feels tight.
If the tailgate still requires force, sits crooked, or rubs the bed, remove the support and reassess the hardware. Those symptoms point to an alignment or structural issue that a replacement cable can't correct by itself.
For a durable Ford Ranger tailgate cable replacement, browse T1A Auto for vehicle-matched cables, hinges, latches, and related hardware. Confirm fitment with the vehicle checker, then choose the replacement parts that address both the failed cable and the adjacent wear you found during inspection.
