


At its core, installing a Tire Pressure Monitoring System (TPMS) sensor means popping the tire off the wheel, swapping out the old sensor on the valve stem, and then getting the new one to talk to your vehicle's computer. The physical part is pretty straightforward for anyone who's comfortable with a tire machine. The real art, though, is making sure that new sensor syncs up perfectly with your car or truck.
Why Installing a TPMS Is a Smart Move for Your Vehicle

Before you even think about loosening lug nuts, it helps to appreciate why this little piece of tech is so critical. A TPMS isn't just another light on your dash; it's a fundamental safety feature that actively protects you, your wallet, and your vehicle. When you understand what it’s doing for you, the installation feels less like a repair and more like a smart, proactive upgrade.
This system is your first line of defense against the dangers of underinflated tires. It’s feeding you real-time data, giving you an immediate heads-up the moment a tire’s pressure drops to an unsafe level. That early warning can be the difference between pulling over to add some air and a catastrophic blowout on the highway.
The Two Faces of TPMS: Direct vs. Indirect
When you get into a TPMS installation, you're almost always going to be dealing with one of two system types. Each one monitors tire pressure differently, and it’s good to know which setup your vehicle has.
- Direct TPMS (dTPMS): This is the most common and accurate type you'll encounter. It uses a small, battery-powered sensor mounted right inside each wheel. This little unit measures the exact air pressure and even the temperature inside the tire, then beams that data wirelessly to your car's main computer.
- Indirect TPMS (iTPMS): This system is a bit different because it doesn't use pressure sensors at all. Instead, it piggybacks on your car’s Anti-lock Braking System (ABS) wheel speed sensors to estimate tire pressure. The logic is that an underinflated tire has a slightly smaller diameter and rotates faster than a properly inflated one, and the iTPMS flags that speed difference.
While indirect systems are lower maintenance (no sensor batteries to die), they are far less accurate and can be fooled. For example, they often can't detect a slow leak that affects all four tires at the same rate. Direct TPMS, on the other hand, gives you precise, individual readings for each tire. Most DIY or shop installations, especially for popular trucks like a Ford F-150 or Toyota Tundra, will involve direct TPMS sensors.
More Than Just a Warning Light
A healthy TPMS does so much more than just prevent accidents. Keeping your tires properly inflated is one of the easiest ways to improve your vehicle's overall health and efficiency.
A properly functioning TPMS is one of the most effective, yet overlooked, tools for maximizing both safety and vehicle performance. It actively works to save you money on fuel and tire replacements while providing invaluable peace of mind on the road.
Think about it: driving on underinflated tires dramatically increases rolling resistance. Your engine has to work harder and burn more fuel just to maintain speed. A working TPMS helps you keep the pressure right where it should be, which can boost your fuel efficiency by 3-5%. It also prevents the kind of uneven tread wear that kills tires prematurely, potentially extending their life by up to 25%.
There's a reason this technology became a federal mandate. Back in 2007, the National Highway Traffic Safety Administration (NHTSA) required TPMS in all new passenger vehicles after data showed under-inflated tires were a major factor in a huge number of accidents. Today, direct TPMS holds a 62% market share globally because it's simply more accurate, often reading pressure within 1 PSI.
You can dive deeper into the world of automotive sensors to see how these different components work together at https://www.t1aauto.com/blogs/t1-auto-blogs/types-of-automotive-sensors. For a complete picture of your car's condition, you might also look into various vehicle health monitoring systems that bundle this data with other diagnostics.
Gathering Your Tools and Choosing the Right TPMS Sensors
Trying to tackle a TPMS sensor job without the right gear is a recipe for a headache. I’ve seen it happen plenty of times—a simple sensor swap turns into a scratched rim, a broken sensor, or a frustrating afternoon spent hunting for a tool you didn't know you needed. Before you even think about lifting the truck, let's get your workstation set up properly.
A little prep work here saves a ton of grief later. Having everything you need within arm's reach turns a potentially messy job into a smooth, professional-quality repair.
Your Essential Toolkit for TPMS Installation
This isn't just about grabbing your socket set. Installing a TPMS sensor correctly requires a specific lineup of tools. Think of it like a surgeon laying out their instruments—every piece has a critical role to play in getting the job done right without causing any damage.
Here's a practical checklist of what you'll need to have on hand.
| Tool Category | Specific Tool | Its Role in Your TPMS Project |
|---|---|---|
| Lifting & Safety | Jack & Jack Stands | This is non-negotiable. You need to get the wheel off the ground, and jack stands are essential for doing it safely. Never get under a vehicle supported only by a jack. |
| Wheel Removal | Lug Wrench or Impact Wrench | Your go-to for breaking the lug nuts loose and getting the wheel off the hub. An impact wrench makes quick work of this. |
| Tire Work | Tire Changer Machine | The big one. You need a proper tire machine to break the bead and safely separate the tire from the rim without tearing the tire or scratching the wheel. |
| Sensor Handling | Torque Wrench (inch-pounds) | Absolutely critical. This is for tightening the sensor's retaining nut to the exact manufacturer spec. It's the only way to prevent leaks or a cracked sensor. |
| Sensor Handling | Valve Core Tool | A simple but vital little tool. You'll use it to remove the valve core and deflate the tire before you start. |
| Programming | TPMS Programming/Scan Tool | You'll often need this to "wake up" a new sensor, program it for your specific vehicle, and complete the final relearn procedure so the truck recognizes it. |
Now, I know what you're thinking: "I don't have a tire changer in my garage." You're not alone. A great workaround is to find a local auto shop or a DIY garage that rents out bay time. This gives you access to the professional-grade equipment you need without the massive upfront cost.
The single most common mistake I see in DIY TPMS jobs is over-tightening the sensor nut. A torque wrench isn't a suggestion—it's your insurance policy against a cracked sensor housing or a slow, frustrating leak at the valve stem.
Choosing the Right TPMS Sensors
With your tools lined up, the next big decision is picking the right sensors for your truck. This choice directly affects not just the installation, but how well the system works for years to come. You'll generally run into two main types of direct TPMS sensors.
-
Clamp-In Sensors: These have a sturdy metal valve stem, usually aluminum, that’s secured to the wheel with a small retaining nut. They’re known for being incredibly durable, making them the perfect fit for trucks and vehicles that see more demanding conditions.
-
Snap-In Sensors: These use a rubber valve stem that gets pulled through the valve hole in the rim, similar to a traditional tire valve. They are faster to install, but from my experience, they don't hold up as well to road salt, ozone, and the general abuse a truck tire faces.
For a workhorse like a Ford F-Series or Chevy Silverado, a clamp-in sensor with a metal body is almost always the better choice. That extra rigidity and strength give you real peace of mind, especially when you're running heavy-duty tires at higher pressures.
When you're shopping, you’ll see options for OEM vs Aftermarket Parts. It’s worth understanding the difference to make a smart call on quality and price. At T1A Auto, we specialize in high-quality aftermarket parts that meet or exceed the original specs. To dig deeper, our guide on choosing between OEM and aftermarket solutions has all the details you need.
Your Guide to TPMS Sensor Installation
Alright, let's get our hands dirty. We're at the heart of the matter now—getting that old, faulty TPMS sensor out and putting a fresh one in its place. This is where patience and a steady hand really count. If you rush this part, you're asking for a scratched-up wheel, a damaged tire, or a brand-new sensor that's broken before it even gets a chance to do its job. We’ll walk through this the right way, focusing on precision over speed.
The whole idea is to methodically separate the tire from the wheel just enough to get to the sensor. Think of it less like a wrestling match with a tire iron and more like a careful bit of surgery.
This quick overview lays out the game plan for a successful installation, breaking down the prep work into three simple phases.
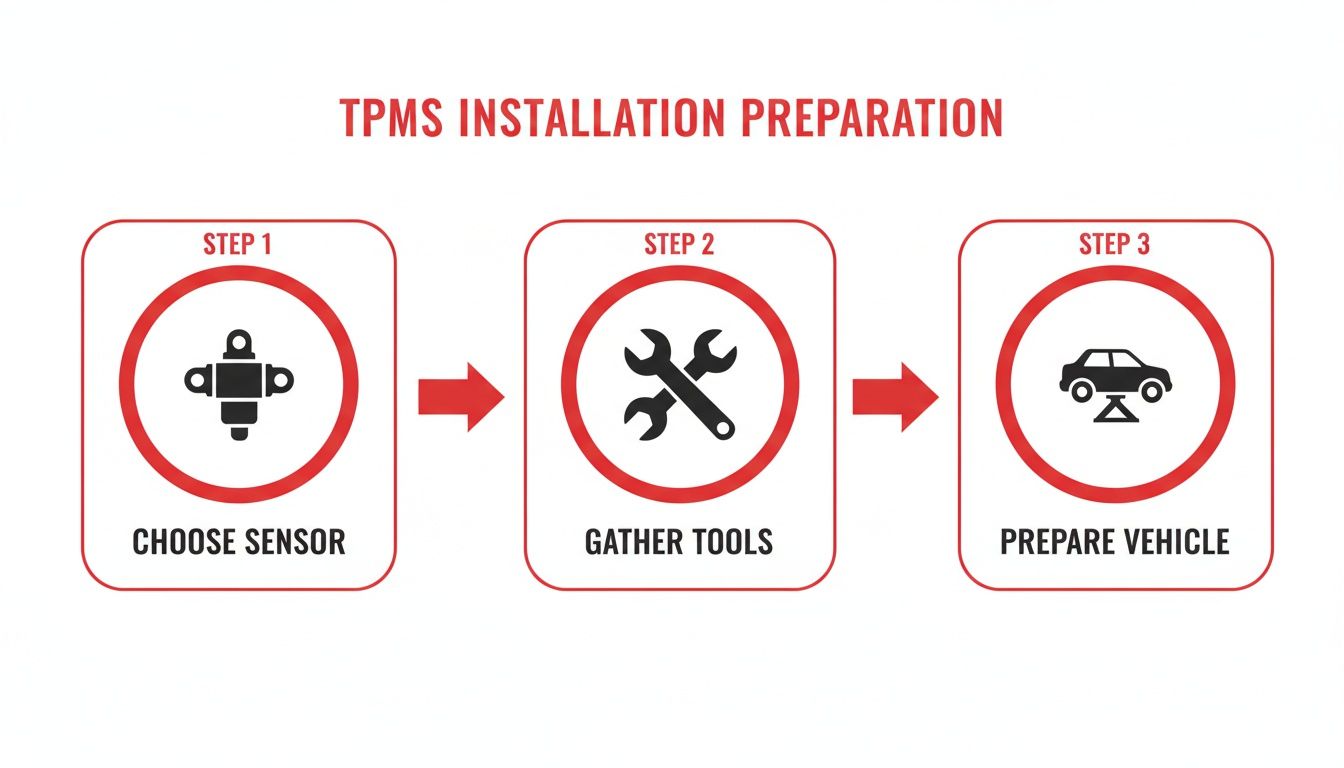
As you can see, a good outcome starts long before you even touch a lug nut. It begins with picking the right sensor and getting your tools in order, then moving on to prepping the vehicle itself.
Safely Preparing Your Vehicle and Wheel
First thing's first: safety. Always. Park your car or truck on a solid, level surface. A concrete garage floor is perfect, but a flat patch of asphalt will do. Slap that parking brake on good and tight.
Here’s a pro tip: while the vehicle is still on the ground, crack the lug nuts loose just a bit. It’s way easier to get the leverage you need now than when the wheel is spinning freely in the air.
Now, slide your floor jack under one of the vehicle’s factory lift points—check your owner's manual if you're not sure where they are. Lift it up until the tire is clear of the ground, and immediately slide a jack stand into place under the frame.
Never, ever work on a vehicle that's only supported by a jack. Jacks can slip, hydraulics can fail. That jack stand is your non-negotiable safety net. It’s what keeps thousands of pounds of steel from ruining your day.
With the vehicle safely secured, you can go ahead and spin off the lug nuts and pull the wheel off. I always set the wheel down on a piece of cardboard or a mat to keep the face of the rim from getting scratched.
Breaking the Bead and Accessing the Old Sensor
This is the one step where having a professional tire machine is almost a necessity. Trying to break the bead—that tight seal between the tire and the rim—with a couple of pry bars is a recipe for a gouged wheel and a ruined tire sidewall. Don’t do it.
Before you start, grab a valve core tool and pull the core out of the valve stem to let all the air hiss out. Once it’s totally flat, get the wheel onto your tire changer. The machine uses a powerful arm to press down on the sidewall, popping the bead loose from the rim. You'll need to do this on both sides of the wheel.
With the bead broken, you can usually just push the top sidewall down far enough to get your hands and tools inside to reach the sensor. In many cases, you don't even have to take the tire completely off the wheel, which saves a good bit of time and muscle.
Removing the Old and Fitting the New Sensor
Once you've got a clear line of sight, look inside the wheel right at the base of the valve stem. You'll see the old TPMS sensor, held on by a small nut on the outside of the rim. A deep socket is what you need here. Carefully unscrew that nut. Once it’s off, you can wiggle the old sensor free and pull it out from the inside.
Before you go any further, take a second to clean the area around the valve stem hole on the rim. Any gunk, dirt, or corrosion left behind can mess up the seal on the new sensor's rubber grommet, which means you’ll be chasing a slow, annoying leak later.
Now, grab your new sensor. If you're using an adjustable-angle one, make sure you set it to match the angle of the old one you just pulled out. Gently feed the new sensor's valve stem through the hole from the inside of the wheel.
Pay close attention—this next part is the most critical step of the entire installation.
Thread the new retaining nut onto the valve stem by hand to get it started. Then, pick up your torque wrench, which should be preset to the manufacturer's spec. For most of these clamp-in sensors, the torque value is surprisingly low, usually somewhere between 4 and 8 Newton-meters (Nm). That’s only about 35 to 70 inch-pounds.
This is absolutely not a "get it good and tight" situation. Over-tightening will crack the sensor's plastic housing or strip its tiny threads. Under-tightening will let air seep out. The torque wrench is the only way to be certain you've hit that perfect, narrow window.
Remounting the Tire and Final Checks
With the new sensor torqued down correctly, it's time to reassemble. Slather some tire lubricant on the tire bead and the lip of the rim. This helps everything slide together smoothly without tearing the rubber. Use the tire machine to carefully work the bead back over the edge of the rim.
Once the tire is back on, reinstall the valve core. Start filling the tire with air. You should hear a couple of loud "pops" as the bead snaps into place against the rim—that's a good sound. It means you have a solid seal.
Inflate the tire to the pressure listed on the sticker inside your driver's side door jamb. Ignore the pressure rating on the tire's sidewall; that’s the maximum pressure the tire can handle, not what you should be running daily.
Finally, mount the wheel back on the vehicle. Snug up the lug nuts in a star pattern to make sure the wheel seats flush against the hub, then torque them to your vehicle's specific value. The physical work is officially done. Now you’re ready for the last, and equally important, phase: programming the new sensor to talk to your car.
Programming and Relearning Your New TPMS Sensors
Getting the new TPMS sensor bolted into the wheel feels like a big win, but don't drop the tools just yet. The last, and most critical, step is making sure your car's computer actually knows the new sensor is there and can listen to it. This is where programming and relearning come in, and trust me, they are not the same thing.
Think of it this way: programming is like assigning a new player a jersey with a unique number. Relearning is updating the team roster so the coach—your vehicle's ECU—knows who's on the field and what position they're playing. If you skip this, that annoying TPMS light will stay on, and the whole system is useless.
Programming vs. Relearning: What's the Difference?
It's really easy to get these two terms tangled up, but knowing which is which will save you a massive headache.
-
Programming: This step is only for universal TPMS sensors. These are sold as blank slates, and you have to use a special TPMS tool to give them an identity. You either clone the ID from the old sensor or create a brand new one, then load the right protocol for your car. Direct-fit sensors, like many we offer at T1A Auto, come pre-programmed, letting you skip this part entirely.
-
Relearning: This is the one step you can't skip. It’s mandatory for every TPMS sensor replacement, whether it’s a pre-programmed unit or a universal one you just programmed yourself. The relearn process is how you formally introduce the new sensor to your car's main computer (the ECU), telling it the sensor's unique ID and which corner of the car it's on.
Finding Your Vehicle's Relearn Procedure
Here's where it gets interesting. There’s no single, one-size-fits-all method. The aftermarket TPMS world is booming—it's expected to jump from USD 3.11 billion in 2025 to USD 5.12 billion by 2030. With so many older cars on the road needing new sensors, you're going to run into a wide variety of relearn procedures. Learn more about the market trends driving this growth and see how aftermarket parts are keeping up.
Your vehicle's owner's manual is always the best place to start, but most cars use one of three main methods.
The Auto Relearn Method
This is the holy grail of relearn procedures—hands-down the easiest. You’ll find this on a lot of Chrysler, Dodge, and Jeep vehicles, plus many European models.
After the sensor is installed and the tire is inflated, all you have to do is drive. A simple 10-20 minute drive at a steady speed, usually over 15-20 MPH, is enough. The car’s computer automatically picks up the new sensor's signal, learns its ID, and assigns it to the correct location. No buttons, no tools, no fuss.
The Manual Relearn Method
This one requires a little input from you, but you won't need any special equipment. It's common on vehicles from Ford, Toyota, and Nissan. You'll need to trigger a "relearn mode" by performing a specific sequence of actions.
For a Toyota Tundra, for example, it might look something like this:
- Make sure every tire is inflated to the pressure listed on your door jamb sticker.
- Turn the ignition to "ON" but don't start the engine.
- Find the TPMS reset button (check under the dash or in the glove box) and hold it down until the TPMS light on the dash blinks three times.
- Take the vehicle for a short drive to finalize the process.
The exact steps vary from model to model, so double-check that manual.
The OBD-II Relearn Method
This is the most involved method and is standard for most GM, Honda, and some Subaru models. You'll absolutely need a TPMS activation tool and sometimes an OBD-II scanner to get this done.
The OBD-II relearn is a direct conversation with your vehicle's brain. You're not just waiting for it to find the sensor; you're actively telling the computer, "Here is the new sensor for the left front wheel," making it a precise and reliable method.
A typical relearn on a Chevy Silverado goes like this:
- Use the driver information center (DIC) controls to put the truck into relearn mode. You'll usually hear a horn chirp to confirm it's ready.
- Start at the front left tire. Point your TPMS tool at the sidewall near the valve stem and press the button to activate the sensor.
- The horn will chirp again, confirming it has learned that sensor's ID.
- Move to the front right, then the rear right, and finally the rear left, repeating the process at each wheel in the correct order.
Getting this final step right is what separates a finished job from a frustrating comeback. Once the relearn is complete, that dashboard light will finally go out, and your car's most important safety system will be back online.
Troubleshooting Common TPMS Installation Problems

You’ve torqued the lug nuts, the tire is aired up, but that pesky TPMS light is still glaring at you from the dashboard. It’s a frustrating moment, but don't worry—it’s a common scenario. Even when the physical installation goes perfectly, a few gremlins can pop up during the final electronic handshake.
Think of this as your post-installation quality check. Most of the time, issues that crop up after installing a new TPMS sensor are about communication between the sensor and the car's computer, not a bad part. Let’s walk through the usual suspects and get that light turned off for good.
The Warning Light Refuses to Turn Off
This is, without a doubt, the most frequent headache. You're sure you did everything right, but the light stays on. Before you start questioning your work, run through this mental checklist.
- Did the Relearn Actually Finish? Some "auto-relearn" systems are anything but instant. They can require up to 20 minutes of continuous driving above a certain speed to finally recognize the new sensor. A quick trip around the block often isn't enough.
- Was it the Right Procedure? You can't use a Ford's relearn method on a Chevy. Every manufacturer has its own unique dance—a specific sequence of button presses, tool activations, or driving patterns. Always double-check the owner's manual or a reliable service guide.
- Did Another Sensor Give Up? It’s entirely possible that while you were replacing one bad sensor, another one on a different wheel decided it was its time to go. A TPMS scan tool is your best friend here; it can quickly ping all four sensors and confirm they’re all broadcasting. This simple check can save you hours of guesswork.
The number one reason a TPMS light stays on after installing a new sensor is a failed or skipped relearn procedure. The car doesn't automatically know a new sensor is there; you have to formally introduce it.
A Sensor Fails to Communicate with Your Tool
You’re in the middle of an OBD-II relearn, pointing your activation tool at the wheel, and... nothing. One of the new sensors just won't talk back, stopping the whole process cold.
First, look at the tool itself. Is the battery low? Have you selected the correct make, model, and year for the vehicle? Using the wrong profile can make the tool send out a signal the sensor can't understand.
Next, consider the sensor's own battery. While rare for a new part, a sensor can sit on a shelf long enough for its battery to die. A quality TPMS tool can often read the sensor's battery voltage, telling you if it has enough juice to broadcast. If it's dead on arrival, the sensor is a dud and needs to be replaced.
Sometimes, diagnosing these issues can feel like a puzzle. If you suspect a deeper issue beyond the TPMS, our guide on how to diagnose car electrical problems can provide broader insights.
A Slow Leak from the New Valve Stem
This is a classic. You come out the next morning to a soft tire. This almost always points to an improper seal at the valve stem, and the culprit is usually improper torque.
A torque wrench is non-negotiable for this job. Most clamp-in sensors require a surprisingly light torque, often around 4-8 Nm (35-70 inch-pounds). If you just tightened it by feel, it’s incredibly easy to be too loose (causing a leak) or too tight, which can crack the sensor's plastic housing or crush the little rubber grommet that creates the seal.
Got Questions About TPMS Installation? We've Got Answers.
Even the best guides can leave you with a few lingering questions. It happens. Think of this as your personal FAQ, built from the kind of questions we hear all the time from people doing this job in their own garages. We'll tackle the common head-scratchers to make sure you can button up the project with confidence.
Let's clear up the details that can sometimes trip people up, so you can get it done right the first time.
Do I Really Need to Replace All the TPMS Sensors at Once?
You could just replace the one bad sensor, but I'll tell you from experience, it’s usually not the best move. TPMS sensors run on little internal batteries that typically last about 5-7 years.
If one has died, the others are probably on their last legs. Swapping them all out at once is smart preventative maintenance. It saves you from the headache of dismounting the tires and paying for labor all over again in just a few months. A little extra effort now saves a lot of time and money down the road.
Can I Use a Universal TPMS Sensor on My Car?
You bet. Universal sensors are a great, budget-friendly choice because they’re designed to be programmed for a huge variety of vehicles. They’re basically blank slates that can learn to speak the language of hundreds of different cars and trucks, all from a single part number.
The crucial thing to remember with universal sensors is that you absolutely need a compatible TPMS programming tool. This gadget is what writes the correct vehicle-specific protocol onto the sensor before you can even start the relearn procedure.
Just make sure you check the sensor's compatibility list against your vehicle's make and model before you pull the trigger on a purchase.
What Happens If I Skip the TPMS Relearn Procedure?
Honestly, skipping the relearn makes the whole installation pointless. It’s like putting a new battery in your TV remote but never pairing it with the TV. Your vehicle's computer has no idea the new sensor exists and won't be able to read its unique ID.
This leads to a couple of certain outcomes:
- That pesky TPMS warning light on your dashboard isn't going anywhere.
- Your vehicle won't be able to monitor tire pressure, which defeats the whole purpose of having the system.
The relearn is the final handshake that officially introduces the new sensors to your car. It's the step that makes the system work, brings back that critical safety feature, and finally gets that warning light to turn off.
For a guaranteed fit and lasting performance on your next project, explore the premium aftermarket TPMS sensors from T1A Auto. Find the exact parts for your vehicle and drive with confidence by visiting us at https://t1aauto.com.
