


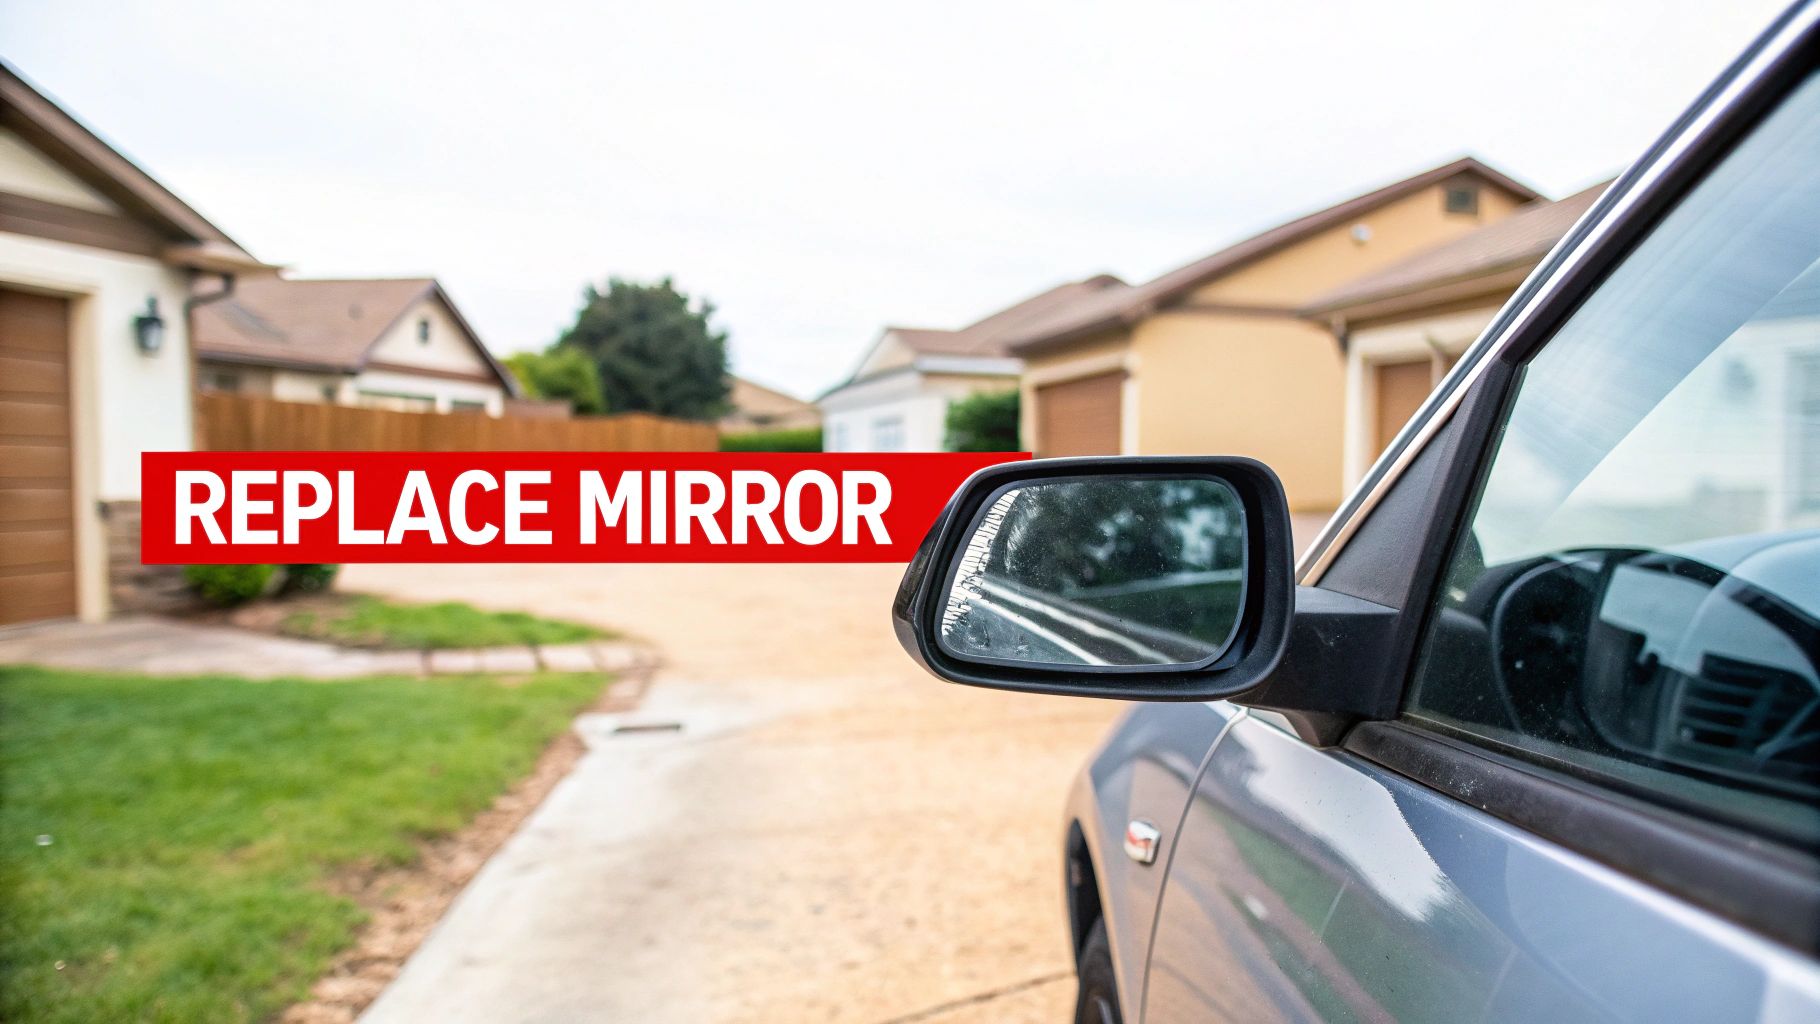
It's not always shattered glass that tells you it’s time for a new side mirror. Sometimes, the problem is more subtle—an electrical glitch, a loose housing from a parking lot bump, or a feature that just quit working. The good news is that replacing it yourself is totally doable.
Why You Might Need to Replace Your Side Mirror
We tend to think a side mirror is fine unless it’s cracked, but today’s mirrors are packed with technology. When any part of that system fails, it affects more than just your convenience—it impacts your safety.
Putting off a replacement isn't just an annoyance; it's a genuine hazard. Learning to tackle this job yourself can save you a ton of cash compared to what a dealership would charge, turning a potential headache into a pretty satisfying weekend project.
Common Reasons for Replacement
The most obvious culprit is physical damage. A run-in with a garage door, a stray shopping cart, or another vehicle can leave you with a cracked housing, a dangling mirror, or shattered glass. Those are the easy ones to spot.
But the damage isn't always on the surface. Modern mirrors have a lot going on inside, and when those features fail, a full replacement is usually the simplest fix.
Keep an eye out for these common electrical failures:
- Failed Power Adjustment: The little motor that lets you aim the mirror from your seat gives up the ghost.
- Malfunctioning Heating Element: The defroster quits, leaving you with a fogged-up or icy mirror when you need it most.
- Broken Turn Signal Indicator: The built-in signal light in the mirror stops flashing, making it harder for other drivers to see your intentions.
A fully functional side mirror is a critical safety feature, not a luxury. Issues with heating, power adjustment, or signal lights directly compromise your awareness on the road and should be addressed promptly.
It’s a surprisingly common problem for drivers. In fact, the global market for replacement mirrors was valued at around $3.7 billion and is expected to grow to $6.2 billion by 2033. That growth is fueled by stricter safety regulations and just more cars being on the road. You can dive deeper into the numbers by checking out the full market analysis on marketintelo.com.
Gathering Your Tools and the Right Part
Jumping into any car repair without the right gear is a recipe for a headache. Before you even touch your old side mirror, let's get organized. Laying out your tools first makes the whole job go smoother and helps you avoid those "oops" moments that can damage your car.
Think of it this way: preparation is half the battle. You wouldn't start painting a room without tape and a drop cloth, right? Same principle applies here.
Essential Toolkit for Side Mirror Replacement
To get this done right, you'll need a few specific items. While a basic socket set and screwdriver are a good start, the real hero of this job is a plastic trim removal tool. Trust me on this one.
| Tool | Primary Use | Pro Tip |
|---|---|---|
| Socket Set | Removing the nuts or bolts that secure the mirror to the door frame. | Keep a small magnetic tray handy to hold the nuts so they don't get lost inside the door panel. |
| Phillips Screwdriver | Removing any screws holding the interior door panel or sail panel in place. | Use a screwdriver that fits the screw head perfectly to avoid stripping it. |
| Plastic Trim Removal Set | Safely prying off interior panels without scratching paint or breaking clips. | Start at a corner and gently work your way around. Never force a clip—if it resists, check for a hidden screw. |
| Needle-Nose Pliers | Disconnecting stubborn electrical connectors. | Squeeze the release tab gently; yanking on the wires can damage the connector. |
Using a flathead screwdriver wrapped in tape instead of a proper trim tool is a classic DIY mistake. It almost always leads to scratched paint or cracked plastic, turning a simple fix into a more expensive problem. A dedicated set is cheap and a lifesaver for any interior work.
Finding the Perfect Match
Now for the most critical part: ordering the correct replacement mirror. It’s not as simple as just matching the color. Modern cars pack a ton of technology into these things, and if the new one doesn't have the exact same features, it just won't work.
Before you click "buy," double-check what your current mirror does.
- Power Adjustment: Can you move the glass with a switch or joystick?
- Heating Element: Does it have a little defrost symbol for clearing ice and fog?
- Turn Signal Indicator: Is there a built-in blinker in the mirror housing or glass?
- Puddle Light: Does a small light shine on the ground when you unlock the doors?
The absolute best way to ensure you get the right part is to use your car’s Vehicle Identification Number (VIN) when you order. This unique code tells the seller everything they need to know, guaranteeing the replacement has the right features and, most importantly, the correct electrical plug.
To skip the guesswork entirely, you can find a huge selection of guaranteed-fit side mirrors from T1A Auto by simply entering your vehicle's details. It’s the easiest way to make sure you get this job done right the first time.
Getting the Old Side Mirror Off
Alright, time to get your hands dirty. Taking off the old side mirror isn't rocket science, but a few key details can make the difference between a quick swap and a headache-inducing afternoon. Let's walk through it, paying close attention to the spots where people usually get stuck.
A little prep work here saves a ton of trouble later. Before you even think about touching a tool, roll your window all the way up. I always add a few strips of painter's tape from the glass to the door frame just to be safe. This simple step ensures the window doesn't decide to slide down on you once the door panel is off.
The infographic below gives you a quick visual on the whole process, from finding the right part to getting your tools ready for the job.
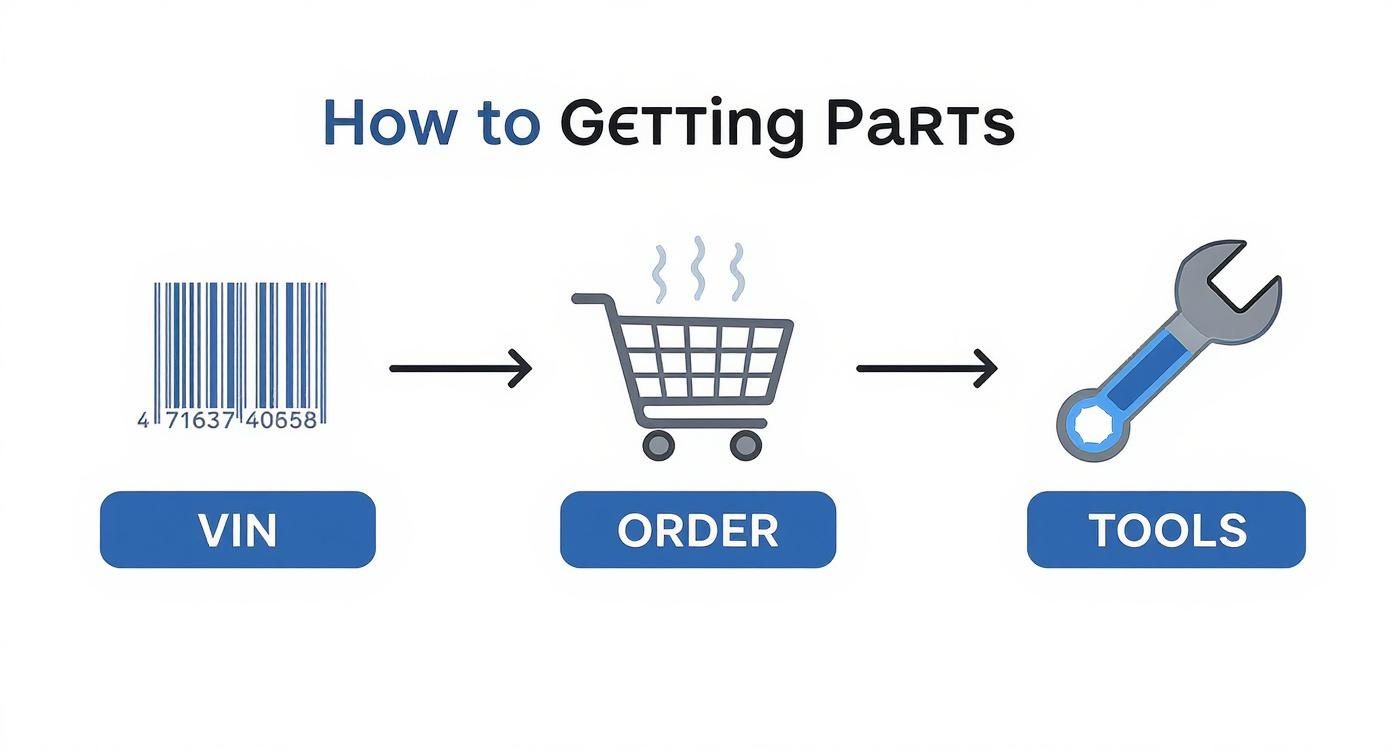
As you can see, a successful repair starts way before you touch the damaged mirror. It all begins with getting the correct replacement part in your hands.
Gaining Access to the Mirror Mounts
First things first, you need to get to the mounting hardware. It’s almost always tucked away behind an interior trim piece. On many cars and trucks, this is a small, triangular plastic piece right in the corner of the window, often called a sail panel. On other models, you'll have to take off the entire interior door panel to get access.
If you’re staring down a full door panel removal, don't sweat it. It usually just involves finding a few hidden screws—check inside the armrest or behind the door handle—and then carefully popping the panel's clips loose. For a complete guide, check out our tutorial on how to remove a car door panel which breaks the whole process down.
Disconnecting the Wiring Harness
With the mounting bolts in sight, you’ll see the wiring harness that powers everything from your mirror adjustments to the turn signal. This part requires a bit of finesse. The plastic connector has a small release tab that you need to press to unplug it.
Pro Tip: Whatever you do, don't just yank on the wires. I've seen that go wrong too many times. Use a small flathead screwdriver or even needle-nose pliers to gently press the release tab. You’ll feel a little click, and the plug should slide right out.
Just about every modern car has power mirrors. The electric side view mirror market was valued at an incredible $8.7 billion in 2022 and is still growing, so you're almost guaranteed to be dealing with these connectors. Damaging one can turn a simple replacement into a real electrical gremlin hunt.
Once the harness is unplugged, hold the mirror firmly with one hand and use your socket wrench to remove the mounting nuts. After the last nut is off, the old mirror assembly will come free from the door. Now you're all set to install the new one.
Getting Your New Mirror in Place
Alright, the old mirror is out of the way, and now for the fun part. Let's get that new T1A Auto replacement mirror mounted up and looking sharp. Getting this right is key to making sure it works perfectly and stays put for the long haul.
First things first, carefully feed the new mirror's wiring harness back through the opening in the door. You don't want to snag or pinch any of those wires. Once the wiring is through, line up the mounting studs with the holes in the door and gently press the mirror base so it sits flush against the frame.
Securing the Mirror and Connecting the Wires
With the mirror sitting in position, it's time to lock it down. Start by hand-tightening the mounting nuts. This is a small but critical detail—it helps you avoid cross-threading the bolts, which can permanently damage the new mirror and make it impossible to secure properly.
Once all the nuts are on and hand-tight, grab your socket wrench and snug them down. You want them firm, but don't go crazy. Over-tightening can easily crack the plastic housing of the mirror assembly, and then you're back to square one. A good, snug fit is all you need.
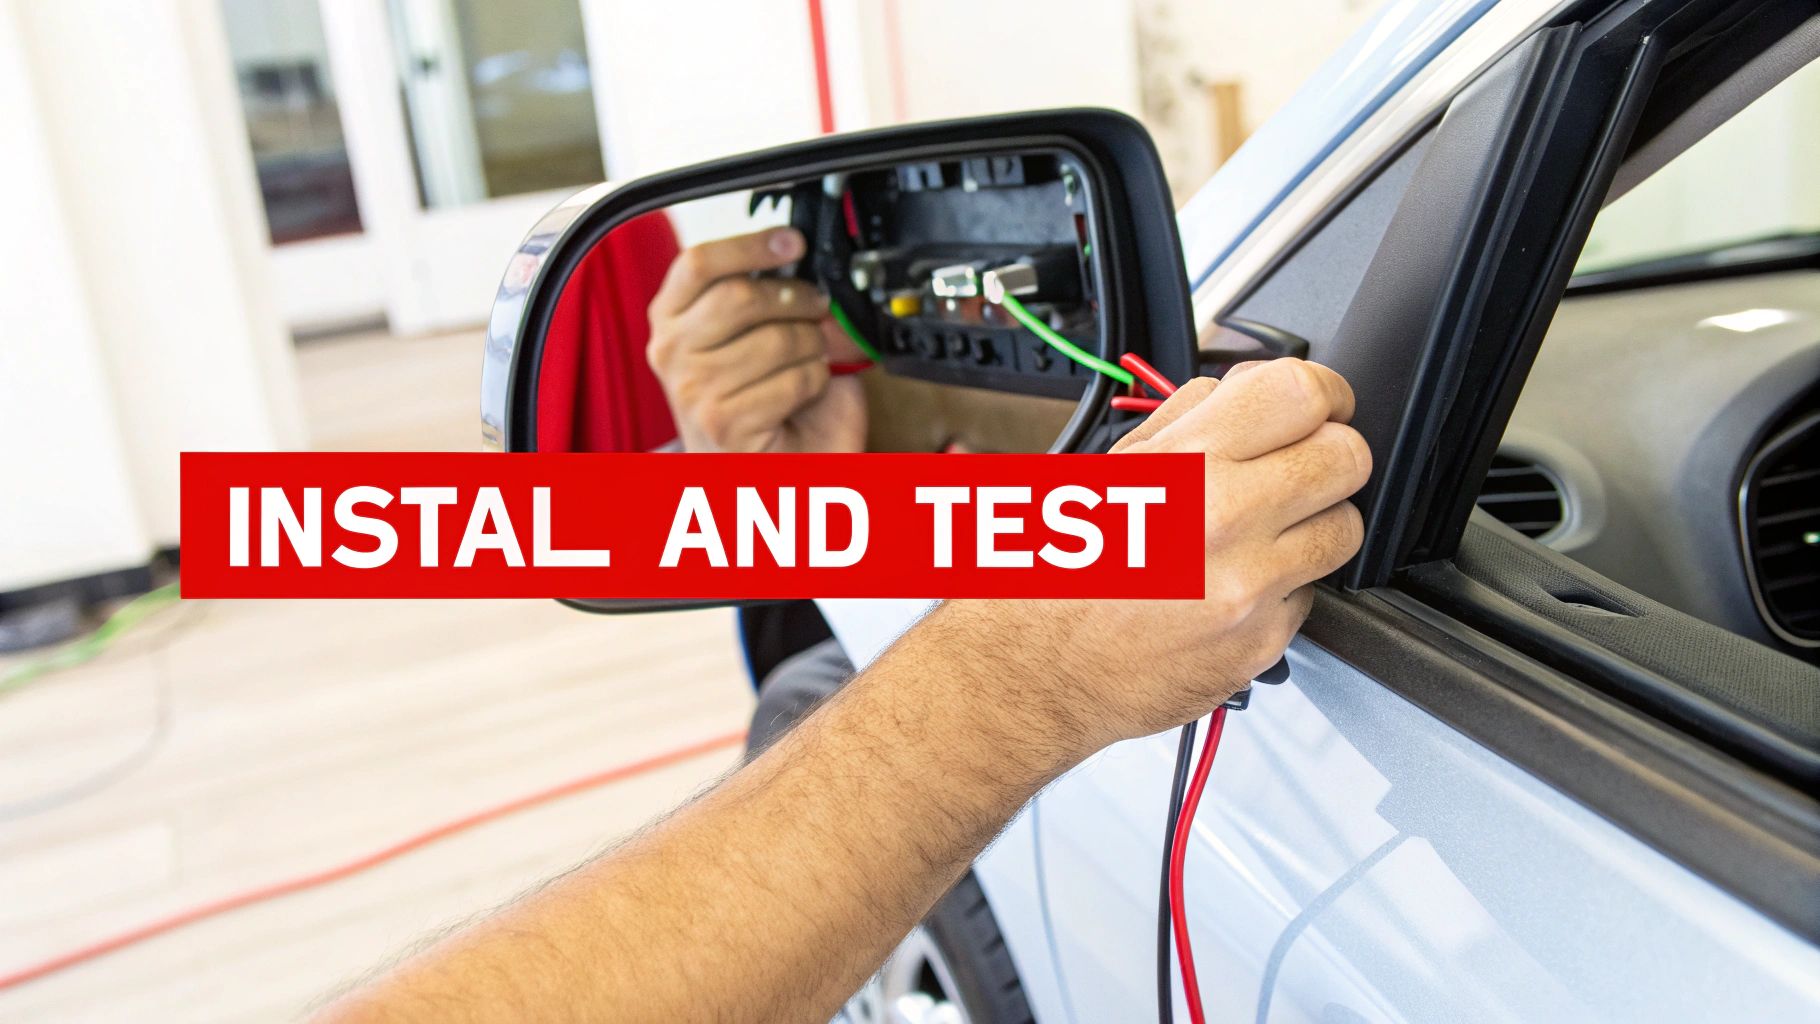
Now, let's get it powered up. The wiring connection is everything.
- Line up the connector: Make sure you have the plug oriented the right way before trying to connect it.
- Push until it clicks: You should hear and feel a solid "click" when the locking tab engages. That's your signal it's secure.
- Give it a gentle tug: A very light pull on the connector will confirm it’s locked in and won’t vibrate loose down the road.
If you don't get that satisfying click, the connection isn't complete, and your power functions won't work. It’s a simple check that makes all the difference.
The Five-Minute Test That Can Save You an Hour
Before you even think about putting that door panel back on, stop. This next step is non-negotiable and will save you a world of frustration. Reconnect your car’s battery (if you disconnected it) and turn the key to the "accessory" position to power everything up.
Pro Tip: Test every single function of the new mirror before reassembling the door. Check the power adjustments—up, down, left, right. Test the defroster if it has one. Check the built-in turn signal. Test it all.
This quick five-minute function check is the best time-saver in the book. Finding out a wire isn't fully connected after you’ve perfectly reinstalled the door panel is a massive headache. A moment of verification now prevents you from having to tear it all apart again.
Once you’ve confirmed everything works as it should, you can reinstall the interior door panel, reconnect any final clips or screws, and step back to admire a job well done.
Navigating Common Installation Problems
Even a job that seems simple on paper can throw you a curveball. I've been there. You get everything bolted on, plug it in, and... nothing. Let's walk through some of the most common hiccups you might encounter when replacing a side mirror, so you can get back on the road without pulling your hair out.
The classic culprit when the power functions don't work is a blown fuse. Before you start questioning the new mirror, pop open your vehicle's fuse box. It’s often a quick and simple fix that can save you a ton of frustration.
Another headache is a stripped mounting bolt. It happens, especially with older vehicles. If a bolt just spins in its hole, don't force it. The best approach is to carefully use a thread repair kit or find a slightly larger self-tapping screw to create a fresh, solid grip. The key is patience to avoid damaging the door frame itself.
Mismatched Connectors and Other Gremlins
So, you go to plug in your brand-new T1A mirror, and the connector doesn't match the one on your car. This is almost always a sign that the wrong part was ordered for your specific vehicle trim. It’s a perfect reminder of why we always recommend double-checking the part against your VIN before you buy.
Quick tip: Sometimes the mirror housing and motors are perfectly fine, but the glass itself is cracked or damaged. In that case, you might be able to save some time and money by just swapping the glass. We have a whole guide on replacing side view mirror glass if that's the situation you're in.
It's wild to think about how much technology is packed into mirrors these days. We're talking about a market that's already valued at $2.8 billion and is projected to more than double to $5.7 billion by 2030. You can read more about this growing technology on strategicmarketresearch.com.
Got Questions? We've Got Answers.
Even the most straightforward DIY job can throw you a curveball. After helping thousands of people swap out their side mirrors, we've heard just about every question in the book. Let's clear up a few common points that can save you a headache down the road.
Just the Glass, or the Whole Thing?
One of the first questions people ask is whether they can get away with just replacing the broken mirror glass. The answer is maybe. If the plastic housing is intact and the power adjustment motor still works perfectly, then yes, a glass-only replacement can be a quick and cheap fix.
But if the housing is cracked or the motor's been knocked out of commission, you'll need the whole assembly. Trying to piece together a broken unit is usually more trouble than it's worth.
What About Upgrading My Mirrors?
It's tempting to think about adding fancy features while you're at it. Can you install a mirror with a built-in turn signal or a heating element on a car that never had them?
Technically, it's possible, but it's rarely a simple plug-and-play job. You're looking at running new wires, adding fuses or relays, and sometimes even having to get the car's computer reprogrammed. What starts as a simple mechanical task quickly spirals into a complex electrical project.
My advice? Stick with what you've got. For a guaranteed smooth installation, order a replacement mirror with the exact same features as the factory original. This way, the electrical connector will match up perfectly, and you'll know everything will work right out of the box.
Does the New Mirror Need to Be Painted?
Most aftermarket mirrors, including ours, come in a standard, ready-to-install matte black finish. On many vehicles, this looks perfectly fine and blends in well with other black trim pieces.
However, if you're going for that flawless, "just-off-the-lot" look, you'll want to get the mirror cap painted. A professional auto body shop can easily paint it to match your vehicle's factory paint code for a seamless finish.
Ready to get the right part for the job? T1A Auto offers premium, durable side mirrors engineered to be a perfect fit for your specific vehicle. Find your match and get back on the road with confidence by visiting T1A Auto.