


If you're hearing grinding noises when you try to roll your window up, or the crank handle just spins freely in your hand, you've likely got a busted manual window regulator. It’s a common problem, especially on older vehicles, where the internal gears and cables have simply worn out. The good news is that with a little guidance, this is a repair you can absolutely tackle yourself and get your window working like new again.
Diagnosing a Failing Manual Window Regulator

Before you even think about buying parts, you need to be sure about what’s broken. Getting the diagnosis right from the start saves a ton of frustration. A failing regulator leaves a very specific set of clues, and once you know what to look (and listen) for, you can be confident you're fixing the right thing.
The first thing to do is just listen. The sounds from inside the door panel will tell you almost everything you need to know.
Interpreting Noises and Sensations
A nasty grinding or clicking noise as you turn the crank is the classic sign of stripped gears. The teeth inside the regulator are worn down and can't mesh properly anymore, which causes that awful sound and keeps the window from moving smoothly—or at all.
If you hear a loud snap or pop and the window immediately falls into the door, that’s a dead giveaway. The lift cable just broke. It’s a complete failure, and there’s no patching that up. A full manual window regulator replacement is your only move.
Another telltale sign is a crank handle that spins around with zero resistance. Sometimes this just means the handle itself is stripped where it meets the regulator spline. But if you check the handle and it’s tight, the problem is deeper inside with the regulator's main gear. If you're curious about the mechanics, our guide on what a window regulator is breaks down how all these parts work together.
Visual Clues of Failure
Sounds aren't the only clues. A quick visual check can confirm your suspicions. Be on the lookout for these signs:
- Tilted or Crooked Window: If the glass is leaning forward or back as it goes up or down, a guide clip or part of the regulator's lift channel has likely broken. The window isn't being held securely, causing it to bind up in its track.
- Window Drops on Its Own: You crank the window all the way up, and a few minutes later it has slid down an inch or two. This points to a failed internal clutch or spring that’s supposed to hold the window in place.
- Stuck Window: The window is completely jammed, and the crank won't budge. Something has probably broken off and is now wedged in the works, locking everything up tight.
Key Takeaway: Don't jump to conclusions. A window that's just slow or stiff might only need its tracks cleaned and lubricated. But if you’ve got that combination of grinding, popping, a free-spinning handle, or a crooked window, a bad regulator is almost certainly your culprit.
There's a reason these are among the top five most-replaced interior parts. Manual regulators are built to last, often up to 10,000 cycles, but failure rates jump by 40% after a car passes 100,000 miles. As vehicles hit that 10-15 year old mark, these parts just reach the end of their service life. You can learn more about the growing automotive window regulator market on globenewswire.com.
2. Assembling Your Toolkit and Finding the Right Part
A successful window regulator replacement really boils down to two things: having all the right tools ready to go before you start, and picking a quality part that isn't going to leave you doing this same job again next year. Get the prep work right, and this goes from a frustrating chore to a satisfying weekend project. If you rush it, you're just asking for broken trim clips and return shipping hassles.
Essential Toolkit for Window Regulator Replacement
Before you even think about popping off that door panel, let's talk about what you'll need. You don't need a professional-grade rollaway chest, but a few specific tools are non-negotiable if you want to do the job without causing damage.
Here’s a quick checklist of the tools I make sure to have within arm's reach for this kind of work.
| Tool Category | Essential Items | Why It's Important |
|---|---|---|
| Panel & Trim | Non-Marring Trim Removal Tools | A flathead screwdriver will gouge your plastic panels. These inexpensive plastic pry tools are designed to pop clips without leaving a mark. |
| Glass Support | Painter's Tape | Once the glass is unbolted from the old regulator, you need to hold it up securely. A few strips of tape over the top of the door frame are perfect. |
| Fasteners | Socket Set with Extension | You’ll likely need 8mm, 10mm, or 13mm sockets for the regulator and door panel bolts. The extension is crucial for reaching recessed bolts inside the door. |
| Screws & Clips | Phillips & Flathead Screwdrivers | A good Phillips head is a must for door handle and panel screws. A small flathead is handy for releasing stubborn electrical connectors or small clips. |
Having these items laid out and ready will save you a ton of headaches and trips back to the toolbox. A clean, organized workspace makes all the difference.
Pro Tip: Grab a magnetic tray or a couple of old yogurt cups. Door panel screws and clips are tiny and seem to have a special talent for vanishing into thin air. Keeping them contained makes reassembly about ten times faster.
Selecting a Durable Replacement Regulator
With your tools gathered, the next big decision is the part itself. Let's be honest, not all aftermarket regulators are made the same, and this is where you can save yourself a future repair. When you're sourcing parts, it helps to understand the broader automotive industry and the vast differences in quality control from one brand to another.
Ever wonder why the original regulator failed in the first place? In many cases, it's because manufacturers used plastic components in high-stress areas like the cable guides or gear housings. Over time, that plastic gets brittle from heat and cold cycles, and eventually, it just cracks or strips out.
This is exactly the problem we set out to fix with T1A Auto regulators. We look at those common failure points and engineer them to be better.
We replace those failure-prone plastic bits with sturdy metal counterparts. It's a simple upgrade that makes a world of difference. A metal gear just isn't going to strip out the way a plastic one will, especially on trucks and work vehicles where the doors get a ton of use.
That small but critical material improvement means you get a part that fits just like the original but has the strength to last, so you aren't tearing that door panel off again in 18 months. If you want to dive deeper, we have a whole article breaking down the key differences between OEM vs. aftermarket parts.
Guaranteeing a Perfect Fit
The final piece of the puzzle is just making sure you're ordering the right part for your specific vehicle. There's nothing worse than getting a door completely disassembled only to discover the new regulator's mounting holes are off by half an inch.
We take the guesswork out of it. At T1A Auto, our website lets you punch in your vehicle's year, make, and model to find parts with guaranteed fitment. This means the regulator you get is built to the exact specs of your door.
No modifications, no fighting with alignment—just a part that bolts right in, the way it's supposed to.
Removing the Old Window Regulator
Alright, you've got your tools laid out and the right part ready to go. Now for the fun part: getting inside the door. This is where a little patience really pays off. If you take your time and follow a methodical approach, you'll avoid breaking those brittle plastic clips or scratching up your door panel—two of the most common headaches for first-timers.
We'll walk through this step-by-step, from popping the panel off to getting that old regulator into the recycling bin.
This visual guide shows the key prep stages: gathering tools, confirming the part, and securing the window.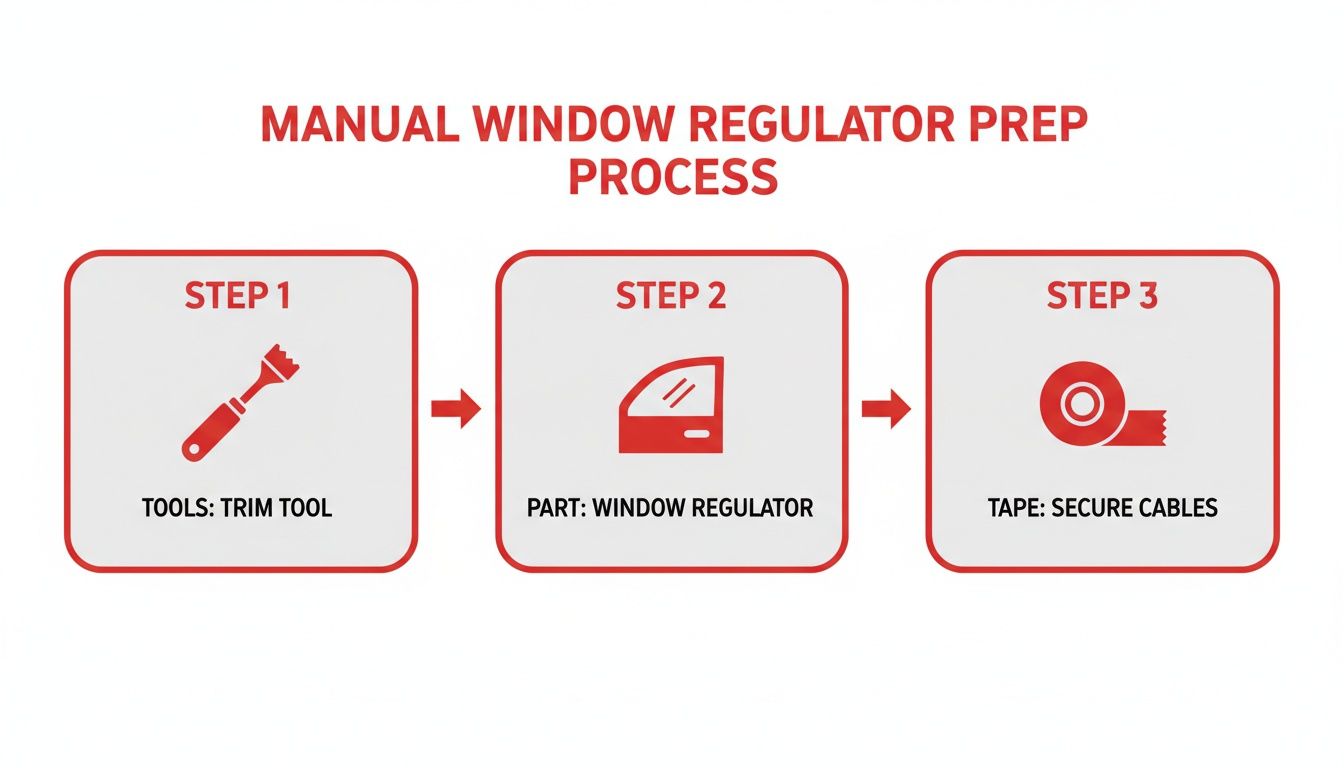
Following this simple preparation flow prevents mid-job surprises and ensures a smoother disassembly process.
Safely Removing the Interior Door Panel
Think of the interior door panel as the gateway to the regulator. It's held on by a mix of hidden clips and screws, and your first mission is to find all of them before you start pulling. Trust me, trying to force a panel that’s still screwed in is the fastest way to crack the plastic.
Start by hunting for screws in the usual hiding spots:
- Inside the door pull or armrest: You'll often find a small plastic cover here. Pop it off with a trim tool to reveal one or two screws.
- Behind the interior door handle: There's a good chance another screw is lurking behind a little cover in this spot.
- Along the bottom edge of the panel: Some cars have a few visible screws along the perimeter.
Once all the screws are out, grab your non-marring trim removal tool. Start at a bottom corner and gently work the tool between the door panel and the metal frame. Carefully pry until you hear that first satisfying pop of a clip releasing. From there, just work your way around the bottom and up the sides, freeing each clip one by one.
With the clips disengaged, the panel will hang from the top lip along the window sill. Lift it straight up and a little bit toward you to unhook it. But don't yank it away just yet—a few things are still connected behind it.
Crucial Tip: Whatever you do, don't use a metal screwdriver to pry on your door panel. It will absolutely gouge the soft plastic. That $10-15 you spend on a proper set of plastic trim tools is one of the smartest investments you can make for any interior car project.
If you want a more detailed walkthrough on this part, check out our guide on how to remove a car door panel for more specific examples.
Dealing with Handles and Electrical Connections
Now that the panel is loose, you need to disconnect everything attached to it. The manual window crank is typically held on by either a C-clip behind it or a central screw hidden under a cap. For C-clips, a special removal tool is easiest, but in a pinch, you can use two small flathead screwdrivers to push the clip off its shaft.
Next is the interior door handle. It's connected to the latch by a thin metal rod held in place with a small plastic swing clip. Just flip the little clip open and the rod will slide right out.
Even with manual windows, you might have power speakers. If so, carefully unplug the speaker harness. These connectors have a small locking tab you need to press to release them. Never just pull on the wires. With everything disconnected, you can finally set the door panel aside somewhere safe.
Securing the Window Glass
This next step is without a doubt the most important safety measure of the entire job. Before you unbolt a single thing on the old regulator, you must secure the window glass in the fully raised position. If you skip this, the second you detach the glass from the regulator, it will come crashing down inside the door and could easily shatter.
Crank the window all the way up. Grab your painter's tape and run two or three long strips from the outside of the window, up and over the top of the door frame, and down onto the inside of the window. This creates a strong sling that will hold the glass tight. Don't be stingy with the tape—use enough so you’re confident it won't slip.
Unbolting and Extracting the Old Regulator
With the window secure, you can now peel back the plastic vapor barrier. Go slow and try not to tear it; this sheet is important for keeping moisture and road noise out of the cabin. You just need to pull it back far enough to get to the regulator bolts.
Inside, you'll see the regulator assembly—it'll look like a metal X-frame or a track system with cables. First, find the bolts holding the regulator to the inner door skin. These are usually 10mm. You’ll also see two bolts or clips that attach the regulator’s lift plate directly to the bottom of the window glass.
Start by unbolting the regulator from the window glass itself. With the glass now free (and safely taped!), you can remove the main mounting bolts holding the regulator frame to the door. The whole assembly will now be loose inside the door.
Getting it out can feel like a game of Operation. You’ll need to collapse and fold the regulator to wiggle it out through one of the larger access holes. It might take some twisting and turning to find the perfect angle. Just be patient and you'll get it out without scratching anything.
This manual window regulator replacement is a very doable DIY job. The whole process typically takes about one to two hours with basic tools and can easily save you $200-$400 compared to what a dealer would charge. As vehicles age—the average car in the U.S. is now 12.5 years old—aftermarket demand for these parts is surging. Interestingly, manual regulators are known for their durability, with data showing they can last 20-30% longer in commercial fleet use due to their simpler, more robust mechanics.
Installing the New T1A Auto Regulator

Alright, the old regulator is out. You're past the halfway point, and now for the rewarding part—getting your new T1A Auto hardware in and making that window work like new. This part of the job is less about brute force and more about finesse.
Getting this right is what separates a professional-feeling repair from one that's just "good enough." A properly installed regulator will be smooth and silent for years, which is exactly why you chose a quality part in the first place.
Maneuvering the New Regulator into Place
Just like the old unit needed some twisting to get out, the new one needs a similar touch to get in. Hold the new T1A Auto regulator next to the old one to get your bearings. This gives you a mental map of how it needs to sit inside the door.
Carefully guide the new assembly through one of the larger access holes. Be mindful of any wires or linkages still hanging around in there; you don't want to snag or damage anything.
Insider Tip: If the regulator seems stuck, don't force it. Try rotating it or collapsing the scissor arms a bit. Every door has a "sweet spot," an angle that lets the regulator slide right in. A little patience here will keep you from scratching up your new part or the inside of the door.
Once it's inside, let the regulator hang loosely while you line up the main mounting bolts with the holes in the door frame. Don't tighten anything yet.
Initial Bolt-Up and Alignment
With the assembly hanging inside the door, the next step is to get the mounting bolts started. Always thread them in by hand first. This simple step prevents cross-threading, which is a massive headache you don't need. Keeping them hand-tight for now gives you the wiggle room you'll need for perfect alignment.
This is where a quality part like a T1A Auto regulator really pays off. It’s engineered for guaranteed fitment, meaning the holes should line up perfectly without a fight. Cheaper, poorly made parts often force you to elongate holes or jam bolts in, creating stress points that lead to another failure down the road.
The market for these parts is huge, with North America holding 30% of the global share for manual window regulators. This is largely driven by the nearly 17 million trucks and SUVs in the U.S. that need replacements each year as their factory plastic gears wear out. You can find more insights on the automotive window regulators market at maximizemarketresearch.com.
Once all the bolts are started, you can snug them down with your socket wrench. Get them firm, but do not overtighten. Cranking down too hard can warp the regulator's mounting plate or even damage the door's sheet metal.
Attaching the Window Glass
This is easily the most critical part of the installation. If the window is even slightly misaligned, it can bind in its tracks, be stiff to operate, or fail to seal against the weatherstripping. Take your time here.
Carefully peel off the painter's tape holding the window up. Supporting the glass with one hand, gently lower it until the mounting holes at the bottom of the glass line up with the clamps or holes on the new regulator's lift plate.
You might need to pop the window crank on temporarily and move the regulator up or down just a hair to get the alignment perfect. Once it's lined up, insert and tighten the bolts or clips that secure the glass. These should be snug, but again, avoid using too much force—the last thing you want is to crack the glass.
- Check for Level: Eyeball the top edge of the window. It should be perfectly parallel with the door frame.
- Feel for Smoothness: The glass should sit securely in the regulator's clamps with no rocking or play.
The All-Important Test Run
Before you even think about putting that door panel back on, you have to test the full range of motion. This five-minute check can save you from the frustration of having to tear everything apart again.
Temporarily slide the window crank back onto the regulator's spline. Now, slowly crank the window all the way down, and then all the way back up.
Pay close attention to what you feel and hear:
- Is the motion smooth? The window should glide without any catching or binding.
- Does it make any noise? Listen for grinding, popping, or scraping. Any of those sounds mean something isn't right.
- Does it seal correctly? When fully up, the glass should press evenly against the weather seal all the way around.
If you hit any stiffness or hear weird noises, stop. The most common culprit is the glass not being perfectly centered in its vertical channels. Just loosen the glass mounting bolts slightly, nudge the glass into a better position, retighten, and test again. This is where the precision of T1A parts really shines, minimizing the need for these frustrating micro-adjustments.
Once you’ve confirmed the window operates flawlessly from top to bottom, you can confidently move on. That successful test is your green light—your manual window regulator replacement is a job well done.
Final Checks and Professional Reassembly Tips
Alright, you've got the new hardware bolted in and the window is secure. You're on the home stretch now, but don't rush this part. These final steps are what make the difference between a job that’s just "done" and a professional-quality repair that will last for years without any annoying rattles or issues.
First thing’s first: that plastic vapor barrier. Carefully press it back into place, making sure the sticky black sealant around the edges makes good contact all the way around. This little sheet of plastic is crucial for keeping moisture and road noise out of your car's cabin. A small gap here can lead to foggy windows, musty smells, and even damp carpets down the line.
Getting the Door Panel Back On (Without Breaking a Clip)
Now for the door panel itself. The trick to getting a perfect, factory-like fit is all about the sequence. Don't just try to mash the clips into their holes.
Start by hanging the top "lip" of the panel over the window sill—get it settled in place first. This takes all the weight and lets you work freely. With the panel hanging, you can now easily reach behind it to reconnect everything. Clip the door handle rod back into its little plastic holder and plug in any speaker or lock connectors you unplugged earlier.
Once everything is connected, you can line up the panel. Go around the edge and give it a firm but gentle push to pop each clip into its hole. You'll hear a series of satisfying "thunks" as they seat properly.
A Quick Pro-Tip: Before you grab your screwdriver, give the panel a little wiggle at the top, bottom, and sides. If you feel any looseness, a clip probably missed its mark. It takes ten seconds to pop it off and realign it now, which is way better than trying to hunt down an infuriating rattle later.
Reattaching the Cranks and Giving It a Final Test
With the panel firmly snapped in place, go ahead and reinstall the screws, typically in the armrest or behind the door handle. These are what pull the panel snug against the door frame, so tighten them until they're secure.
Next, put the manual window crank back on. If your model uses a C-clip, just slide it into the groove on the handle's shaft until it clicks. If it’s the screw-on type, simply tighten it down until the handle feels solid with no play.
The very last thing to do is a full systems check. This is your personal quality control. Go through the list:
- Window Action: Roll the window all the way up and down a few times. Listen for any weird sounds and make sure the movement is smooth and consistent.
- Door Handle: Work the interior handle to make sure it opens the door latch properly.
- Door Lock: Test the manual lock to ensure it engages and disengages without a fight.
- Speaker Check: If you have a speaker in that door, flip on the radio to confirm it’s still working.
If everything passes the test, that's it! You're done. You’ve just completed a manual window regulator replacement and saved yourself a good chunk of money in the process. Job well done.
Common Questions We Hear About Window Regulator Replacement
Even with the best guide in front of you, it's normal to have a few questions pop up when you're elbow-deep in a door panel. Let's run through some of the most common issues people face during a manual window regulator replacement. Getting these answers straight will help you wrap up the job without any headaches.
Do I Need a New Regulator or Just the Crank Handle?
This is a great question, and figuring it out first can save you a ton of unnecessary work. The classic symptom is a crank handle that just spins and spins, with no resistance and no action from the window. When that happens, the problem is almost always stripped splines on either the handle itself or the regulator's gear shaft.
Here's the quick and easy way to diagnose it. Pop the handle off—it's usually held on by a single screw or a tricky little C-clip hiding behind it. With the handle out of the way, grab the exposed metal shaft with a pair of pliers. Now, try to turn it.
If the window rolls up and down smoothly, you're in luck! All you need is a new handle. But if the shaft just spins in place or you hear a grinding noise from inside the door, the regulator is toast.
Can I Just Replace the Broken Cable?
Technically, you might be able to, but trust me on this one—it’s a bad idea for a DIY repair. It might seem like a cheap fix if you just have a snapped cable or a busted plastic clip, but it’s a recipe for frustration.
Regulator assemblies are sold as a complete unit because getting the cable tension just right is a massive pain. You have to re-spool the new cable perfectly, and if the tension is even slightly off, it will bind, jump the pulley, or snap again in no time. It's one of those jobs that's rarely worth the hassle.
Expert Tip: Save yourself the headache and just replace the whole assembly. A quality replacement ensures all the moving parts—the gears, guides, and cables—are fresh and ready for years of service. That’s why we’re able to back our T1A Auto regulators with a lifetime warranty; we know the entire unit is built to last.
Why Does My New Regulator Feel So Stiff?
It's common for a new regulator to feel a bit tight right out of the box, but you need to know the difference between "new-part stiff" and "something's wrong stiff." If cranking the window feels like a real workout, a few things could be going on.
First, and most often, the window glass isn't sitting perfectly in its vertical tracks. Even a slight misalignment will cause it to bind. Double-check that it's seated properly. While you're at it, clean out the rubber window channels and hit them with a light shot of silicone spray lubricant. You'd be surprised how much gunk builds up in there.
Next, make sure the regulator assembly is bolted flat against the inner door frame. If it's mounted at a slight angle, the mechanism can bind under load. Finally, keep in mind that a brand-new, heavy-duty regulator is going to have tighter tolerances and feel more robust than the worn-out part you just removed. As long as it moves smoothly without any weird popping or grinding sounds, it should break in and feel perfect after a little use.
Ready to get that window rolling smoothly again? The T1A Auto team has your back with guaranteed-to-fit parts. Check out our durable, metal-upgraded manual window regulators at T1A Auto and get the job done right.