


You press the window switch and... nothing. Or worse, you hear a horrible grinding sound from inside the door panel. When your power window stops working, a faulty power window regulator is one of the most common culprits. This is the mechanism inside the door that actually does the heavy lifting, moving the glass up and down.
When one fails, you might find your window is sluggish, crooked, or has dropped completely inside the door, leaving you exposed to the elements.
Diagnosing a Failing Power Window Regulator
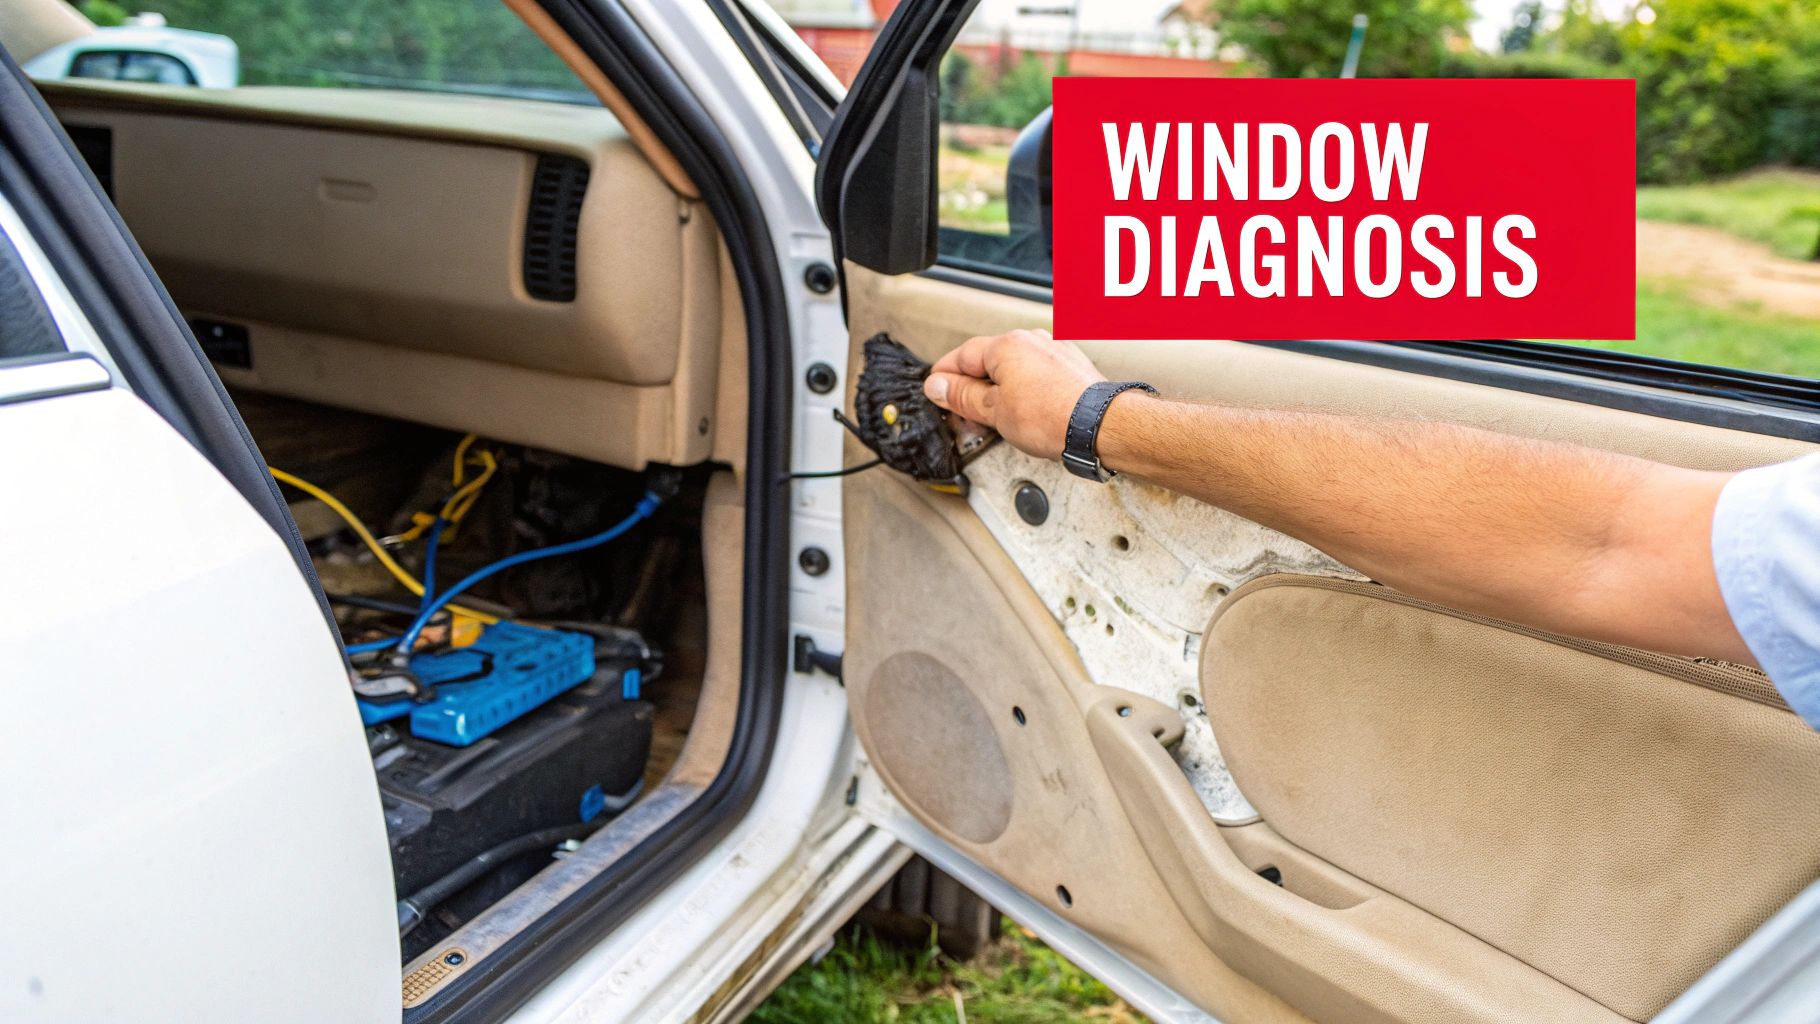
Before you start ordering parts, let's make sure the regulator is actually the problem. It's easy to misdiagnose a bad motor or a dead switch as a regulator failure, and that’s a mistake that costs both time and money. The trick is to use your ears and pay attention to what the window is—or isn't—doing.
The biggest clue? You press the switch and hear the motor humming or grinding away inside the door, but the glass doesn't budge. This is a great sign, in a way. It means the motor is getting power and trying to do its job, but the mechanical part of the system—the regulator—is broken and can't transfer that power into motion.
Common Failure Symptoms
So, what should you be looking and listening for? From my experience, a bad regulator usually shows up in one of a few distinct ways:
- A Loud "Pop" or Grinding: This is the classic sound of a snapped cable or a stripped gear. It’s often sudden and unmistakable.
- The Window Drops Into the Door: If the glass suddenly falls, the mechanism that holds it up has given way completely.
- Slow, Stuttering Movement: A window that struggles its way up or down is often fighting against a bent track or a binding part in the regulator.
- The Glass is Crooked: When the window tilts to one side as it moves, it means one of the lift points has broken or disconnected from the glass.
Expert Tip: If you hit the switch and hear absolutely nothing—just dead silence—your problem is likely electrical. Before tearing the door apart, check for a bad switch, a blown fuse, or a dead motor. Our guide on how to test your window motor walks you through troubleshooting that side of the system first.
This isn't a rare problem; in fact, regulators account for 15-20% of all door repairs annually. The automotive window regulator market is massive, growing from $15.23 billion and expected to hit $23.32 billion as more people need replacements. The good news is that choosing a quality aftermarket power window regulator can save you a bundle, often $200-$500 per door compared to what a dealer would charge for an OEM part.
Choosing the Right Replacement Regulator
So you've figured out the power window regulator is toast. Good job. Now comes the part where you find its replacement, and this is where paying close attention to the details really matters. "Close enough" won't cut it here; you need the exact part for your vehicle’s year, make, and model to ensure everything lines up and works smoothly.
When you start looking, you'll see two main designs out there: cable-driven and scissor-type regulators. Cable systems are what you’ll find in most modern cars and SUVs. They’re quick and quiet, but their weak spot is the cable itself, which can fray, stretch, or snap over time. Scissor-type regulators, with their beefy cross-braced metal arms, are the workhorses you often see in older cars and trucks. They’re built like tanks but can be a bit slower and take up more space inside the door.
Understanding Your Options
The market for these parts is massive, so you've got plenty of choices. It's interesting to note that scissor-type regulators still command about 40% of the market share, largely because they are the go-to for trucks like the Ford F-150 and Chevy Silverado. Their tough-as-nails design can handle the abuse that would shred a lesser part.
In places like North America, where harsh winters can make plastic components brittle and prone to cracking, aftermarket parts make up a huge 35% of sales. And it's no wonder, when you consider that 1 in 7 door-related complaints are tied to window failures. You can actually dive deeper into these industry stats in this in-depth power window market report.
This brings us to the big question every DIYer faces: should you go with an OEM part or an aftermarket one?
- OEM (Original Equipment Manufacturer): This is the identical part your car came with from the factory. The fit is guaranteed, but you'll pay a premium for it at the dealership.
- Aftermarket: These parts come from third-party companies. The best aftermarket brands don't just copy the original; they often identify the weak points and improve them.
A perfect example of this is the small plastic clips and pulleys used in many factory regulators. These are notorious failure points. Quality aftermarket regulators often replace these flimsy plastic bits with durable metal ones, drastically extending the part's lifespan so you aren't stuck doing this same repair again in a couple of years.
Comparing Power Window Regulator Types
To help you quickly identify what's likely inside your door, here’s a quick rundown of the two most common regulator types.
| Regulator Type | Common Vehicles | Strengths | Weaknesses |
|---|---|---|---|
| Cable-Driven | Modern cars, SUVs, minivans | Fast, quiet, and lightweight | Cables can fray, stretch, or snap; plastic parts can get brittle |
| Scissor-Type | Older vehicles, trucks, heavy-duty applications | Extremely durable and robust | Slower, heavier, and can be bulkier |
Ultimately, choosing a high-quality aftermarket part is often the smartest route for a home mechanic. You get a component that's frequently better-engineered than the original, and you save a good chunk of change in the process.
If you're still on the fence, our guide on OEM vs. aftermarket parts breaks down the pros and cons in more detail. My best advice? Always look for a supplier that offers a lifetime warranty. That’s the clearest sign they stand behind their product’s quality and durability.
Your Pre-Repair Safety and Tool Checklist

A smooth power window regulator repair all comes down to good preparation. Trust me, jumping into this job without the right gear can turn a simple fix into a nightmare of scratched door panels and lost screws. So, before you even think about popping off that first trim piece, let's get your tools and safety plan squared away.
Think of it as your pre-flight check. A few minutes of prep now will save you a ton of headaches later. There’s nothing worse than getting a door panel halfway off only to realize you don’t have the right size socket.
Assembling Your Essential Toolkit
You don’t need an entire professional workshop for this, but a few key tools are non-negotiable if you want to do the job right and avoid damaging your car's interior. A good basic mechanic's toolset will get you most of the way there.
Here’s what I always make sure I have on hand:
- Socket and Ratchet Set: A standard set is perfect for the bolts holding the regulator and motor in place.
- Screwdriver Set: You'll definitely need a mix of Phillips and flathead screwdrivers for all the little screws, especially the ones tucked away behind handle trim and switch plates.
- Non-Marring Trim Removal Tools: This one is a must. Prying on plastic panels with a metal screwdriver is the quickest way to leave permanent gouges and snap those brittle plastic clips. These inexpensive plastic pry tools are worth their weight in gold.
- Needle-Nose Pliers: Invaluable for getting a grip on those fiddly electrical connectors and pulling them apart without breaking the locking tabs.
Critical Safety and Prep Steps
Safety isn't just a suggestion—it's the most important part of any DIY auto repair. You're going to be working around electricity and a heavy sheet of glass inside a tight space, so a few precautions are absolutely essential.
Safety First: Before you do anything else, disconnect the negative terminal on your car battery. This takes less than a minute and completely prevents you from shorting out an electrical component or, in some cars, accidentally triggering a side airbag.
With the power cut, the next thing to deal with is the window glass itself. If it’s stuck all the way up, you’re in luck. But if it has dropped down into the door, you have to secure it. Use strong painter's tape crisscrossed over the top of the door frame or grab a pair of suction cup handles to hold the glass firmly in place. This is crucial to stop it from suddenly crashing down while your hands are inside the door.
While you're focused on this fix, it's also a good time to think about the bigger picture of vehicle care. For a more structured approach to car maintenance, a detailed fleet vehicle maintenance checklist can offer some great insights. Now that your tools are laid out and the car is prepped safely, you're ready to get that old regulator out.
Time to Dig In: Removing the Old Window Regulator Assembly
Alright, with your tools laid out and the car prepped, we're ready to get inside that door. This is where the real fun begins. Don't let it intimidate you; if you're patient and methodical, it's a very straightforward job. The first thing standing between you and that faulty power window regulator is the interior door panel.
Getting Past the Door Panel
Door panels can be tricky because manufacturers love to hide the fasteners. You’ll find screws tucked away behind trim pieces, under the armrest, or inside the door pull cup. Grab your trim removal tools and start hunting. Gently pry off any small plastic covers you see—chances are there's a screw hiding behind it.
Once you've found and removed all the screws, the panel is still held on by a bunch of plastic clips around its edge. Slide your pry tool between the door frame and the panel, then give it a gentle twist. You'll hear a distinct "pop" as each clip lets go. Just work your way around the entire perimeter until the panel feels free.
If you hit a snag or want a more detailed breakdown, check out our guide on how to remove a car door panel for specific examples.
Peeling Back the Vapor Barrier
With the panel off, you'll be looking at a sheet of plastic or foam—that’s the vapor barrier. It’s there to keep moisture and noise out of your car, and it's attached with some seriously sticky black goo.
Don't just rip it off. You only need to peel it back far enough to get your hands and tools inside. Start at a corner and pull gently. The adhesive is tacky and will get on everything, so be careful. I like to fold the barrier up and use a piece of painter's tape to hold it out of the way while I work.
Now you’ve got a clear view of the entire regulator assembly: the tracks, the cables, and the motor. Before you touch anything else, pull out your phone and snap a few pictures from different angles. Trust me, having a visual reference for how the bolts are placed and how the wiring is routed will be a lifesaver later.
Freeing the Glass and Pulling the Regulator
Before you can unbolt the regulator, the window glass has to be detached from it. The glass is held in place by two or more clamps that bolt onto the regulator's carrier. If you taped the window all the way up, you'll likely need to lower it a bit to line the bolts up with the access holes in the door frame.
Pro Tip: If the motor is completely shot and you can't move the window, you'll need a helper. Have them hold the glass securely while you unbolt it. Once it's free, you can either lift the glass completely out of the door or slide it all the way up and tape it firmly to the top of the door frame. Just don't let it sit there unsecured.
Now that the glass is out of the equation, the rest is easy. Find the electrical plug going into the window motor and disconnect it. Next, locate all the bolts holding the regulator's tracks and motor to the inner door skin. There are usually between four and six of them. Remove them one by one.
The old regulator assembly is now just sitting loose inside the door. It might take a bit of twisting and turning, but you’ll be able to carefully maneuver the whole thing out through one of the larger access holes.
And that's it! You've got the old one out. The hardest part is officially behind you.
Installing the New Power Window Regulator
Alright, the old regulator is out. Now for the satisfying part: putting the new one in. This is basically the reverse of what you just did, but taking your time here is what separates a professional job from one that's going to rattle and cause problems later.
First, you'll need to gently guide the new regulator assembly back inside the door. Wiggle and rotate it carefully through the access hole—it's a bit like a puzzle, so don't force it. Once it's inside, get the mounting bolts started by hand. This prevents cross-threading and makes alignment much easier. Just leave them loose for now.
This flowchart breaks down the basic path to getting the regulator out, which we're now just reversing. It's a good reminder of the layers involved.
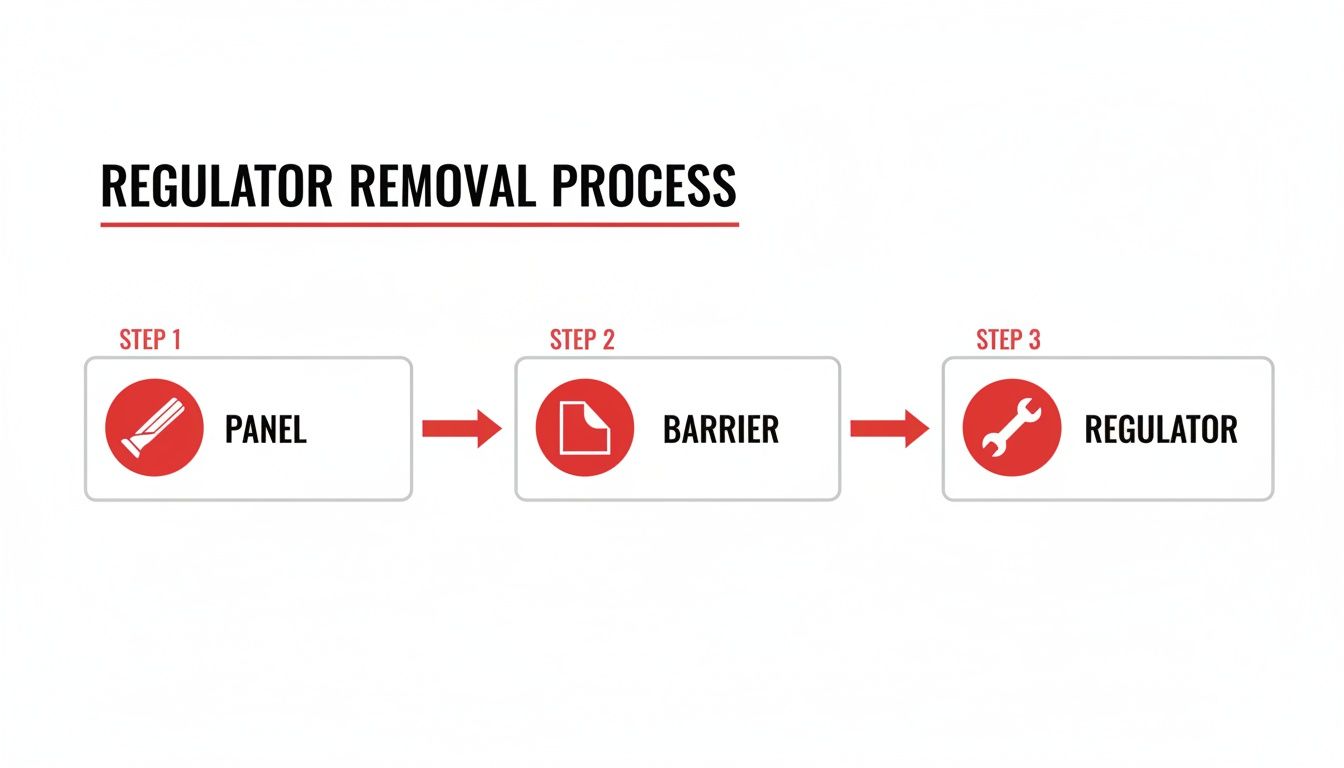
As you can see, getting to the regulator means methodically working your way in, and now we're just building it back out.
Securing the Regulator and Glass
With the regulator hanging loosely in place, you can begin to tighten the mounting bolts. I always recommend a crisscross pattern, just like you would with lug nuts on a wheel. This helps the whole assembly sit flat against the door frame and keeps the tracks from getting pinched or binding up.
Next up is the glass. This is often where a second set of hands comes in handy. Carefully lower the window pane back into the door, lining up the mounting points on the glass with the clamps or clips on the new regulator. Have your helper hold the glass steady while you get the fasteners started.
Crucial Alignment Check: Before you crank down on the glass clamps, double-check that the window is sitting perfectly level in its track. Even a tiny bit of tilt can cause it to bind, run slowly, or put a ton of strain on your brand-new motor.
The All-Important Test Run
Before you even think about snapping that door panel back on, it’s time for a test. Plug the electrical connector into the new window motor, then go reconnect the negative battery terminal. Grab your master window switch, plug it in, and let's see how it works.
- Roll it all the way down. Are you hearing any weird grinding or clicking?
- Roll it all the way up. Does it move smoothly? Does it seal properly at the top?
- Cycle it a few times. Run it up and down a couple more times just to be sure everything is seated correctly.
This quick check takes maybe five minutes, but it can save you the massive frustration of having to pull the entire door apart again. Once you’re happy with it, disconnect the battery one more time.
It’s worth noting that the industry is leaning heavily into more advanced automatic regulators, particularly with the boom in EVs. If you're doing this for a living or just want the best for your car, look for CAPA-certified parts. They guarantee a perfect fit and are properly tested, helping you avoid the 25% failure rate common with cheaper aftermarket imports. These better-quality parts often feature metal-reinforced components and solid warranties. You can read more about these automotive window regulator market trends if you're interested.
Now, you can put everything back together. Carefully re-stick the vapor barrier, making sure you get a good seal all around to keep moisture out. Plug in any connectors for speakers, locks, or mirrors. Finally, line up the door panel clips with the holes in the door and give it a few firm thumps to pop it back into place before reinstalling the last few screws.
Common Questions About Window Regulator Repair
No matter how many times you do a job, there are always a few little questions that come up. When you're tackling a power window regulator replacement, it's easy to hit a small snag or second-guess a step. Let's walk through some of the most common issues I see people run into.
You're not alone if you get stuck on these—they're just part of the process.
Is It the Motor or the Regulator?
This is probably the number one question. The symptoms can look the same, but your ears will usually tell you what you need to know. Just roll down your working window a bit so you can hear clearly, then hit the switch for the broken one.
What do you hear coming from inside the door panel?
- A whirring, humming, or grinding sound? That's your motor trying its best, but the glass isn't moving. This almost always means the regulator's cable or plastic bits have failed. The motor is getting power, but the mechanical part is shot.
- Total silence or maybe a faint click? This points to an electrical problem. The signal isn't getting to the motor, or the motor itself has burned out. The problem could be the switch, the wiring, or the motor.
If you want to be 100% sure, you can pop the panel off and test the motor's connector with a multimeter. If it's getting juice when you hit the switch but not spinning, you've found your culprit.
Why Is My New Window Slow or Crooked?
This is a classic sign that something is in a bind, but it’s usually a simple fix. A crooked or slow window is fighting against friction somewhere.
First, check how the glass is sitting in the regulator's clamps. Is it perfectly level? Even a slight tilt can cause it to bind in the channels. Loosen the clamps, straighten the glass, and tighten them down evenly.
If the glass is straight, the regulator assembly itself might be slightly misaligned inside the door. Try loosening the main mounting bolts just a bit—not all the way—and shift the whole unit by a millimeter or two up, down, left, or right. Then, tighten it back down. Sometimes that tiny adjustment is all it takes to find the sweet spot where everything moves freely.
Here’s a pro tip: Once everything is aligned, spray a little silicone lubricant into the vertical rubber channels the glass slides in. This makes a huge difference, helping the glass glide effortlessly and reducing strain on the new motor.
Can I Just Replace the Broken Cable?
Technically, yes. Should you? Almost never. I've seen people try, and it's a nightmare.
Re-spooling those cables is an incredibly frustrating job. They're wound under high tension, and getting the timing right on the pulleys without special factory tools is next to impossible. You'll spend hours fighting it, and there's a good chance it will just jam up again.
Save yourself the headache. For DIYers and even professional mechanics, replacing the entire regulator and motor assembly is the way to go. It’s faster, more reliable, and you know all the parts are fresh and ready to work together.
How Do I Get the "Auto-Up" Feature Working Again?
Many newer cars have that handy "one-touch" or "auto-up" function. After you replace the regulator, the motor's internal memory for the window's travel limits is wiped. You just need to re-teach it.
First, make sure the replacement motor you bought supports this feature—not all of them do.
Once installed, the reset procedure is usually very simple:
- Using the switch, run the window all the way down and keep holding the switch down for about 5 seconds after it stops.
- Now, run the window all the way up and keep holding the switch up for another 5 seconds.
This simple cycle tells the motor where the top and bottom of the track are. The exact steps can vary slightly by manufacturer, so it's always a good idea to check your owner's manual just in case.
At T1A Auto, we're committed to providing premium aftermarket parts that solve these common frustrations for good. Find the perfect power window regulator for your vehicle, backed by our lifetime warranty and expert support. Shop now at t1aauto.com.
