


You press the key-fob button, hear a faint click inside the door, and watch the other locks respond while one Tundra door stays put. Maybe the lock works after several attempts. Maybe the interior switch works but the remote doesn't. Before you remove the door panel and order a replacement, find out whether the problem is the actuator. A broken wire in the door-jamb harness, a poor connection, a fuse, or a binding latch can create the same symptoms.
A Tundra door lock actuator is an electromechanical part, not just a switch. The repair goes smoothly when you test the circuit first, identify the failure point, and install a complete assembly that matches the truck's door and configuration.
Table of Contents
- Recognizing Failing Tundra Power Lock Symptoms
- Testing the Circuit Before Removing the Door Panel
- Why Replacing the Complete Latch Assembly Is Best
- Removing the Old Actuator and Installing the New One
- Post-Installation Testing and Sourcing Quality Parts
Recognizing Failing Tundra Power Lock Symptoms
The classic actuator failure is localized. One door refuses to lock or release while the remaining doors respond normally. You might hear a click, buzz, or rapid clicking from the affected door, but the lock button doesn't complete its travel. An actuator can also work intermittently, respond only from the key fob, or respond only from the cabin switch.
Those variations matter. A lock that works from the remote but not the interior switch may point toward a switch, control, or wiring issue rather than a failed motor. A lock that changes behavior when the door moves is especially suspicious for a damaged harness near the hinge. Silence doesn't prove the motor has failed, because an open circuit can prevent power from reaching it.
What sits inside the door
Modern power locking systems grew out of centralized locking arrangements that electrically connect individual door locks to a common control unit. A command from the key, interior switch, or remote receiver drives a small motorized actuator integrated with the latch, as described in the history of the vehicle door-lock actuator in US5722272.
That architecture gives you several possible failure points:
- The command side includes the remote, interior switch, and vehicle control module.
- The supply side includes the relevant fuse, relay, ground, connector, and wiring.
- The mechanical side includes the motor, gears, rods, latch, and lock mechanism.
The Tundra entered the full-size pickup market after this electrical transition was already established, so the lock actuator should be approached as a coordinated circuit and mechanism. Treating it as a simple on-or-off switch leads to parts swapping and repeat repairs.
Match the symptom to the door
Operate the affected lock from both controls and compare it with a working door. Note whether the actuator makes noise, whether the lock moves partway, and whether the problem changes with the door open or closed. A useful overview of these patterns is available in this guide to door lock actuator symptoms.
Practical rule: If flexing the door-jamb harness changes the symptom, stop blaming the actuator until you've inspected the conductors and terminals.
Public complaint records document actuator concerns across Tundra model years, but complaint counts aren't failure probabilities. The available records don't establish a universal defect rate, so use the symptom to direct testing rather than assuming every stubborn lock needs the same part.
Testing the Circuit Before Removing the Door Panel
The efficient diagnostic order starts outside the door. Toyota service information places fuses and relays before the suspected components, then uses switch operation, wiring checks, and mechanical evaluation to narrow the fault. That sequence prevents you from spending time inside the door when the actual problem is upstream.
Follow the electrical path
Start with the related fuse and relay checks using the truck's vehicle-specific service information. Don't rely on visual inspection alone for a questionable fuse. Confirm the circuit has the expected feed, and compare the affected lock with a working lock where the circuit design allows a meaningful comparison.
Next, operate the lock with the interior control switch and remote. Record each result instead of relying on memory. If one input works and the other doesn't, that difference points toward the command path. If neither input works, continue toward the power feed, harness, connector, and actuator.
A compatible scan tool with Toyota active-test capability can command the actuator without removing the trim. This is valuable for intermittent faults because you can observe the command while moving the door or flexing the harness. Toyota's operation checks and active-test procedures are outlined in this door lock actuator testing guide.
Inspect the door-jamb harness
The flexible rubber boot between the body and door deserves careful attention. Repeated opening and closing can fatigue conductors inside the insulation, leaving a wire broken internally while the outside still looks acceptable.
Have an assistant operate the lock while you gently flex the harness at the hinge area. Don't pull hard or damage the boot. A change in lock behavior is a strong reason to inspect continuity, terminal tension, corrosion, and conductor condition before removing the actuator.
Toyota's symptom guidance supports checking the harness and connector before condemning the actuator. You can review the relevant manufacturer-oriented symptom table for the diagnostic order.
Check polarity at the motor connector
If the command reaches the door, test at the actuator motor connector during both lock and open commands. The motor reverses direction by changing voltage polarity, so test both signals rather than checking only for a single power feed.
- Voltage polarity present, no movement: Suspect the actuator motor, internal gears, or a mechanically seized latch.
- No command voltage: Continue backward through the connector, harness, switch, module, fuse, and relay.
- Intermittent voltage: Move the harness and connector while monitoring the circuit, then repair the wiring before installing parts.
Don't use a generic resistance number as a Tundra pass/fail specification. Commanded operation, polarity, mechanical movement, and vehicle-specific service data provide a stronger basis for the decision.
Why Replacing the Complete Latch Assembly Is Best
After you have verified that power, ground, and command polarity reach the door correctly, the decision gets simpler. If the actuator still will not move the lock through its full travel, replacing the complete latch assembly is usually the repair that saves time and prevents a comeback.
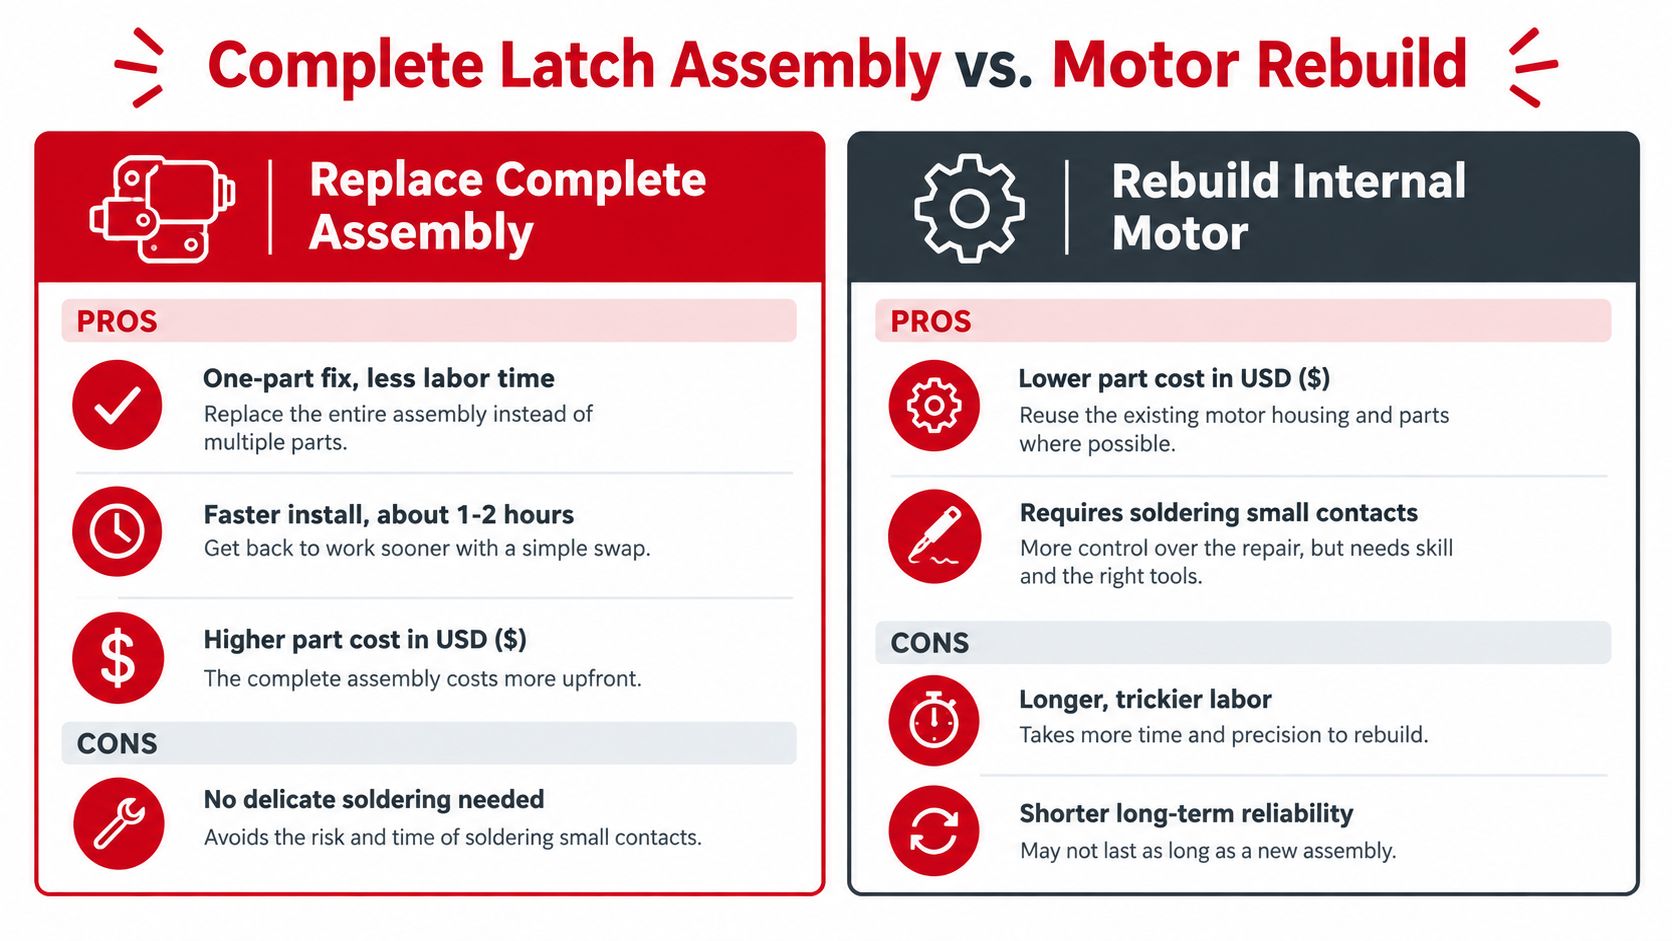
Opening the actuator housing and cleaning contacts can make a dead unit twitch on the bench. It does not restore the rest of the wear inside the mechanism. The housing packs the motor, gears, springs, switch contacts, and latch interface into one small assembly, and once it starts failing intermittently, more than one part is often involved.
Owner teardown reports line up with that reality. In the Tundra actuator discussion and repair observations, people describe corrosion between the motor's tin contacts and the board's copper contacts, along with how easy it is to disturb the internal pieces during disassembly. That is useful real-world evidence. It is not proof that every truck fails the same way, but it does show why a partial repair can turn into a second teardown.
Rebuilding versus replacing
Cleaning contacts only makes sense when corrosion is the whole problem and the gears, springs, motor, and case are still in good shape. That is hard to confirm on an intermittent unit, especially one that has already slowed down, stuck, or failed under door-installed load. Weak motor torque, worn gear teeth, cracked plastic, and latch drag can all stay behind after the contacts look better.
Replacing only the small motor has the same weakness. The old gear train and latch still have to do the work. If the latch is dragging or the internal travel is off, the fresh motor is forced to push through the same resistance that wore out the original setup. Lubrication can help a sticky latch move more freely, but it will not fix damaged contacts, worn gears, or a motor that no longer has enough torque to complete the stroke.
That is why I steer DIY repairs toward the full assembly. It costs more up front, but it cuts down the unknowns during reassembly and keeps the actuator, latch, lever positions, and linkage relationship matched as a unit. For a truck that gets used every day, that is the safer call when the original housing shows corrosion, contamination, or mechanical drag.
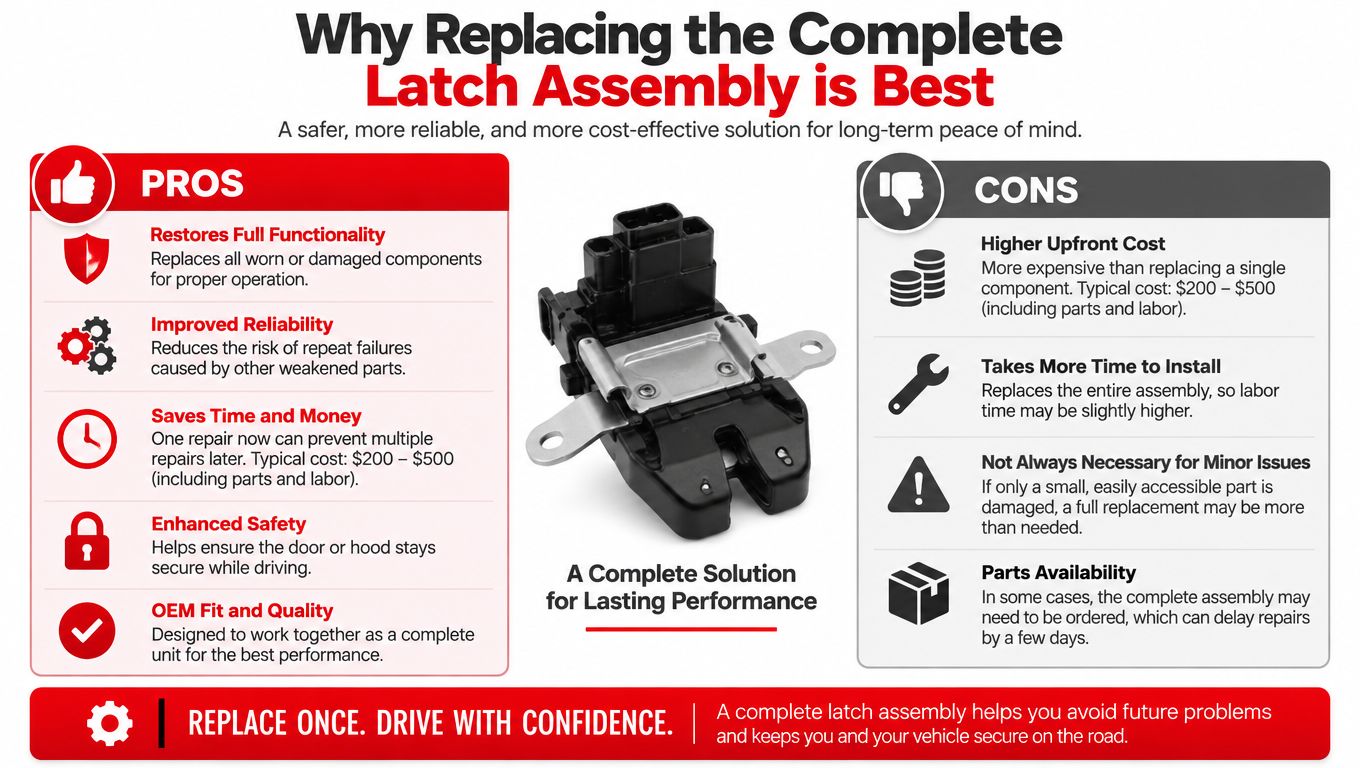
Before ordering, confirm the model year, cab style, door location, connector style, and latch design. Similar-looking Tundras can use different assemblies, and a wrong part wastes labor fast.
A complete assembly also gives you a clean chance to inspect the surrounding hardware. Check for rod bind, damaged clips, contamination around the latch, and sound-deadening material that interferes with movement. If the mechanism around the actuator is dragging, even a new unit can be overloaded and fail early.
For an exploded view of the related components and linkage relationships, use this door latch assembly diagram. The diagram will not replace vehicle-specific service information, but it does show why correct rod routing and full latch travel matter.
Removing the Old Actuator and Installing the New One
Have the replacement assembly, trim tools, screwdrivers, a small pick, a flashlight, and a container for fasteners ready before opening the door. Disconnect the battery if your vehicle-specific procedure calls for it, and protect the window glass and painted surfaces with tape or a clean cloth.
Begin by removing the interior trim fasteners and releasing the panel clips with a trim tool. Work around the perimeter instead of prying one corner aggressively. Support the panel as it loosens, because switches, courtesy lamps, and other connectors may still be attached.
Preserve the original routing
Disconnect the electrical connectors by releasing their locks rather than pulling on the wires. Peel the vapor barrier back carefully and keep the adhesive surface clean. You need enough access to see the latch, rods, connector locks, and the path the harness follows.
Photograph the original rod routing before unhooking anything. Identify each retaining clip and note its orientation. A rod that is installed in the wrong clip, routed behind the wrong bracket, or left under tension can make the motor run while the lock fails to complete its travel.
A practical removal sequence is:
- Release the linkage clips: Rotate or lift each retainer as designed, then slide the rod out without bending it.
- Unplug the actuator: Press the connector lock fully before separating the plug.
- Remove the latch fasteners: Keep the fasteners organized and support the assembly as the final fastener comes out.
- Compare assemblies: Check connector shape, mounting points, rod attachments, and lever positions before installing the replacement.
- Install without forcing it: Seat the latch squarely, tighten the fasteners appropriately, and restore every retainer to its original position.
The latch should move through its mechanical range by hand before you connect the rod or reinstall the panel. If it feels gritty or binds, find the interference now. Don't expect the motor to overcome a misrouted rod or a sound-deadening layer pressed against the mechanism.
If you also work on commercial vehicles, a reference such as browse DAF electrical components can help when identifying related electrical hardware, but it isn't a substitute for matching the Toyota assembly to the exact Tundra application.
Reconnect the actuator and any disconnected switches, then temporarily position the panel without fully securing it. This gives you access for testing and avoids removing the trim again if a rod needs correction.
Post-Installation Testing and Sourcing Quality Parts
Don't finish the repair when the new latch is bolted in. Test it while the trim is still accessible, because a connector that isn't locked, a rod that is slightly out of position, or a latch that doesn't reach full travel can appear normal until the panel is fully secured.
Test both electrical and mechanical operation
Start with the door open. Use the cabin switch and remote to command locking and releasing, watching the latch and listening for abnormal strain. Then close the door and repeat the commands. The lock should complete its movement without hesitation, and the other doors should continue to respond normally.
Check the door-ajar indication and operate the inside handle. Use the key cylinder where fitted to confirm the manual override releases the latch. Toyota's active-test information supports a documented check with repeated lock and release cycles, door-open and door-closed operation, and a final manual release check before reinstalling trim. The relevant procedure is described in the Tundra active-test service information.
Installation standard: A motor that makes noise isn't enough. The lock must reach full travel, the latch must release mechanically, and the vehicle must recognize the door state correctly.
Once the test passes, reinstall the vapor barrier without leaving gaps around the access area. Refit the trim panel, align the clips with their holes, and tighten the fasteners without crushing the panel. Operate the window and every door control after reassembly to confirm that no harness or linkage was disturbed.
Choose by fitment and construction
A quality replacement starts with exact application matching, not just a general Tundra description. Confirm the door position, cab style, model year, connector, and latch configuration. Premium aftermarket suppliers may offer assemblies designed around OEM fitment, with upgraded metal components where applicable and warranty coverage that differs by component type.
Used components can be useful when budget or availability controls the repair, and resources covering auto parts from wreckers for Toyota may help locate salvage options. Inspect any used latch for corrosion, binding, damaged connectors, and evidence that the original failure followed it into the replacement.
For a new option, T1A Auto lists vehicle-specific replacement parts and provides fitment information, product guidance, and warranty terms that vary by item. That makes the catalog useful when you want to compare a complete latch assembly with other repair paths rather than gamble on an unmatched actuator.
A broken door-jamb wire can imitate a dead motor, and a binding latch can destroy a new one. Test the circuit first, replace the complete assembly when the internal mechanism is compromised, and verify every function before the trim goes back on.
T1A Auto offers vehicle-matched aftermarket door and latch components for repairs such as this, with fitment guidance and warranty coverage listed by product. Visit T1A Auto to compare the correct Tundra door-lock replacement for your truck and finish the job with the right assembly.
