


You lower the tailgate to unload something and notice a cable hanging loose. Maybe the other side looks tighter, or the gate gives a small jerk before it settles. Before you order a Tundra tailgate cable, separate normal unloaded slack from damaged support hardware. Then match the replacement to your truck, not just the Tundra name.
A cable replacement is manageable on a conventional manual tailgate, but the details matter. The gate needs independent support during the job, the attachment shafts must seat correctly, and a power tailgate needs more than a visual check before you call the repair finished.
Table of Contents
- Match the Cable to Your Tundra Model Year
- Tell a Worn Cable From Normal Slack
- How to Replace a Tundra Tailgate Cable Step by Step
- Test the Tailgate Under Load Before Closing Up
- Replace One Cable or Both and Order the Right Set
Match the Cable to Your Tundra Model Year
| Model years | Part numbers | Sold as | Strap length |
|---|---|---|---|
| 2004-2006 Toyota Tundra | 65770-0C040, 65770-0C050 | Left and right cables | 17 15/16 in |
| 2007-2022 Toyota Tundra | 65770-0C060, 65770-0C070 | Rear left and right replacement set | 17 3/4 in |
| 2023 and newer Toyota Tundra | Confirm by VIN and original cable identification | Confirm individual sides or matched set for the tailgate equipment | Match the vehicle-specific specification |
Use the table as a catalog fitment reference. A year range alone does not confirm fit for every tailgate arrangement, and the listed part numbers are not interchangeable just because the cables look similar. For newer trucks without a confirmed listing, check the VIN and original hardware identification rather than applying an older specification.
The T1A Auto cable set for 2004-2006 Toyota Tundra is listed as a metal replacement for that application, with references 65770-0C040 and 65770-0C050. Compare the attachment arrangement with your truck before ordering.
Why the Tundra name isn't enough
Tundra production spans multiple generations and hardware changes. GoodCarBadCar's U.S. Tundra sales history records 196,555 sales in 2007 and 159,528 in 2024. That broad model history means a search can return similar-looking cables for different applications.
Compatibility depends on the cable's shaft, retaining arrangement, and end fitting, as well as its length. Before shopping, record the vehicle and tailgate details:
- Vehicle identity: Confirm the model year from the vehicle identification information, not the registration date alone.
- Cab and bed configuration: Include both when checking the application.
- Tailgate equipment: Identify a manual tailgate or a power-operated arrangement.
- Package contents: Check whether the listing includes one cable, both sides, or additional attachment hardware.
- Original identification: Photograph any readable part number and both mounting ends before disassembly.
If the application is unclear, use the guide to search for parts by VIN. A stamp on an old cable is only a clue if that cable may already have been replaced; compare it with the vehicle application.
Write down the part reference before comparing listings. Choose a listing with a specific year range and fitment details, rather than one that says only “Tundra.”
Tell a Worn Cable From Normal Slack
Visible slack isn't proof of failure. A manufacturer communication for 2015 Tundras, summarized by the Center for Auto Safety, explains that the cable stays are designed to have some slack when the tailgate carries no load because of tailgate loading requirements.
That guidance has a specific model-year scope. It supports checking the correct vehicle information before condemning a loose-looking cable, not assuming every amount of slack on every Tundra is acceptable.
Inspect the gate with the truck parked securely on level ground. Lower it under control, keep your body out of its drop path, and inspect both cable stays, including the areas next to the fittings where damage can be harder to see.
| Symptom | Likely cause | Check or fix |
|---|---|---|
| Tailgate drops or jerks when opened | Lost support from a failed cable, damaged fitting, or altered cable geometry | Support the gate and inspect before any load test; replace damaged support hardware |
| Visible slack with the tailgate closed or empty | Designed slack may be present | Check model-specific guidance and behavior under a controlled load before replacing |
| Frayed or broken strands in the coated steel | Fatigue and wear | Replace the cable, don't just grease it |
| Corrosion or a flattened section under the coating | Moisture exposure or mechanical damage; road salt may contribute | Inspect the opposite side and plan paired replacement if similarly deteriorated |
| Bent or cracked mounting point | Possible overtightening or impact damage | Repair the mounting point before fitting a new cable |
| One side sits lower than the other | Unequal loading, damaged support, or attachment misalignment | Inspect both sides and compare heights |
Distinguish appearance from lost support
Use a bright inspection light and look around the entire accessible cable circumference. Don't slide bare fingers along suspect wire strands. Check for coating splits, rust emerging near the ends, detached fittings, and distortion where the cable attaches.
Uneven sag deserves investigation, but it doesn't identify the failed component by itself. A shifted attachment, damaged bracket, or incorrect replacement cable can produce a similar appearance. Check whether the gate itself sits square before blaming cable length.
Inspection rule: If you find broken strands, a detached fitting, or a cracked mount, stop. A load test isn't a way to prove damaged hardware is safe.
If the hardware passes visual inspection, apply a modest, controlled load within the truck's documented tailgate limits. Don't stand or bounce on the gate to test it. Watch whether it remains stable and level rather than judging only the curve of an unloaded cable.
Record any persistent jerk, uneven support, or abnormal movement. Structural damage justifies replacement immediately; a repeatable operating symptom justifies further diagnosis even when the coating looks intact.
How to Replace a Tundra Tailgate Cable Step by Step
Prepare a socket set, suitable hand tools, a calibrated low-range torque wrench, eye protection, and a secure means of supporting the tailgate. Compare the new cable ends with the originals before removing anything. This workflow is for a conventional manual tailgate; verify the service procedure for the exact truck.
The basic sequence keeps the gate supported while you exchange its support hardware.
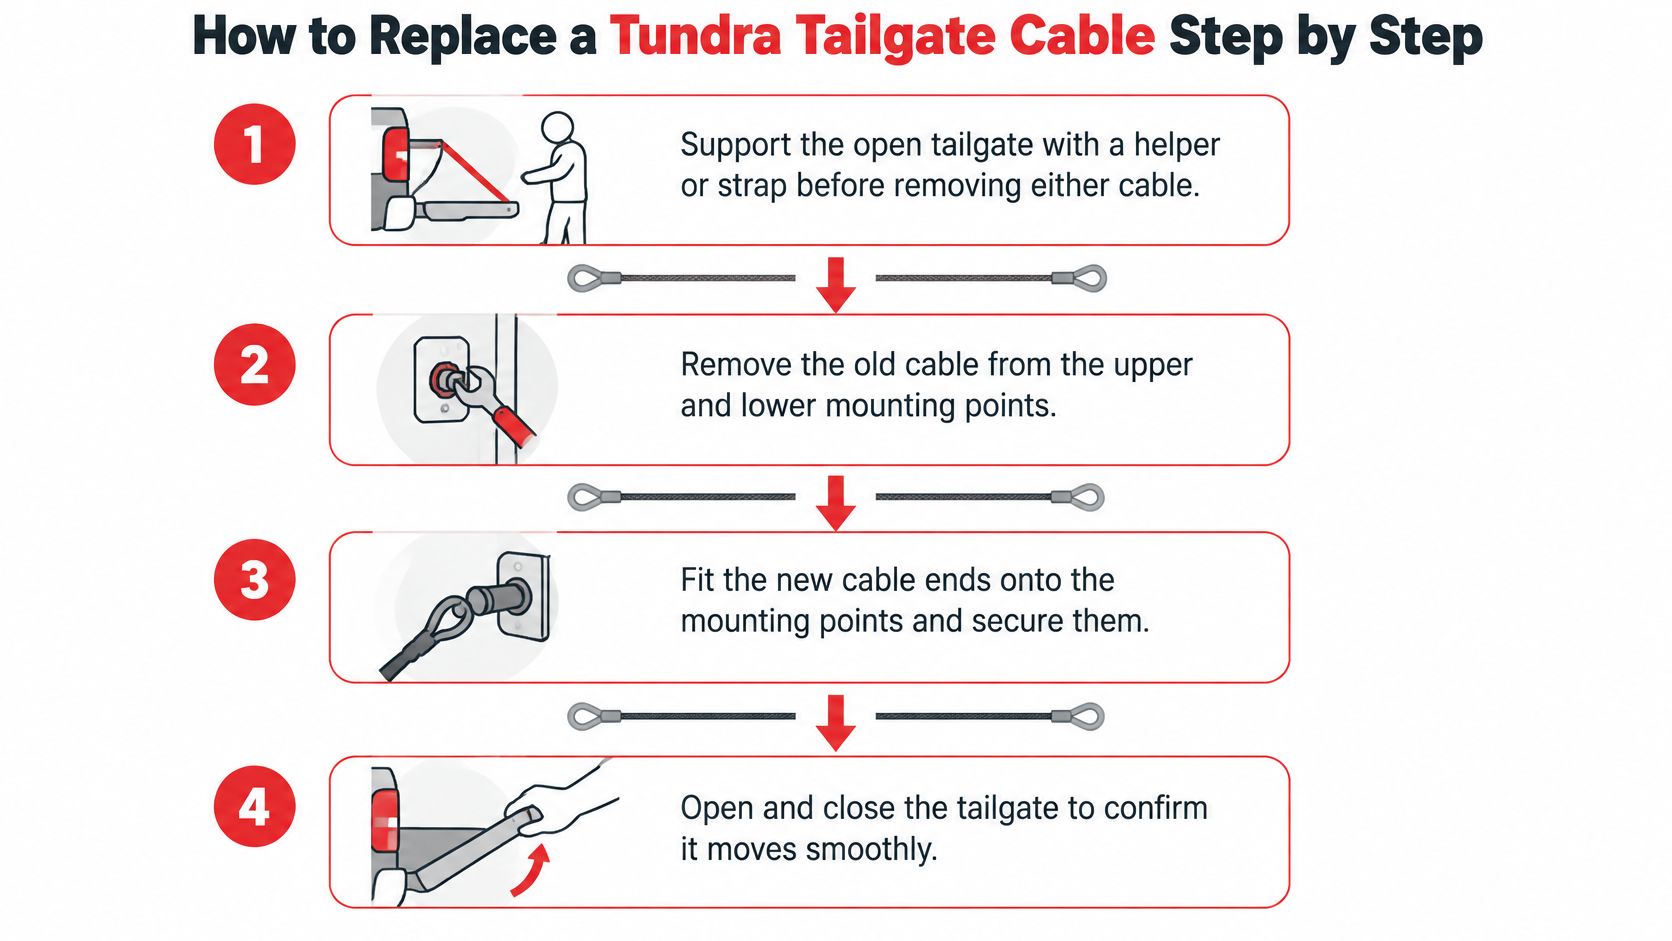
Support, remove, and install
- Support the open tailgate independently. Use a secure strap arrangement or a helper who can maintain control while you work. Take the tension off the cable before releasing it, and don't assume the remaining cable is your work support.
- Work on one side at a time. Photograph the routing, end orientation, washers, and retaining features before removing the old cable. Release its attachments using the appropriate service method, keeping fingers clear as the fittings become unloaded.
- Fit the cable and gate-side shaft to the tailgate. Seat the components squarely and start the associated fastener by hand. If it won't thread easily, stop and check alignment rather than using a ratchet to force it.
- Fit the cable and deck-side shaft to the body. Start that attachment by hand as well, leaving the assembly positioned for a final seating check. Don't confuse the cable attachment with adjacent hinge hardware or loosen unrelated hardware to make the cable fit.
- Check routing and seating. Remove twists and sharp bends, and confirm both shafts are fully seated in their intended positions. A fitting that rests against a shoulder instead of seating over it can look assembled until the gate takes weight.
- Torque both attachment points correctly. The Tundra cable installation procedure specifies 14 N·m (10 ft·lbf) at the gate-side and deck-side attachments. Use a calibrated wrench suitable for that setting, and confirm that this procedure applies to your truck.
- Repeat on the opposite side. Keep the independent support in place while exchanging the remaining cable. Compare routing and fitting orientation, but don't force components into a mirrored arrangement if the vehicle-specific hardware differs.
- Check movement before applying cargo weight. Lower and raise the tailgate slowly several times while watching the cable paths and attachment points. Stop for binding, fresh strand damage, unusual slack, or a side-to-side height difference.
Why fastener control matters
More torque isn't more security. Excess tightening can deform brackets or damage the attachment, while insufficient tightening can permit movement and progressive misalignment. Don't add lubricant, substitute a different bolt, or stack washers to make an ill-fitting assembly tighten down.
Use the correct socket with the wrench square to the fastener. A large wrench working at the bottom of its range is a poor substitute for a tool suited to a light attachment specification. Don't follow the torque wrench with an extra pull from a hand ratchet.
If the attachment hardware is corroded, rounded, or otherwise questionable, identify it before proceeding. Our tailgate cable bolt guide provides additional context for evaluating that part of the repair.
This video provides a visual reference for the replacement work.
Don't cut or press shafts as a shortcut when the specified removal method isn't clear. If the applicable procedure requires that work, wear eye protection and use the proper support and tooling. Stop if the new fitting needs force or modification merely to reach its mounting point.
Before driving, confirm that the tailgate closes fully, latches securely at both sides, and sits evenly. A power tailgate also needs functional and diagnostic verification, not just correctly tightened cables.
Test the Tailgate Under Load Before Closing Up
Start with the tailgate unloaded. Confirm the original complaint, then operate it through its normal opening and closing sequence while keeping cargo, hands, and tools clear. A gate that looks level while stationary may still bind, trigger jam detection, or fail to latch during movement.
After it passes the unloaded check, assess support under the owner's normal use conditions. Use a controlled load within the vehicle's documented limits, distribute it sensibly, and keep people off the gate. Remove anything that could slide, obstruct closure, or interfere with a power mechanism before operating it.
Use this checklist to keep the functional check deliberate.
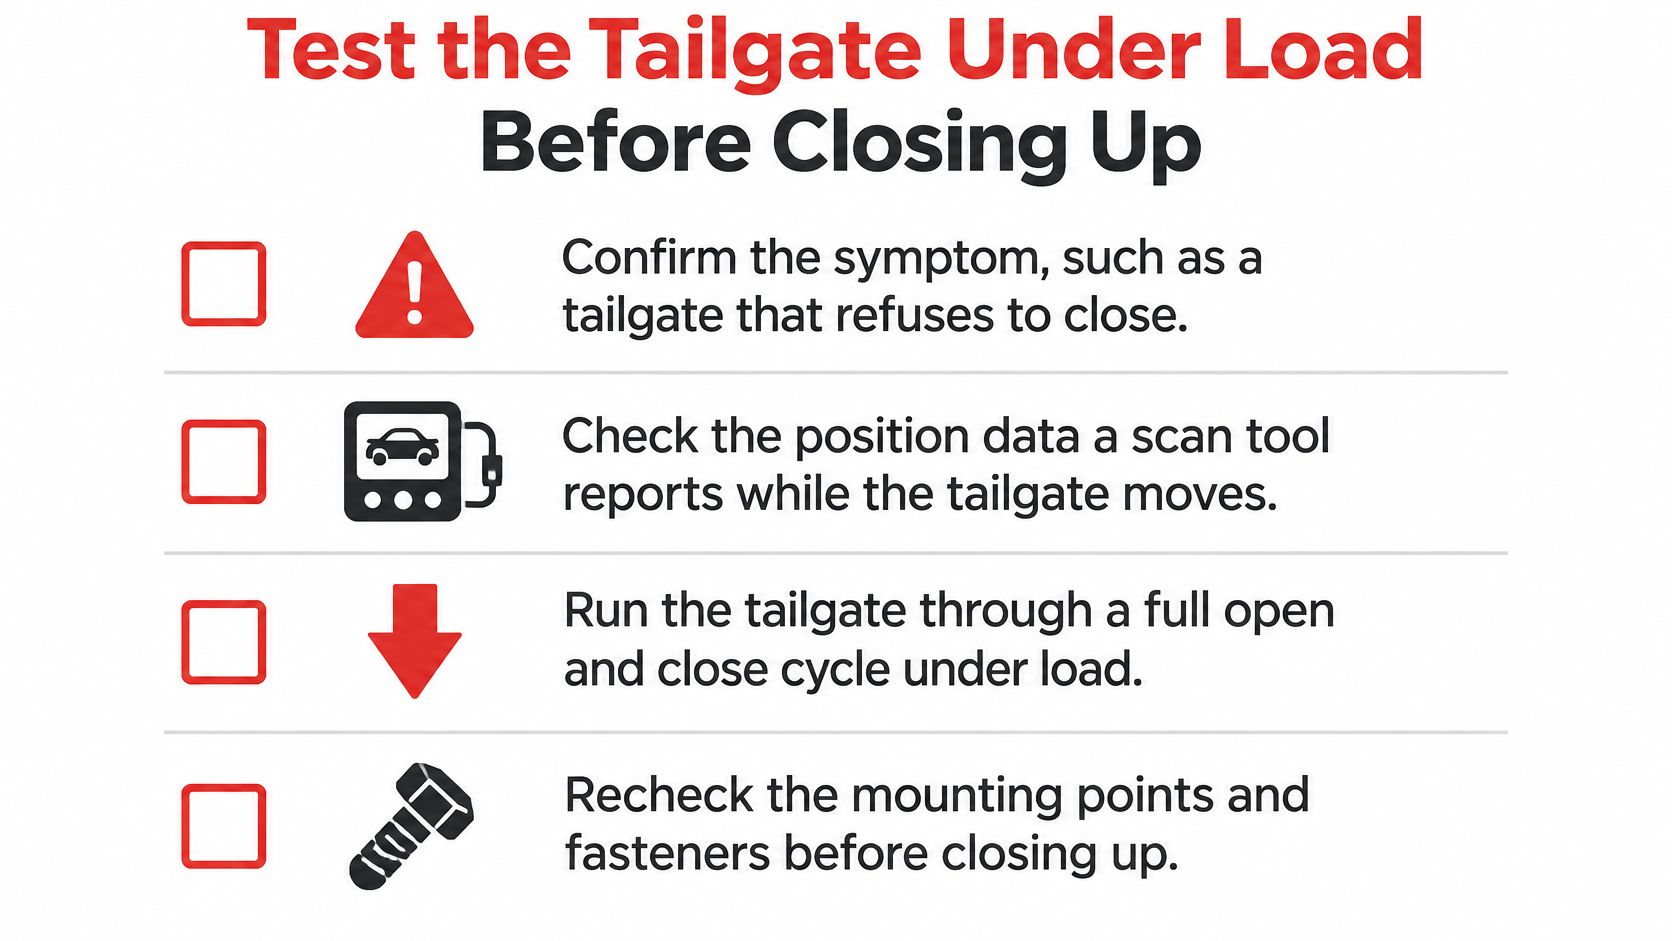
What to watch and record
- Original symptom: Note whether the no-close condition, jerk, or uneven movement still occurs.
- Audible warnings: Record beeps and when they occur rather than repeatedly forcing another attempt.
- Movement: Watch for asymmetric travel, binding, or an unexpected reversal.
- Latching: Confirm complete engagement, not merely a tailgate that appears closed.
- Attachments: Recheck for shifted fittings, bracket movement, and disturbed fasteners after testing.
If movement is normal but latching isn't, inspect the latch system separately rather than changing cable length to compensate. Our tailgate latch assembly guide can help distinguish latch-related checks from cable support work.
Power-tailgate position checks
For the application covered by Toyota's power-tailgate diagnostic bulletin hosted by NHTSA, the specified open-position reading is 5047–5054, the closed-position reading is 4000, and the procedure records a nominal 27 mm hole height before adjustment. These are bulletin-specific diagnostic references, not universal settings for every powered Tundra tailgate.
A technician should confirm bulletin applicability, perform a vehicle health check, and inspect the relevant position data. Altered cable geometry or a shifted attachment can affect those readings even when the cable looks intact.
A clean-looking cable isn't proof that a power tailgate is correctly adjusted.
The documented adjustment procedure involves removing cable stays individually and modifying the slotted end when necessary. That's controlled service work, not a general instruction to file a replacement cable until the warning stops.
Count the repair complete only when the full operating cycle repeats cleanly, the latch engages, and applicable position readings remain stable. If readings stay outside the specified range, take the truck to a dealer or a shop equipped to perform the Toyota diagnostic procedure.
Replace One Cable or Both and Order the Right Set
Replace both cables when they share the same age and exposure. A single-side repair still makes sense after isolated damage if the opposite cable is a recent replacement and passes inspection.
Compare the complete assemblies, including wire, end fittings, and mounting points. Saving a serviceable cable can be reasonable, but only when its condition is clear.
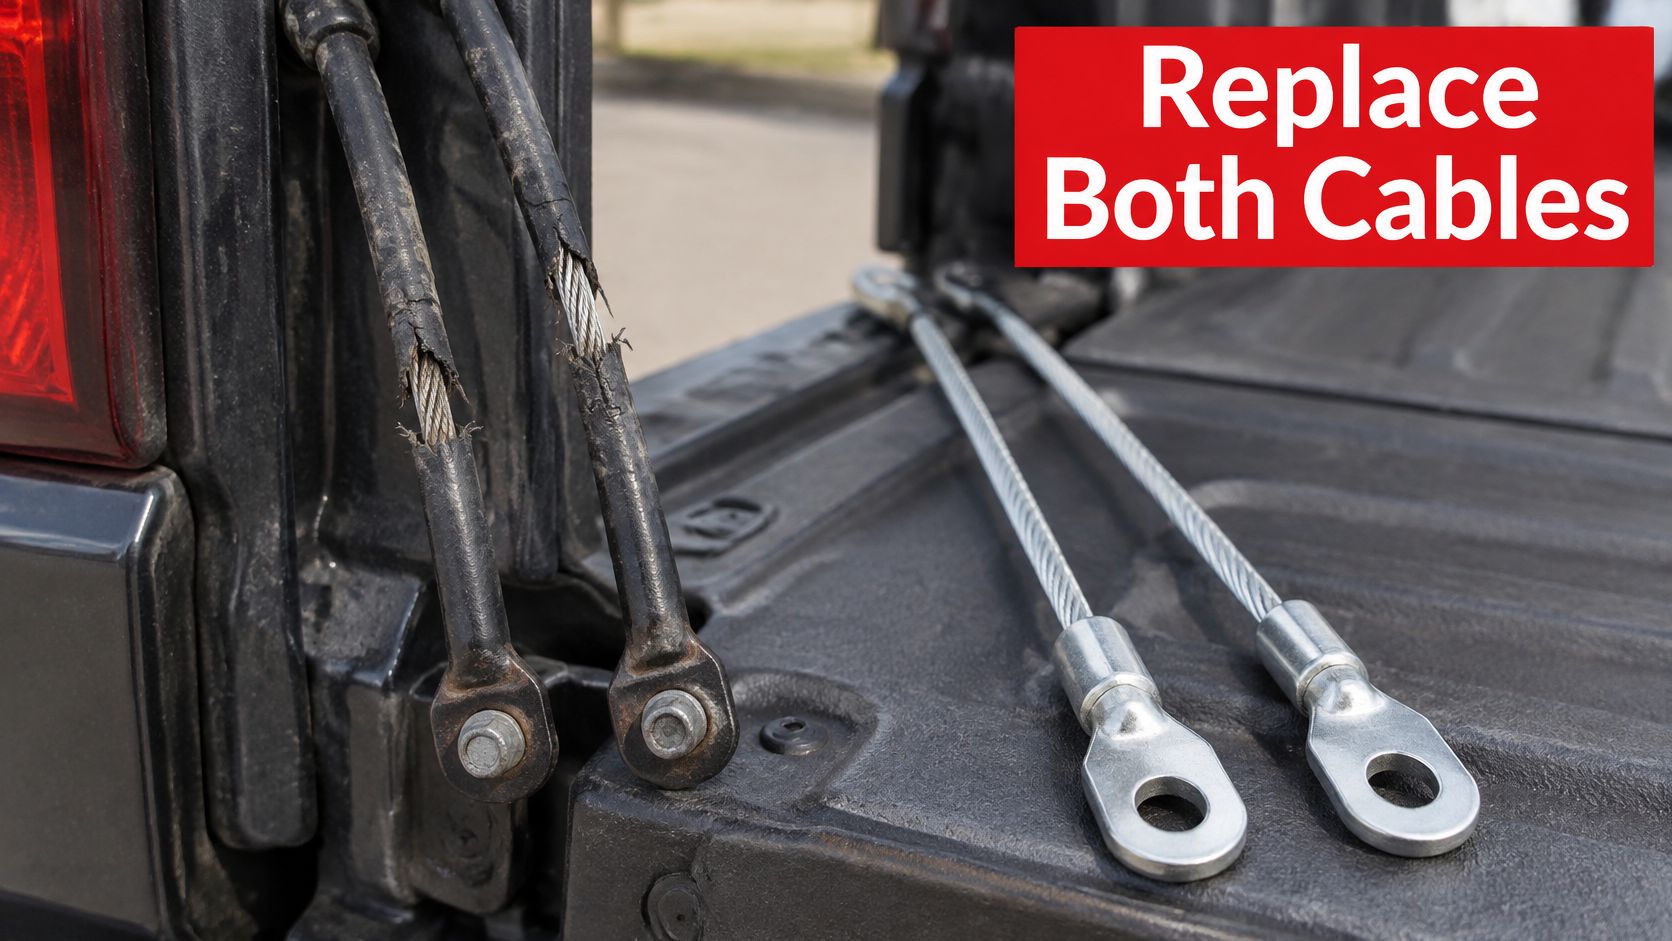
Choose by condition, not convenience
Owner discussions on Tundras.com describe coating deterioration and debate lubrication versus replacement. These accounts can prompt an inspection, but they do not establish a dependable service-life interval or prove that intact-looking wire retains its original strength.
Lubrication can reduce friction; it cannot repair corrosion, fatigue, broken strands, or flattened cable sections. Don't cover deterioration and treat a quieter or smoother cable as repaired.
| Condition of the opposite cable | Replace one side? | Replace both sides? |
|---|---|---|
| Passes a full inspection, with age and exposure documented | Reasonable after isolated damage; less attractive if both are aging together | Optional when structurally sound |
| Frayed strands, flattened section, or corrosion | No; retain only a sound cable | Yes |
| Same era, same exposure, both cables aging | Not recommended as the default | Yes, to restore matched support |
| Power tailgate needing readjustment after one side changes | Only with the applicable diagnostic and full-cycle checks afterward | Yes if both cables are defective; out-of-range readings alone don't condemn them |
Photograph both cables, their end fittings, and mounting points before deciding. Record comparable length measurements and unloaded gate height, but don't use matching measurements as proof of internal condition. If the remaining cable fails inspection, replacing only one side is a poor saving.
What an upgrade can and can't solve
The original coated cable already contains metal wire. A metal replacement is an upgrade only when its fitment, construction, end fittings, and corrosion protection are established.
A like-for-like replacement preserves the original support arrangement. An alternative design may suit cables near the end of their service life, provided its specifications and fitment are established. Neither design repairs a cracked mounting bracket.
Buying advice: Confirm the replacement's strap length and fitment for your Tundra. A different length can change how the support cable fits the tailgate geometry.
For a fleet truck that runs salted winter routes, inspect both cables at scheduled service, especially the fittings and any areas beneath damaged coating. Record each cable's condition and exposure instead of assigning every truck the same replacement age.
Keep a repair record
Before ordering, collect the vehicle identification, original part references, photographs, and inspection findings in one job record. Keep the removed parts until the replacements pass functional checks, then record the new assemblies as a baseline for future inspections.
Most T1A Auto parts come with installation instructions, and its support team is available to assist with installation questions. Once a warranty claim is approved, T1A Auto ships a replacement part. If a return is required, it provides instructions.
That record helps a small shop avoid repeating diagnosis and gives an owner a clear reference when the cables are inspected again. T1A Auto offers vehicle-specific tailgate cables and related support hardware. Have your model year, part reference, and tailgate details ready when comparing replacement options.
