


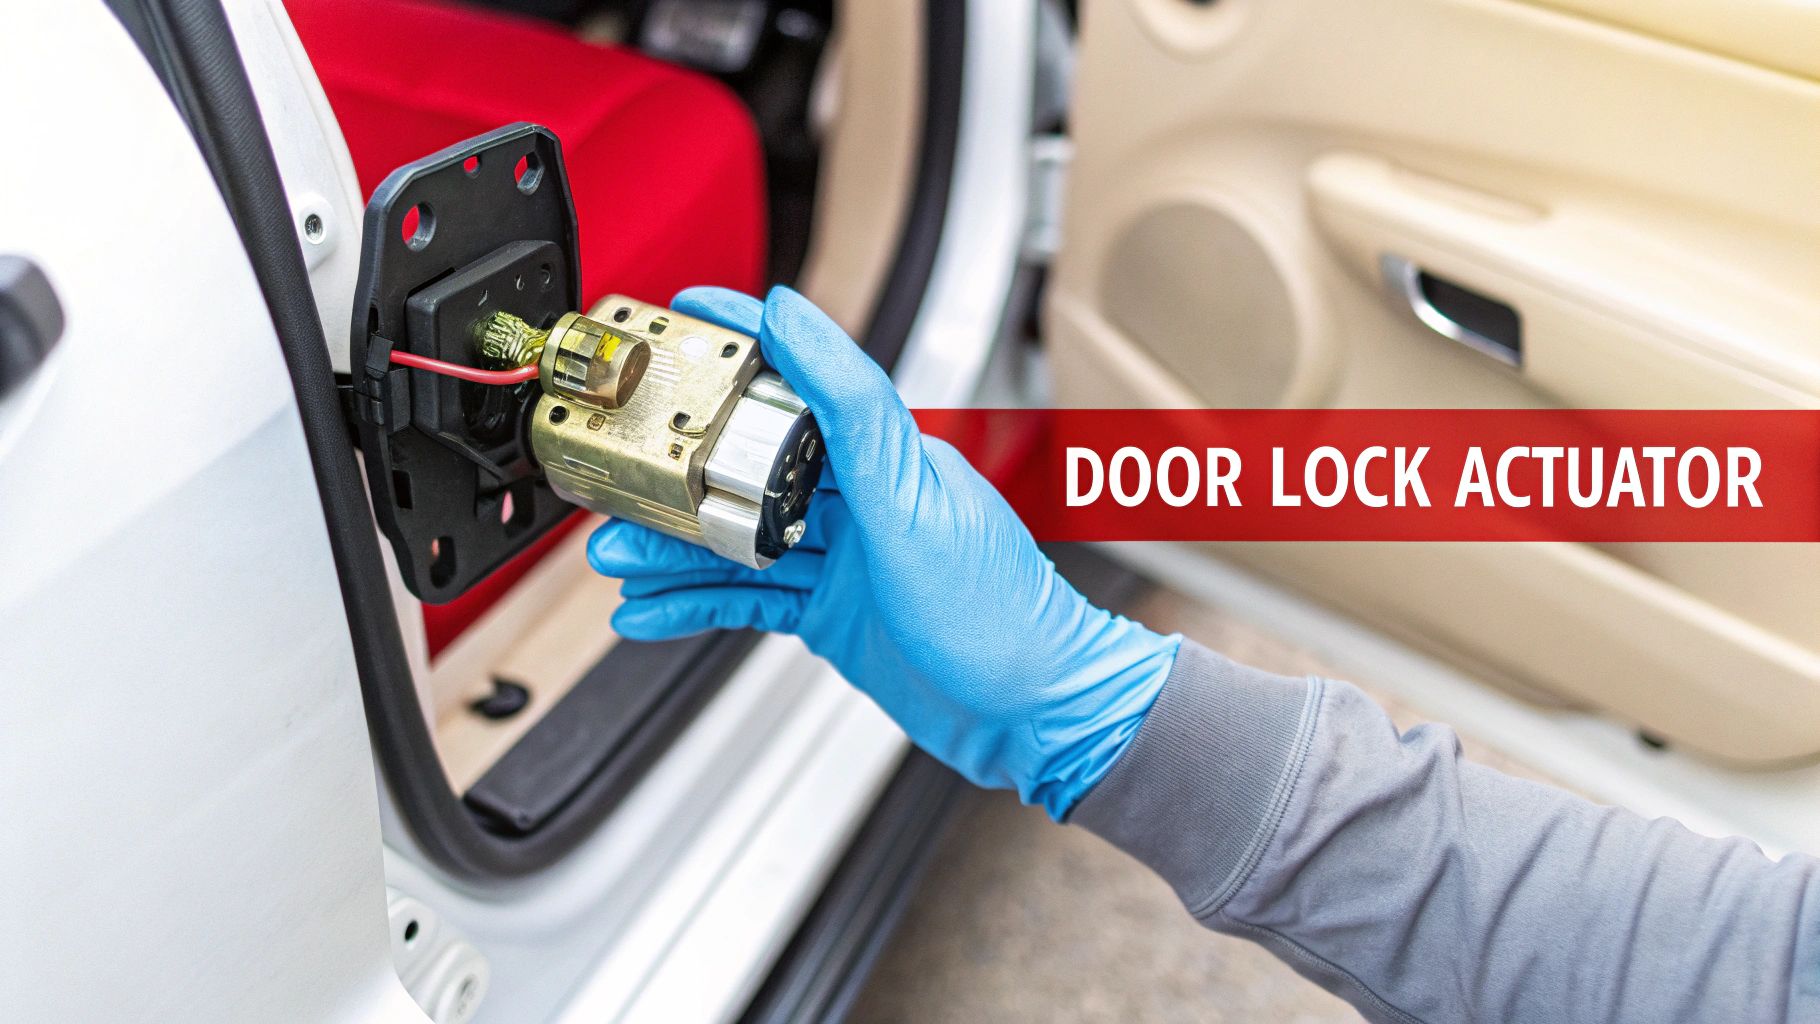
Ever wonder what actually happens inside your car door when you hit the lock button on your key fob? That satisfying thunk is the work of a small but mighty component called the door lock actuator.
It's a compact electric motor hidden inside the door panel. When it gets a signal from your key fob or the switch on your door, it physically moves the lock mechanism, securing or unlatching your door. Think of it as the muscle behind your car's entire power locking system.
The Heart of Your Car's Security System
The best way to understand the central locking system is to think of it as a team. Your key fob is the coach calling the play, and the door lock actuator is the player on the field that makes it happen. Without it, we'd all be back to the old days of locking each car door individually with a key.
When you press that button, a low-voltage electrical signal zips over to the actuator. A tiny motor inside spins a set of gears, which in turn push or pull a small rod connected to the door latch. That simple mechanical movement is what secures your vehicle.
Why This Small Part Is So Important
A fully functioning door lock actuator is something we take for granted until it stops working. A single failure can throw off your daily routine and, more importantly, compromise your vehicle's security. It's a reminder that even small parts matter, a good principle to remember whether you're doing a routine check-up or inspecting a used EV.
Here’s a quick rundown of what a healthy actuator gives you:
- Convenience: Lock or unlock every door at once. Simple.
- Security: Properly secure your vehicle and deter theft.
- Safety: Quickly unlock all doors in an emergency, which is a critical feature.
- Peace of Mind: Walk away from your car knowing it and everything inside is protected.
The numbers show just how essential these parts are. The global automotive door lock actuator market was valued at $2.2 billion in 2023 and is expected to grow at a 4.50% CAGR through 2032. That growth is fueled by our demand for better security features in everything from passenger cars to commercial trucks.
When one actuator fails, it's more than just an annoyance. It’s a weak link in your car's security chain. A door that won’t lock properly is an open invitation, while a door that won’t unlock can be a major safety hazard in an emergency.
With this basic understanding, you'll be in a much better position to figure out what's wrong with your locks and decide if it's a repair you can handle yourself.
How a Door Lock Actuator Really Works
Ever wondered what’s happening inside your car door when you hit that lock button? It’s not magic. It’s a beautifully simple chain of events that takes your command and turns it into that satisfying thunk of a secured door—all in a split second.
When you press the lock or unlock button on your key fob or the switch on your door, you’re not physically moving anything. You're actually sending a small radio signal to your car's brain, usually called the Body Control Module (BCM). Think of the BCM as the air traffic controller for all your car's comfort and security electronics.
The BCM catches that signal, figures out what you want to do (lock the driver's door, unlock all doors, etc.), and then shoots the order out to the right part.
From Electrical Pulse to Physical Motion
Once the BCM gets your command, it sends a quick jolt of electricity down a wire to the door lock actuator. This electrical pulse is the starting pistol for the actuator, waking up the tiny motor inside and telling it to get to work. The actuator’s entire job is to turn this zap of electricity into real, physical movement.
Tucked inside the actuator's plastic casing is a small but surprisingly strong DC motor. When it gets that signal from the BCM, it spins to life for a brief moment. This little motor is the heart of the whole operation, providing the muscle needed to move the lock.
The Bottom Line: The door lock actuator is basically a translator. It takes a quiet electrical whisper from the car's computer and turns it into the brute force needed to physically lock or unlock your door. It’s the essential link between digital convenience and mechanical security.
But a spinning motor alone can't lock a door. Its rotational energy has to be converted into the back-and-forth motion that actually moves the lock mechanism.
The Gears Behind the Action
This is where some clever little gears come into play. Most actuators use a rack-and-pinion system to get the job done. A small gear, the pinion, is attached directly to the motor. As it spins, its teeth mesh with a flat, toothed bar called the rack, pushing it in one direction.
That rack is connected right to the door’s locking rod. So, when the motor spins one way, it pushes the rod and locks the door. When the BCM reverses the electrical polarity for an unlock command, the motor spins the other way, pulling the rack and the rod back, unlocking it. That distinct whir-clunk you hear? That’s the sound of the motor, gears, and latch all doing their job in perfect sequence.
Why the Guts of the Actuator Matter
Those internal gears might be small, but they take a beating over the years. Every single time you lock or unlock your car, they're put under stress. Add it all up over a few years, and you’re talking about thousands upon thousands of cycles. This is where a lot of factory-installed actuators meet their end.
To save a few pennies on production, many original (OEM) actuators are built with plastic gears. It doesn't take an engineer to figure out what happens next: over time, they crack, the teeth strip, and the actuator fails.
Here’s a quick breakdown of why upgrading makes a huge difference:
Actuator Components Plastic vs Upgraded Metal
| Component Feature | Standard OEM (Plastic) | T1A Auto Upgraded (Metal) |
|---|---|---|
| Durability | Prone to stripping and cracking over time, especially in extreme temperatures. | Resists wear, stripping, and breakage for a significantly longer lifespan. |
| Reliability | Performance can degrade, leading to inconsistent locking or complete failure. | Provides consistent and reliable operation cycle after cycle, year after year. |
| Long-Term Cost | Lower initial cost but often requires premature replacement, leading to higher lifetime costs. | Higher initial investment but prevents future failures, saving money and hassle. |
This is exactly why opting for a quality replacement with upgraded metal internal components, like the ones we build at T1A Auto, is such a smart move. Beefier metal gears just don't strip out or break like their plastic counterparts. It's a simple, effective upgrade that ensures your new part will last, giving you real peace of mind.
Recognizing the Signs of a Failing Door Lock Actuator
A door lock actuator almost never dies quietly. It usually gives you plenty of warning signs before it fails completely, almost as if it's trying to tell you something's wrong. If you learn to spot these symptoms early, you can diagnose the problem and fix it before you're stuck with a door that won't lock—or worse, won't open.
These little motors work hard, cycling thousands upon thousands of times over the life of a vehicle. It's no surprise they're one of the most common parts to fail in modern cars and trucks, typically showing their age after 100,000 to 150,000 miles. The culprits are usually internal gear wear, moisture damage from a leaky window seal, or simple electrical shorts. While passenger cars make up about 70% of the actuator market, they're a frequent repair on commercial vehicles, too.
This flowchart gives you a simple look at the chain of command, from the signal sent by your key fob to the Body Control Module (BCM) and finally to the actuator's motor.
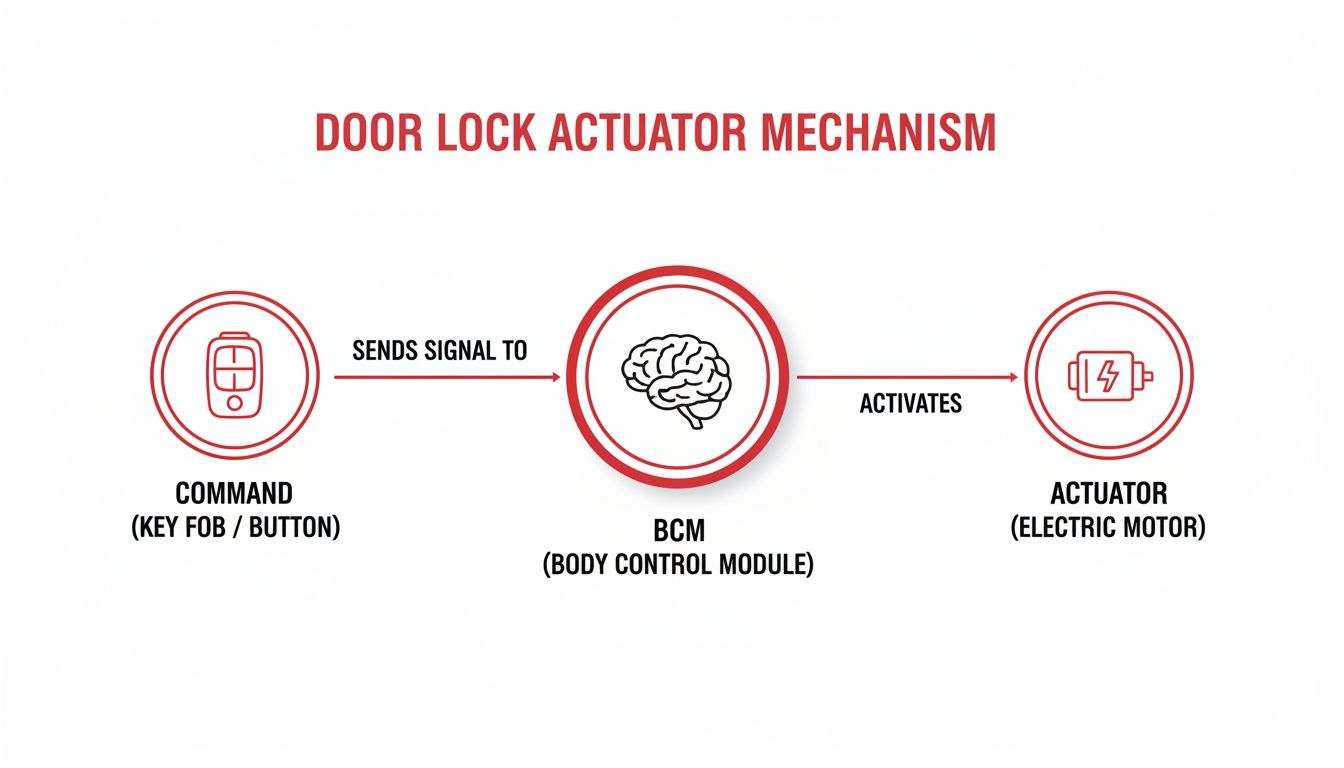
As you can see, the actuator is what does the actual heavy lifting—turning that electronic signal into physical movement.
Unmistakable Noises From Inside the Door
One of the first and most obvious clues is the noise coming from inside your door. A healthy actuator makes a solid, satisfying thunk. When it's on its way out, you'll start to hear some pretty strange sounds when you hit the lock or unlock button.
Listen carefully for any of these:
- A Buzzing or Whirring Sound: This usually means the electric motor is still spinning, but the gears inside are stripped. The motor is trying, but it can't grab onto anything to move the lock.
- A Series of Rapid Clicks: This often points to an actuator that's trying to engage but lacks the power or mechanical grip to finish the job. It's getting stuck.
- Grinding Noises: This is the classic sound of broken or worn plastic gears chewing on each other. It’s a dead giveaway that the internal parts have failed.
- Complete Silence: If three doors lock and one makes no sound at all, the motor in that door's actuator has probably burned out or isn't getting any power.
These sounds are your best early warning system. Don't ignore them.
Erratic and Inconsistent Lock Behavior
Beyond the noises, a dying actuator will start to act up. Its performance becomes unpredictable, which can be a real headache in your daily routine. This is usually when most people realize something is seriously wrong.
This erratic behavior can manifest in a few different ways. Maybe the lock works just fine on a warm afternoon but refuses to budge on a cold morning. Temperature swings can cause worn electrical contacts and old plastic parts to expand or contract just enough to cause a failure.
Another common symptom is a lock that only works some of the time. You might find yourself clicking the key fob two or three times before the door finally responds. That kind of inconsistency points directly to a weak motor or a bad electrical connection inside the actuator itself.
Key Takeaway: An actuator that works "sometimes" is an actuator that's failing. Inconsistency isn't a random glitch; it's a clear sign that the component is on its last legs and needs to be replaced before it quits for good.
Finally, you might notice one door just isn't cooperating with the others. You hit the central lock button, and three doors lock, but one stays open. This "rogue door" is the clearest sign that the problem is with its specific actuator, not a bigger system-wide issue like a fuse. Catching these kinds of things early is what regular vehicle maintenance is all about. For a complete guide to keeping your car healthy, check out our ultimate car maintenance checklist. By learning to spot these signs, you can confidently pinpoint the issue and get ready for a straightforward DIY repair.
How to Diagnose a Bad Actuator Yourself
Before you spend a dime or even think about pulling off a door panel, you need to be sure the actuator is actually the problem. Nothing's worse than wasting a weekend and buying a part you don't need. The good news is you can run a few simple checks with just your ears, your eyes, and your car key to figure out what's really going on.
These tests are quick, easy, and don't require a professional toolbox. By working through them, you can rule out other common culprits and be confident you're on the right track.
The Simple Listen Test
This is the easiest place to start. Go to the door you think is acting up, stand close, and have a friend (or use your key fob) hit the lock and unlock buttons a few times. A healthy actuator makes a solid, satisfying thunk or clunk sound when it works. You know the sound.
A dying actuator, however, often makes its presence known with some pretty strange noises. Listen carefully for any buzzing, whirring, or grinding. These sounds usually mean the little electric motor inside is still trying, but the gears are stripped and can't move the lock anymore. If you hear dead silence from that one door while the others lock, the motor has probably given up completely.
Manual vs. Power Test
Next, let's figure out if we're dealing with a mechanical jam or an electrical failure. First, try locking and unlocking the door using the power lock switch inside your car, and then again with your key fob. Pay close attention to what happens.
Now, take your physical key, stick it in the outside lock, and turn it. If the lock works perfectly fine with the key but doesn't respond to the power buttons, that's a huge clue pointing directly at a bad actuator or the wiring going to it. But if neither the key nor the power lock works, you might have a bigger problem with the latch assembly itself.
Pro Tip: When an actuator fails, it's almost always a one-door problem. If all of your power locks suddenly stop working at once, don't rush to buy four new actuators. The issue is more likely a central problem, like a blown fuse or a bad master relay.
The Crucial Isolation Test
This last test is the final confirmation. Use the central locking button on your driver's door to lock every door at once. Then, walk around the car and physically check each door handle. Did they all lock? If only one door—the one you've been suspicious of all along—is the odd one out, you've successfully isolated the issue.
This confirms the problem is contained within that specific door's locking system, making the actuator the number one suspect. Actuator failure is a surprisingly common headache, especially on popular trucks. For example, some data shows that on vehicles like the Toyota Tacoma, about 1 in 5 owners may run into lock issues by 80,000 miles, often because the plastic gears inside wear out.
If you're ready for the next step and want a more detailed walkthrough, check out our guide on how to test a door lock actuator, which gets into using a multimeter to be absolutely certain.
Your Step-by-Step Guide to Replacing an Actuator
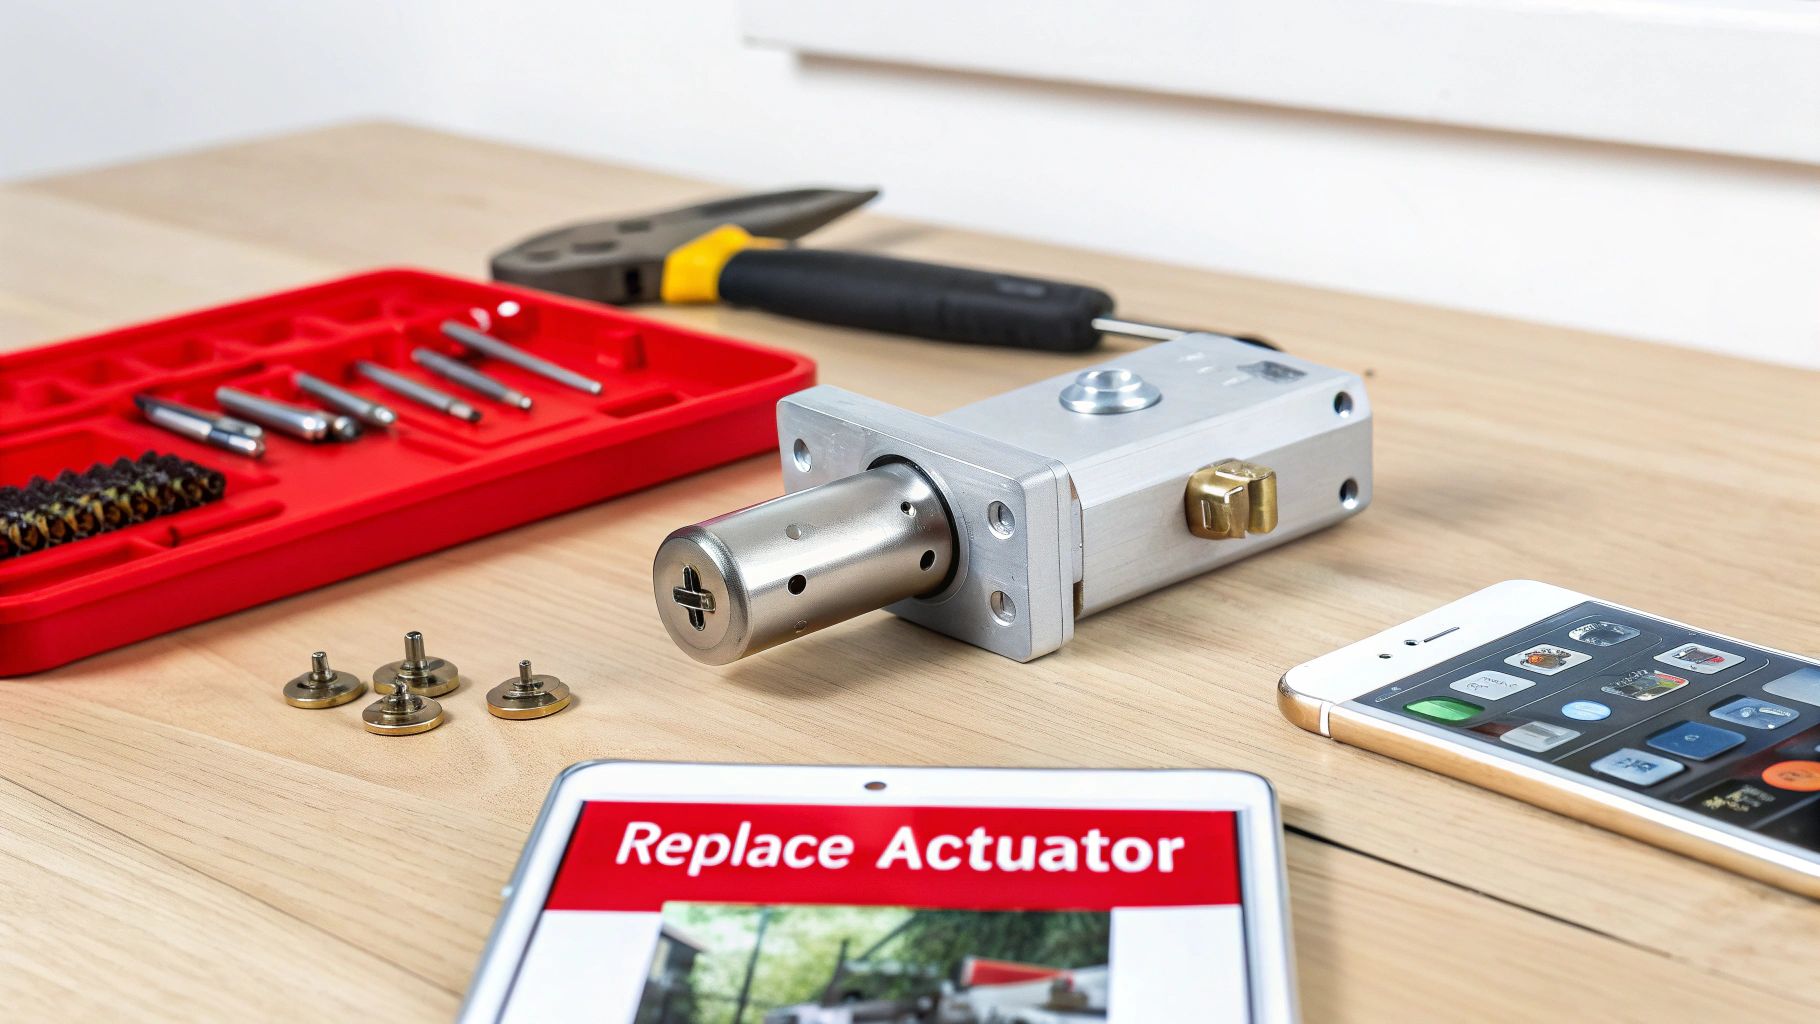
Alright, you've figured out the problem, and now it's time to get your hands dirty. The good news is that replacing a door lock actuator is a very doable DIY job that can save you a few hundred bucks in labor costs. With a little patience and the right tools, you can have your car's security back in order in a single afternoon.
This guide will break the whole process down into simple, easy-to-follow steps. We’ll walk you through everything from gathering your tools to snapping that last trim piece back on, so you can tackle this with confidence.
Gathering Your Essential Tools
Before you even think about starting, getting your tools lined up will make the difference between a smooth job and a frustrating mess. You don't need a professional-grade garage, but a few key items are non-negotiable if you want to do this without breaking anything.
Here's what your basic toolkit should look like:
- Trim Removal Tool Kit: These plastic pry tools are your best friend. They’re essential for popping off the door panel without scratching your paint or snapping the delicate clips.
- Socket Set with Extension: You'll absolutely need this for the bolts holding the actuator in place and maybe for other parts like a window guide rail.
- Screwdriver Set: Have a good mix of Phillips and flathead screwdrivers handy. They’ll be needed for the various screws hidden in the door panel and handle.
- Needle-Nose Pliers: These are perfect for getting a grip on stubborn electrical connectors and fiddling with the small linkage rods inside the door.
- Work Light or Headlamp: It's dark inside a door panel. A good light source is crucial for actually seeing what you’re doing.
Having these laid out and ready to go will make the whole process much smoother and save you from running to the hardware store mid-job.
Removing the Interior Door Panel
The first real step is getting that interior door panel off. It can look intimidating, but it’s a straightforward process as long as you’re careful and methodical. The trick is knowing where all the hidden screws and clips are.
Most door panels are held on by a couple of visible screws—often tucked away behind small plastic covers in the armrest or behind the door handle—and a bunch of plastic clips around the edge.
Pro Tip: Before you start yanking on things, pull out your phone and take a few pictures of the door panel. A visual reminder of where screws go and how cables are routed will be a lifesaver when it's time to put it all back together.
Once the screws are out, grab your plastic trim tool and gently start prying the panel away from the door frame, starting from the bottom. You’ll hear a series of pops as the clips release. That first step can be the trickiest, so for a more detailed walkthrough, check out our guide on how to remove a car door panel to make sure you get off on the right foot.
Disconnecting and Replacing the Actuator
With the panel off, you'll need to carefully peel back the plastic vapor barrier to get into the door's inner cavity. You should now be able to see the actuator assembly, which is usually bolted right next to the door latch mechanism. It will have an electrical plug and at least one mechanical rod connected to it.
Here’s the basic order of operations for the swap:
- Disconnect the Electrical Connector: Find the release tab on the wiring harness, press it, and gently pull it away from the old actuator.
- Unhook the Linkage Rods: Carefully unclip the little plastic retainers holding the metal rods that connect the actuator to the door handle and lock. Pay close attention to how they’re oriented before you pop them off.
- Unbolt the Old Actuator: Use your socket wrench to remove the bolts (usually three of them) holding the actuator assembly to the door. The old part should now come right out.
- Install the New Actuator: Line up the new actuator and secure it with the bolts. Reconnect the linkage rods to their proper spots and snap the retaining clips closed.
- Reconnect the Power: Plug the electrical connector back into the new unit. You should hear a solid click when it’s securely in place.
Before you put everything back together, give the new actuator a test run. While the door is still open, use your key fob and the car’s interior lock switch to make sure it locks and unlocks properly. Hearing that satisfying thunk is the sound of success. Once you've confirmed it works, you can reassemble the door in the reverse order you took it apart.
How to Choose the Right Replacement Actuator
Picking out a new door lock actuator isn’t as simple as finding the cheapest one that pops up in a search. The choice you make now determines whether you’re doing a quick, one-time fix or tearing your door panel off again in six months. Let's make sure it's the former.
The first, non-negotiable step is confirming exact vehicle fitment. An actuator for a Honda Civic might look a lot like one for a Toyota Camry, but trust me, it won't work. To get it right, you need to match the part to your vehicle's specific year, make, and model. This ensures every mounting hole, electrical plug, and rod connection lines up perfectly.
Beyond the Basics: Durability and Warranty
Once you've nailed down the fit, it's time to think about quality. A cheap price tag is often a warning sign of cheap materials. Many budget-friendly aftermarket actuators are built with the same flimsy plastic gears that likely failed in your original part.
Think of it this way: why replace a failed part with another one built to the same weak standard? Investing in a premium replacement with upgraded internals is how you stop the cycle of repairs.
When you're comparing actuators, keep an eye out for these crucial differences:
- Internal Guts: Does the description mention upgraded metal gears or a reinforced design? That’s your sign of a part built to last, often outperforming the original factory component.
- Material Quality: Better parts use higher-grade plastics and metals that won't get brittle from heat, cold, and the stress of daily use.
- Warranty Coverage: A manufacturer’s warranty tells you how much they believe in their own product. A 90-day warranty on a cheap part should raise some serious red flags.
This is a classic dilemma for any DIYer. If you want to get into the weeds of how different parts are made and what to look for, check out this guide on the differences between OEM vs. aftermarket parts. The bottom line? Spending a little more now on a quality part with a solid, long-term warranty saves you a ton of time and frustration down the road.
To make things even simpler, here's a quick checklist to guide your purchase.
Replacement Actuator Buying Checklist
Use this table as a quick reference to ensure you're ticking all the right boxes when you buy your replacement part.
| Consideration | What to Look For | Why It Matters |
|---|---|---|
| Vehicle Compatibility | Exact Year, Make, Model, and Door Position (e.g., "Front Driver Side") match. | Guarantees the part will physically fit and all connections will line up without modification. |
| Internal Components | Product descriptions mentioning "upgraded metal gears" or "reinforced design." | Metal gears are a direct solution to the most common failure point (stripped plastic gears), ensuring longevity. |
| Warranty | A limited lifetime warranty or a multi-year warranty. | A strong warranty signals the manufacturer's confidence in their product's durability and quality. |
| Electrical Connector | The pin count and connector shape match your vehicle's harness. | Prevents electrical issues and ensures the actuator communicates correctly with the car's locking system. |
| Included Hardware | Look for kits that include new mounting screws or clips if needed. | Saves you a trip to the hardware store and ensures you have everything for a smooth installation. |
Taking a minute to run through these points before you click "buy" is the best way to ensure you get the right part the first time and enjoy a repair that actually lasts.
Common Questions About Door Lock Actuators
When you're gearing up for a repair like this, a few questions are bound to come up. Getting solid answers can be the difference between a smooth job and a frustrating afternoon. Let's tackle some of the most common things people ask when they're in your shoes.
Can I Just Replace the Motor Inside the Actuator?
It’s a tempting thought, especially if you’re trying to keep costs down. The little electric motor is almost always the culprit, so why not just swap it out?
The short answer is: it’s usually not worth the headache. These actuator assemblies are typically sealed units, not designed to be opened up. Trying to pry one apart without cracking the housing or breaking a clip is a real challenge.
Even if you get it open, finding the exact replacement motor and getting all those tiny gears lined back up perfectly is a fussy, high-precision task. For a repair you can trust, your best bet is to replace the entire door lock actuator assembly. It's the most reliable and efficient way to go.
Should I Replace All My Actuators at Once?
Ah, the classic "while you're in there" debate. When one actuator gives up, it's usually because it’s hit its limit after thousands of locking and unlocking cycles. Since all the actuators in your car are the same age and have been used about the same amount, it’s a safe bet the others could be on their way out too.
You don't have to, of course. But many seasoned mechanics and DIYers will replace them in pairs (both fronts or both rears) or even do all four at once. Think of it as preventative maintenance. It saves you the hassle of pulling another door panel apart just a few months from now.
The Big Question: Does a broken actuator cause a safety inspection failure? In most places, a vehicle will not fail a standard safety inspection just for a faulty power lock. As long as you can still open the door from the inside and outside, you're typically in the clear. Still, it's a major security and convenience issue you'll want to fix.
Ultimately, whether to replace them all at once comes down to your budget and how you value your time. If you’ve got the parts and the weekend blocked off, doing the whole set can be a smart move that buys you some serious peace of mind.
For a guaranteed fit and lasting performance on your next repair, trust T1A Auto to deliver premium, reliable parts that get the job done right the first time. Find your perfect replacement part today at https://t1aauto.com.