


A power window usually quits at the worst time. The glass stops halfway in the rain, drops into the door with a thud, or creeps up crooked and leaves a gap you can hear on the highway. Most drivers start by searching for a replacement part. That's understandable, but it's also how you waste a Saturday and buy the wrong assembly.
The smarter move is to diagnose the failure before the door panel comes off. A window regulator assembly might be the problem, but it isn't always the problem. Slow travel can come from drag in the run channel. A dead window can come from a switch, wiring fault, or worn motor. On newer vehicles, safety features and calibration logic can turn a simple parts swap into an electrical fitment issue.
Table of Contents
- Introduction to Window Regulator Assembly Function
- How to Tell Your Window Regulator Assembly Is Failing
- Choosing the Correct Window Regulator Assembly for Your Vehicle
- Safe Replacement Walkthrough for Your Window Regulator Assembly
- Adjustment Testing and Pro Tips for Lasting Results
- Final Checklist and When to Get Extra Help
Introduction to Window Regulator Assembly Function
Inside the door, the window regulator assembly does one job. It moves the glass up and down in a controlled path and keeps the glass aligned while it travels. When it fails, the window may bind, tilt, stall, or fall.
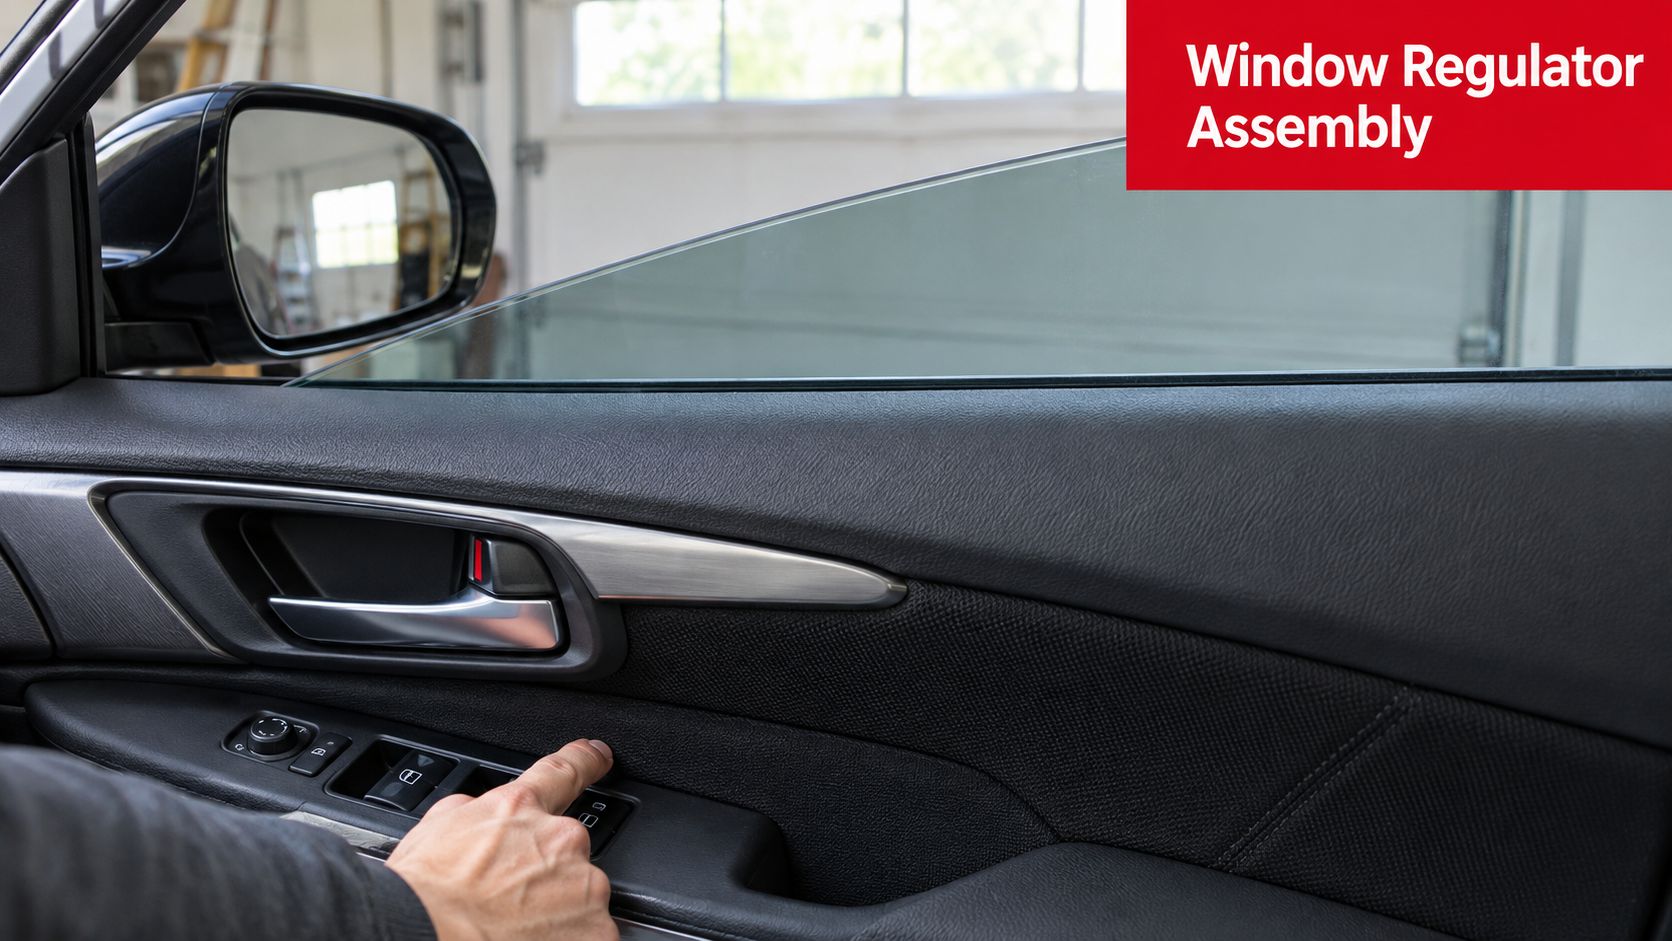
If you want a quick visual primer on the basics, this overview of what a window regulator is is useful before you start pulling trim.
What the assembly actually includes
Use of the word "regulator" often refers to the whole setup, but there are a few different designs.
- Cable style is common on modern vehicles. A motor drives a cable and carriage that slides the glass along a track.
- Scissor style uses pivoting arms. You'll still see this on some applications, especially older designs.
- Gear-driven layouts vary by manufacturer, but the idea is the same. The regulator converts motor rotation into smooth glass movement.
On power windows, the motor and regulator work together. Sometimes they're sold separately. Sometimes they're sold as one combined assembly. That matters when you're ordering parts and when you're trying to decide whether the old motor is still worth keeping.
Why this part matters more than people think
A bad regulator isn't just annoying. It affects weather sealing, theft protection, and day-to-day drivability. If the glass won't seat correctly at the top, water gets in, wind noise shows up, and the door may never feel right until the alignment is fixed.
This isn't a small niche category either. Multiple market studies place automotive window regulators in the multi-billion-dollar range globally, with one estimate valuing the market at US$7.5 billion in 2024, projected to reach US$9.1 billion by 2030 at a 3.3% CAGR, while another places it at USD 7.79 billion in 2024 with growth to nearly USD 11.6 billion by 2032 at a 5.1% CAGR. A third study estimates USD 7.702 billion in 2024 rising to USD 12.24 billion by 2035 at a 4.3% CAGR. The same market coverage also identifies power window regulators as the dominant type, with 68.3% share, and says Asia Pacific accounts for 42.7% of revenue in 2025 according to automotive window regulator market research.
Practical rule: If the glass is loose, crooked, or unsupported, treat it like it can drop at any moment. Hands, trim, and speakers lose that fight.
How to Tell Your Window Regulator Assembly Is Failing
Most replacement guides jump straight to panel removal. That's backwards. The fastest way to save time is to listen to what the window is doing before you touch a screw.
Independent repair guidance points to a major gap in typical how-to content. If the motor runs but the glass doesn't move, drops suddenly, binds, or tilts, the regulator is a likely suspect. If the window moves slowly, that can also point to worn motor brushes, degraded grease, or friction in the tracks, so the regulator assembly may not be the only issue according to early failure diagnosis guidance for window regulators.
Symptom patterns that usually mean regulator trouble
A few failure patterns come up again and again:
- Motor noise with no glass movement often means the regulator has stripped, separated, or lost control of the carriage.
- Glass drops into the door usually points to a broken support point or failed regulator mechanism.
- Window tilts forward or backward as it moves suggests the regulator isn't carrying the glass evenly.
- Grinding or clicking from inside the door often means the drive side is under stress or skipping.
Those are the jobs where I expect to find a mechanical failure, not just an electrical one.
Symptoms that can fool you
Slow movement gets misdiagnosed all the time. Dirt and grit in the window channel increase load on the cable or gear drive. Binding in the track can make a healthy regulator act weak, and it can also overwork a new one if you replace the assembly without fixing the drag. Independent technical guidance specifically identifies dirt, grit, or restriction in the window channel as a key cause of overload and binding in power window systems according to power window regulator failure analysis.
Before pulling the panel, check these basics:
- Listen at the door. No sound at all can mean switch, fuse, wiring, or motor.
- Watch the glass edge. If one side rises faster, alignment or regulator support is suspect.
- Help the glass gently by hand. If it suddenly moves with assistance, drag or channel friction may be a big part of the problem.
- Try the master switch and the door switch. One works and the other doesn't? That points away from the regulator.
Don't assume a slow window needs a regulator. If the mechanism is still structurally sound, cleaning and lubrication can solve the complaint without replacing the assembly.
What I trust before disassembly
If the glass has fallen, tilts badly, or the motor clearly runs while the glass stays put, I stop debating and prepare for an internal mechanical failure. If the window is just slow, I stay suspicious of friction until proven otherwise. That's the difference between fixing the problem and just replacing parts.
Choosing the Correct Window Regulator Assembly for Your Vehicle
Once the diagnosis points to the assembly, fitment becomes the next trap. The wrong part might look close on the bench and still be useless when the connector, glass clamp, or mounting pattern doesn't match.
The fitment checks that matter
Start with the basics and don't skip any of them:
- Vehicle details. Year, make, model, and door position matter. Front left and rear left are not interchangeable unless the catalog says they are.
- Manual or power. This sounds obvious, but it still gets missed.
- Regulator only or regulator with motor. Some vehicles let you reuse the original motor. Others package the assembly as one unit.
- Connector shape and harness routing. A plug that almost fits is the wrong plug.
- Glass attachment style. Clamp design and mounting point location must match the glass.
Modern buyers also need to think past bolt holes. Recent market coverage says anti-pinch and obstacle detection are becoming baseline expectations, and some vehicles can disable window operation when a pulse sensor in the regulator motor assembly malfunctions. That means the right replacement increasingly depends on electronics compatibility, not just whether the glass fits the track, as noted in market coverage of automotive power window regulator design trends.
Window Regulator Assembly Options Compared
| Assembly Type | Best For | Key Consideration |
|---|---|---|
| Regulator only | Original motor is confirmed good | Confirm motor transfer compatibility and gear engagement |
| Regulator with motor | Unknown motor condition or combined assembly design | Match connector, mounting, and any electronic features |
| Manual regulator | Vehicles without power windows | Verify crank interface and arm geometry |
| Recycled OE assembly | Older vehicles or hard-to-find applications | Inspect wear, cable condition, and mounting points closely |
If you're dealing with an older truck or a model with shrinking aftermarket support, it can help to find recycled car components for comparison or hard-to-source OE hardware. Just inspect used regulators carefully. A used assembly with dry tracks or frayed cables can put you right back in the door.
For buyers comparing factory and replacement parts, this guide on OEM vs aftermarket parts is worth a look. One practical option in this category is T1A Auto, which catalogs vehicle-specific window regulator replacements and focuses on fitment by vehicle search rather than universal guesswork.
Safe Replacement Walkthrough for Your Window Regulator Assembly
This job is very doable in a home garage if you stay organized and respect the glass. The window itself is what turns a normal door-panel repair into a part-breaking mess when it isn't supported.
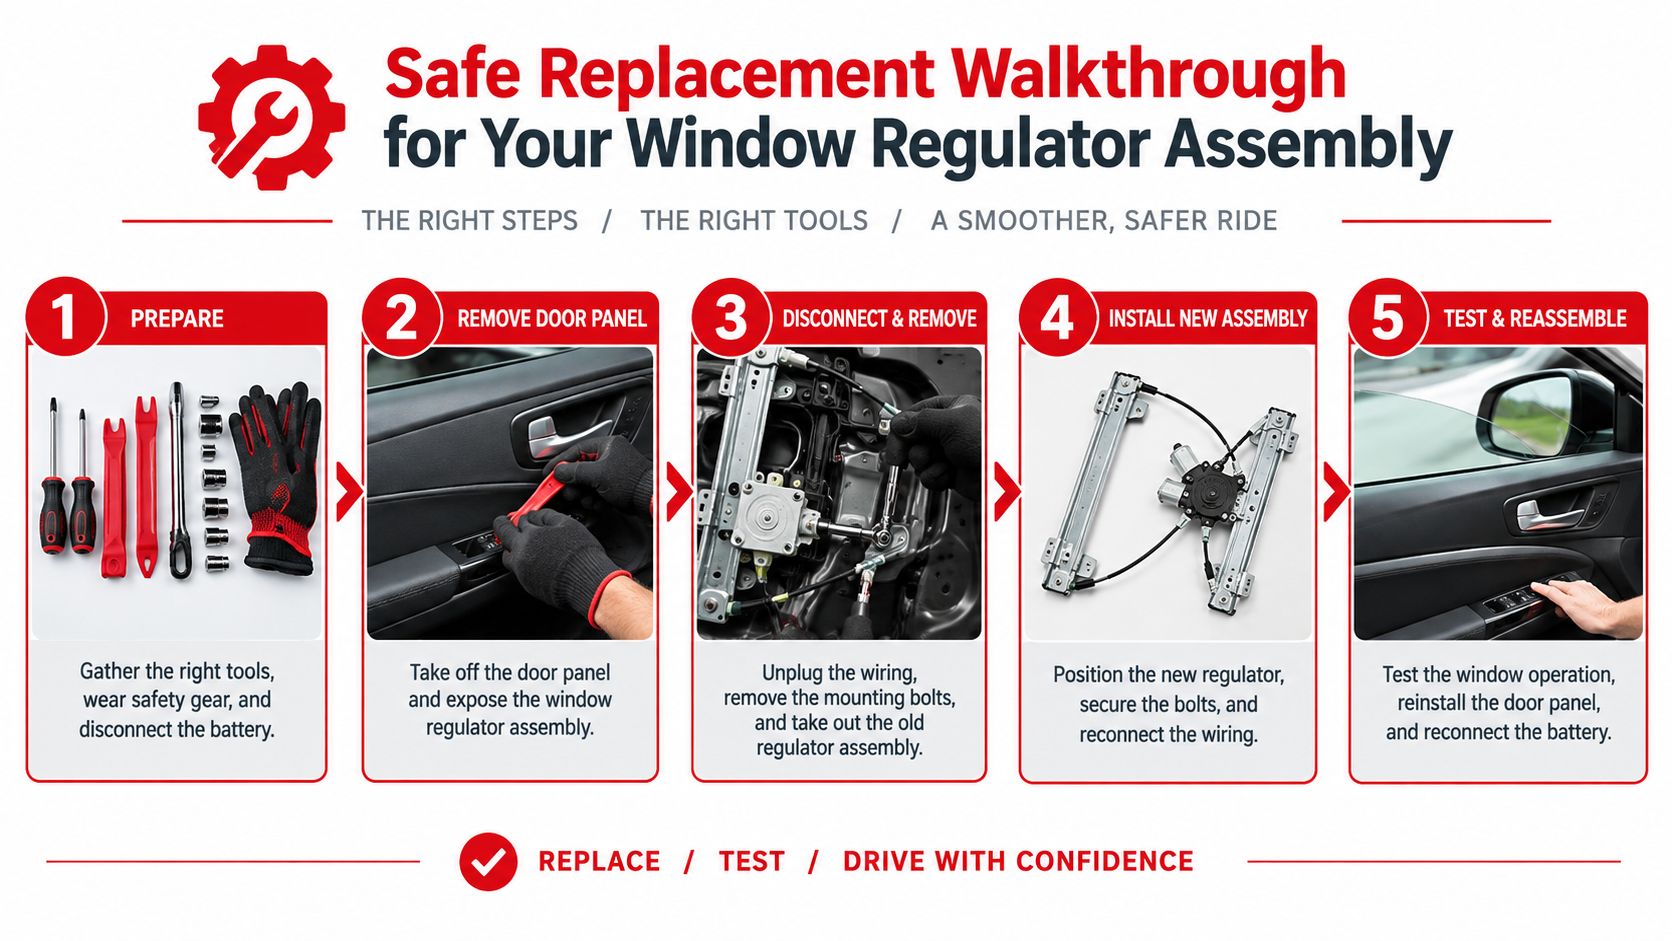
A practical workflow used in service guides is to disconnect the battery, remove the door panel and moisture barrier, secure the glass, disconnect the glass from the regulator, remove the regulator, install the replacement, reconnect the motor harness, and test smooth travel before reassembly. Some designs also require drilling out rivets or grinding rivet heads, and some assemblies need to be pre-positioned so the motor gears mesh correctly before final tightening according to this replacement workflow for a window regulator.
Get the door open and stable first
Disconnect the battery if the service information for your vehicle calls for it, especially on doors with side airbags or sensitive electronics. Then remove the trim panel carefully. Hidden screws are usually behind switch bezels, pull handles, trim caps, or reflector lenses.
Set the panel somewhere safe instead of letting it hang by the wiring. Peel the moisture barrier back slowly. If you tear it up, you create future water leaks and speaker problems.
If you need a refresher on clip locations and trim removal habits, this guide on how to remove a car door panel helps before you start prying.
Support the glass before you touch the regulator
This is the part people rush, and it's the part that bites them.
Use painter's tape across the top of the door frame, or use a temporary support that holds the glass up securely. If the regulator has already failed and the glass is loose, treat it like it can slide down the second you disconnect it.
Keep one hand on the glass whenever the attachment points are loose. Tape is a helper, not a guarantee.
Disconnect the glass from the regulator carriage or clamps. Some vehicles give you access through service holes. Others make you reposition the window first so the fasteners line up with the openings.
Remove the old assembly without forcing it
Once the glass is free and supported, unplug the motor harness and remove the regulator fasteners. Some assemblies come out cleanly with bolts. Others are riveted in place and need drilling or grinding before removal.
Dry-fit the replacement before tightening anything fully. I look for three things right away:
- Track position. The regulator should sit naturally in the door, not under twist.
- Gear engagement. If the motor and regulator interface isn't seated correctly, the assembly may bind on first movement.
- Harness path. Wires must route where the factory intended, away from moving arms, cables, and glass edges.
Here's a video reference that helps some people visualize the door work before they start:
Test before trim goes back on
Reconnect what you need for a live test and run the window through its travel before reinstalling the barrier and panel. Watch the front and rear edges of the glass, listen for cable strain, and make sure the top seal closes evenly.
The biggest avoidable mistakes are simple:
- Losing support on the glass and cracking trim or the glass itself
- Misrouting the wiring so the regulator snags it
- Forcing the regulator into place when spring tension or alignment is wrong
If the travel isn't smooth with the panel off, it won't magically improve with the panel on.
Adjustment Testing and Pro Tips for Lasting Results
A new window regulator assembly can still work badly if the glass is slightly off in the channel, the tracks are dirty, or the system needs electronic relearn. A decent repair becomes a durable repair.
What to test before the panel goes fully back on
Run the glass all the way up and all the way down several times. You're checking for even movement, full seal contact, and no hesitation at the same point in travel.
If the window cocks slightly as it rises, loosen the glass attachment just enough to correct the seating and try again. Don't start reefing on bolts to fix alignment. That usually makes things worse.
Use a window-safe lubricant sparingly on the run channels if they're dry or dirty. The goal is to reduce drag, not soak the door.
Electronics matter on newer vehicles
Power windows used to be mostly mechanical with a motor attached. That's no longer true on many models. If the vehicle uses anti-pinch logic, obstacle detection, or position learning, the replacement may need a calibration or relearn procedure before the auto-up function works correctly.
A window that moves normally in manual mode but acts wrong on auto-up often needs calibration, not another regulator.
If you're also working around a garage, shop, or outbuilding where weather sealing matters, practical references like auto shop window solutions Safety Restore can be useful for thinking through visibility and enclosure choices in the workspace itself. That doesn't replace vehicle service information, but it does help when you're setting up a cleaner place to do trim and glass work.
Habits that help the new assembly live longer
- Clean the channels early. Grit in the run channel adds load every time the glass moves.
- Fix slow operation quickly. A dragging window can overwork cables, gears, and the motor.
- Watch harness routing on reassembly. One trapped wire can create a new problem that looks mechanical.
- Don't force auto-up against resistance. If the glass binds, find the cause before cycling it again.
- Reinstall the moisture barrier carefully. Water inside the door belongs behind that barrier, not in the cabin or on the speaker.
Final Checklist and When to Get Extra Help
By the time the job is done right, you've handled four separate tasks. You diagnosed the fault instead of guessing, matched the part to the vehicle and feature set, installed it without losing the glass, and tested the travel before buttoning up the door.
Use a short final check before calling it finished:
- Glass seats evenly at the top
- Auto-up and auto-down behave normally if equipped
- No clicking, popping, or cable strain sounds
- Door panel sits flush and all switches work
- Moisture barrier is back in place
Call a shop if the window still binds after alignment checks, if the motor circuit acts intermittently, or if the vehicle won't complete its calibration procedure. That's especially true on models where the regulator motor assembly ties into safety logic and position sensing. Some problems aren't in the regulator at all. They're in the control side.
If you need a replacement that matches your vehicle correctly, T1A Auto carries window regulators and other high-wear door components with vehicle-search fitment tools, plus install-focused resources that help avoid common mistakes. Browse T1A Auto if you want to compare options before opening the door panel.
