


The window is halfway down, rain is coming, and the crank either spins without lifting anything or locks up as the glass approaches the top. It's tempting to order a replacement immediately. But a torn glass run, loose handle, or distorted door can imitate a failed regulator, and a new mechanism won't fix those problems.
A useful window regulator manual starts with diagnosis, not unbolting. The job is manageable with ordinary hand tools, but you need to separate glass resistance from mechanism resistance, support the pane securely, and leave final tightening until the glass tracks correctly.
Table of Contents
- Tell a Bad Regulator From a Bad Channel
- Tools Glass Support and Door Safety
- How to Remove and Install the Regulator
- Align the Glass and Set the Fasteners
- Failures That Come Back After the Swap
- Match the Door Before You Order
Tell a Bad Regulator From a Bad Channel
A free-spinning crank tells you the drive isn't reaching the glass. It doesn't automatically tell you where that connection failed. Check that the handle is engaging its shaft before condemning the mechanism behind the panel.
The manual regulator is the complete load-bearing assembly, not just the handle. Its crank drive, gears, arms or cable, pivots, and carrier work together to lift and hold the pane. A broken connection anywhere along that path can leave the handle moving while the glass stays put.
Resistance is a different clue. If the window moves comfortably through most of its travel but becomes stiff near the end, inspect where the glass enters the seals. A pane that tips forward or backward deserves the same attention before you buy parts.
Separate the mechanism from the glass
Remove the trim for access, then support the glass before detaching its carrier. With the pane independently secured, disconnect the glass attachment according to the vehicle procedure and gently operate the unloaded regulator. Keep your fingers outside the arms, cable path, and carrier travel.
If the mechanism remains hard to turn, inspect its gears, pivots, cable, and track. If it moves smoothly, investigate the glass path instead. With a helper controlling the pane, check its movement in the channels without allowing it to drop or twist.
A manufacturer service bulletin hosted by NHTSA directs technicians to inspect window guides and slot seals for lumps, protrusions, tears, and other abnormalities. Those small defects matter because a folded seal can grip the glass hard enough to feel like a mechanical jam.
Manual window symptoms and what to replace
| What you feel | Likely cause | Next action |
|---|---|---|
| Handle spins freely, glass stays put | Stripped crank gears or broken regulator drive | Confirm handle engagement, then replace the failed regulator; stop cranking |
| Stiff only near full up or full down | Torn slot seal, lumpy glass run, or dirty channel | Inspect and replace the damaged run or seals first |
| Hard crank after glass is unbolted | Binding arms, pivots, cable, or track | Replace the regulator assembly after checking crank engagement |
| Regulator moves smoothly, glass still binds | Guides, weather seals, or a bent door shell | Repair the channel or door before fitting a new unit |
| Frayed cable, kinked track, or cracked pivot | Failed regulator assembly | Replace; lubrication will not restore drive |
| Slow or diagonal travel after a new part | Mounts off the witness marks or glass not seated | Loosen, realign, and retest before final torque |
Know when to stop testing
Visible cable damage or a cracked pivot ends the lubrication experiment. Grease won't reconnect a broken drive, restore missing teeth, or straighten a kinked track.
If you discover a motor or previous conversion behind the panel, use the window motor versus regulator guide to identify what supplies the lifting force.
Practical rule: Don't install a replacement regulator against a channel that still grips, twists, or traps the glass.
Tools Glass Support and Door Safety
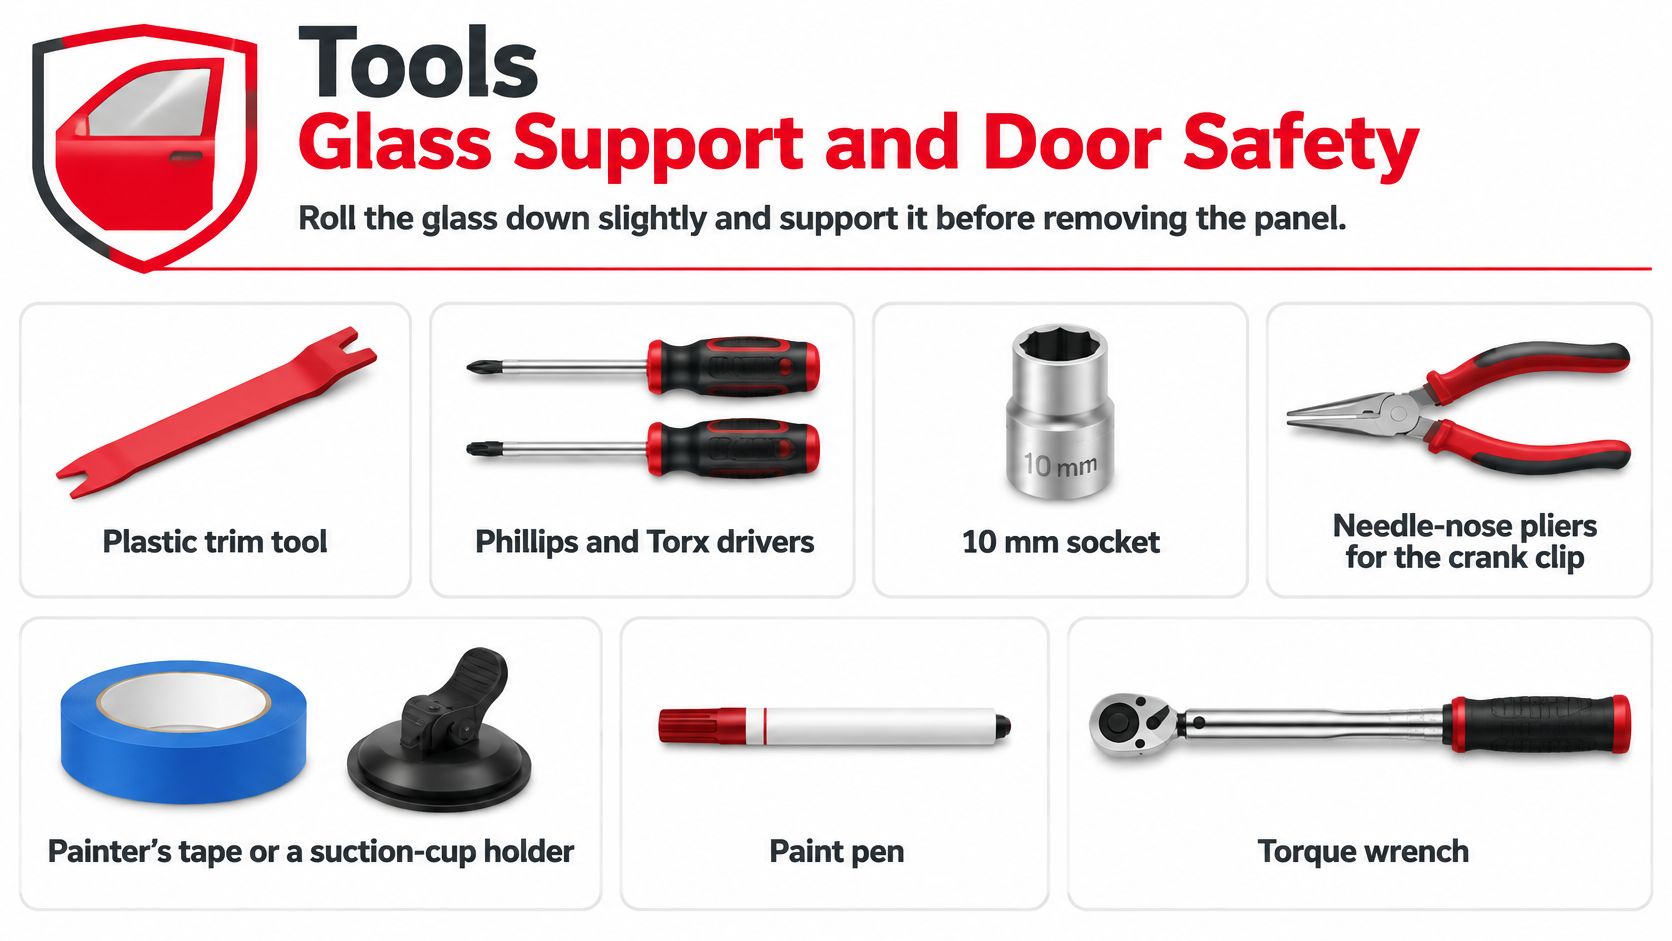
Glass support comes before releasing any load-bearing fastener. Position the pane so you can reach its attachments, then secure it independently of the regulator. If the mechanism has already failed, have a helper control the pane while you establish support.
Lay out the tools before opening the door. Searching for pliers while balancing loose glass is exactly the situation you want to avoid.
- Trim tools: Use a plastic trim tool to release the panel without levering against its finished face.
- Drivers and sockets: Gather Phillips and Torx drivers, plus a 10 mm socket as a starting point. Confirm the actual fasteners on your vehicle.
- Crank-clip tools: Use a crank-clip removal tool or needle-nose pliers where access allows.
- Glass support: Have painter's tape suitable for the surfaces involved or a proper suction-cup support fixture.
- Marking and tightening: Keep a paint pen, small-parts tray, and suitable torque wrench within reach.
Use this checklist to stage the bench before you start.
Support the pane without trusting weak tape
On a framed door, broad tape strips can pass over the upper frame and attach to clean glass surfaces. Cross the strips to resist movement, but don't assume tape stuck to dusty glass or delicate paint will hold. Use a dedicated fixture when the frame design, surface condition, or glass weight makes tape unreliable.
An unsecured pane can drop into the door, damage its edge, or trap a hand. Keep hands out from beneath it even after support is fitted, and don't slam or move the door while the glass is detached.
Engineering literature on window-regulator mechanism development describes the progression from metal lever arrangements to cable-driven designs. That difference matters at the access opening: a bulky scissor assembly needs a different removal path from a narrow cable track.
Protect the trim and electrical equipment
A hand-crank window doesn't need a window-motor connector, but the door may still contain powered locks, speakers, or airbag equipment. Follow the vehicle's battery-disconnection procedure if you'll disturb those components, including its specified airbag waiting period.
Release the crank's retaining clip rather than jamming a screwdriver beneath the knob. Cup a hand around the clip so it doesn't disappear across the workshop.
Peel the vapor barrier carefully from a corner and preserve the sealing material where possible. Photograph cable routing and mark adjustable mounting positions before loosening them. Those preparations cost little effort and prevent guesswork during reassembly.
How to Remove and Install the Regulator
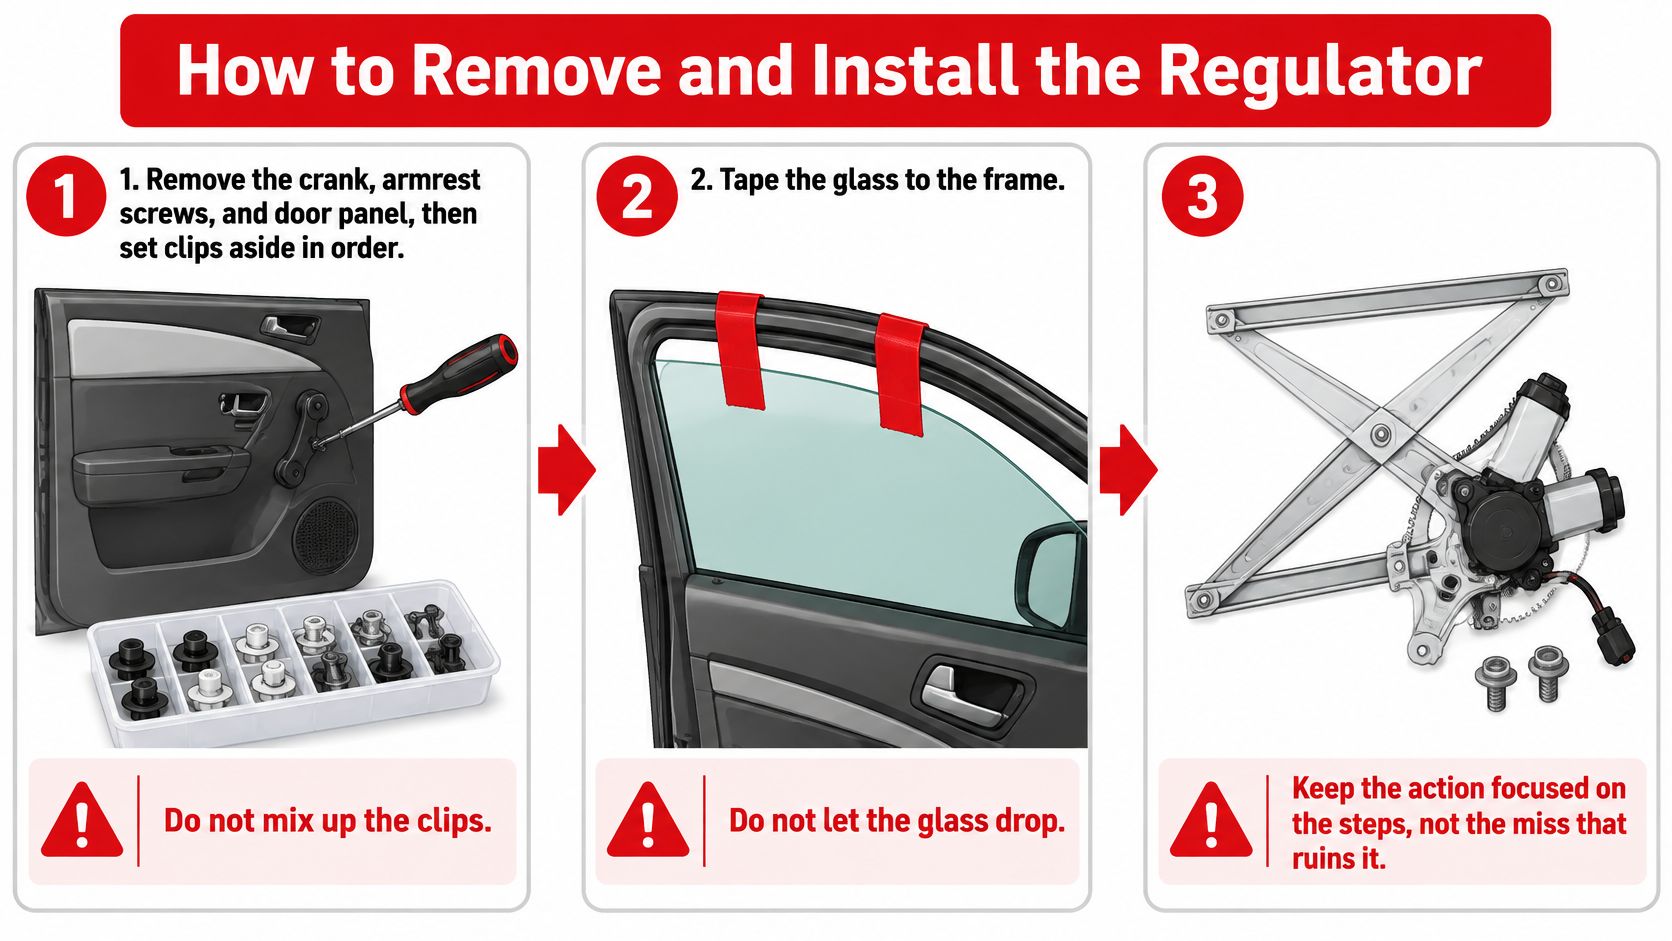
Use the vehicle's service procedure for fastener locations, glass attachments, and access requirements. The sequence in this manufacturer repair procedure hosted by NHTSA emphasizes secured glass, controlled mechanism removal, restored waterproof coverings, and full-travel checks after installation.
The illustration is a quick orientation aid, not a substitute for the detailed sequence below.
Remove the old assembly without loading the glass
- Remove the crank, armrest screws, and door panel. Check behind trim caps and handle bezels before pulling on the panel. Release clips near their attachment points, then lift or withdraw the panel in the direction its retainers require. Keep clips and screws grouped by location; the wrong screw can damage trim during reassembly.
- Secure the glass to the frame or support fixture. Confirm that the support holds independently before touching the carrier attachments. If access requires moving the glass first, reposition it while the regulator still supports it. Don't release a jammed attachment and expect to catch the pane afterward.
- Disconnect the glass from the carrier. Depending on the door, you may be releasing bolts, clamps, or clips. Hold the pane under control as the connection separates, then secure it in the position required for regulator removal. Don't pry against an exposed glass edge.
- Remove the regulator mounting fasteners. Record their locations and retrieve loose hardware immediately. If the assembly won't move, inspect for a hidden fastener rather than pulling harder. Some doors use rivets, which require the vehicle's specified removal and replacement method.
- Maneuver the regulator through the access opening. Fold or position a scissor mechanism only as its design permits; guide a cable unit out without bending its track. Keep hands away from spring-loaded arms. Don't dismantle a counterbalance spring or force the assembly through an opening it hasn't been positioned to clear.
If the panel won't release cleanly, check the car door panel removal guide before breaking a concealed retainer.
The video provides another view of the work area and handling involved. Match every operation to your own door's construction.
Fit the replacement before closing the door
- Compare the assemblies on the bench. Match the mounting pattern, crank-shaft orientation, carrier attachment, and overall mechanism layout. A similar silhouette isn't enough. Stop if the new part needs improvised holes or a forced glass connection.
- Install the regulator and start its fasteners by hand. Position adjustable mounts near their original witness marks. Each fastener should engage cleanly without the wrench pulling misaligned parts together. Leave the adjustment permitted by the service procedure.
- Bring the glass onto the carrier under control. Release the temporary support only as a helper or fixture takes the load. Seat the pane fully in its intended clamps or attachments, then secure it sufficiently for safe testing. Don't cycle glass that can slip from a loose carrier.
- Check travel before final tightening. Turn the crank gently through complete movement while watching the leading and trailing edges. Stop for tilt, scraping, or an abrupt increase in effort. Make permitted alignment adjustments, then tighten to the vehicle's specification and retest.
- Restore the moisture barrier and reinstall the trim. Refit waterproof plugs and seal the barrier continuously around its intended perimeter. Confirm that wiring and latch cables aren't trapped. Reinstall the panel, crank clip, and handle, then verify that the handle stays engaged and clears the trim.
Align the Glass and Set the Fasteners
A regulator can fit every mounting hole and still move the glass badly. Mounting holes line up before the glass does, so check the glass path separately. The carrier must support the pane squarely while the channels guide its edges without pushing it sideways.
Start adjustable mounts finger-tight, then bring them toward the original paint marks. Treat those marks as a starting position rather than proof the previous installation was correct. If the door has been repaired or the old regulator shifted, the glass path has the final say.
Keep this alignment checklist beside the open door.
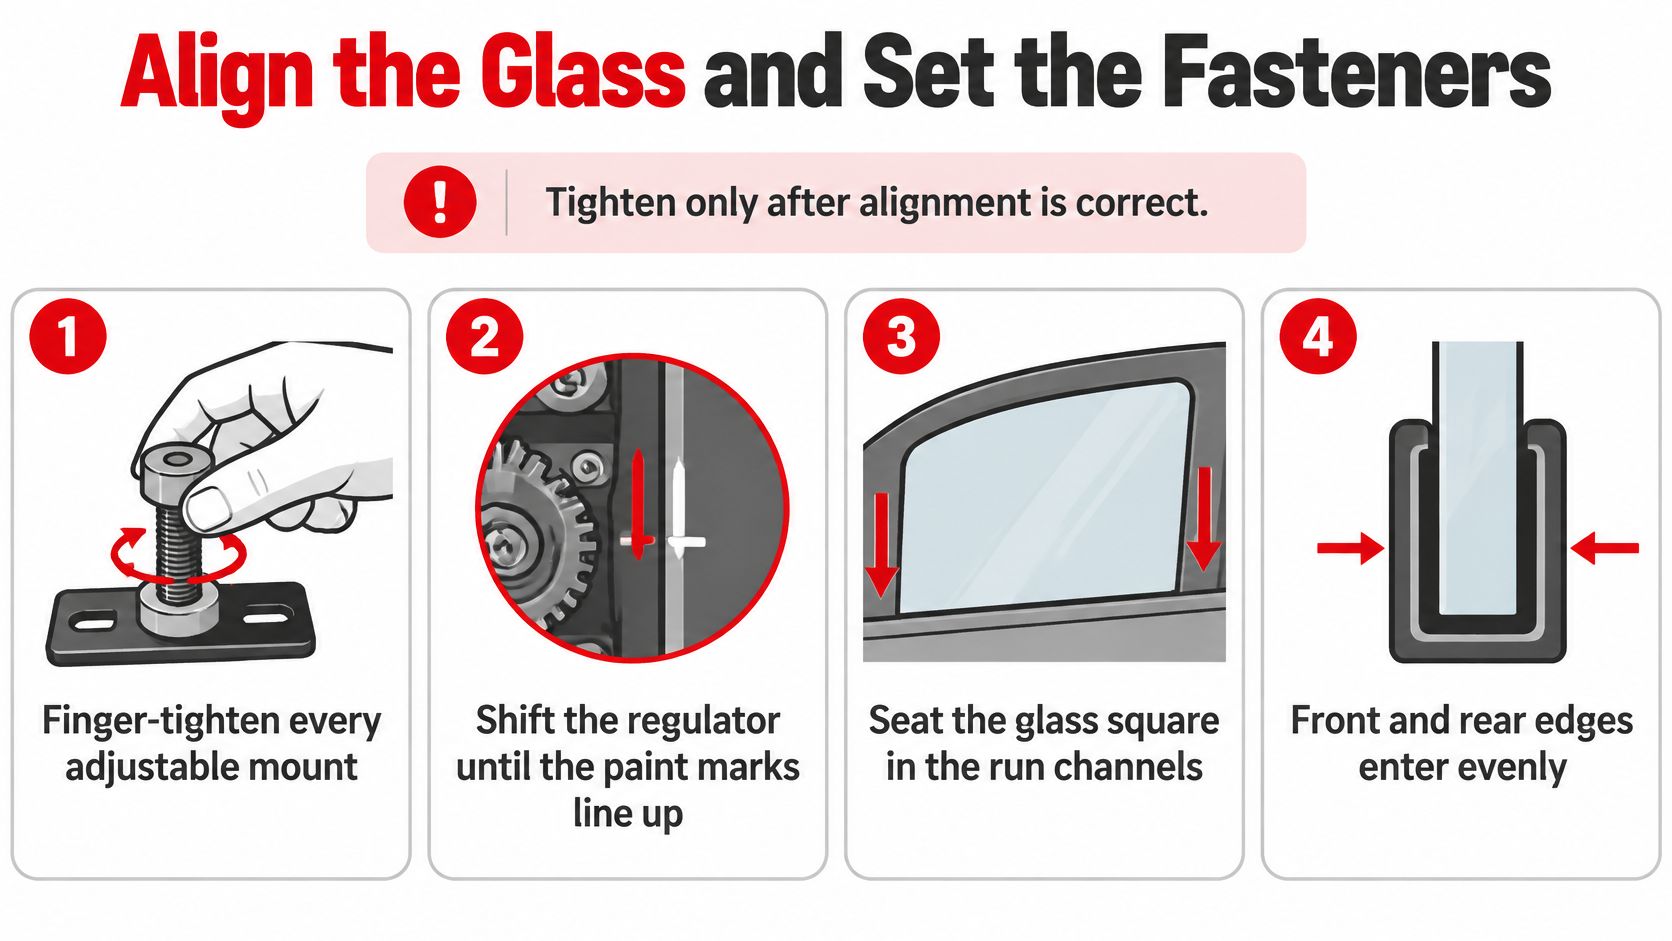
Watch the edges rather than the crank
Observe the front and rear glass edges as they enter the upper seals. They should approach their intended seating positions without the pane rotating abruptly. A seal that folds inward or gets dragged upward needs attention before you add clamping force at the mounts.
Keep glass attachments secure enough to retain the pane during testing. Adjustment means controlled movement at the locations the manufacturer provides, not a pane loosely balanced on its carrier.
- Diagonal rise: Check carrier seating and regulator position before changing the upper stop.
- Localized scraping: Inspect the contact point for a displaced run, trapped debris, or incorrect guide position.
- Ticking or snapping: Stop and inspect the mechanism instead of trying to wear the sound away.
- Abrupt final resistance: Check how the glass meets the seal rather than forcing the handle farther.
A new regulator should travel without forcing the handle.
Tighten with the correct specification
Use the torque and tightening order for the actual vehicle and fastener. A small motor screw, regulator mounting nut, and glass clamp each perform a different job, so they do not share a universal tightening value.
The Tesla Model S regulator service procedure illustrates why exact procedures matter: it specifies fastening requirements and calls for functional checks after regulator work. It is a powered-window procedure, not a torque reference for an unrelated hand-crank door.
A fastener should seat squarely and tighten progressively. If it spins, suddenly loses resistance, or takes force before its head reaches the mounting surface, stop and inspect the threads and alignment. More torque will not repair a crossed thread or a distorted bracket.
After final tightening, repeat the full-travel check and feel for consistent effort through the whole sweep. A purely manual assembly has no one-touch initialization or electronic pinch-calibration routine. If the door contains powered equipment, follow its applicable initialization and safety-testing procedure before calling the job complete.
Failures That Come Back After the Swap
A successful first test with the trim removed doesn't guarantee a finished repair. Reassembly can introduce a new rub, leave a loose attachment, or conceal a moisture-barrier gap. Test again with the crank and panel installed, because their clearances are part of the working system.
Manual regulators avoid motor and electrical failure modes, but they still depend on sound mechanical parts. The Power Electronic Tips history of window systems explains the move toward powered systems while noting why mechanically simpler manual arrangements remained useful. Simpler diagnosis doesn't mean every fault belongs to the regulator.
Lubrication can reduce friction, not repair damage
Say the replacement works unloaded but becomes heavy with the glass attached. Packing grease into the felt run isn't a sound response. Clean the channel, inspect its lining, and use only a glass-run lubricant compatible with that material and the vehicle's service guidance.
Where silicone lubricant is permitted, apply a light amount to a clean run rather than saturating it. Heavy deposits collect dirt and can obscure a torn or displaced lining. Keep lubricant away from surfaces that need adhesion, particularly where the moisture barrier must reseal.
Worn gear teeth, loose riveted pivots, and broken sliders need mechanical repair or replacement. A fresh crank handle won't remove play inside the regulator. Likewise, tightening the handle harder won't restore a damaged shaft connection.
Inspect what reassembly can disturb
- Crank retention: Replace a deformed retaining clip rather than bending it repeatedly and hoping it stays engaged.
- Glass hardware: Replace damaged fasteners with the specified type. Rounded heads turn the next adjustment into an extraction job.
- Panel clearance: Check that the crank doesn't scrape the trim and that no panel clip contacts a moving arm.
- Barrier sealing: Press the sheet onto a continuous seal, without folds that direct water toward the cabin.
- Cable and harness routing: Return them to their retainers so the regulator can't catch them during travel.
A wet sill after the repair may be a sealing problem rather than a lifting problem. Water can enter the door's outer cavity during normal use; the inner barrier must direct it away from the trim and cabin. Don't block the door's drainage paths while resealing the barrier.
Before closing the job: Test with the trim installed, not only while the mechanism is exposed.
Don't use a replacement to compensate for collision damage
After a collision repair, compare the glass movement with the door frame and guide positions. A distorted shell can put the guides out of relationship even when the regulator mounts neatly. Correcting that geometry may require body-repair equipment rather than another regulator.
A longer crank is not a remedy for persistent effort. It gives your hand a mechanical advantage while increasing the force applied to cables, arms, and tracks.
Judge the repair by repeatable results: straight travel, secure glass, an engaged handle, no abnormal contact, and a properly sealed door. If those checks fail, keep the trim accessible until you've identified the remaining cause.
Match the Door Before You Order
Order from the vehicle configuration and the mechanism in the door, not a photograph that looks close. Photograph the old regulator in place, its attachment to the glass, and any identifying marks before removal. On a modified vehicle, confirm what is physically installed rather than trusting the original equipment description.
A switch opening or a crank hole proves little after a conversion. Inspect the drive arrangement and connections inside the door. Manual and powered regulators both lift the same glass. Their carriers, mounting patterns, and drive arrangements still differ enough that one cannot stand in for the other.
Confirm the identifiers that control fit
What must match on a manual regulator
| Identifier | Why it changes the part | Where to confirm |
|---|---|---|
| Model year and body | Mounting pattern and travel can change within a generation | VIN, door-jamb label, and the application listing |
| Front or rear, left or right | Arm shape and glass geometry are built for one position | The door you stripped |
| Two-door or four-door | Glass length and regulator travel differ | Body or cab style |
| Manual crank vs power | Carrier, mounting pattern, and drive arrangement can differ | Crank drive and actual motor connections |
| Scissor vs cable | Access path and mounting layout differ | The regulator you removed |
| Glass bolts vs clips | The carrier interface must match | How the pane was attached |
Use the parts cross-reference guide when comparing an old part number with a replacement listing. Treat the cross-reference as a first check, then confirm the carrier and mounting layout visually against the unit you removed.
Electronic obstruction detection belongs to powered systems, as described in Microchip's power-window control application note. Don't apply an electronic relearn routine to a hand-crank mechanism, and don't omit required calibration if a motorized assembly is present.
Keep unrelated catalog parts separate
A vehicle's catalog covers far more than the window mechanism. The same model range can list door handles, cameras, and a front and rear parking assist kit like the one below, which solves a reversing problem rather than a window that will not move.
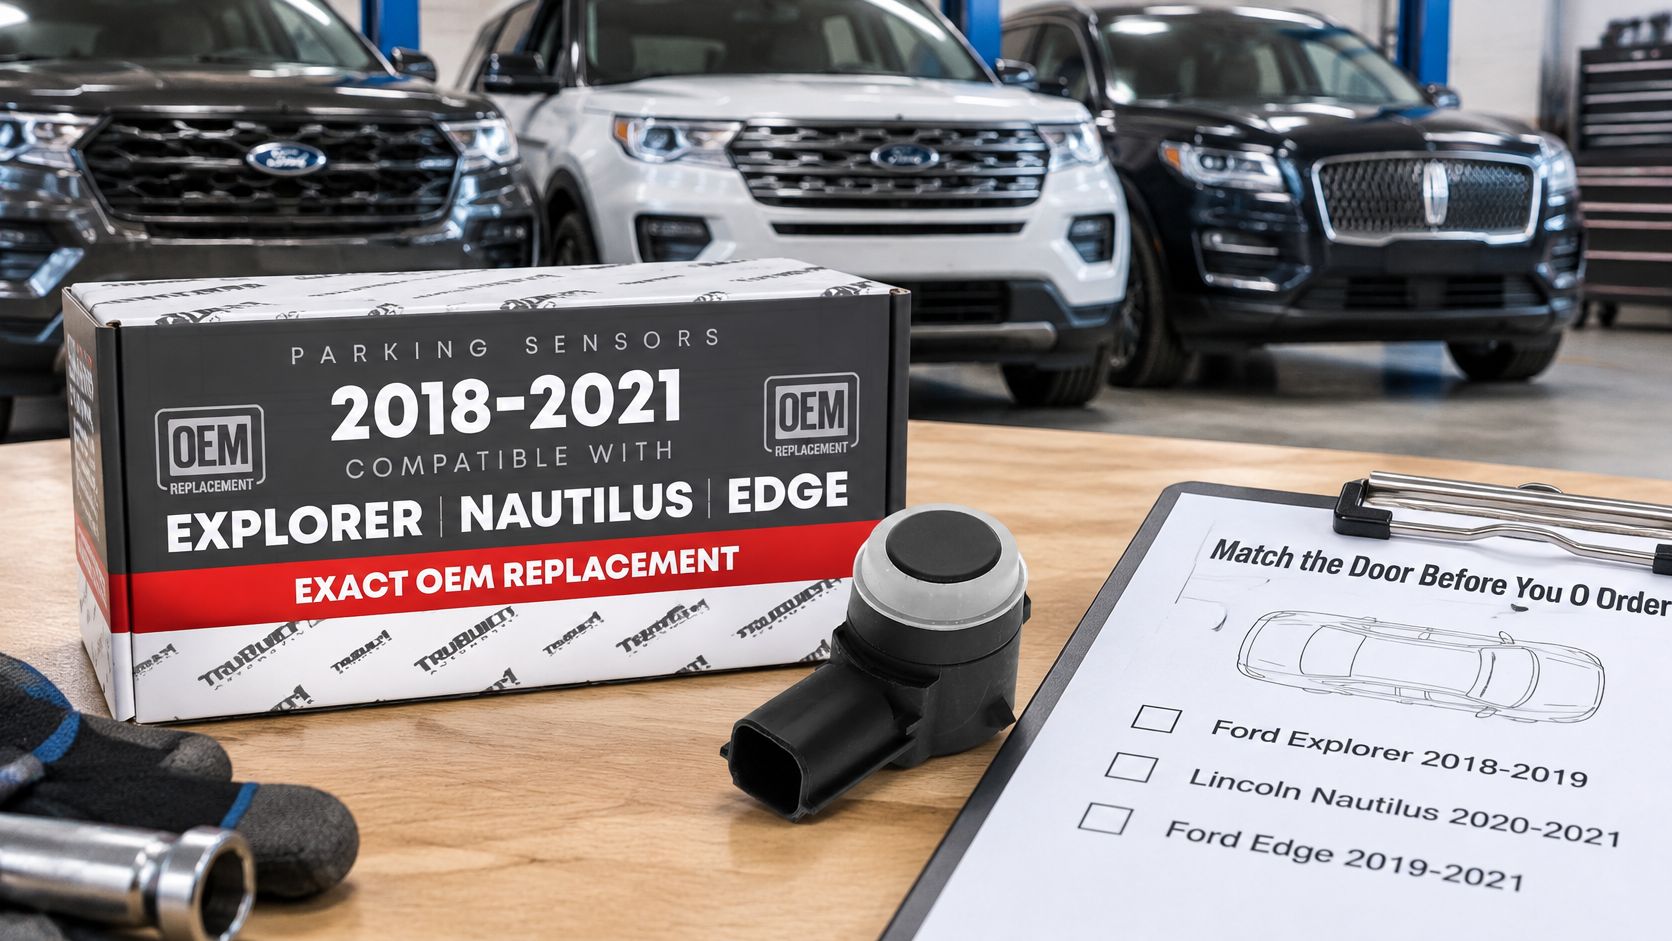
Check the category name and the part's function on the listing before anything goes in the cart. At T1A Auto, we sell window regulators alongside door handles, side mirrors, cables, hinges, latches, and support parts, and most of our parts come with installation instructions. Compare the supplied instructions with the door and the removed assembly before installation.
If extended warranty coverage matters, register the order on our website to activate it; unregistered orders are not eligible for warranty service. Make the final order check concrete: manual drive, correct door side, matching glass attachment, and a clean, undamaged channel. If every identifier matches yet the pane still cocks in its run, the fault sits in the door rather than the part you ordered.
T1A Auto offers window regulators and related door hardware for vehicle-specific repairs. Visit T1A Auto with your vehicle details, door position, and photos of the original mechanism so you can compare the correct replacement before opening the packaging.
