


A window that suddenly drops into the door, stops halfway, or makes a grinding sound can turn a quick errand into a repair job. If you've already got the door panel off, resist the urge to order a motor or complete assembly until you know whether the fault is electrical, mechanical, or just a lost calibration.
Good window regulator motor repair starts with the symptom, then tests the switch, wiring, motor, and regulator in that order. A motor that runs doesn't prove the regulator is sound, and a silent window doesn't prove the motor is dead.
Table of Contents
- Diagnosing Symptoms Before You Replace Anything
- Tools, Safety Checks, and Prep Work Before Teardown
- Testing the Motor and Switch Under Load
- Removing the Door Panel Without Damaging Clips
- Choosing Between a Motor, Regulator, or Full Assembly
- Reinstalling, Relearning, and Confirming Anti-Pinch Safety
- Preventing Repeat Failures and Your Next Step
Diagnosing Symptoms Before You Replace Anything
Start with what the glass does. Does it stay completely still, move slowly, work in only one direction, respond to one switch but not another, or drop and tilt? Those differences narrow the search before you remove trim or buy parts.
A silent window can point to a fuse or circuit breaker, a failed switch, damaged wiring where the harness passes into the door, a poor connector, or a motor that isn't operating. If the window works from the passenger switch but not the driver's master switch, focus on the switch and its circuit before blaming the regulator. If it fails intermittently after the door moves, inspect the door-jamb wiring and connector for a loose terminal or damaged wire.
A motor you can hear while the glass stays still changes the direction of the diagnosis. The motor may be turning while a stripped gear, broken regulator arm, detached glass bracket, or tangled cable fails to transfer that movement to the pane. Don't keep holding the switch to see what happens. A jammed mechanism can put extra load on the motor and make a smaller repair worse.
Slow movement can come from a tired motor, but it can also mean the glass is dragging in a dirty or distorted channel, the regulator is binding, or the electrical supply is poor. If the glass moves crookedly, drops, or wobbles, treat the regulator or glass attachment as suspect and stop operating the window until it's secure. Modern mechanisms combine the motor with guides, lifting arms or cables, and control features, so one symptom rarely identifies one failed part. For context, vehicles on U.S. roads reached an average age of 12.8 years in 2025, making accumulated wear in wiring, switches, and regulators a practical concern (KPMG's aftermarket industry update).
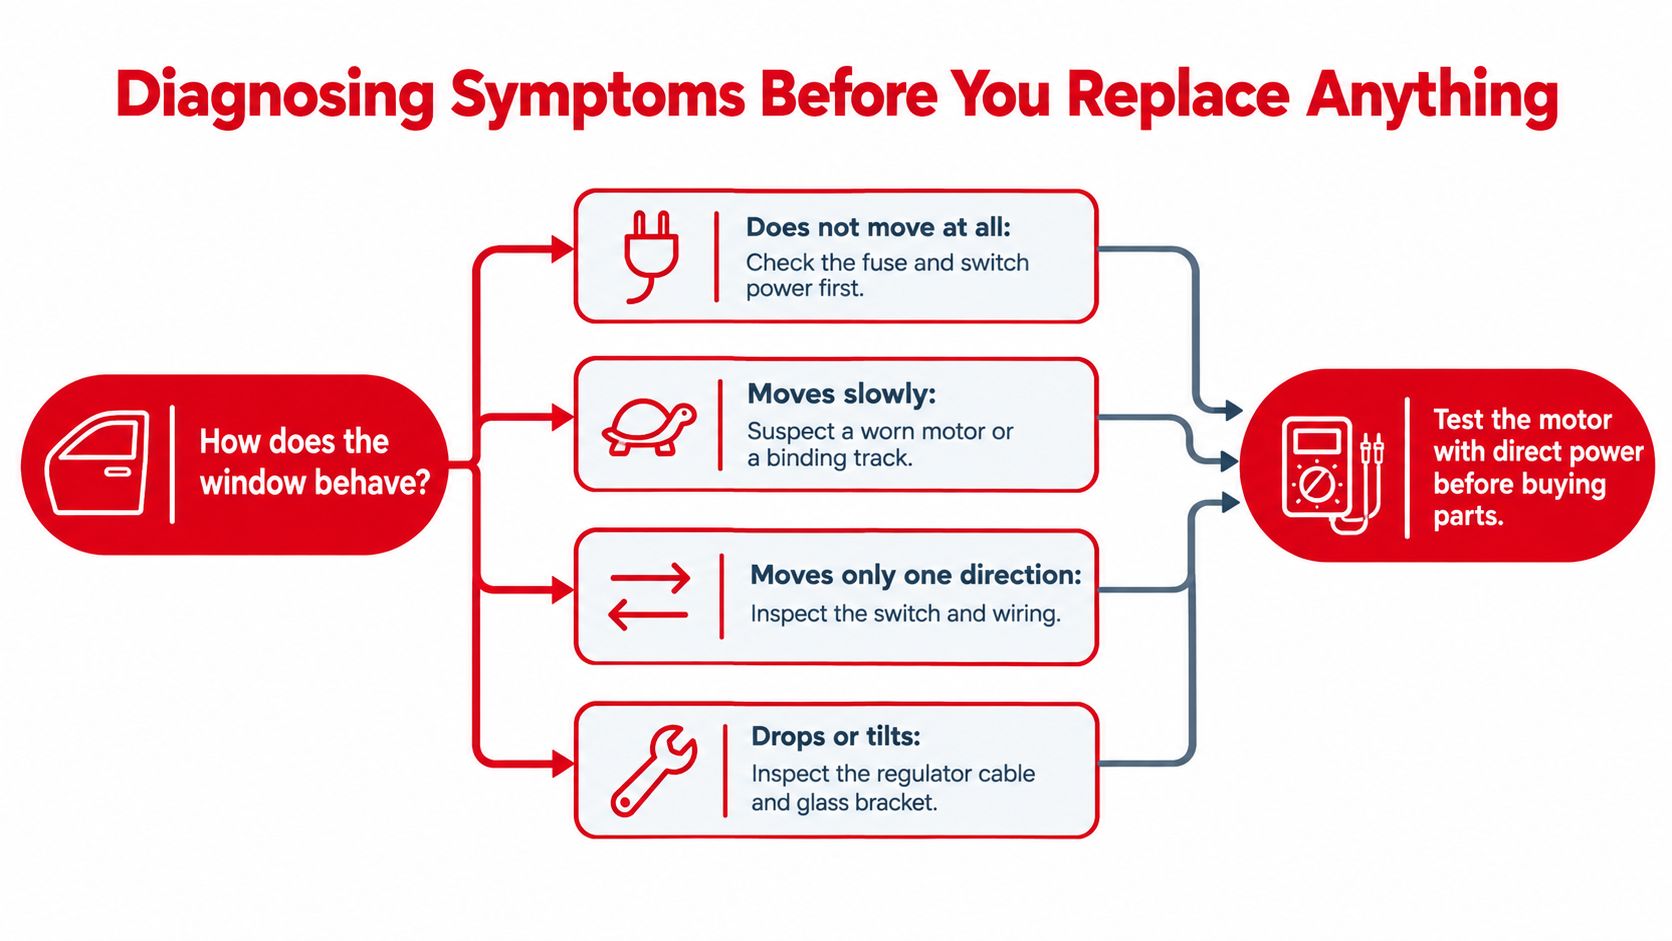
Follow the same decision path in the driveway: identify the behavior, check the circuit and switch, then test the motor and inspect the mechanism. Don't buy a motor just because the window is stuck. A new motor won't repair a broken cable, poor ground, binding track, or failed control.
Tools, Safety Checks, and Prep Work Before Teardown
Gather the tools before opening the door. A digital multimeter with back-probe pins lets you test at the motor connector without damaging its terminals. Add a socket set with extensions, plastic trim tools, painter's tape, and a wedge or ratchet strap that can hold the glass securely. A fused test light can help with basic circuit checks, but it doesn't replace voltage and ground testing under load.
Look up the vehicle-specific service information before disconnecting anything. Confirm the fuse or circuit-breaker location, connector access, whether the battery needs to be disconnected for the procedure, and whether the window needs initialization afterward. Door construction and electrical precautions vary, so don't assume the last vehicle you worked on is a reliable guide.
Secure the glass before releasing hardware
The glass is the part most likely to get damaged when a repair goes sideways. Before removing regulator fasteners, secure it with tape over the top of the door frame or support it with a suitable wedge. Don't rely on a failing regulator to hold the pane, and don't put your hand beneath glass that could drop.
Keep fingers clear whenever the system is powered. If a test requires operating the switch with the door trim removed, plan where your hands and tools will be before anyone presses the button. Disconnect the battery when the manufacturer's procedure calls for it, especially before handling connectors or working near equipment that could move unexpectedly.
Practical rule: Don't remove the regulator bolts until the glass is supported and stable. A cracked pane or damaged channel can turn a straightforward repair into a much larger job.
Testing the Motor and Switch Under Load
Start at the supply, not at the parts counter. Check battery voltage, then inspect the vehicle-specific fuse or circuit breaker. A good fuse doesn't prove the motor is receiving power, but a failed circuit protection device gives you a clear place to investigate before opening the door.
Next, back-probe the motor connector and command the window both up and down. Many power-window systems reverse polarity at the motor to change direction, so the voltage pattern at the two terminals should change when you reverse the switch. Use the vehicle's wiring information to interpret the reading. If the connector receives voltage in both directions but the motor stays still, check terminal tension, ground-side voltage drop, and whether the glass or regulator is binding before condemning the motor.
A motor can also fail intermittently. Inspect the connector for corrosion or water intrusion and check the door-jamb wiring while watching the meter. If the fault changes as the harness flexes with the door, trace the wiring rather than replacing a motor that may still be serviceable.
Use the switch comparison as a clue
Try the window from another available switch, such as the passenger switch and driver's master switch, if the vehicle supports both. If one works and the other doesn't, that comparison helps narrow the fault to the switch or its circuit. For a more focused switch-specific check, see this guide to a power-window switch that isn't working.
A loaded current check can reveal more than a motor that spins freely on a bench, because the motor is being tested while working against the mechanism. Toyota service information describes approximately 16–34 A during a sustained close-command test, followed by a drop below 1 A after the system's protection response. Those figures are vehicle-specific, not a universal pass-or-fail threshold (vehicle window troubleshooting guidance). High draw may indicate a stalled or binding mechanism, while intermittent open-circuit behavior can point to an internal motor issue.
| Observed Result | Likely Fault | Next Check |
|---|---|---|
| No voltage at the motor connector | Fuse, switch, wiring, or control fault | Check the circuit and command path using vehicle-specific service information |
| Voltage changes with up/down commands, but the motor stays still | Motor, connector tension, ground, or mechanical binding | Check ground-side voltage drop and inspect for a seized track or tangled cable |
| Motor runs but glass doesn't move | Stripped gear or failed regulator connection | Inspect the cable, lifting mechanism, and glass attachment |
| Window works from one switch but not another | Switch or switch circuit | Compare switch inputs and inspect its connector |
| Operation changes as the door moves | Door-jamb wire or connector fault | Inspect the harness and test continuity while flexing it |
Removing the Door Panel Without Damaging Clips
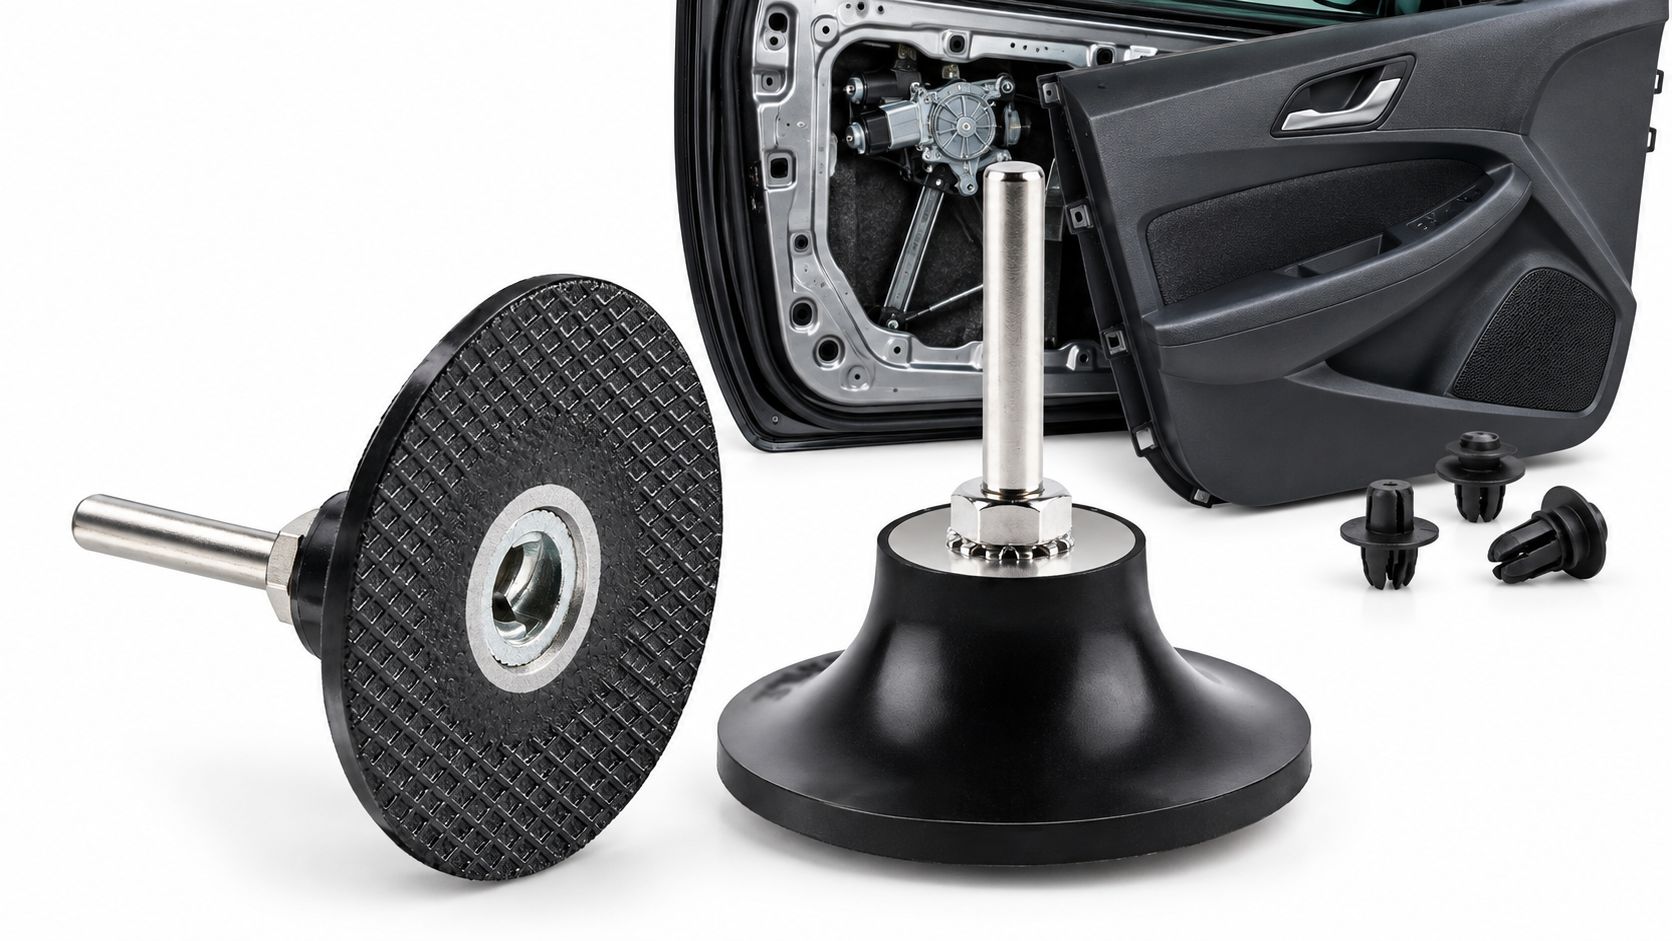
A panel that refuses to lift often has a screw still hidden behind trim. Check behind the interior pull handle, inside the armrest, and beneath covers near the mirror and lock. Remove all fasteners before prying. For a door-specific walkthrough, follow this guide to removing a car door panel.
Use a plastic trim tool at the bottom edge and work around the panel, releasing clips one at a time. The top may hook into the door or sit against a delicate seal, so avoid levering there. If one corner stays put, check for another fastener rather than pulling harder. A snapped clip can leave the trim loose, rattling, or difficult to seat during reassembly.
Once the clips release, lift the panel enough to reach the window switch, speaker, and lock connectors. Unplug them without pulling on the wires. Label similar-looking connectors, and support the panel if a short harness keeps it attached while you disconnect everything.
Keep the water barrier intact
Peel back the moisture barrier slowly and preserve its seal. A tear or poor reseal can let water reach the door interior and electrical connectors. With the regulator exposed, note where its fasteners, clip nuts, and rivets sit before removing anything.
Check that the glass is secure before working on the regulator. Support it with tape or a suitable prop, then remove the regulator fasteners. The access work can take time, especially when hidden screws or stubborn clips hold things up. Keep the hardware organized and reuse clips only if they remain intact. If the glass cannot be held securely, stop and get help rather than risking a drop inside the door.
Choosing Between a Motor, Regulator, or Full Assembly
Pick the replacement based on what failed, not on which part is easiest to find. A motor-only replacement makes sense when testing points to the motor and the regulator moves smoothly without cable damage, binding, or glass wobble. It can be a poor choice if the regulator has already been dragging or the cable is frayed, because the new motor will still have to drive a failing mechanism.
A full regulator assembly is the stronger option when the cable is broken or tangled, the track is bent, the glass tilts, or the mechanism is visibly worn. Replacing the motor and regulator together costs more in parts than replacing only a motor, but it avoids installing a motor onto a regulator that may fail again. Whether a motor can be transferred or serviced separately depends on the vehicle and the replacement design.
A rebuild may suit a sound track with a worn pivot, clip, or other serviceable component. It requires careful inspection and parts that match the mechanism precisely. A used assembly can reduce the initial parts outlay, but its wear history may be unknown, and its exact fit still needs to be confirmed.
Match the part to the door
Window systems have evolved from early motorized mechanisms into assemblies that can include a motor, cables or lifting arms, guides, switches, and anti-pinch controls. Brose patented an automotive power-window system in 1926, and the design history helps explain why modern repairs may involve more than swapping a motor (power-window motor and replacement overview). It doesn't mean parts are interchangeable. Confirm the vehicle year, body style, door position, mounting points, glass travel, and cable routing before ordering.
| Repair path | Makes sense when | Main trade-off |
|---|---|---|
| Motor only | The motor is faulty and the regulator remains smooth and undamaged | Less replacement hardware, but the old mechanism stays in service |
| Full assembly | Cables, guides, track, or glass alignment show damage | Replaces more components, but fitment needs careful checking |
| Rebuild | The track is sound and the failed pieces are individually serviceable | Depends on repairable parts and careful assembly |
| Professional installation | The procedure, calibration, or door design is beyond your tools or experience | A shop handles the installation and model-specific checks |
Compare the actual regulator materials and warranty terms, too. Some aftermarket assemblies use upgraded metal components where an original design may have used plastic. The right decision depends on the part configuration that fits the vehicle, not on a blanket rule that metal or a complete assembly is always the answer.
Reinstalling, Relearning, and Confirming Anti-Pinch Safety
A window that moves again isn't necessarily repaired. Start installation by threading the regulator fasteners loosely, then place the glass in its channels and align it before tightening evenly. Check that the pane sits squarely in the guides; tightening a misaligned assembly can create drag, noisy travel, or poor sealing.
Before reinstalling the door trim, reconnect the system and run the window through several full up-and-down cycles. Watch the glass as it travels. It should remain aligned, move smoothly, and reach its stops without unusual noise or stalling. If the manufacturer specifies a relearn procedure, complete it before judging one-touch operation or the repair.
Relearn the travel limits when required
Some modern systems use position sensing, anti-pinch logic, or electronic motor modules. After the battery has been disconnected, a motor has been replaced, or a regulator has been installed, the window may need initialization. A common pattern is to close the glass fully, hold the switch briefly, open it fully, and repeat the specified hold. Follow the exact vehicle procedure rather than assuming that sequence applies to every model.
A recent manufacturer bulletin hosted by NHTSA links intermittent window loss to carbon-brush tolerances. Its prescribed approach is to reinitialize the window first and replace the motor only if initialization fails (NHTSA-hosted power-window service bulletin). That's a useful reminder that lost calibration or intermittent brush contact can mimic a failed motor.
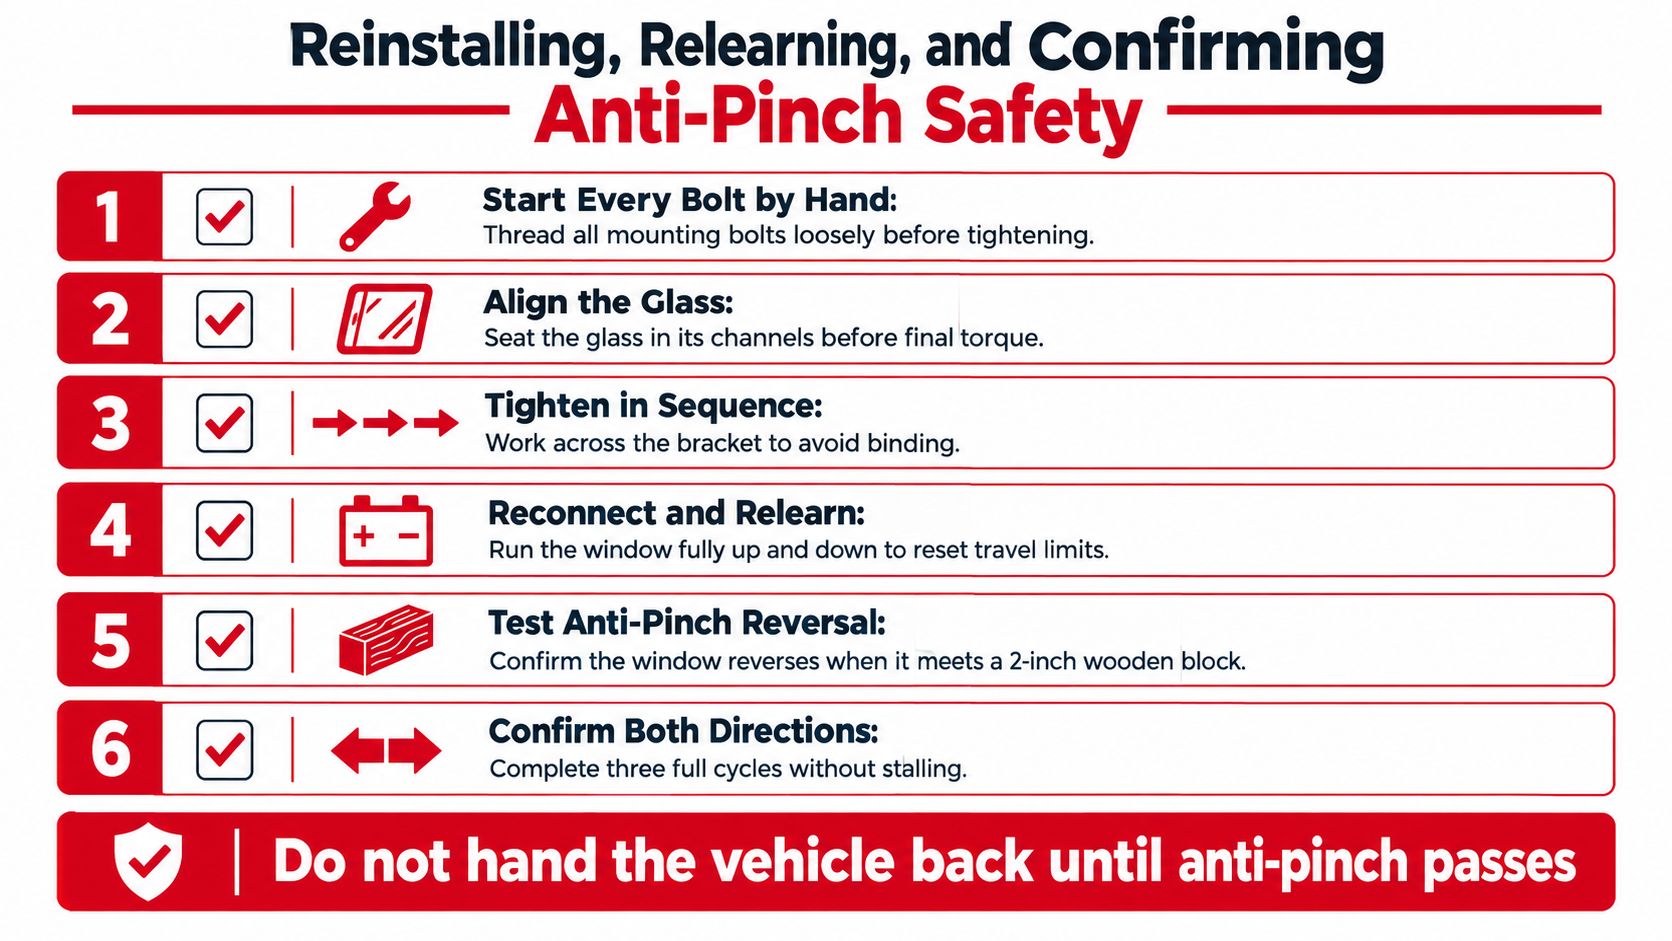
Test anti-pinch operation using a safe, soft test object and the vehicle's service procedure. Never use your fingers. Stop and get professional help if the window reverses unexpectedly, calibration repeatedly fails, or the glass closes with excessive force. A successful mechanical installation and a safe anti-pinch system are separate checks.
Preventing Repeat Failures and Your Next Step
Once the repair is sound, reduce the conditions that put unnecessary strain on the mechanism. Keep glass channels clean and use only the lubricant specified for the vehicle. Apply it sparingly, keep it off the glass and seals, and clear the door's drain holes so water doesn't pool near electrical parts. This guide to window-track lubrication can help you avoid treating the glass or seals with the wrong product.
Don't keep holding the switch after the glass reaches its stop, and don't repeatedly cycle a window that's grinding, tilting, or moving slowly. Investigate water intrusion promptly, especially if the moisture barrier was disturbed during the repair. Water at the motor connector can create an electrical fault that looks like a failing motor.
Recall checks belong on the final inspection list. A 2025 Ford recall involving certain 2024 Ranger and Lincoln Nautilus vehicles stated that incorrectly repaired windows might fail to reverse during global closing, allowing excessive pinch force and increasing injury risk (NHTSA recall notice). Check recalls by VIN, particularly after door or window work, and follow the manufacturer's repair and verification instructions.
For a shop or fleet, record the original symptom, voltage and polarity results, current behavior, calibration outcome, and exact part configuration. Those notes make it easier to tell whether a repeat failure came from the motor, regulator, wiring, or installation instead of guessing from noise alone. If the glass is unstable, the circuit test is inconclusive, or anti-pinch behavior isn't right, stop and have a technician inspect it.
T1A Auto offers powered and manual window regulators that shoppers can search by vehicle, helping match the part to the year, make, and door position. Before ordering, visit T1A Auto to confirm fitment and compare the warranty terms for metal components and standard items.
