


When a power window stops working, the usual suspects are a blown fuse, a bad window motor, or the switch itself has given up the ghost. But before you start pricing out expensive parts, let's walk through a few simple checks that could save you a headache and a trip to the shop.
It all starts with a little detective work.
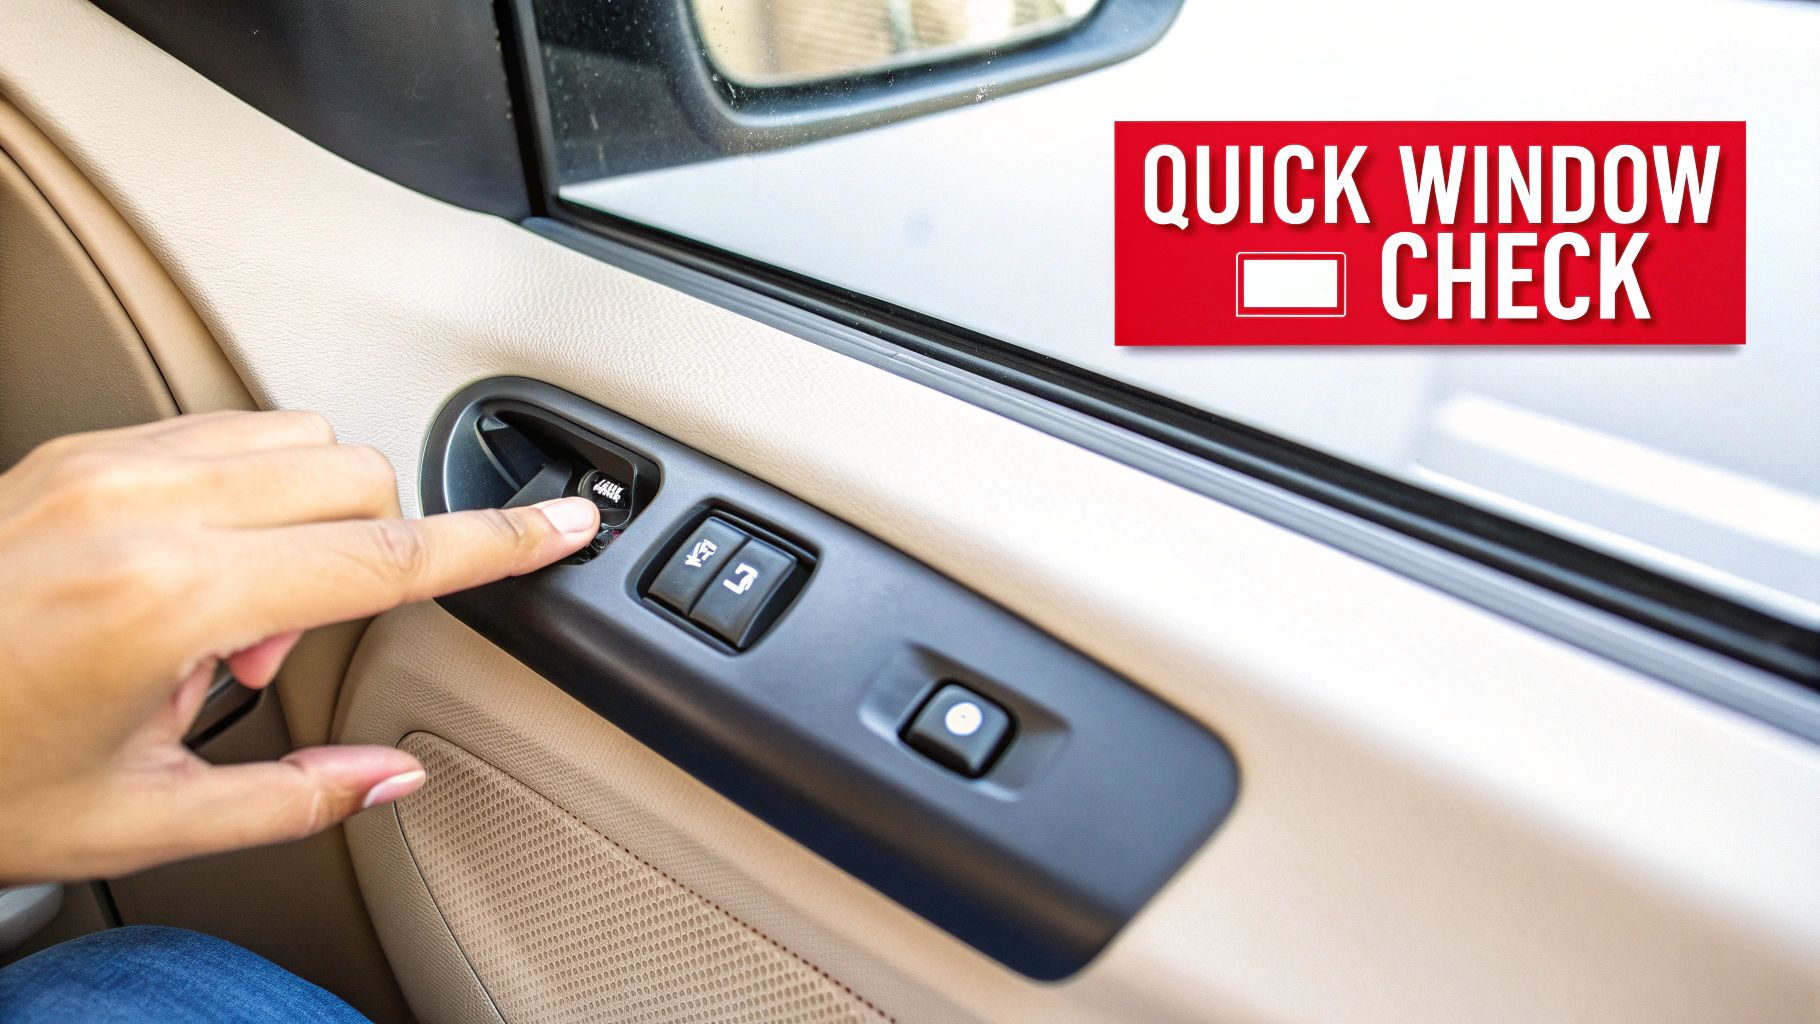
Quick Checks When Your Power Window Fails
We've all been there—you hit the button to roll down the window, and... nothing. It's a frustratingly common problem. Power window switch failures are one of the most frequent electrical gremlins car owners face. Often, the internal contacts just wear out, corrode from a bit of moisture, or fail from the constant electrical load over years of use. For a deeper dive, Chipper Auto Glass offers more insights into these common failures.
Don't jump to conclusions and assume the worst. A methodical approach here can make all the difference, often pointing to a simple fix you can do yourself.
Start With The Obvious
First things first, let's rule out any simple oversights. Check the child safety lock for the windows. I can't tell you how many times this is the culprit, especially after a car wash or when kids have been in the back seat. Find the window lock button on the driver's master control panel and press it a few times to make sure it isn't stuck.
Next, try to operate the stubborn window from every possible switch. Use the switch on its own door, and then try it again using the master switch on the driver's door. This quick test tells you a lot:
- Works with the master switch, but not its own? This is great news. The problem is almost certainly the individual switch on that door.
- Doesn't work with either switch? Now we're likely looking at the window motor, the fuse, or the wiring going into that specific door.
- Multiple windows are dead? If a few windows all stopped working at once, the issue is probably centralized. Think a main fuse, the entire master switch assembly, or a body control module.
Listen for Clues
Your ears are one of your best diagnostic tools. Press the switch and listen carefully.
Do you hear a faint click or a soft humming sound coming from inside the door panel? That's actually a good sign. It usually means the switch is working and sending power, but the window motor or the mechanical regulator is jammed or has failed.
If you hear absolute silence, the problem is electrical. The signal isn't even making it to the motor, which points you back toward a bad switch, faulty wiring, or a blown fuse.
Pro Tip: If you hear the motor straining but the glass isn't moving, stop pressing the button. Trying to force it can quickly overheat and burn out the motor, turning a simple mechanical jam into a much more expensive electrical repair.
To help you get started, this chart matches common symptoms with their most likely causes. It’s a great way to narrow down the possibilities right from the start.
Quick Diagnostic Chart: Common Symptoms and Likely Causes
| Symptom | Most Likely Cause | Recommended First Action |
|---|---|---|
| Only one window won't work from any switch. | Bad window motor or regulator. | Listen for a click/hum from the door when pressing the switch. |
| Window works from the master switch, but not its own. | Faulty individual window switch. | Inspect the individual switch and its connector. |
| No windows work from any switch. | Blown main fuse or faulty master switch assembly. | Check the main power window fuse in the fuse box. |
| Window goes down but not up (or vice-versa). | Worn contacts inside the switch. | Test the switch with a multimeter; likely needs replacement. |
| Windows work intermittently or slowly. | Failing motor or low voltage issue. | Check battery/alternator and inspect the motor connector for corrosion. |
Use this as your starting point. By identifying the symptom that best matches your situation, you can focus your efforts on the most probable cause instead of guessing.
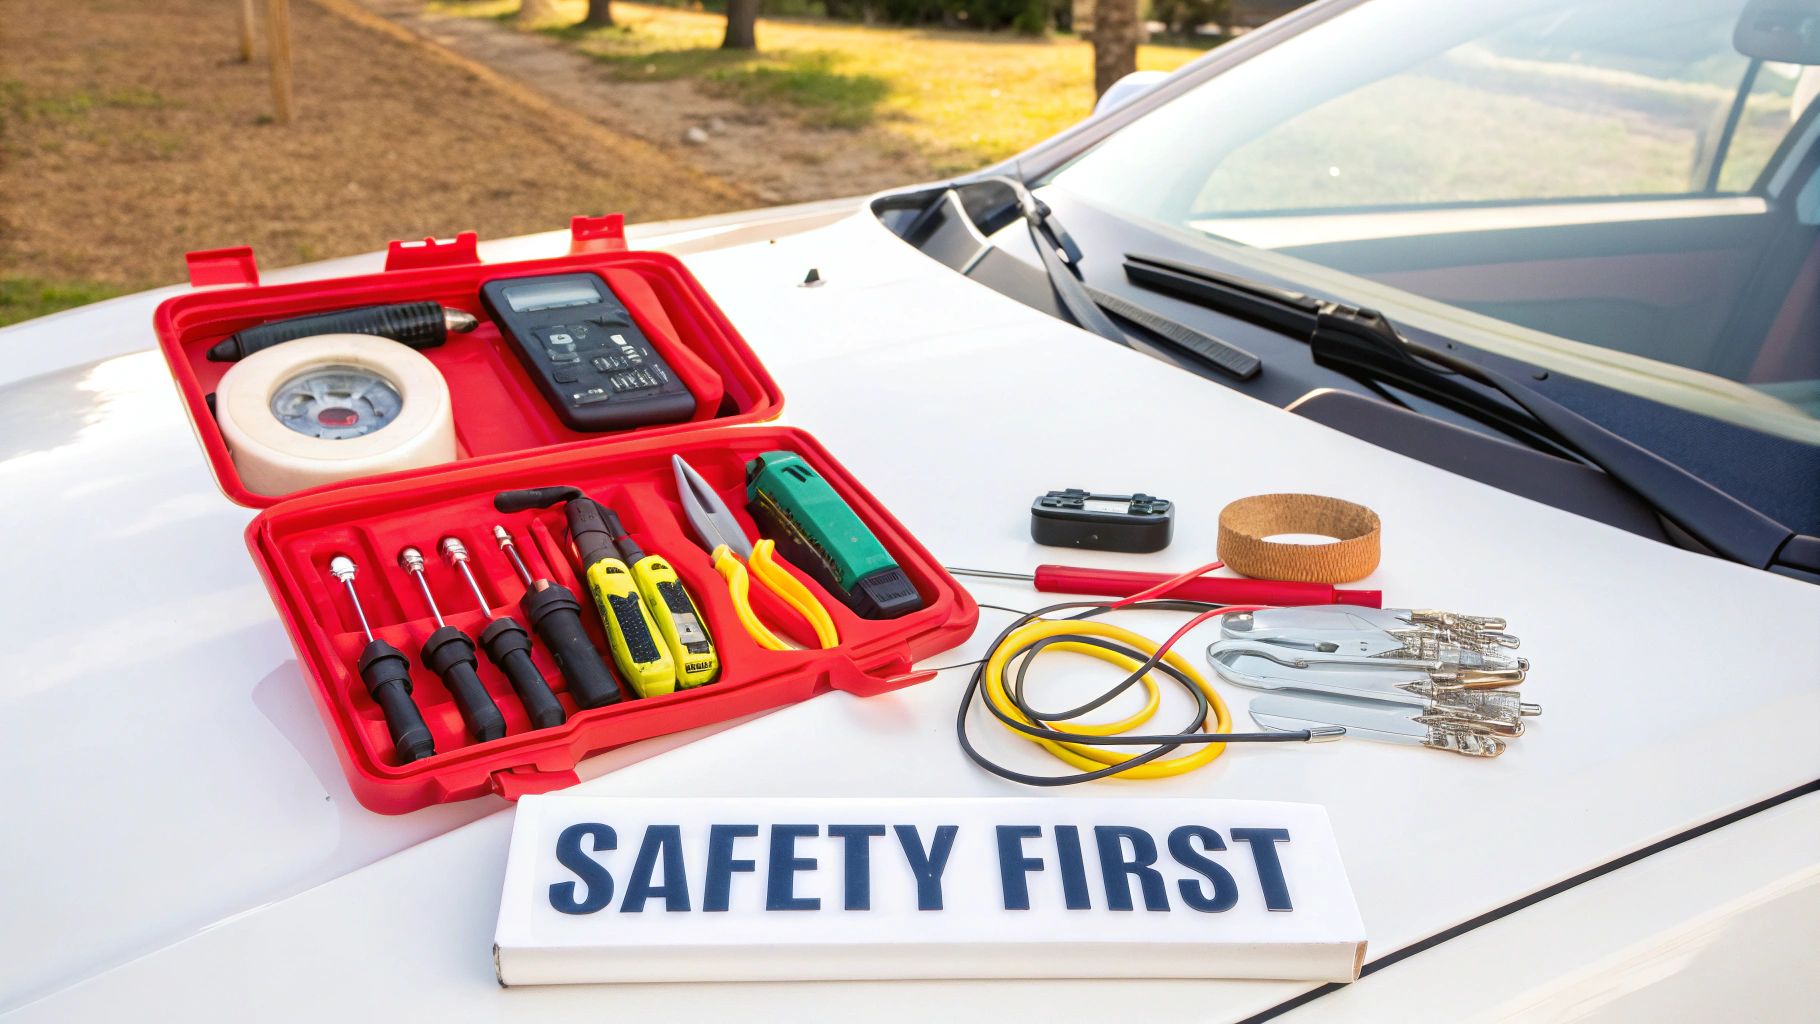
Essential Tools and Safety for Window Repair
Before you even think about popping off a trim piece, let's talk safety. It’s the absolute first step. Cars today are loaded with complex electronics, and it’s shockingly easy to cause a short circuit or accidentally set off an airbag. Trust me, that's a mistake you only make once.
So, always, always start by disconnecting the negative terminal of your car's battery. Grab a socket wrench, loosen the nut on the terminal, and pull the cable off. Just tuck it safely to the side where it can't accidentally touch the post again. This one simple step powers down the whole electrical system and makes it safe to start working.
Assembling Your DIY Toolkit
Alright, with the battery disconnected, let's get our tools in order. Having everything you need within arm's reach saves a ton of headaches later. More importantly, using the right tools prevents you from turning a straightforward fix into a cosmetic nightmare. A metal screwdriver can gouge a plastic door panel in a split second.
Here’s a short list of what I recommend having on hand before you begin:
- Plastic Trim Removal Set: These are non-negotiable. They’re designed to pop off interior panels and switch bezels without scratching the plastic or breaking the delicate clips that hold everything together.
- Socket Set with Extension: You'll definitely need this for the bolts holding the door panel on, and maybe for the switch or motor assembly itself.
- Multimeter: This is your secret weapon for diagnostics. It lets you test for voltage and check a switch's continuity, removing all the guesswork from the process.
I also like to keep a roll of painter's tape nearby. It’s perfect for labeling screws or protecting the paint around the edges of the door panel while you work. A little prep work goes a long way toward a clean, professional job.
Understanding the Hidden Dangers
A power window might not seem like a big deal, but the system packs a surprising punch. Believe it or not, federal safety data shows that automatic windows can exert 30 to 80 pounds of upward force. That’s more than enough to cause serious injury, which is why modern cars have auto-reverse safety features.
A word of caution: even with the power off, the window regulator inside the door is under tension from a big spring. If your repair takes you deep enough to remove the regulator, handle it carefully to prevent it from snapping open.
Getting prepared is about more than just having the right tools; it’s about knowing what you’re up against. For a detailed guide on getting the door panel off without breaking anything, check out our walkthrough on how to remove a car door panel. It’ll show you where all the common hidden clips and screws are.
Finding the True Culprit: Fuse, Motor, or Switch?
Alright, you've got your tools ready and you're thinking about safety. Now for the real work: figuring out exactly what's causing your window woes. We're going to follow a logical path of elimination, and that always means starting with the simplest and cheapest possibility first—the fuse. You’d be surprised how many "broken power window" jobs end right here.
A blown fuse is just a tiny, sacrificial part. It's designed to be the weak link in the chain, protecting expensive components like your window motor from a sudden electrical surge. When it goes, it cuts all power to that circuit.
Start Your Search at the Fuse Panel
First thing's first: find the fuse panel. Most cars have two of them. One is usually under the hood in the engine bay, and the other is inside the car, often tucked away under the driver's side of the dashboard or behind the glove box. Your owner's manual is your best friend for this part; it'll have a map showing you exactly where the panels are and what each fuse does.
Once you’ve located the right panel, check the diagram—it’s typically on the back of the panel cover or in the manual—to find the fuse for the power windows. Look for a label like "P/W," "WINDOWS," or something similar. Grab a fuse puller (there’s often one clipped inside the fuse box) or a small pair of needle-nose pliers and gently pull the fuse straight out.
Hold it up to the light and take a close look at the thin metal strip running through the middle.
- A good fuse has a solid, unbroken S-shaped wire inside.
- A blown fuse will have a clear gap or a dark, burnt-looking smudge where that wire has broken.
If it's blown, that's almost certainly your problem. Pop in a new fuse with the exact same amperage rating. Seriously, never use a higher-rated fuse; it's a major fire hazard. If the new one blows right away, you're dealing with a short circuit somewhere that needs more digging.
Is the Window Motor Making Any Noise?
Fuse looks good? Okay, our next suspect is the window motor. This is the part doing all the heavy lifting, and just like any other motor, it can simply wear out over time. Thankfully, you can get a good idea of its condition without having to rip the door apart just yet.
Your ears are your first diagnostic tool here. Turn the car’s ignition on, then have a friend press and hold the window switch while you lean in and put your ear right up against the door panel. What do you hear?
A faint clicking or a low humming sound is actually great news. It means the switch is sending power and the motor is at least trying to do its job. In this scenario, the problem is mechanical, not electrical. You're likely looking at a jammed window regulator or maybe a stripped gear inside the motor itself.
If you can hear the motor trying to work, give the door panel a good, solid thump with the side of your fist while your helper is still holding the switch. Sometimes, that little jolt is all it takes to get a stuck motor moving again. It’s a temporary fix at best, but it’s a dead giveaway that the motor is on its last legs.
On the other hand, total silence points us back toward an electrical problem. No power is reaching the motor. This could mean a bad switch, a break in the wiring, or an internal failure in the motor itself. This is where we break out the multimeter.
Using a Multimeter for a Definitive Motor Test
To know for sure if the motor is getting the juice it needs, we have to test for voltage right at its electrical connector. This single test is the quickest way to distinguish between a dead motor and a problem further up the line, like the switch. To do this, you will need to get the door panel off to access the motor's wiring.
Set your multimeter to the DC Voltage setting (usually marked with a V⎓), and choose the 20V range if it isn’t auto-ranging. Find the two-wire plug that goes directly into the window motor and carefully disconnect it.
With the car’s ignition on, stick the multimeter's red and black probes into the two slots of the connector coming from the car's wiring (not the side going into the motor). Now, have your helper press and hold the window switch down.
- You should get a reading of approximately +12 volts.
- Next, have them pull the switch up. The reading should flip to -12 volts.
If you see those readings, your switch and wiring are working perfectly. The culprit is, without a doubt, a dead window motor. If you get no voltage reading at all, then the motor isn't getting any power, and our investigation moves on to the switch and its wiring. For a more detailed walkthrough on this specific test, check out our guide on how to test a window motor.
How to Test a Power Window Switch Like a Pro
Alright, so the fuse is good, but the window motor is dead silent. This is a classic sign that we're dealing with an electrical problem, and the trail is leading straight to the switch or the wiring connected to it. It’s time to grab your multimeter and get to the bottom of it.
We're going to follow a logical path here. Fuse is okay? Check. Motor not making a peep? Check. That leaves the switch and its wiring as the final suspects.
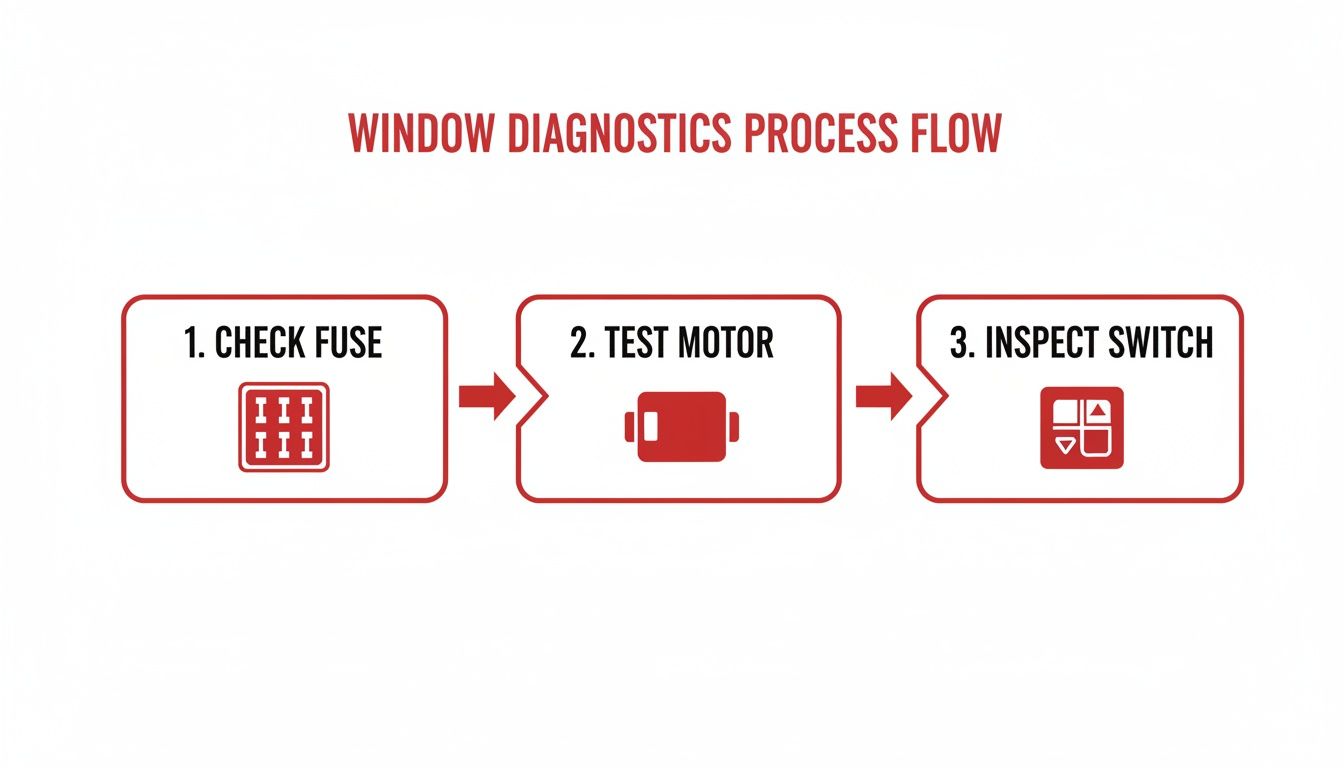
This flowchart gives you a great visual of how to tackle the problem, moving from the easy stuff to the more hands-on tests.
Getting to the Power Window Switch
First things first, we need to get our hands on the switch. It's usually housed in a plastic panel or bezel on the door panel or armrest. This is where a set of plastic trim removal tools becomes your best friend. Seriously, don't use a screwdriver—you'll absolutely gouge the soft plastic and leave a permanent, ugly mark.
Look for a small notch or seam around the edge of the switch panel. Gently slide a trim tool in and carefully pry it up. You’ll feel a few clips release as you work your way around. Once it’s loose, don't just yank it out. Remember, there's a wiring harness plugged into the back. You'll need to carefully disconnect it by finding the small locking tab on the connector, pressing it down, and pulling the plug straight out.
Performing a Continuity Test on the Switch
With the switch free, it's time for a continuity test. This is a simple but effective test that uses a multimeter to check if the switch is properly completing a circuit when you press the button. It’s the best way to know for sure if a switch has failed internally.
- Set your multimeter to the continuity setting. The symbol usually looks like a sound wave or a diode. A good way to check is to touch the probes together; the meter should beep.
- Now, look at the pins on the back of the switch. You’ll need to find the main power input, the ground, and the two output pins that go to the motor. A wiring diagram for your car is a huge help here, but you can often figure it out with some careful inspection.
- Touch one probe to the power input pin and the other to one of the motor output pins. Press the switch button for that direction (e.g., "down"). If the switch is working, your multimeter will beep, telling you the circuit is complete.
- Do the same thing for the other direction ("up"), moving your probe to the second motor output pin. Again, you should hear a beep when you press the button.
If that multimeter stays quiet on either test, you've found your culprit. The internal contacts are shot, and the switch is toast.
Real-World Example: I see this all the time on older Ford F-150s. The driver's window will go down just fine, but it refuses to go back up. It's almost always a worn-out "up" contact inside the master switch. A quick continuity test confirms it—you get a beep for the "down" pins but dead silence for the "up" pins.
To make sense of what your meter is telling you, here’s a quick reference guide.
Understanding Your Multimeter Readings
Use this reference to interpret what your multimeter is telling you when testing the window switch and its connections.
| Test Point | Expected Reading (Good Component) | Reading Indicates Failure | Next Diagnostic Step |
|---|---|---|---|
| Switch Continuity | Meter beeps (or shows near-zero resistance) when the button is pressed. | Meter remains silent (or shows "OL" for open loop). | The switch is faulty. Replace the switch. |
| Wiring Continuity | Meter beeps when testing a single wire from end to end. | Meter remains silent. | There is a break in the wire. Inspect and repair the wire. |
| Voltage at Connector | ~12V between the power and ground pins with the key on. | 0V or significantly low voltage. | Check the fuse, relay, or wiring leading to the switch. |
These simple checks are incredibly powerful for isolating the exact point of failure without guesswork.
Inspecting the Wiring Harness
If the switch passes the continuity test, the next place to look is the wiring. The most common point of failure is inside that flexible rubber boot that runs between the door and the car's body. Think about it—those wires get bent and flexed every single time the door opens and closes. After a few thousand cycles, they can fray and break.
Carefully peel back the rubber boot on both ends to get a good look at the wiring harness inside. Go through each wire one by one, looking for any signs of damage. You're looking for cracked insulation, visible copper strands, or a wire that has been completely severed. A broken wire here is a very common reason why a passenger window won't work from the driver's side.
The Professional's Trick: The Bypass Test
If you want the ultimate confirmation, you can do what we call a bypass test, or "jumping" the motor. This trick takes the switch completely out of the picture by sending power directly to the window motor. If the window moves, you know with 100% certainty that the switch or its wiring is the problem.
All you need is a short piece of wire (a jumper wire).
- Look at the wiring connector that you unplugged from the switch. Identify the two pins that lead directly to the window motor.
- Briefly touch your jumper wire between the main 12V power pin and one of the motor pins. The window should move one way.
- Now, do the same thing with the other motor pin. The window should move in the opposite direction.
If the motor whirs to life during this test, you can be confident that the motor and regulator are perfectly fine. The fix is as simple as ordering a new power window switch.
Installing a New Power Window Switch The Right Way
Alright, you've diagnosed the problem and confirmed the power window switch is toast. Now for the fun part: putting in the new one. This is where all that diagnostic effort pays off, letting you wrap up a professional-level repair right in your own driveway.
Swapping out a window switch is usually a pretty simple job, but the devil is in the details. If you rush it, you're just asking for broken plastic clips or scuffed-up door panels. Let's walk through this the right way, making sure it's a clean and successful repair.
Getting the Old Switch Assembly Out
First things first, we need to get that faulty switch out of the door. Grab your plastic trim removal tools and gently start prying the switch panel or bezel away from the door card. These are almost always held in by a few pressure clips, so just work your way around the edges with a bit of leverage until it pops loose.
Once the panel is free, you'll see the wiring harness plugged into the back of the switch assembly. Find the little release tab on the plastic connector—you'll need to press it down firmly while pulling the connector straight out. These can be a little stubborn after years of being clicked into place, so give it a good tug but try not to wiggle it side-to-side, which can bend or damage the pins inside.
With the harness disconnected, the entire switch panel is free. On some cars, the switch is built right into this panel. On others, you might have to remove a couple of tiny screws or release a few more clips to separate the switch itself from the bezel. Go slow here; old plastic can be brittle.
A Quick Tip from the Garage: I always keep a magnetic tray or even just an old yogurt cup nearby for screws and small parts. It’s amazing how easily these things can fall and disappear into the black hole of a car's interior, turning a 15-minute job into a frustrating hour-long search.
Choosing Your Replacement Power Window Switch
This is probably the most important part of the entire job. The market is flooded with aftermarket parts, and trust me, they are not all created equal. You'll see everything from dirt-cheap knock-offs to dealer-priced OEM parts. So, how do you choose?
This decision really determines how long your repair will last. Think about it: power window switch failures are a huge reason for aftermarket sales, with the global market expected to reach $3.7 billion by 2025. For popular trucks in the US like the F-Series and Silverado, roughly 12% of owners report a switch problem by the 100,000-mile mark. Taking that to a shop can set you back anywhere from $150 to $400.
With those numbers in mind, spending a little extra on a quality part just makes sense. Here’s what I look for:
- Guaranteed Fitment: The seller should promise it fits your exact year, make, and model. No guesswork.
- Upgraded Internals: Good brands will often advertise that they've improved on the original design with things like better contact points to resist wear.
- Solid Warranty: A long warranty shows the manufacturer stands behind their product. It's your safety net if the part fails prematurely.
Grabbing the cheapest switch you can find online might save you a few bucks today, but you'll likely be doing this job all over again in a year. A quality-guaranteed part from a reputable source is a permanent fix, not just a temporary patch. For a deeper dive into troubleshooting these issues, check out our complete guide on how to fix a power window.
Installing the New Switch and Putting It All Back Together
Now that you have the new switch, the rest is easy—just do everything in reverse.
If you had to separate the switch from its bezel, start by snapping the new one into place. You should hear and feel a solid "click" as the tabs lock in. Then, plug the main wiring harness back in. The connector is keyed to only go in one way, so you can't mess it up. Push until it clicks, and you're golden.
But hold on. Before you snap that panel back into the door, let's test it. Reconnect the negative battery terminal, turn the key to the "on" position, and run the window up and down. Make sure it operates smoothly. If your car has an "auto-up/down" feature, you might need to re-initialize it. Just hold the switch up for a few seconds after the window is fully closed, then hold it down for a few seconds after it's fully open.
Once you’ve confirmed it all works perfectly, disconnect the battery one last time for safety. Now you can line the switch panel up with the opening in the door and press it firmly and evenly back into place until it sits flush. Reconnect the battery terminal for good, and that's a wrap. You just saved yourself a nice chunk of change and a trip to the shop.
Common Questions About Power Window Repairs
If you're digging into a power window repair for the first time, you’re bound to have questions. It’s totally normal. Knowing what to expect can be the difference between a quick fix and a day full of headaches. Let's walk through some of the most common issues we see and what they really mean.
Why Does My Window Go Down But Not Up?
Ah, the classic one-way window. This is the single most common symptom of a bad power window switch, and we see it all the time. Think of it this way: the switch has two separate electrical contacts inside—one for "up" and one for "down."
Over thousands and thousands of presses, one set of those contacts simply wears out before the other. The "up" function usually goes first because the motor has to fight gravity, which pulls a little more power and creates more wear over the years. While you can't completely rule out a wiring issue, a faulty switch is the culprit in over 90% of these cases.
The good news is that this is a dead giveaway. A window that works in only one direction lets you skip a lot of the more complex electrical guesswork and points you right to the switch.
Can I Just Clean the Switch Instead of Replacing It?
It's tempting to try and save a few bucks by prying the switch open and cleaning the contacts, but honestly, it's rarely a permanent fix. Those little plastic switch housings are held together with brittle clips that were never meant to be opened and closed again.
You'll likely break the clips just trying to get it apart. Even if you succeed and clean the corrosion with some contact cleaner, the original protective coating on the contacts is long gone. That means the corrosion will be back in just a few weeks or months, and you'll be right back where you started, but this time with a broken switch.
When you weigh the low cost of a quality replacement switch—which often has better-than-factory internals and a warranty—against the hassle, a new switch is the smarter, more reliable choice every time.
All My Windows Stopped Working at Once. Is It the Master Switch?
When every window dies at the same time, it’s easy to jump to the conclusion that the driver's side master switch is fried. It’s certainly a possibility, but don't get ahead of yourself. Always check the simple stuff first.
Here's the order of operations I'd follow:
- Check the Window Lock Button: Seriously, this is the number one cause. It’s so easy to bump it by accident. Press it a few times to make sure it isn't engaged or stuck. You’d be surprised how often this is the "fix."
- Inspect the Main Fuse: Your vehicle's fuse box contains a single, higher-amperage fuse that protects the whole power window system. If it blows, everything goes dark.
- Test the Master Switch: If the lock and fuse check out, now it's time to test for power at the master switch's main connector. This will confirm whether the switch assembly is actually the problem.
Do I Need to Reprogram the Window After Replacing the Switch?
For most cars with basic power windows, the answer is a simple no. The new switch is a plug-and-play part. You just pop it in, and you're done.
However, if your car has the "auto-up/down" or "one-touch" feature, you'll probably need to re-initialize it after the repair. This sounds way more technical than it is. It's usually a simple process of running the window all the way up and holding the switch for a few seconds, then running it all the way down and holding it again. Your owner's manual will have the specific re-learning steps for your vehicle.
If you've run through these diagnostics and still can't get the window moving, or if you just don't feel comfortable digging into your car's wiring, it might be time for professional electrical diagnostics and repair.
For guaranteed-to-fit power window switches with upgraded internals and a solid warranty, trust T1A Auto. Find the right part for your vehicle today and get your windows working like new. https://t1aauto.com