


The most common advice about a stuck car window is also the advice that wastes the most parts: replace the window regulator. A window that stops moving can have a failed switch, a poor ground, a blown fuse, a binding run channel, lost calibration, or a damaged motor. The regulator may be innocent.
A proper window regulator replacement starts with diagnosis and ends with safety validation. You need to prove that the mechanism has failed, install a part that matches the door exactly, and confirm that the glass, seals, one-touch operation, and anti-pinch protection all work before the door panel goes back on.
Table of Contents
- Diagnosing the Real Cause of Window Failure
- Safe Door Panel Removal and Glass Securing
- Swapping the Regulator and Motor Assembly
- Calibrating Auto Reverse and Pinch Protection
- Selecting Durable Parts for Long Term Reliability
- Final Validation and Reassembly Checklist
Diagnosing the Real Cause of Window Failure
A silent window doesn't automatically point to a broken regulator. Start at the switch and work toward the mechanism. Press the switch in both directions while listening closely. A complete lack of sound can indicate a switch, fuse, wiring, ground, or motor problem. Clicking, humming, or strained operation points you toward the motor, glass guides, or regulator assembly, but sound alone isn't proof.
One service-data summary reports that about 35% of complaints initially attributed to the regulator originate in the motor or electrical system. Treat that figure as a diagnostic benchmark rather than a universal failure rate, because the source is secondary, but it reinforces the cost of ordering parts before testing. Use this window motor testing guide for a more focused electrical check.
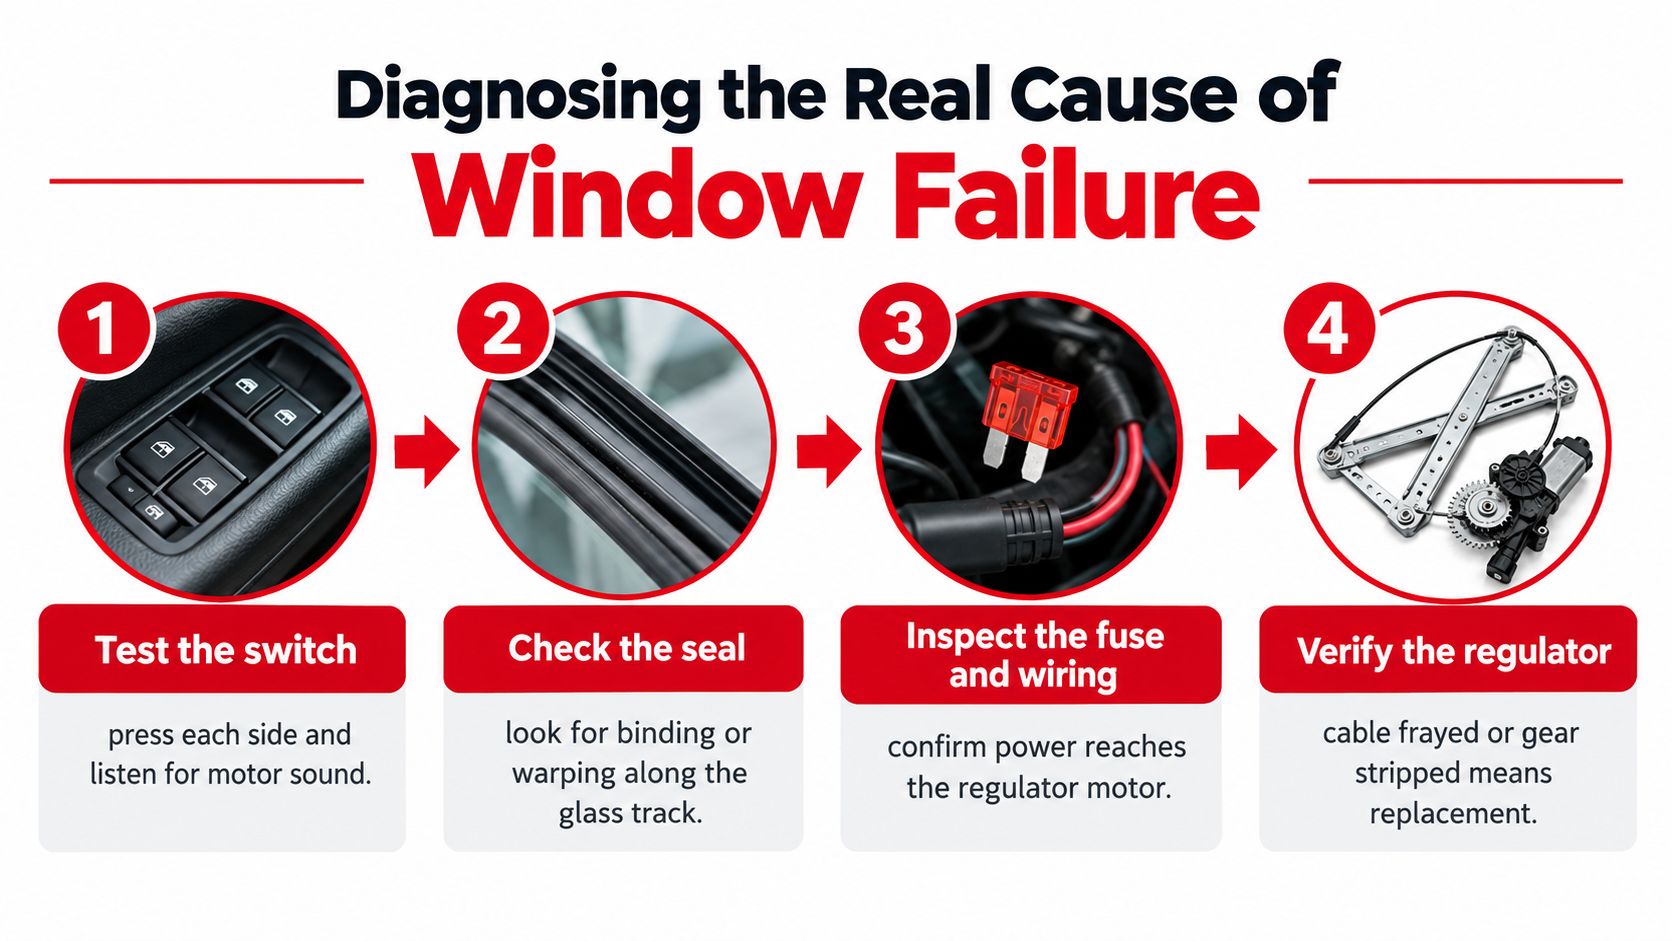
Test the circuit under load
A voltage reading with the connector disconnected can mislead you. Back-probe the motor connector while operating the switch and confirm that battery voltage and ground remain available under load. If voltage disappears when the switch is pressed, trace the fuse, switch, connector, wiring, and ground rather than removing the regulator.
If the motor clicks but doesn't turn, the motor may be seized or the regulator may be jammed. If it runs but the glass doesn't move, inspect for a detached clamp, stripped gear, derailed cable, or broken cable strands. A cable regulator with frayed strands often creates uneven travel or a rough grinding sound.
Check friction before condemning hardware
With the glass supported, assist it gently by hand while operating the switch. Don't force a stalled window. Notice whether the glass moves freely in the channels or fights the run seals. Inspect the guide channels and slot seals for lumps, tears, protrusions, warping, or contamination. Excessive friction can overload a good replacement regulator and recreate the original failure.
Practical rule: If the glass binds without the motor driving it, repair the channel or seal before installing a new mechanism.
The final diagnosis should identify the failed component, not just the symptom. A motor with confirmed power and ground but no useful output needs motor attention. A motor that runs while the cable slips, the gear strips, or the glass clamp separates indicates regulator failure. A window that moves correctly after channel friction is corrected doesn't need a regulator at all.
Safe Door Panel Removal and Glass Securing
Door panels hide fasteners, electrical connectors, clips, moisture barriers, and sometimes side-impact airbag wiring. Disconnect the battery according to the vehicle's service procedure before disturbing door-mounted electrical equipment. Keep the keys away from the vehicle while you work so nobody can operate the switch unexpectedly.
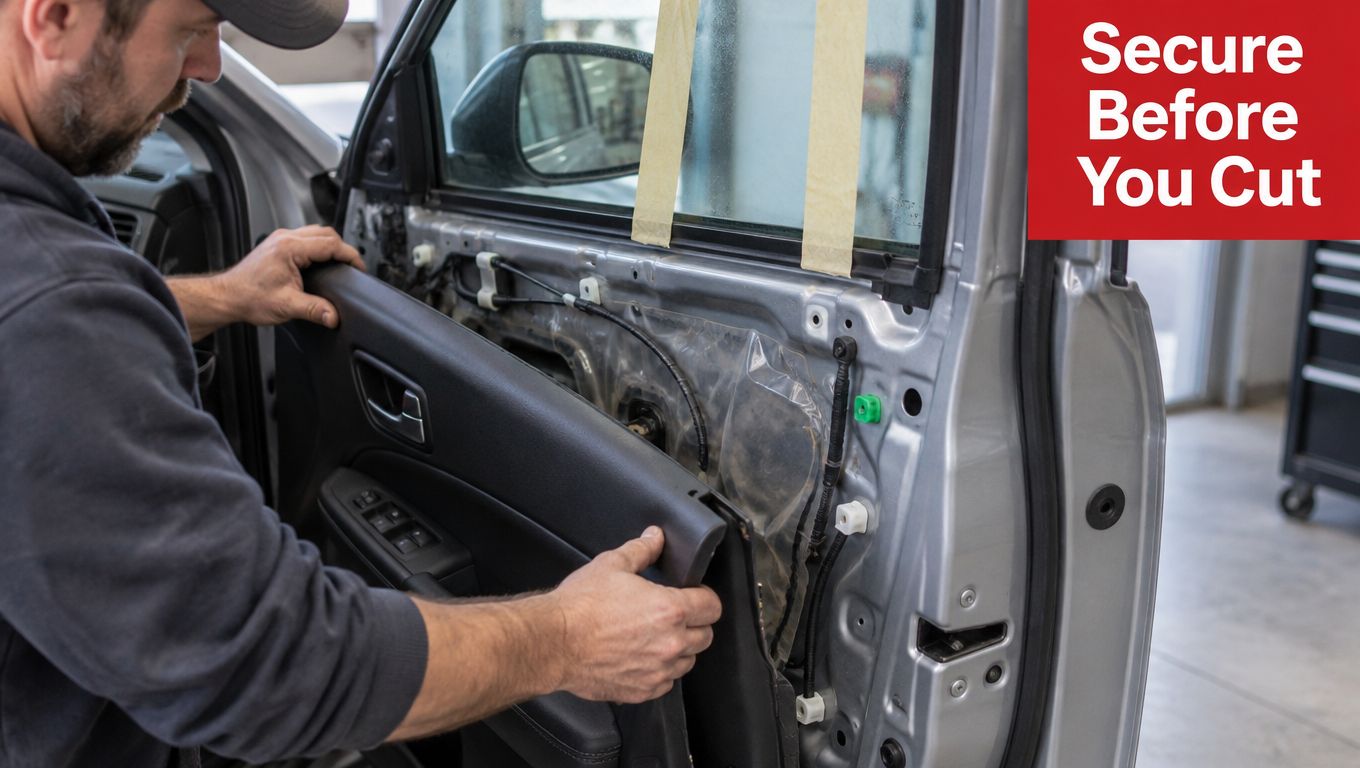
Use a trim tool rather than a screwdriver wherever possible. Look for concealed screws behind the pull cup, armrest, speaker grille, switch bezel, and interior handle. Release the clips one at a time, support the panel as it separates, and disconnect each harness by its locking tab instead of pulling on the wires. A guide such as this door panel removal walkthrough can help you locate model-specific fasteners before you apply force.
Protect the glass before removing the regulator
If the glass is still raised, secure it before touching the regulator bolts. Place wide painter's tape over the top of the glass and across the door frame, using several strips on both sides. Add a support block across the frame where appropriate, with padding that won't scratch the paint or glass. Tape is a backup, not the only support.
Remove the water deflector carefully. Don't tear it, because the barrier keeps rainwater inside the door cavity and away from the trim, speaker, and cabin. If the adhesive releases, preserve the original sealing surface and plan to restore it during reassembly.
The exact door architecture varies, so don't assume that one procedure applies to every vehicle. Even the visible tint and glass area can be subject to local rules, so check the applicable windshield and front window VLT limits before replacing or modifying glass.
After removing the panel, disconnect the motor and any latch, speaker, courtesy-light, or airbag connectors required by the vehicle procedure. Keep fasteners in labeled containers. Before extracting the regulator, confirm that the glass is stable and that no cable or harness remains attached.
Work slowly around the access opening. Door edges are sharp, and the regulator path can pinch fingers even when the motor is disconnected. Wear eye protection, keep your hands outside the cable and gear path, and never operate the assembly while holding the mechanism.
Swapping the Regulator and Motor Assembly
Before loosening the first fastener, compare the replacement with the removed unit on a bench. Confirm the year, make, model, body style, door position, mounting holes, connector orientation, glass-clamp location, and cable routing. A part can look nearly identical and still place the glass at the wrong angle or use a connector that cannot be secured.
The vehicle may use a scissor, gear-driven, cable-driven, or older hydraulic arrangement. That history matters because window technology evolved from hydraulic-electric systems introduced on selected 1941 vehicles to the all-electric architecture Chrysler introduced on the 1951 Imperial. Later systems became common across more vehicle types, but the mechanism still varies substantially by application. The history of power windows explains why year and design identification remain important for fitment.
Disconnect the motor connector and remove the regulator fasteners through the door access openings. Support the assembly as the last fastener comes out. If the replacement is regulator-only, transfer the motor only when the service procedure permits it and the motor has passed testing. A weak motor can make a new regulator appear defective, while a healthy motor attached to a damaged cable assembly won't solve the problem.
Tighten the assembly without distorting the door
Start every fastener by hand. Thin door metal can cross-thread easily, and forcing a bolt with a power tool can damage the captive nut or pull the mounting flange out of shape. Once all fasteners are started, tighten them evenly in stages so the assembly seats flat.
Published procedures show regulator fasteners can be approximately 8 to 10 N·m, while motor fasteners may be substantially lower, as documented in the manufacturer service procedure. Those values aren't a universal specification for every vehicle. Use the vehicle-specific service manual, because substituting one generic torque value can strip threads or distort the door structure.
Reconnect the switch temporarily before reinstalling the moisture barrier or trim. Cycle the glass while watching the entire travel path. Stop if the glass tilts, the cable snags, the motor strains, the seal drags, or the mechanism makes a new grinding noise. The glass should remain parallel to the beltline and clear the run channels without jumping.
Do not finalize the repair until the assembly passes this open-door test. Correcting a misaligned clamp or loose fastener is much easier while the access opening is exposed than after the panel and barrier conceal the work.
Calibrating Auto Reverse and Pinch Protection
A mechanically smooth window can still be electronically incomplete. Vehicles with one-touch operation, automatic closing, or anti-pinch monitoring may need to relearn the glass's upper and lower travel limits after a battery disconnect, motor replacement, wiring repair, or regulator installation.
Start with the vehicle's published initialization procedure. Some systems use the window switch, with a controlled full-close and hold followed by a full-open and hold sequence. Others require a scan tool, a body-control-module routine, or manufacturer software. Don't guess at a sequence copied from another model. A lost calibration can imitate a failed regulator, and a late-model vehicle may report a configuration fault even when the hardware is installed correctly.
Recent manufacturer bulletins posted by NHTSA describe slow closing, incomplete closure, erratic operation, and apparent anti-pinch failures caused by incorrect regulator dimensions, damaged or mispositioned run seals, or missing initialization. One bulletin specifies replacement only when a measured assembly dimension falls outside 24.5 to 25.5 mm, so measure and follow the procedure rather than replacing parts by symptom alone. The bulletin also shows why initialization belongs in the diagnostic sequence, not as an afterthought.
Test reversal without using your hand
After calibration, close the door as required by the vehicle procedure and verify manual, one-touch, and automatic operation separately. Keep hands, fingers, and tools away from the glass opening during testing. Use a suitable soft test object, such as a roll of paper towels, positioned according to the manufacturer's instructions.
Manufacturer procedures require a controlled anti-pinch check with a test object rather than a hand or body part. Procedures often specify that the glass should reverse by approximately 150 mm after contacting the object, as described in the NHTSA-posted manufacturer instructions. Follow the specific vehicle requirement, because reversal behavior and test conditions differ.
If the glass closes without reversing, reverses at the wrong point, or produces a “window motor not configured” fault, stop using automatic closing until the issue is resolved. Check the run channel, calibration, wiring, module configuration, and regulator dimensions. A scan tool may be necessary when manual initialization can't restore the safety function.
Selecting Durable Parts for Long Term Reliability
Price alone doesn't tell you whether a regulator will last. Compare the parts that carry the load: cable diameter and routing, pulley construction, glass sliders, mounting plate rigidity, motor quality, and the way the cable terminates at the clamps. A low-cost assembly that repeats the same weak plastic interfaces as the failed unit may fit the door and still provide a short repair.
Metal sliders and reinforced contact points can make sense in high-wear locations, but material upgrades don't excuse poor fitment. A rigid component installed at the wrong angle can increase glass drag and load the motor. The durable choice is the part that combines appropriate construction with exact vehicle compatibility.
Confirm fitment before ordering
Use the full application details, not just the vehicle name. Verify the model year, make, model, body style, front or rear position, left or right side, manual or power operation, and whether the motor is included. Compare connector images and mounting-hole layouts when catalog information allows it.
Warranty terms also deserve scrutiny. A lifetime warranty on a metal component has value only if the seller can identify the correct application and support the return process. Specialized retailers such as T1A Auto offer vehicle compatibility checking and replacement window regulator assemblies with upgraded metal components, so the buyer can compare an aftermarket design against an OEM-style assembly. For a broader decision framework, see aftermarket parts versus OEM components.
Don't assume “direct fit” means “install without adjustment.” Even a correctly cataloged part needs a side-by-side inspection, careful fastening, glass alignment, and post-installation calibration. The part is one part of the repair system, alongside the seal, guide, motor, wiring, and control module.
Final Validation and Reassembly Checklist
The repair isn't finished when the glass moves. Before reinstalling the panel, run the window through its complete travel and watch for tilt, seal drag, cable noise, or interference with the door frame. Confirm that the glass stops correctly, automatic functions work where fitted, and anti-pinch behavior has passed the controlled test.
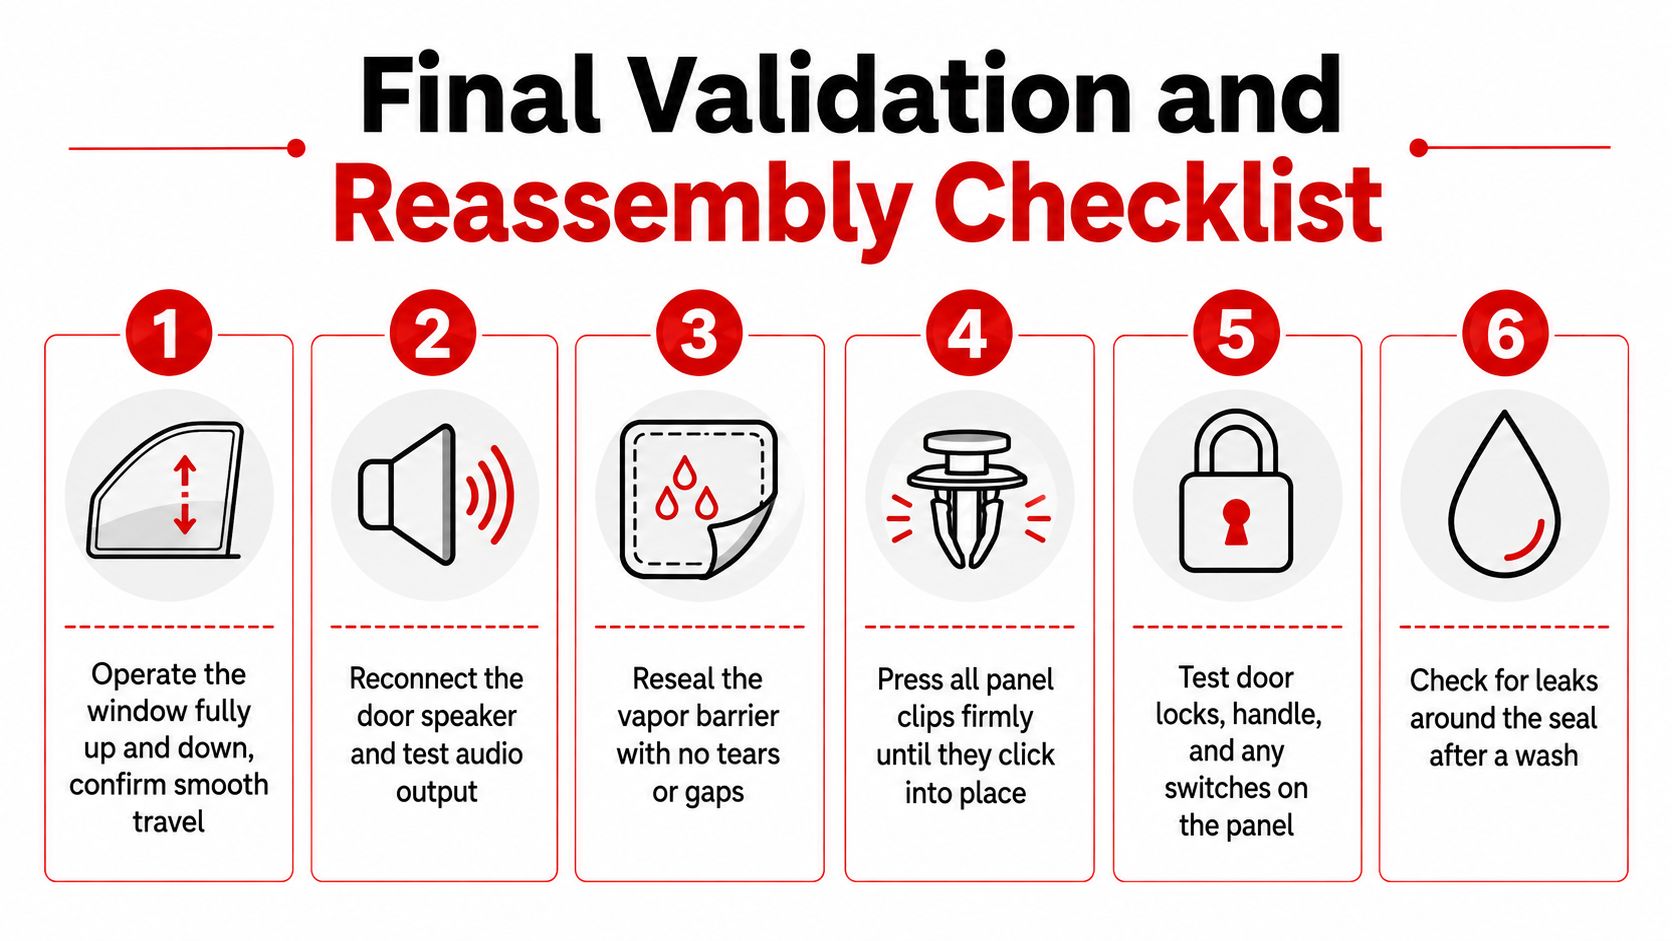
Use this sequence while the door cavity remains accessible:
- Inspect hardware: Confirm every regulator fastener is tight and no tool, clip, or loose bolt remains inside the door.
- Check electrical functions: Reconnect the speaker, lock, handle, courtesy light, switch, and any other door equipment, then test each one.
- Restore the barrier: Repair or replace torn waterproof tape and press the moisture barrier firmly into its original sealing path.
- Seat the panel: Align the upper lip first, then press each retaining clip into place without trapping wiring.
- Test clearances: Operate the window after the panel is fitted to confirm trim pressure isn't rubbing the glass.
- Check water sealing: Simulate rain around the outer glass seal and inspect the lower door and cabin side for leaks.
A quiet, aligned window with working safety functions is the standard. If anything feels wrong, remove the panel while the evidence is still fresh instead of accepting a symptom that may become a second failure.
T1A Auto supplies vehicle-matched replacement window regulator assemblies and other door hardware, including options with upgraded metal components and warranty coverage. Visit T1A Auto to check fitment for your vehicle before ordering, then use the diagnostic and validation steps above to complete the repair correctly.
