


So, your car window made that dreaded thunk, and now it's sitting crooked in the door. It’s a frustrating experience, but figuring out what went wrong is the first step to getting it fixed right. The good news is, the problem is almost always a mechanical failure inside the door, not just the glass itself randomly popping loose.
Let's get into what's really happening behind that door panel.
Why Your Car Window Is Off Its Track

A window doesn't just decide to fall off its track one day. There's always a specific part that has failed, and believe it or not, your own eyes and ears are the best tools you have for an initial diagnosis. You can figure out a lot before you even pick up a screwdriver.
The workhorse behind the scenes is a part called the window regulator. This is the assembly of cables, pulleys, and metal tracks that actually lifts and lowers the heavy glass. After years of going up and down, its parts—especially the plastic clips and pulleys—get brittle and eventually give out.
Listen to What Your Car Is Telling You
The noises coming from your door are direct clues. A loud, sudden POP followed by the glass dropping is a classic sign of a snapped regulator cable. If you hear a grinding, chewing, or crunching sound, that usually means a plastic pulley or a gear has shattered into pieces inside the door.
What if you hear the motor whirring away but the window doesn't budge? That's actually a good sign for the motor. It tells you the motor is getting power, but it's disconnected from the glass. The cable has likely snapped and isn't attached to anything anymore. You can get a better understanding of how all these parts work together in our guide on what a window regulator is.
Pro Tip: The moment you hear a loud pop or a grinding noise, stop hitting the window switch! If you keep trying to force it, you could burn out a perfectly good motor, which just adds more cost and time to the repair.
Diagnosing Your Window Problem From Sound and Sight
Before you start taking things apart, use this table to match what you're seeing and hearing with the likely culprit. This can save you a ton of guesswork.
| Symptom | Most Likely Cause | What to Do Next |
|---|---|---|
| Window drops suddenly with a loud POP | A regulator cable has snapped under tension. | The entire regulator assembly needs to be replaced. |
| Grinding or crunching noise when you hit the switch | A plastic guide, clip, or pulley has broken apart. | Prepare to replace the full regulator assembly. |
| Motor whirs, but the window doesn't move | The cable is detached from the motor or window clips. | A full regulator replacement is almost always the solution. |
| Window tilts forward or backward as it moves | A guide rail is broken, or a lift point has detached. | The regulator is failing and will need replacement. |
| Window is slow, judders, or struggles to move | The motor is failing, or the regulator tracks are bent/obstructed. | You may need a new motor, regulator, or both. |
Once you’ve listened and watched, you’ll have a solid idea of what’s broken and can confidently order the right parts for the job.
What to Look for Before You Open the Door
How the window falls is just as telling as the sound it makes. Does it tilt awkwardly to the front or back? That points to a break at one of the lift points or a cracked guide rail. If the glass just drops straight down into the door, that often means a complete failure, like both cables snapping at once.
This is an incredibly common issue for all kinds of cars and trucks. The constant demand for these repairs is what drives the $1.8 billion global automotive window regulator market. Manufacturers are always working on creating more durable replacement parts to deal with these frequent failures in both personal and commercial vehicles.
By paying attention to these simple clues, you can diagnose the problem with confidence and know exactly what you need before you even start the repair.
Getting Your Toolkit Ready
Before you even think about popping off that door panel, let’s talk tools. Trust me, spending five minutes getting everything you need laid out will save you an hour of headaches later. Trying to improvise with the wrong gear is a fast track to frustration, busted trim clips, and maybe even a shattered window.
You're not going to need a professional mechanic's toolbox for this. Most of what you need is probably already sitting on a shelf in your garage. The key isn't having exotic tools, but having the right tool for each specific part of the job.
The Must-Have Hand Tools
This is your bread and butter. A solid socket set and a few screwdrivers will get you through about 80% of the work.
- Socket Set: Grab your metric set. You'll almost certainly need 8mm, 10mm, and 12mm sockets for the bolts holding the window regulator and other bits in place.
- Screwdriver Set: You'll want a couple of different sizes of both Phillips head and flathead screwdrivers. These are perfect for those little screws hiding under armrests or behind tiny plastic covers.
- Pliers: A pair of needle-nose pliers is your best friend for stubborn electrical connectors. They let you get a grip and release the locking tab without breaking it.
A Few Lifesaving Extras
Now for the items that separate a smooth job from a nightmare. These aren't expensive, but they make a world of difference, especially when dealing with delicate interior pieces.
- Non-Marring Trim Removal Kit: If you buy one thing for this job, make it this. These plastic pry tools are specifically designed to get under trim and pop clips loose without scratching your paint or snapping the plastic. Don't use a screwdriver!
- Painter's Tape: Once you get the door panel off, the glass will be loose. You need a reliable way to hold it up and out of the way. A few strips of strong painter's tape across the top of the glass and onto the door frame works perfectly.
- Work Gloves: The inside of a car door is full of surprisingly sharp metal edges. A good pair of gloves will save your knuckles.
- Flashlight or Headlamp: It’s dark in there. A headlamp is ideal because it keeps your hands free, but a bright flashlight will do the trick.
Crucial Safety Step: Disconnect the Battery
Before you unplug a single wire, disconnect the negative terminal on your car battery. This is non-negotiable. It prevents any electrical mishaps and, more importantly, deactivates the side-impact airbag in the door. The last thing you want is that thing going off while your hands are inside.
Alright, once you've got your tools laid out and the battery disconnected, you’re officially ready to get your hands dirty. This prep work is what separates a frustrating afternoon from a successful repair you can be proud of. Let's move on to getting inside that door.
Removing the Door Panel to Access the Window Assembly
Alright, with your tools laid out and the battery disconnected, it’s time to get inside the door. This is where a lot of people get a little hesitant, but trust me, modern door panels are designed to come off without a fight. The whole trick is knowing where the hidden fasteners are and using a little finesse so you don't snap any plastic clips.
Every car model has its own quirks, but the general idea is the same. The screws are usually hiding in plain sight—you just need to know where to look. Check inside the door pull cup, under the armrest, or behind any little plastic covers near the door latch.
This quick infographic covers the essential prep work you should never skip before you start popping things loose.
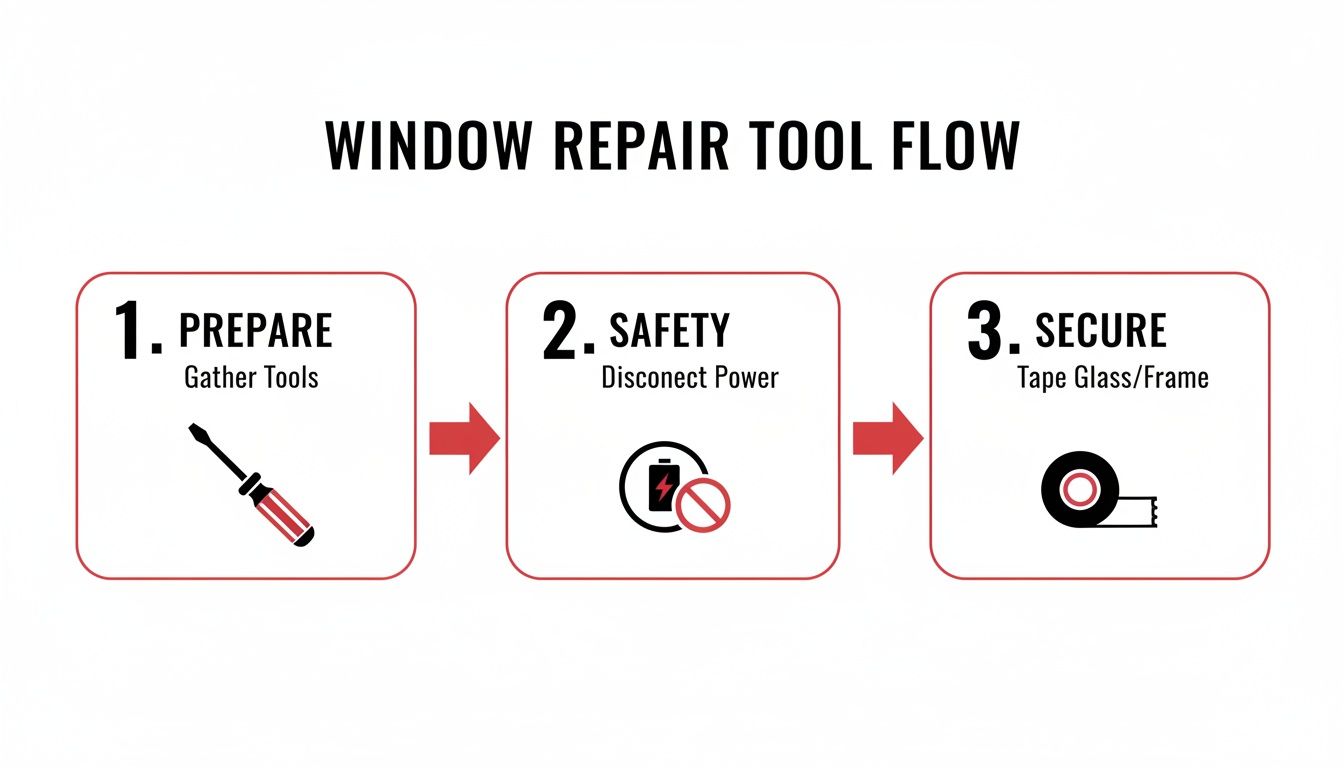
Think of this as your final checklist: have the right tools on hand, disconnect the power for safety, and tape that glass up so it doesn't drop unexpectedly.
Finding and Removing Fasteners
Start by feeling around for any small, removable plastic covers. A small flathead screwdriver or, even better, a plastic trim tool can pop them right off, revealing the screws hidden underneath. Once those are out, the panel is just held in place by a series of plastic clips around its edge.
This is where those non-marring trim tools earn their keep. I like to start at a bottom corner, slide the tool between the door panel and the metal frame, and give it a gentle pry. You'll hear a distinct pop as the first clip lets go. Just work your way around the perimeter of the door, releasing one clip at a time. For a much more detailed guide covering different types of vehicles, take a look at our complete tutorial on how to remove a car door panel.
Important Takeaway: Once the clips are free, don't just yank the panel off! It’s still connected by wires for the window switches, speakers, and maybe even lights. Let it hang gently for a moment while you carefully unplug those connectors.
Peeling Back the Vapor Barrier
After you set the panel aside, you'll be looking at a sheet of plastic or foam attached to the door. That's the vapor barrier, and it’s there to protect your interior from moisture and cut down on road noise.
You don't need to tear it off. Just carefully peel it back from a corner. That black, gooey adhesive is meant to be resealable, so be gentle. Pull back just enough to give yourself a clear line of sight and enough room to get your hands and tools inside the door.
Now you’ve got full access to the window assembly. You can clearly see the regulator, the motor, and the tracks the glass rides in. This is where you can properly diagnose the problem and start the actual repair. Here's what to do next to fix a car window off track:
- Secure the Glass: If you haven't already, use strong painter's tape or duct tape to hold the window up. Run a couple of strips over the top of the door frame so that the glass can't come crashing down while you work.
- Disconnect the Motor: Find the electrical plug going into the window motor and disconnect it.
- Unbolt the Regulator: Look for the bolts holding the entire regulator assembly to the inner metal of the door. There are usually between four and six of them.
- Release the Glass: The window itself is typically clamped to the regulator's lift plate with two bolts. Loosen and remove these to free the glass from the old assembly.
- Remove the Assembly: Getting the old regulator out can feel a bit like a game of Tetris. You'll have to tilt and rotate the assembly to snake it out through one of the access holes in the door. Go slow to avoid scratching the glass or your paint.
With the broken assembly out of the way, you're ready to put the new part in.
Repair or Replace? Making the Right Call
Alright, you've got the old window regulator assembly out and sitting on your workbench. Now comes the big question: can you patch this thing up, or is it time to just replace it?
I get it. The temptation to find a quick, cheap fix is strong. But let's be realistic—something inside that assembly failed, and a simple patch job is usually just a temporary band-aid that will leave you stranded again.
In very rare cases, the glass might just pop out of the mounting clips. But honestly, in my experience, that's almost never the root cause. 99% of the time, when a window drops into the door, it's because a physical part snapped. That’s why a full replacement is almost always the smartest, most reliable long-term solution.
What to Look For on the Old Regulator
Before you decide, take a good, hard look at the old assembly. The evidence of failure is usually pretty obvious and will make the choice for you.
- Frayed or Snapped Cables: Are the metal cables stretched out, frayed, or completely broken? These are under constant tension and are usually the first thing to go.
- Cracked Plastic Pulleys: Check the little plastic wheels that guide the cables. They get brittle with age and often shatter, causing the whole system to lose tension in an instant.
- Bent or Damaged Tracks: Give the metal rails a once-over. It’s less common, but a hard impact or a serious jam can bend the track, making it impossible for the window to move smoothly.
- Broken Plastic Clips: Look closely at the clips that physically hold the glass. If they're cracked or shattered, there’s no safe or reliable way to repair them.
If you spot any of these problems, a full replacement isn't just a good idea—it's the only way to get a lasting fix. This is also where you'll appreciate the difference quality parts make. For instance, T1A Auto regulators often use upgraded metal components to replace the original plastic parts that were prone to failing in the first place.
A window regulator is a complete system. When one little piece fails, it puts a ton of extra stress on everything else. Trying to fix a single broken pulley often just means another part will fail a few weeks later, and you'll be right back where you started, taking that door panel off again.
Of course, if you get stuck or decide the job is too much, specialized help is always available from auto repair shops or dealerships.
Repair vs Replace: A Practical Comparison
Still on the fence? This simple guide can help you determine if you can attempt a simple repair or if a full replacement is the smarter choice.
| Situation | Recommended Action | Why It Matters |
|---|---|---|
| Window glass simply popped out of intact clips. | Repair | This is a rare, easy fix. Just clean the clips and glass, then reseat it properly. |
| You see any frayed cables or broken plastic parts. | Replace | A broken component is a sign of system failure. A patch won't last. |
| The metal track itself is bent or twisted. | Replace | A bent track can't be reliably straightened. It will always cause binding and strain the motor. |
| You want a reliable, long-term solution. | Replace | A new assembly restores the entire system to factory performance and gives you peace of mind. |
Ultimately, choosing a full replacement saves you from future headaches and ensures your window works like it's supposed to. The cost of a power window regulator repair is surprisingly affordable when you do it yourself, especially compared to the time and frustration you'll save by not having to do the job twice. Investing in a quality part now means you won’t be tearing into your door again in a few months.
Installing the New Regulator and Reassembling Your Door
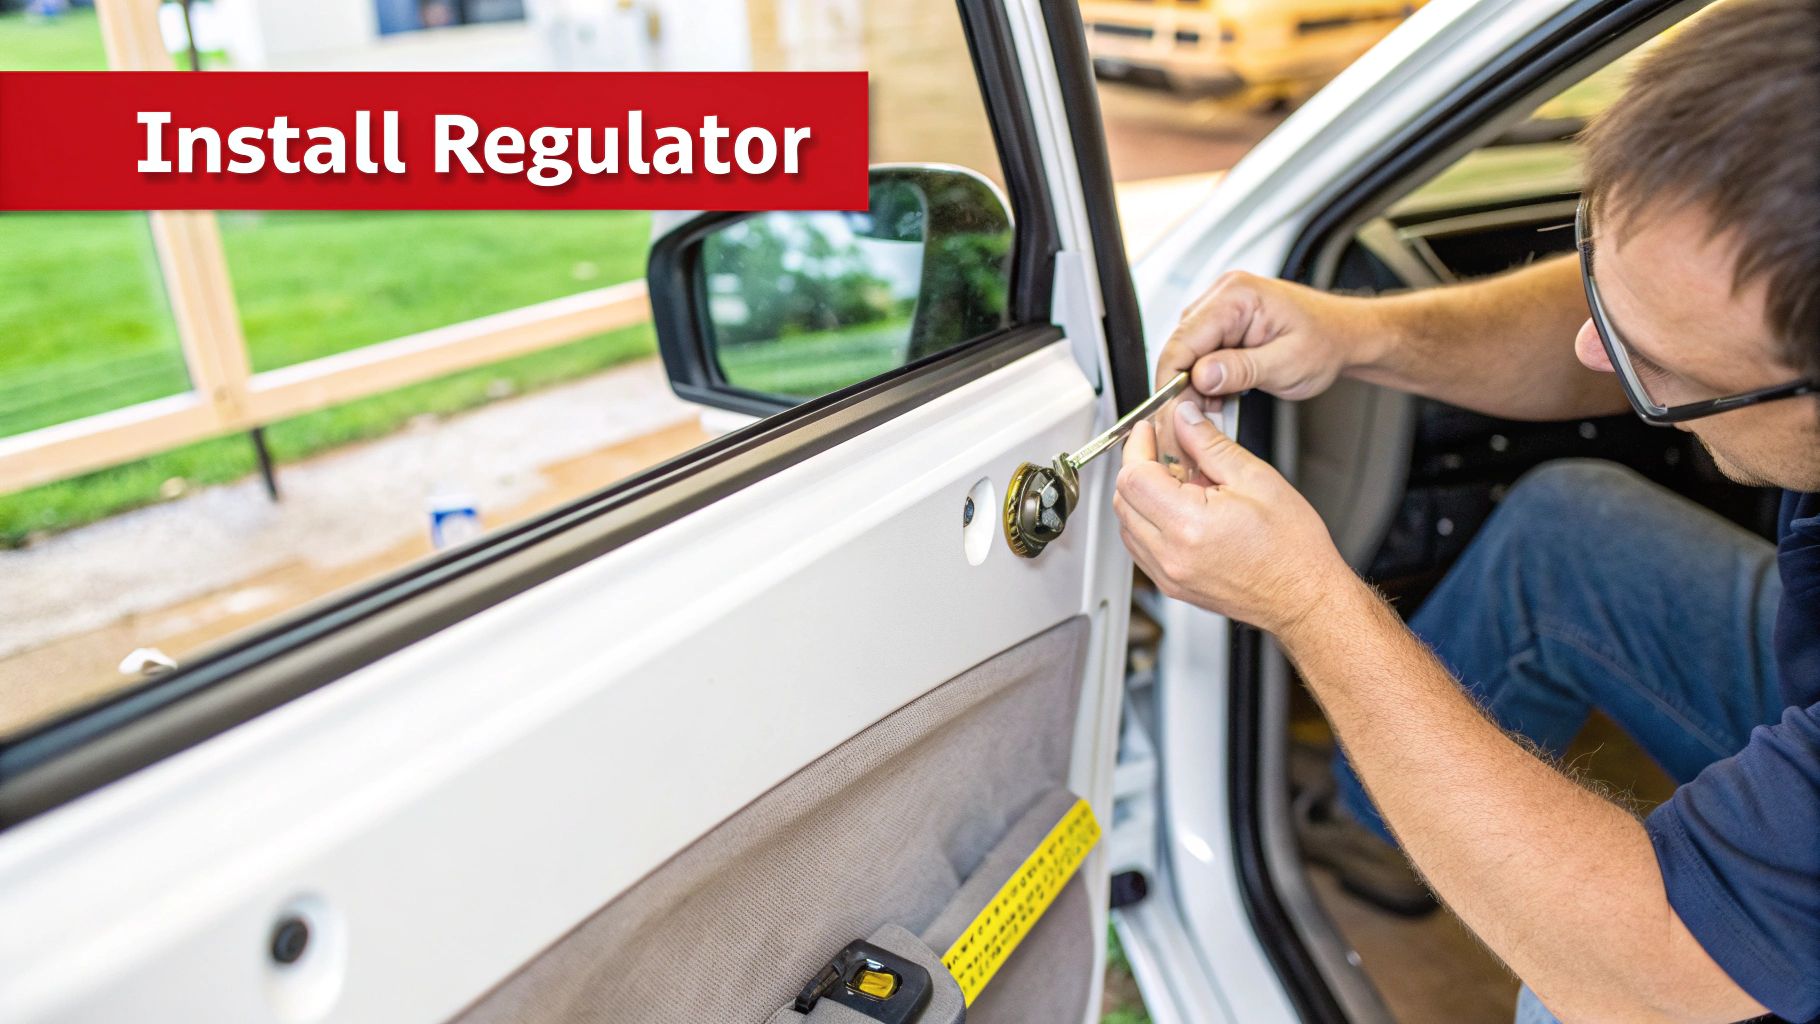
Alright, this is where the magic happens. Getting the new regulator in is usually a lot smoother than wrestling the old, broken one out. The name of the game here is patience and precision.
Start by carefully guiding your new T1A Auto regulator assembly back inside the door, using the same opening you pulled the old one from. Don't try to bolt it down tight just yet. Just get a couple of the mounting bolts threaded in loosely to hold it in place. You’ll want that little bit of wiggle room for the next part.
Aligning and Securing the New Assembly
With the regulator hanging in place, it's time to reintroduce the window glass. Gently lower the glass until it sits squarely on the new mounting clips. This is probably the most important alignment of the whole project, so take your time. You need to make sure the bolt holes on the glass clamp line up perfectly with the holes in the window.
Once everything is lined up, insert and hand-tighten the two bolts that clamp the glass to the regulator. Now you can go back and tighten down all the main regulator mounting bolts, securing the whole assembly to the door frame. Doing it in this order prevents you from putting any unnecessary stress on the glass or the new mechanism.
The All-Important Test Run
Don't even think about putting that door panel back on yet. This step is non-negotiable and will save you from the massive headache of having to tear it all apart again if something isn't right.
Temporarily plug the window switch back into its wiring harness. Make sure your hands and tools are clear of any moving parts, then go reconnect the negative terminal on your car battery. It's time to test your work. Run the window all the way up and down a few times.
- Watch for Smoothness: Is the glass traveling evenly? Any shuddering, jerking, or tilting is a bad sign.
- Listen for Noises: A new regulator should be almost silent. If you hear grinding, clicking, or straining, something's not right.
- Check the Seal: When the window is all the way up, does it press firmly against the weatherstripping?
If you notice any problems, disconnect the battery again and make your adjustments. Most regulator mounting holes are a little oversized, which gives you some play for fine-tuning. A few minutes spent getting it perfect now will ensure the fix lasts.
Pro Tip: Once the window is fully raised, give it a firm push from the inside with your palm. It should feel solid. If you feel any wobble or play, the bolts holding the glass to the clips probably need to be torqued down a little more.
Final Reassembly Steps
Once you've confirmed the window is operating flawlessly, you're on the home stretch. Just disconnect the battery one last time for safety.
Carefully press the plastic vapor barrier back onto the door. Make sure that black, sticky adhesive gets a good seal all the way around—this is what keeps water out and cuts down on road noise. Next, reconnect any plugs you disconnected for the speakers, power locks, or the window switch itself.
Finally, line up the door panel with its plastic clips and give it a few firm thumps with the heel of your hand to snap it back into place. Reinstall the last few screws in the armrest or by the door handle, pop any trim covers back on, and you're officially done. Reconnect the battery, and go enjoy a window that actually works.
Got Questions? We've Got Answers
Even the most straightforward repair can throw a curveball. When you're wrestling with a car window that's gone off its track, a few questions always seem to come up. Let's walk through some of the common ones I hear from folks doing this job for the first time.
One of the biggest temptations is to just try and force the glass back into the track. I get it—it looks like it just slipped out. But trust me on this, it's almost never that simple. A window doesn't just wander off track for no reason; something broke. It could be a snapped cable or a shattered plastic clip. Shoving it back in place without fixing the real problem is just setting yourself up for it to happen again, probably when you're in a drive-thru line in the rain.
"I Hear the Motor, But Nothing Happens. Is It Broken?"
Hearing that whirring sound when you hit the switch is actually a good thing! It tells you the motor has power and is trying to do its job. That noise is the sound of the motor spinning freely because the cable connecting it to the window has either snapped or jumped off a pulley. The mechanical connection is gone, so all that spinning isn't moving the glass.
In this classic scenario, the fix is to replace the entire window regulator assembly. The good news is you can almost always unbolt your original motor from the broken regulator and attach it to the new one. This saves you a good chunk of change.
DIY vs. Shop Costs: The Bottom Line
Taking your car to a shop for this repair will likely run you somewhere between $250 and $500, with labor being a huge part of that bill. By doing it yourself with a solid aftermarket part, you can usually get the whole job done for under $100. Your biggest cost is the part, making this one of the most satisfying and budget-friendly fixes you can do.
"How Long is This Actually Going to Take?"
Let's be realistic about timing—it's the key to keeping your sanity on a project like this. If you've never pulled a door panel off before, I'd block out a good 2 to 3 hours. That gives you plenty of wiggle room to work carefully, not rush, and avoid snapping any of those brittle plastic clips.
A seasoned pro might knock this out in an hour, but you're not racing anyone. Taking your time is what separates a successful repair from a frustrating one. When you're weighing whether to do it yourself, the overall car window repair cost is a major factor. Seeing the potential savings is often all the motivation you need to grab your tools and get to work. It helps you make a smart call that fits your budget, skill level, and schedule.
When you're ready to fix it right and fix it for good, T1A Auto has the quality replacement window regulators you're looking for. We engineer our parts with upgraded, more durable components and guarantee the fit for your vehicle. We're here to help make your DIY repair a total success. Find the right part for your car or truck at https://t1aauto.com.
