


Getting parking sensors installed professionally will typically run you between $250 and $550, covering both the parts and the labor. Feeling handy? If you're up for a DIY project, you can grab a solid aftermarket kit for $100 to $300 and install it yourself, pocketing a nice savings on labor.
What Does Parking Sensor Installation Really Cost?
Let's be honest, trying to squeeze into a tight parking spot can be a nerve-wracking experience. But it doesn't have to be. Adding aftermarket parking sensors is one of the smartest, most affordable safety upgrades you can give your vehicle. While you might get sticker shock from a dealership quote, the real-world cost for a quality aftermarket setup is much more reasonable.
The final bill really boils down to two things: the cost of the sensor kit itself and the time it takes a technician to get it wired up and working perfectly. Once you understand how that breaks down, you can figure out the best approach for your budget and your comfort level with a wrench.
A Quick Cost Breakdown
For the vast majority of cars and drivers, a standard four-sensor setup on the rear bumper is the sweet spot. It gives you great coverage without breaking the bank.
Here’s a snapshot of what you can expect to pay for a typical professional installation:
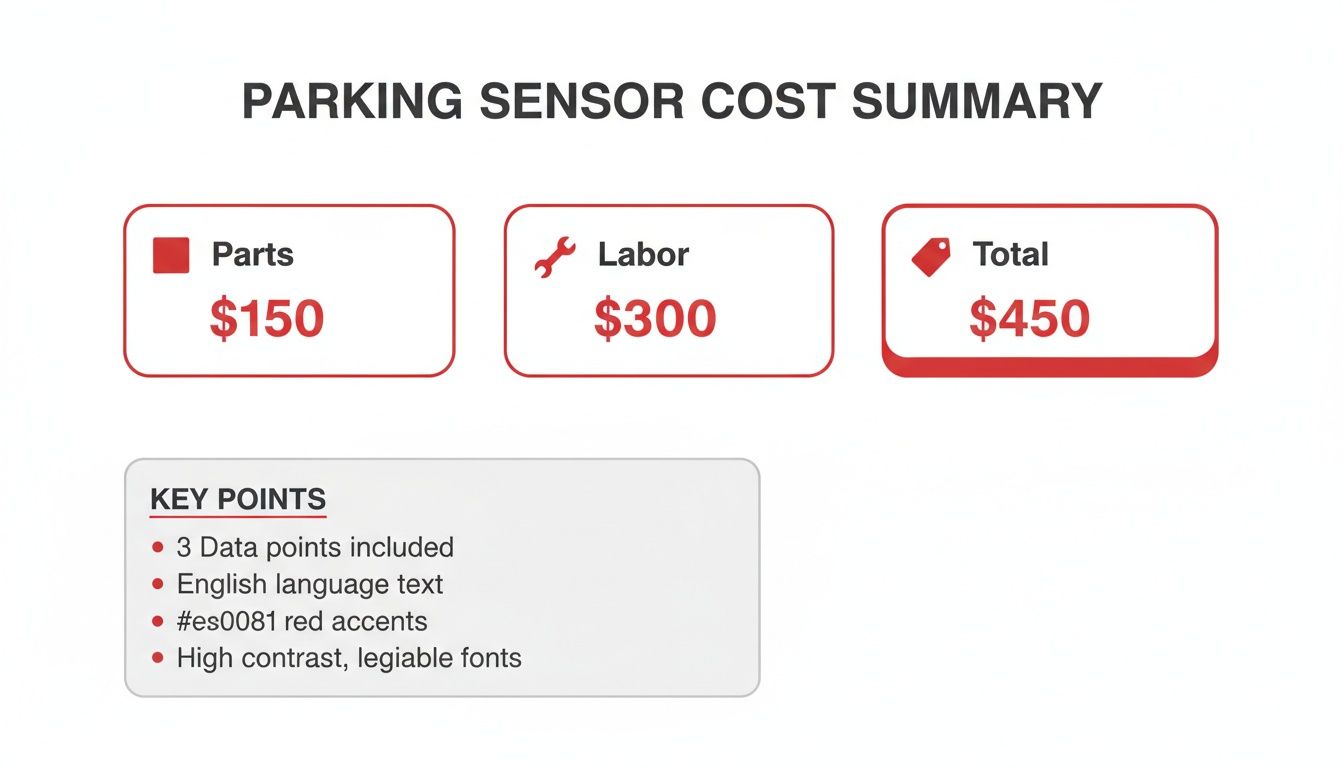
As you can see, the labor is where most of the money goes—often costing twice as much as the parts themselves. This is pretty standard across the board.
The numbers back this up, especially when you consider that North America accounts for a 35% global share of the automotive sensor market. A complete aftermarket ultrasonic sensor kit from a trusted brand will set you back $100 to $300 for the hardware alone.
Professional installation at an independent garage usually falls between $200 and $400. That's a huge bargain compared to dealership prices, which can easily soar past $800 thanks to OEM part markups and higher labor rates. If you want to dive deeper, you can read the full research about the automotive parking sensor market to see the trends. The takeaway is clear: there’s a big opportunity to save money without skimping on quality.
To make it even simpler, here's a table summarizing the costs you can expect.
Parking Sensor Installation Cost at a Glance
This table gives you a clear side-by-side comparison of going the DIY route versus hiring a professional for a standard four-sensor kit.
| Installation Type | Average Parts Cost (4-Sensor Kit) | Estimated Labor Cost | Estimated Total Cost |
|---|---|---|---|
| DIY | $100 - $300 | $0 | $100 - $300 |
| Professional | $100 - $300 | $200 - $400 | $300 - $700 |
Ultimately, the choice comes down to your budget and how comfortable you are with tackling the installation yourself. Both paths lead to the same result: a safer, more confident parking experience.
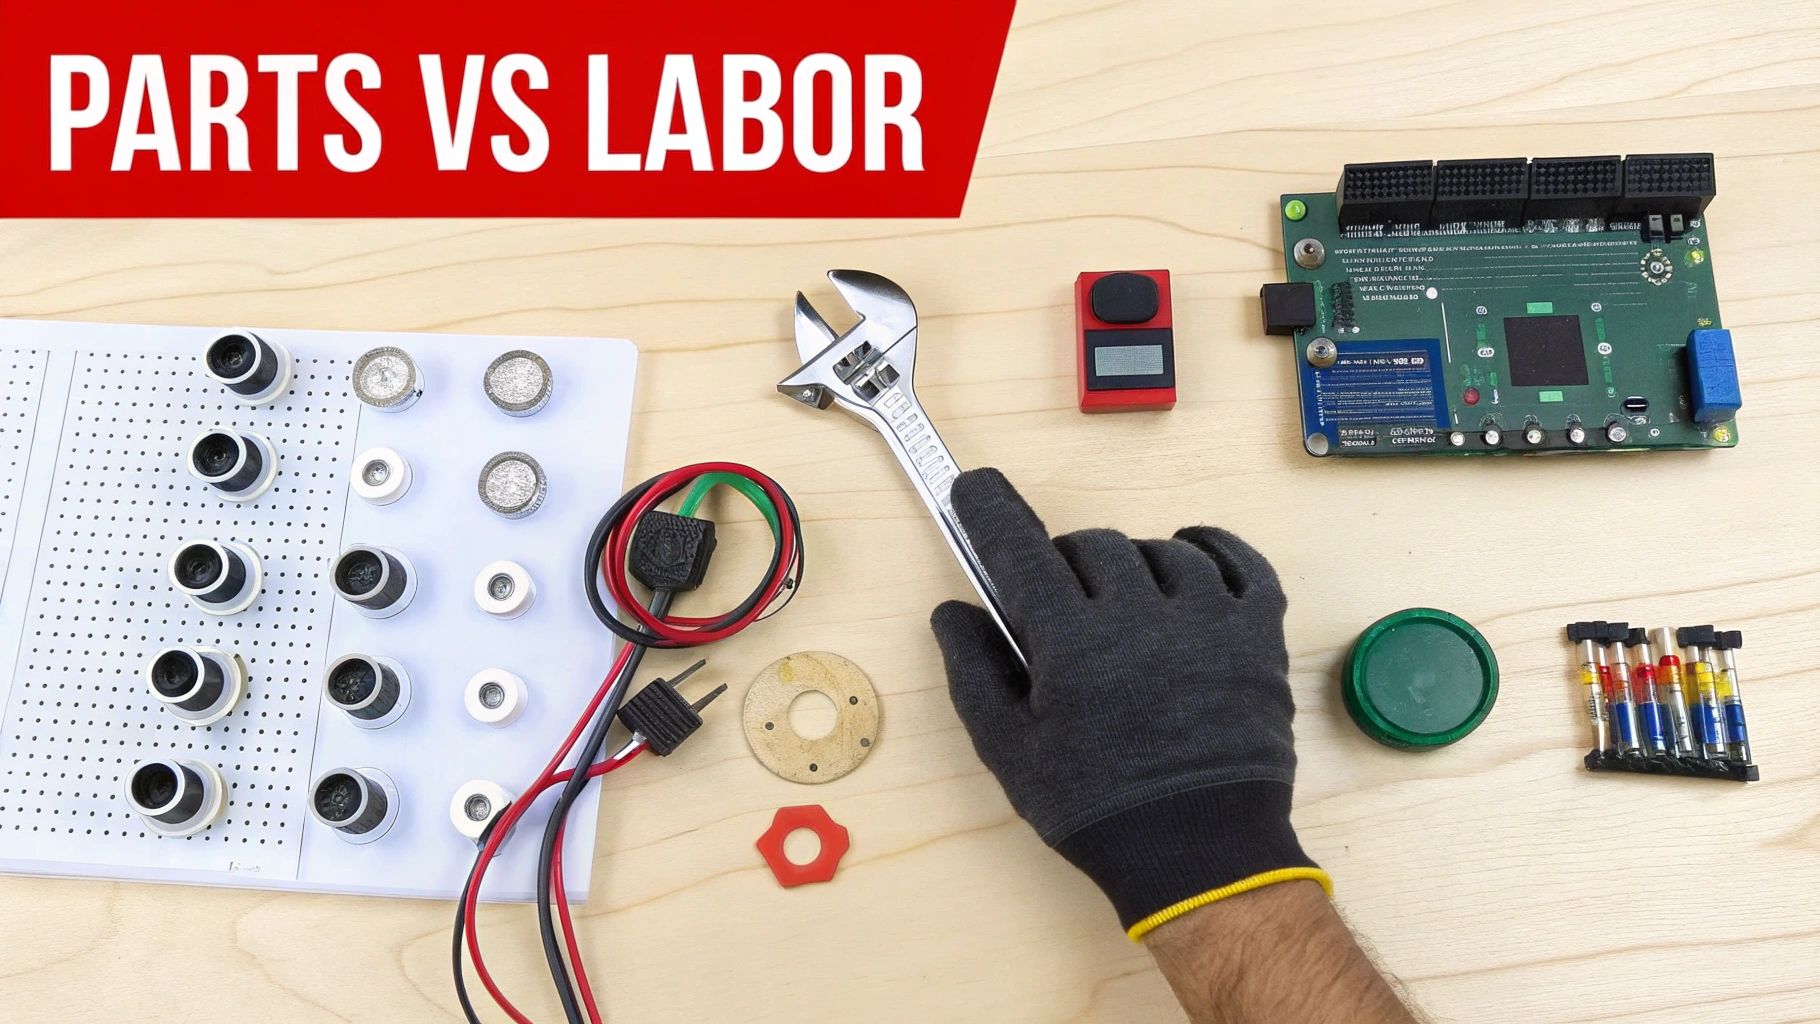
Deconstructing the Price: Parts vs. Labor
When you get a quote for a parking sensor installation, the final number is really telling two separate stories: the cost of the hardware itself and the cost of the skilled hands needed to put it all together. Figuring out how these two pieces fit into the total price helps you make smarter choices for your budget.
Generally, the physical parts make up about 30-40% of your total bill. The other 60-70%? That’s for the professional labor.
Think of it like getting a new kitchen faucet. You pay for the faucet itself, but you also pay the plumber for their time and expertise to make sure it's installed without leaks. Each part of that process has its own price tag.
Breaking Down the Cost of Parts
The "parts" on your invoice aren't just the little sensor discs. It’s the whole kit—the brain, the wires, the display, everything. And the price of that kit can swing quite a bit depending on what you're getting.
Here’s what drives the cost of the hardware:
- Type of Sensor: Most kits use ultrasonic sensors, which bounce sound waves off objects to measure distance. They’re reliable and affordable. Another option is electromagnetic sensors, which create a field behind the bumper and don't need any holes drilled, but they tend to be less common.
- Number of Sensors: A standard kit for the rear bumper usually comes with four sensors, which is plenty for most cars. But if you want full 360-degree awareness, you can get an eight-sensor system for the front and back, which will naturally cost more.
- Included Features: The simplest kits just give you an audible beep that gets more frantic the closer you get. Fancier systems might add an LED or LCD display inside the car to show you exactly how many inches you have left, which adds to the price.
This is where opting for quality aftermarket parts from a supplier like T1A Auto really pays off. You get hardware that’s built to fit perfectly and last, often meeting or even beating the quality of original factory parts, but without that dealership markup.
Understanding the Value of Labor
Labor is where you're paying for experience and precision. It might feel like a big chunk of the cost, but a pro installation is far more involved than just drilling a few holes in your bumper.
A technician's hourly rate isn't just for their time; it's for the meticulous work that protects your car's paint, electronics, and overall finish. It's an investment in getting the job done right the first time to avoid bigger headaches down the road.
Here's what that labor cost actually covers:
- Careful Bumper Removal: On most modern cars, the bumper has to come off completely to get to the right mounting spots. This is a delicate job that requires avoiding scratches and not breaking any of the hidden plastic clips.
- Precise Drilling: A good tech will measure everything twice to drill perfectly spaced and level holes. This isn't just for looks; it ensures the sensors work as intended.
- Discreet Wiring: The wires have to get from the sensors on the outside to the control module on the inside. This means carefully snaking them through the car's body and hiding them behind interior panels for a clean, factory-installed look.
- System Calibration and Testing: After it's all hooked up, the system needs to be tested to make sure it activates properly in reverse and gives accurate warnings.
This parts-and-labor model is standard for most vehicle upgrades. For instance, if you look at the RV awning replacement cost breakdown, you'll see the same principle at play. You’re paying for the awning itself, but you're also paying for the professional skill needed to install it safely and correctly.
Key Factors That Drive Your Final Cost
Think of a quote for installing parking sensors as a starting point, not the final number. Several things can nudge that price up, sometimes significantly. Knowing what these variables are ahead of time is the best way to budget properly and avoid that dreaded surprise on the final bill.
It's a bit like buying a tire. The price for a standard one on a family sedan is pretty straightforward. But if you need a specialized, heavy-duty tire for a big truck, you expect to pay more for the size and complexity. The same logic holds true here.
Vehicle Type and Complexity
Let's face it: not all cars are built the same, and that's especially true when it comes to adding new electronics. A modern pickup truck is a completely different beast to work on than a small, simple sedan.
-
Modern Trucks (like a Ford F-150 or Chevy Silverado): These often feature beefy steel bumpers, tons of trim pieces, and complex wiring that’s already tied into things like trailer hitches. Drilling through steel is tougher and takes longer than plastic, and carefully tapping into the right wires adds labor hours.
-
Luxury Vehicles & SUVs: Cars from brands like BMW, Mercedes, or even high-end SUVs are packed with advanced driver-assistance systems (ADAS). A technician needs to know exactly how to hook up new sensors without accidentally triggering a dozen warning lights. That specialized know-how costs more.
-
Simple Sedans (think Honda Civic or Toyota Corolla): These are usually the most straightforward. They often have plastic bumper covers that are easy to pop off and drill. The wiring is less complicated, making the whole job quicker and, therefore, cheaper.
A simple rule of thumb: the more panels, clips, and wires a technician has to carefully remove and reinstall to access the bumper, the higher the labor cost will be.
Add-Ons and Customizations
The base sensor kit is just the beginning. The features you choose to add will also affect the total price, increasing both parts and labor costs.
-
Paint-Matching Sensors: Most sensor kits come in a standard black finish. If you want them to blend in perfectly with your car's color, you'll need them professionally painted. This extra step at a body shop can add $50 to $150 to your total.
-
Front and Rear Systems: While installing a full 8-sensor system (four front, four back) at once is more economical than doing the jobs separately, your initial cost will be higher. You're buying a bigger kit and paying for almost double the installation time.
-
Display Integration: The most basic kits just beep. If you upgrade to a system with a dedicated LED display on your dash or, even better, one that integrates with your car’s factory infotainment screen, the job gets more complex. This means more wiring and sometimes programming, which naturally raises the labor cost.
How Common Factors Impact Your Installation Cost
To give you a clearer picture, here’s how different choices can add to your baseline cost.
| Cost Factor | Potential Additional Cost | Description |
|---|---|---|
| Bumper Removal | $50 - $150 | Required for most installations. Luxury or complex vehicles may be on the higher end of this range. |
| Number of Sensors (8 vs. 4) | $100 - $250 | The cost of the larger kit plus the extra labor for drilling, mounting, and wiring the additional sensors. |
| Paint Matching | $50 - $150 | Covers the cost of professionally painting the sensors to match your vehicle's factory color. |
| Display Integration | $75 - $200+ | For wiring a separate display or integrating with the car's existing screen, which requires more labor and expertise. |
| Vehicle Complexity | $50 - $200+ | Surcharge for luxury cars, trucks with steel bumpers, or vehicles with advanced electronic systems (ADAS). |
Keep in mind, these are estimates. The final variable is your location. Labor rates for a skilled auto technician can easily swing by 20-30% depending on whether you're in a small town or a major city.
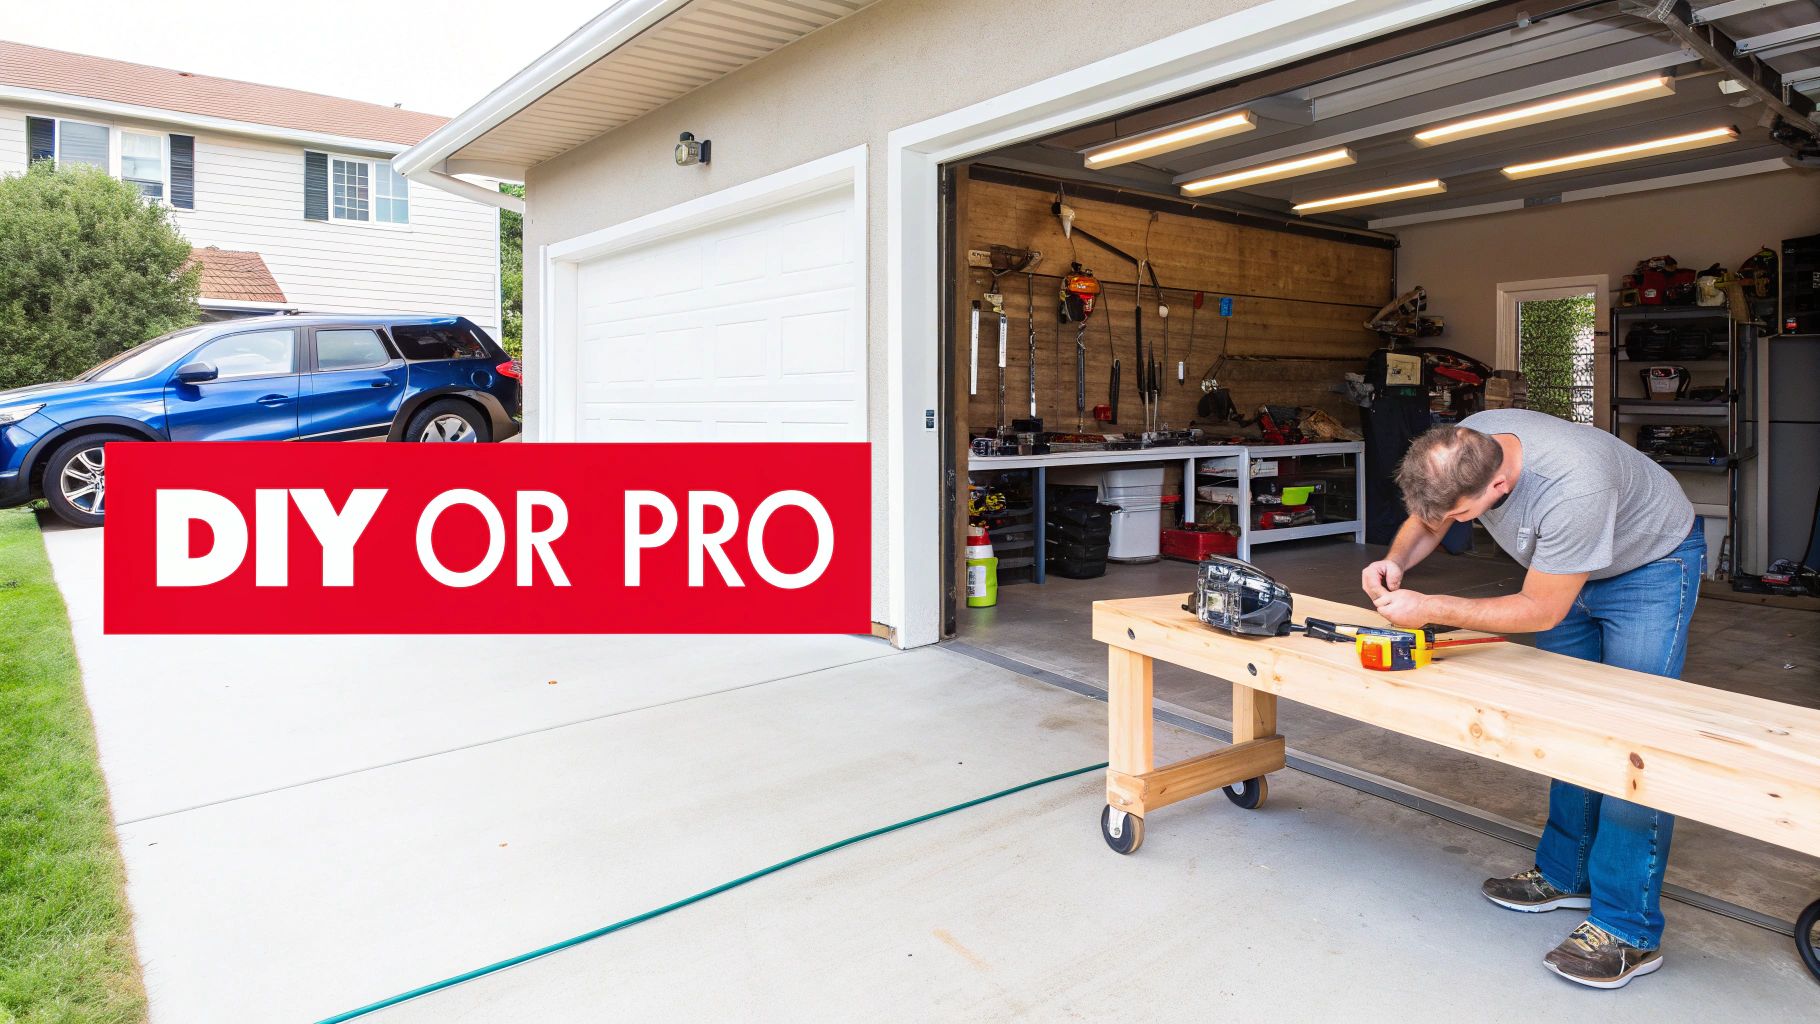
Choosing Your Path: DIY or Professional Install
When it's time to add or replace parking sensors, you've got a classic fork in the road. One path leads to a satisfying weekend project and some serious cash savings. The other offers professional precision and the peace of mind that comes with it. The right choice really boils down to your comfort level with tools, your available time, and your budget.
Going the DIY Route
For anyone who's handy and enjoys working on their own vehicle, the Do-It-Yourself (DIY) route is a no-brainer. It immediately slashes the cost by turning a "parts and labor" bill into just a "parts" bill. We're talking about potentially cutting your total spend by more than half.
This is your chance to pocket hundreds of dollars while getting to know your car or truck a little better.
The DIY path is especially popular for truck owners. If you've got a Tundra or a Silverado, you stand to save a bundle. With T1A Auto's premium sensors, the parts will run you between $120-$280. Most DIYers can knock out the installation in under three hours using the harnesses we include. Compare that to dealer rates that often start at $450+ once you factor in their diagnostic fees, and the savings are huge.
Plus, you're not going it alone. Our support team resolves 90% of customer questions within 24 hours, so you have a safety net if you hit a snag.
The Case for Professional Installation
On the other hand, there's the professional installation path. This is the way to go if you're short on time, don't have the right tools, or if the idea of drilling into your bumper and messing with your vehicle's wiring gives you hives. Yes, it costs more, but you're paying for an expert's time and a guarantee.
A professional technician brings a lot to the table:
- Experience and Precision: They’ve done this job hundreds of times. They know exactly where to drill, how to route wires safely, and how to make it all look factory-installed.
- Specialized Tools: Modern bumpers are held on by a tricky series of clips that are easy to break. Pros have the specific tools to get them off without causing damage.
- Guaranteed Work: A reputable shop will stand behind their installation. If a sensor fails or the wiring has an issue down the road because of their work, they'll fix it.
This route completely removes the risk of a costly mistake, like drilling a hole in the wrong spot or causing an electrical short. For many, that peace of mind is worth every penny.
Making the Right Decision for You
So, which path is yours? It really comes down to an honest look at your own skills and confidence.
If you've successfully done other car projects—like changing your oil, swapping out brake pads, or installing a new stereo—you probably have what it takes to install parking sensors. To see what's involved, check out our detailed guide on how to install parking sensors, which walks you through the entire process.
Ultimately, both paths get you to the same destination: a safer, less stressful parking experience. One rewards you with cost savings and the pride of doing it yourself, while the other offers a fast, guaranteed, and completely worry-free solution.
Why Quality Parts Are a Smarter Investment
When you're staring at the total cost to install parking sensors, it's really tempting to just grab the cheapest kit off the shelf. But I've seen it time and time again: a low upfront price often leads to a much bigger headache—and a bigger bill—down the road. What feels like the cheapest option today can easily become the most expensive one tomorrow.
It’s like buying a good pair of hiking boots. Sure, you could get a cheap pair that falls apart after one rocky trail, leaving you stranded. Or, you could invest in a quality pair that sees you through years of adventures. Your car's safety systems deserve at least that much consideration.
This isn't just about avoiding the hassle of a do-over. It's about investing in a system that works, without fail, every single time you shift into reverse.
The True Cost of Poor Quality
Let's be blunt: low-quality aftermarket sensors are notorious for failing early. They can stop working from a little moisture, an electrical hiccup, or just plain shoddy manufacturing. When that sensor dies, you’re not just back where you started—you’re out the money for the part and all the time you spent putting it in.
Even worse, a faulty sensor can give you false readings or, scarier yet, no reading at all. That creates a dangerous blind spot right when you need protection the most. It’s the difference between a smooth park and a sickening crunch. Suddenly, the $50 you saved on a bargain-bin kit disappears when you're looking at a $500 bill for paint and bumper repair.
The T1A Auto Commitment to Durability
This is exactly why investing in high-quality parts is the only move that makes long-term financial sense. At T1A Auto, we engineer our parts for durability and reliability. The whole idea is to meet or beat the original factory specs without the sky-high dealership price tag.
We believe a part should be a permanent solution, not a temporary fix. That’s why we back our components with a lifetime warranty, offering you complete peace of mind.
Here’s what really sets a quality part apart from the rest:
- Guaranteed Fitment: Our parts are guaranteed to fit your specific vehicle, which means no wrestling with installation or making frustrating modifications.
- Built to Last: We use upgraded materials to replace plastic components that are known to fail, ensuring the part holds up for the long haul.
- Reliable Performance: Every single sensor is tested to make sure it gives accurate, consistent readings. You can actually trust it when it matters most.
Choosing the right components from the start ensures your parking sensor installation cost is a one-time investment in safety, not the first of many repairs. For a deeper look into what makes a great sensor, check out our guide on the best aftermarket parking sensors and see how quality construction truly makes all the difference.
Answering Your Top Parking Sensor Questions
Even after we've walked through all the costs and benefits, you probably still have a few questions rolling around in your head. It's completely normal. Getting clear, straightforward answers is the best way to feel confident about your decision.
Let's tackle the most common questions we hear from drivers every day. Think of this as the final checklist before you pull the trigger.
Can I Add Parking Sensors to Any Car or Truck?
For the most part, yes. You can add parking sensors to just about any vehicle out there, whether it's a brand new pickup or a decade-old sedan. Aftermarket kits are designed to be pretty universal, fitting everything from compact cars to heavy-duty trucks.
The real question isn’t if it can be done, but how tricky the installation will be. A big truck or SUV often has a nice, wide, flat bumper that’s a dream to work on. On the flip side, a car with a sleek, curved bumper demands a lot more precision when measuring and drilling to get the sensors aimed just right.
The key is to start with a quality kit from a supplier that guarantees it'll fit your specific make and model. This simple step saves you a world of headaches by ensuring all the wiring, connectors, and sensor housings are a perfect match.
Is It Cheaper to Install Front and Rear Sensors Together?
Without a doubt. If you want full 360-degree coverage, installing a front and rear system at the same time is way more cost-effective. The big savings come from the labor.
Think about it: a technician only has to pull apart your car's interior trim, route all the wiring, and hook everything up to a power source once. If you split the job into two separate appointments, you're basically paying them to do all that time-consuming work twice, which could nearly double your labor bill.
For the DIY crowd, the logic is the same. Buying a complete 8-sensor kit is almost always cheaper than buying two separate 4-sensor kits. Plus, you only have to tear your car apart once—and that alone is worth it.
Will Aftermarket Sensors Void My Car Warranty?
This is a huge worry for a lot of people, but you can relax. Here in the United States, your rights are protected by the Magnuson-Moss Warranty Act. This federal law prevents a manufacturer from voiding your entire vehicle warranty just because you installed an aftermarket part.
For a warranty claim to be denied, the dealer would have to prove that the aftermarket part you installed was the direct cause of the problem. If your parking sensor system goes on the fritz, it's a pain, but our guide on troubleshooting when a parking sensor is not working can help you figure it out.
The best way to protect yourself is to use high-quality parts and make sure the installation is done right, so it doesn't mess with any of your vehicle's existing electrical systems.
How Much Do You Really Save with Aftermarket Sensors?
The savings are huge—it’s one of the biggest reasons people choose this upgrade. Getting OEM sensors installed at a dealership can easily set you back $800 to over $1,000. It’s a steep price.
Now, compare that to a premium aftermarket kit from a trusted brand like T1A Auto, which usually runs between $100 and $300 for the parts. If you have an independent shop do the install, you’ll probably add another $200 to $400 in labor. Even then, your total cost is often less than half of what the dealership would charge.
And if you’re comfortable doing the installation yourself? The savings are even better, making it one of the smartest and most impactful upgrades you can do for your vehicle.
Ready to enhance your vehicle's safety with a reliable, affordable solution? At T1A Auto, we offer premium, guaranteed-to-fit parking sensors designed for durability and easy installation. Explore our collection of high-quality parking sensors at T1A Auto and park with confidence.
