


If a tailgate handle cover looks flush and clicks into place, does that mean the job's done? No. A cover that sits pretty can still pinch handle travel, hide a bent rod, or leave one latch half engaged. That's the gap most parts listings don't close. You're not just replacing trim. You're working on the outside of a latch system that keeps cargo in the bed and the gate closed at speed. Fit the part, then prove the latch works.
Table of Contents
- Match Your Tailgate Setup Before You Order
- Remove the Old Cover and Inspect the Latch
- Install the Cover and Test the Latch
- Troubleshoot Common Latch Problems
- Materials, Durability and Theft Risk
Match Your Tailgate Setup Before You Order
Start in the driveway, not at checkout. Check five things on the truck itself before you compare listings. If you guess here, you'll order a close-looking cover that fights you at install.
- Model year, make, and model: Write down the exact year, not the body style range you think it falls in, and confirm the trim or cab if the listing asks for it.
- Bed length: Note whether you've got a short, standard, or long bed, because tailgate width and handle placement can change with bed configuration.
- Camera, LED, and power lock: Look for a rear camera, an LED light in the handle assembly, or a power lock that works with the fob. Each one changes holes, wiring, or internal clearance.
A tailgate handle cover isn't universal trim. It's a shaped part of the exterior handle and latch assembly, molded to the gate contour, handle pocket, and lock position for a specific application. A cover for another year can share the same basic outline and still sit high on one corner, crowd the lock cylinder, or misalign the camera hole by enough to matter. I would not order on photos alone. Photos show finish. They don't show clip spacing or rod clearance.
Match the Setup You Actually Have
Use the table below to identify your setup, then match every feature in the right-hand column, not just the handle shape.
| Tailgate setup | How to identify it | What to match |
|---|---|---|
| Standard handle bezel, no sensors | Handle is a plain bezel around the lock with no camera or LED holes | Model year, make, model, bed length and the bezel part number |
| Camera or LED hole in the assembly | Holes in the handle assembly for a rear camera or a light | Camera and LED hole layout as well as the handle shape |
| Power-lock tailgate | Powered actuator linked to the lock rods | Actuator and rod geometry, plus clearance for the actuator boot |
| Multifunction tailgate | Swing door, step or other special access feature | Opening style, latch linkage and the cover contour around the access area |
Opening style matters on newer gates because the handle may serve a section that moves differently from a plain drop-down panel. Ford's Pro Access Tailgate can open its swing door to 37, 70, or 100 degrees, according to Ford's century of tailgate innovation history. A cover shaped for that access area has to follow the swing section's contour and linkage. A standard bezel won't become correct because the handle pocket looks similar.
Why Exact Fit Is a Safety Check
The handle area connects to rods and latches on both sides of the gate. If the cover distorts, binds the lever, or leaves the mechanism exposed to impact and contamination, you're affecting more than appearance. The National Highway Traffic Safety Administration Safety Recall U74 instructions covered approximately 1,429,000 Ram 1500, 2500, and 3500 pickup trucks from model years 2015-2017, where a fractured limiter tab in the power-lock actuator could let over-travel pull the lock rods and release the latches. Your cover swap won't cause that defect, but the lesson applies. Alignment and clearance around the release mechanism protect the parts that do the actual latching.
Stop rule: If one feature on your gate doesn't match the listing, stop and confirm before you order. Don't plan to trim, force, or shim your way out of a fitment mismatch.
Before parts arrive, gather plastic trim tools, a labelled tray for fasteners, a phone for reference photos, and a small torque wrench that reads in inch-pounds or Newton-meters. For Ford-specific fitment context, check the guide to tailgate parts for the Ford F-150 before you narrow your search. As a pricing reference for matching by features, our tailgate handle assembly for 2014-2022 Toyota Tacoma and Tundra with camera and LED holes is on sale at $54.97, and a rod clip set of 5 pairs, left and right, for 1999-2007 Chevy Silverado and GMC Sierra is $8.97. Those examples show why you price the complete job, clips included, after fitment is confirmed.
Remove the Old Cover and Inspect the Latch
The old cover is in the way of the only clear view of the rods, clips, and actuator. Once the new cover is on, that view is gone unless you tear the gate down again. Work slowly and keep the fasteners organized.
A new cover placed over a bent rod hides the fault and leaves the latch unrepaired.
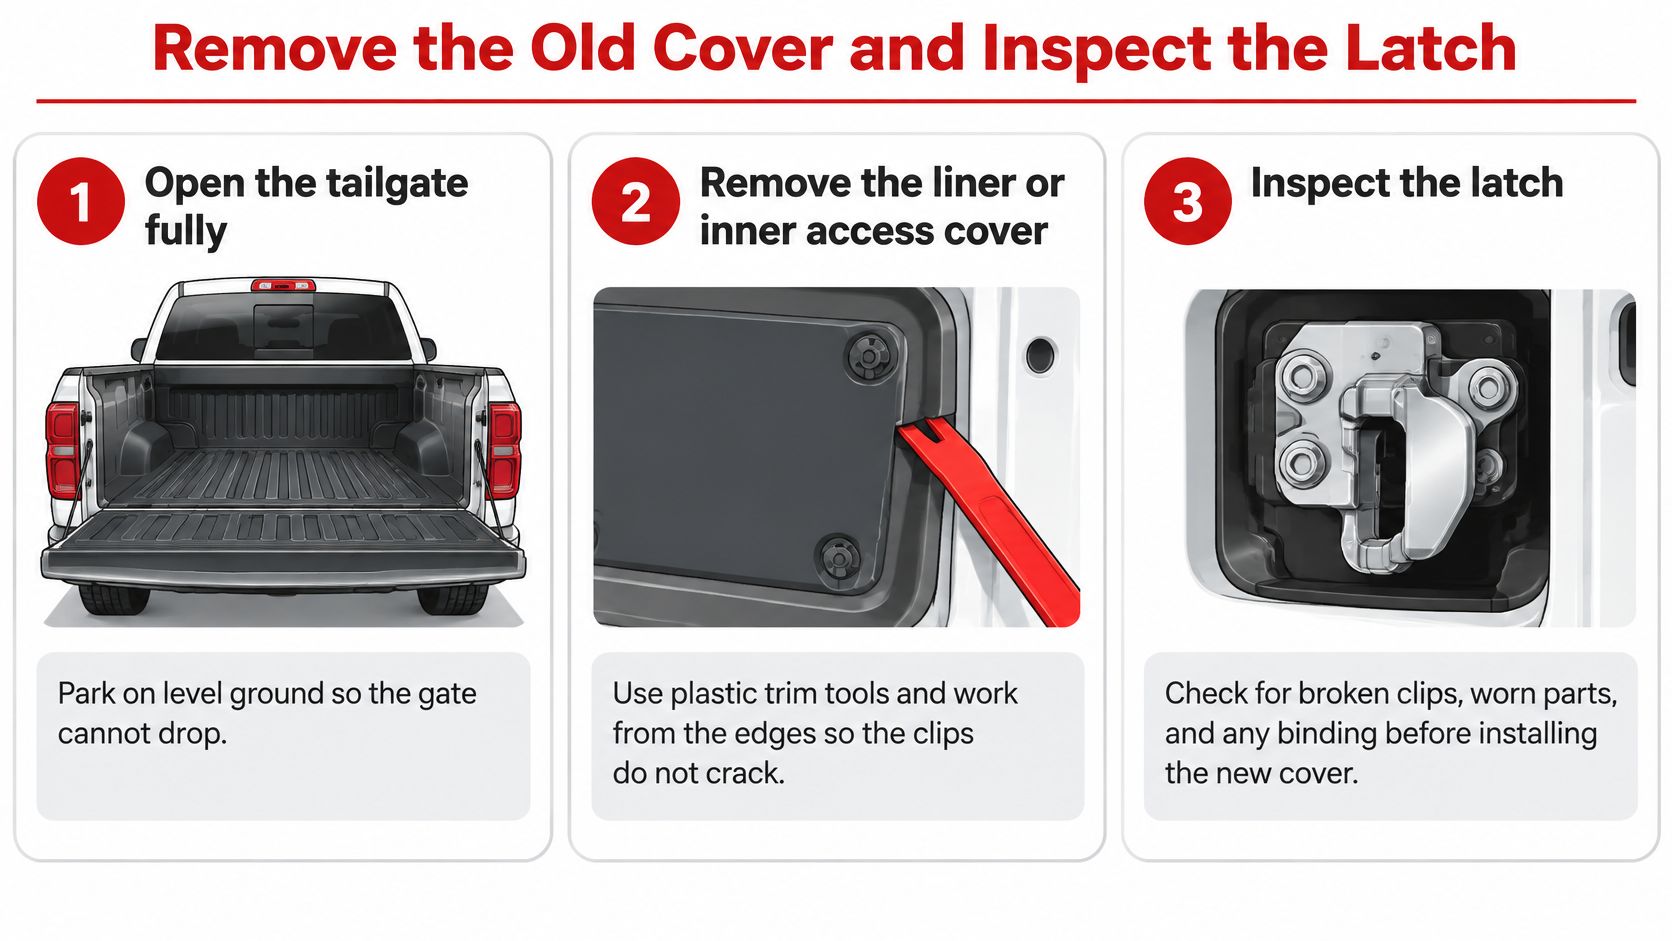
The graphic below outlines the basic sequence before you start pulling clips.
Removal in Five Steps
- Open the tailgate fully on level ground: Park where the gate can rest flat and cannot drop or swing while you lean on it and reach into the handle area. Support the gate if the cables or straps look worn.
- Remove the liner or inner access cover: Work from the edges with plastic trim tools so the clips release without cracking. A metal screwdriver concentrates force and tears clip towers. Ease one corner free, then move along the edge instead of prying harder at one stuck point.
- Photograph everything before you disconnect it: Capture fastener locations, clip positions, rod routing, and wiring. The new cover goes back in that same pattern, and memory fails once parts sit in a tray. Take one wide shot and one close shot of each rod clip.
- Remove the cover fasteners and lift the old cover away: Keep screws in a labelled tray in the order you removed them, especially if lengths differ. A long screw in a short hole can distort plastic or foul a moving part. If the cover hangs up, find the hidden clip instead of yanking.
- Inspect the rods, actuator, and threads, then cycle the latch by hand: Look for bent geometry, damaged threads, binding, cracked clips, and signs of over-travel. Move the handle through full travel and watch both rods reach the latch. The cover is cosmetic. The rods are what release the gate.
What to Look for Before the New Cover Goes On
Damaged latch-actuating-rod threads can leave a handle that will not open the tailgate, and the Ford service documentation reproduced in the NHTSA technical service bulletin file shows cover fasteners tightened in a specified sequence to 5 N·m (44 in-lb), not by feel. Treat that torque as an example for that procedure only. Your OEM service manual controls your truck.
A healthy assembly is easy to recognize. Rods run straight without kinks. Threads are clean and intact. Clips hold without slop. The handle moves smoothly through full travel with no catch at the release point, and both sides respond together.
I would not put a cracked clip back into service. Forcing a brittle clip usually spreads the damage to the liner or the rod end, and the gate comes apart again when that clip lets go. If any rod is bent, any thread is stripped, or the actuator binds, stop and fix that first. Fitting the cover now only makes the fault harder to reach, and the latch still will not open.
Install the Cover and Test the Latch
Start with the rule that protects the whole job. Don't drill, cut, bend brackets, or remove structural material to make a cover fit unless an OEM procedure explicitly authorizes it. A cover that needs a bracket bent is the wrong cover, or something behind it is already bent. Either way, forcing clearance creates a latch problem you didn't have before.
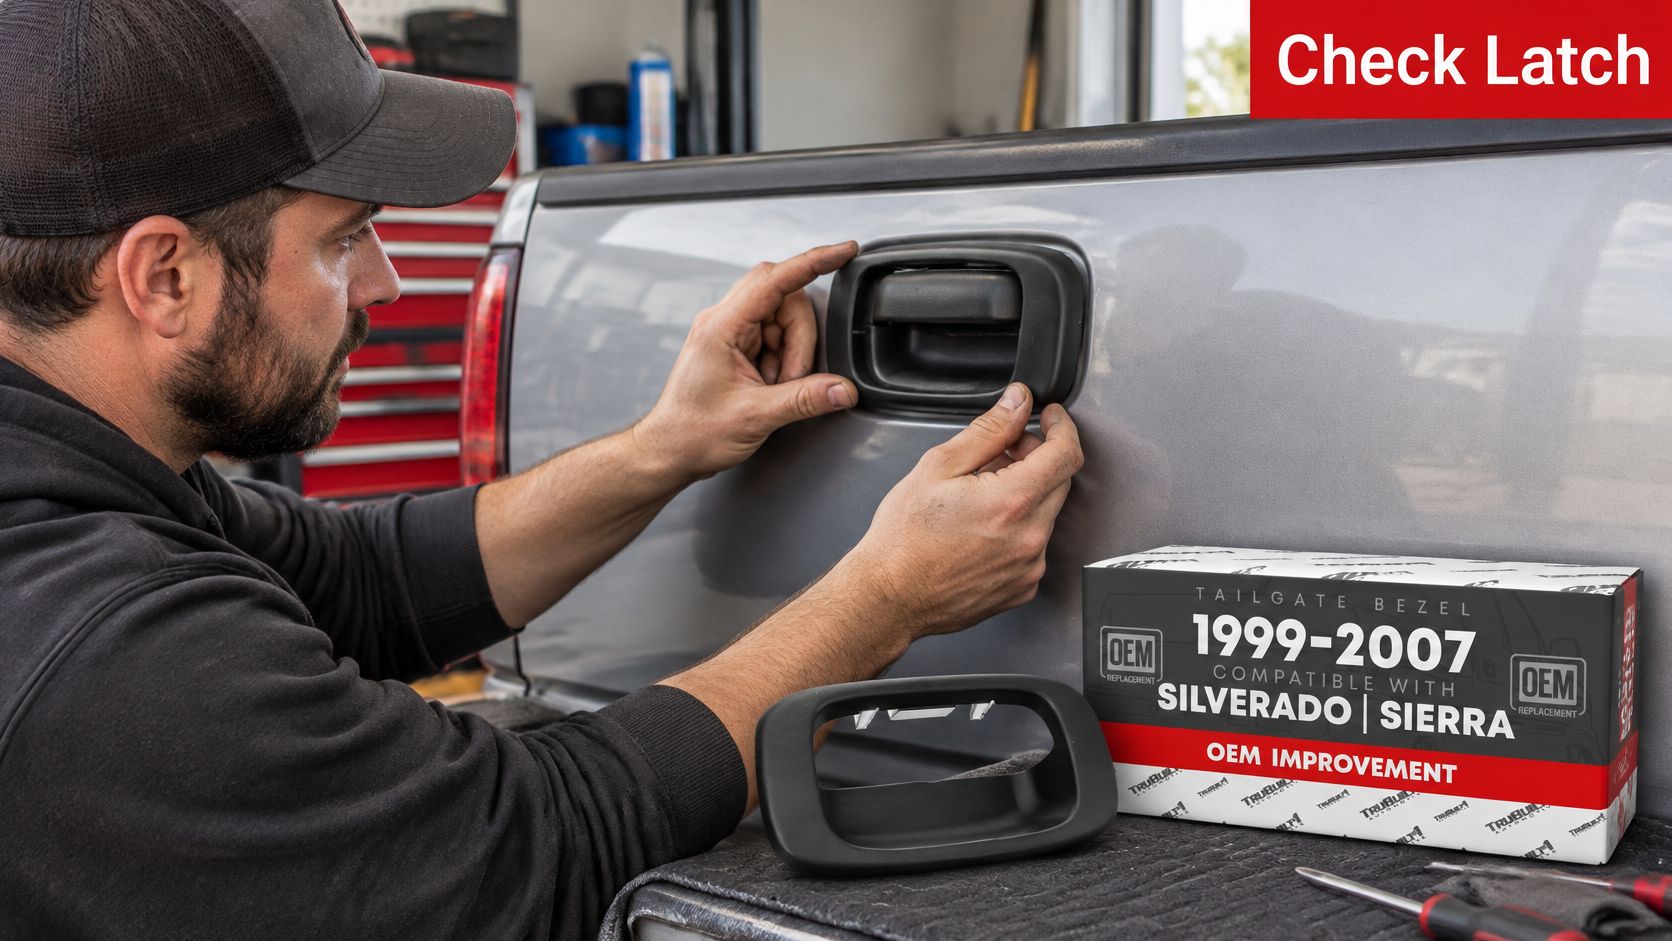
The photo below shows a bezel being seated on the gate, which is the stage where hand pressure, not tools, should tell you whether the part belongs there.
Fit the Cover Without Forcing It
- Dry-fit the new cover by hand: Hold it in place and move the handle through its full travel before any fastener goes in, because binding found now costs seconds and binding found after assembly costs a teardown.
- Check clearance around moving and electrical parts: Confirm the cover doesn't rub the lock cylinder, wiring, handle lever, or actuator boot, since light contact under no load becomes a stuck handle once fasteners pull the plastic down.
- Seat clips and fasteners in the photographed pattern: Start every fastener by hand first so the cover can settle evenly, then work in the sequence your service manual specifies. If one corner pulls down early, the opposite clip may ride out of its slot.
- Tighten with a torque wrench, not by feel: Plastic distorts when you overtighten it, which opens gaps for water entry, and loose fasteners back out and rattle. Both errors feel fine in the driveway and fail later.
One manufacturer bulletin in the NHTSA recall instructions for tailgate striker correction warns against tools that could bend or deform tailgate brackets and requires deburring and debris removal after authorized cutting. Those same instructions address misaligned strikers by adjusting striker position for acceptable closing effort, then torquing the striker to 34 N·m (25 ft-lb) on certain applications and 49 N·m (36 ft-lb) on others. Don't borrow either value unless your manual calls for it. Striker torque is vehicle specific, and guessing can leave a gate that slams hard but still doesn't latch squarely.
The video below is useful for watching handle and bezel handling before you commit fasteners, especially how the assembly presents to the gate.
Run the Latch Test Before You Drive
- Reinstall the liner, then test open and closed: Operate the handle through full travel, confirm both latch mechanisms release, close the gate fully, and pull outward without using the handle. Repeat the cycle several times and watch for slipping, excess closing effort, or a latch that doesn't reengage.
That pull test is the point of the whole job. A cosmetically perfect cover that restricts travel or masks striker misalignment can let the gate open unintentionally, which is a road-safety hazard and a fast way to lose cargo. If the gate needs force to close, one side releases late, or the handle feels gritty, remove the cover and recheck clearance and striker alignment. Don't drive on a maybe. Latches don't improve with road vibration.
Troubleshoot Common Latch Problems
Work symptom first, part second. Each failed test points to a small group of causes, and the check that confirms it is usually visual. Start with the cover off if you have to. You can't diagnose rod or clip problems through new plastic.
- Handle won't open the gate: Inspect the latch-actuating rod threads, rod clips, and cover clearance at the lever. Damaged threads or a clip that's popped free will let the handle move without pulling the rods far enough to release.
- Only one side releases: Compare both rods side by side for bends, binding, or a loose clip before you adjust anything else. The side that doesn't release usually shows shorter travel when you work the handle slowly.
- Gate needs force to close or won't reengage: Check striker alignment and look for witness marks showing the latch hitting high, low, or to one side. Adjust for acceptable closing effort per your service manual, then torque to the manual's specification.
- Rattles or a loose cover: Recheck clip seating and fastener torque in sequence. If the plastic is distorted from overtightening, loosen it, let it reseat flat, and retighten correctly instead of cranking it down harder.
- Handle sticks through its travel: Look for contact at the lock cylinder, wiring, or actuator boot, then reseat the cover or reroute the harness to its photographed position. Never bend a bracket to gain room.
- Gate opens unexpectedly or cargo shifts: Stop driving the truck with a load in the bed. That isn't a cover problem until a qualified technician proves otherwise, so have the full latch assembly inspected before you use the gate again.
One pattern covers most comebacks. Owners replace the visible part, skip the functional test, and discover the underlying fault with the bed loaded. I would rather spend ten minutes cycling an empty gate than trust a latch that only worked once.
If your truck is a Ford and the symptom points past the cover into the latch itself, the walkthrough on Ford F-150 tailgate latch repair covers the next diagnostic steps. Use it after you've confirmed the cover isn't binding the lever. Diagnosis in the wrong order sends you buying latch parts for a clearance problem.
Materials, Durability and Theft Risk
A cover is protective trim, not security hardware. The material decides how that trim holds up to glove pulls, lumber scrapes, and freeze-thaw cycles. Hinge access, the cable release, and the factory lock stay exactly as they were.
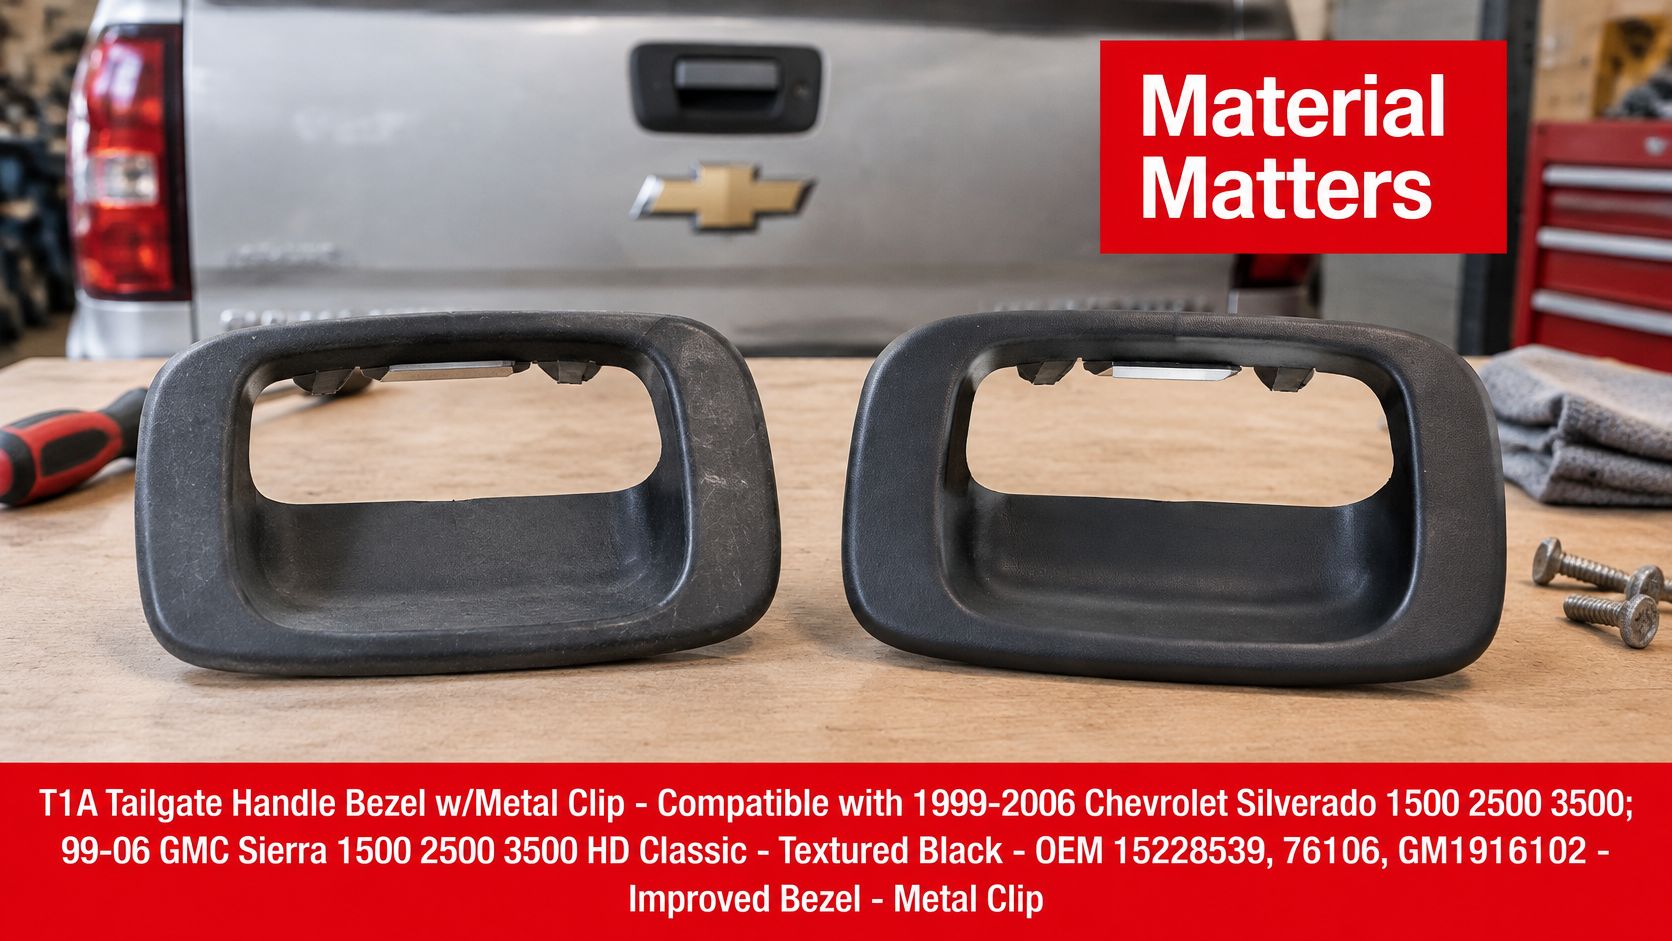
Plastic bezels hide scuffs and cosmetic cracks and match textured factory finishes. Years of sun and cold can make them brittle, especially around clip points that flex every time the cover comes off. Metal-upgraded parts take repeated opening cycles better and hold their shape longer at those stress points. On a work truck opened with gloves, tools, and lumber sliding past, I would pay for the stronger part. On a lightly used truck, a correct plastic bezel torqued properly will serve fine.
The bezels below show the kind of part you are evaluating, clips included. Clip condition is where durability is won or lost.
What a Cover Cannot Protect
Theft works through the hinges and cable release, so those need separate protection. Some Tacoma tailgates can be removed rapidly by opening the gate and disconnecting the support cables. Reporting on why Toyota Tacoma tailgates are popular theft targets notes that 19 of 20 stolen tailgates in Costa Mesa during the first months of 2024 were Tacoma units. A fresh cover leaves hinge geometry, cable-release access, and a weak factory lock untouched. A complete-looking gate can also be worth more once it is off the truck.
| Protection | Does a cover help? | Better fix if it falls short |
|---|---|---|
| Cosmetic damage | Yes, it hides cracks and scuffs | Replace the bezel or the full assembly |
| Weather sealing | Partly, if it seals tightly to the gate | Check gaskets and drain paths around the cover |
| Tamper resistance | Limited, because the lock cylinder stays exposed | Keep the factory lock working or add a lock |
| Theft deterrence | No, it does not block cable release or hinge access | Add a cable or hinge lock, or a tonneau cover as a secondary barrier |
Use the table as a decision rule. If the lock works, the truck parks in low-risk places, and the damage is cosmetic, the cover alone finishes the repair. If the truck is older, the lock is worn, or it parks on the street, pair the cosmetic repair with real deterrence: a hinge or cable lock, VIN or plate marking, and a tonneau treated only as a secondary barrier. A tonneau slows access. A working tailgate lock still has to be there. For matching hinge, latch, and fastener hardware, see the overview of a tailgate hardware kit. After any security add-on, cycle the lock cylinder and the handle. A guard that crowds the handle binds the lever the same way a wrong cover does.
Shop T1A Auto for tailgate handle covers, upgraded metal handle assemblies, rod clips, cables, and latch hardware searchable by vehicle. Confirm camera, LED, and power-lock features against the listing, install to your service manual's torque spec, and run the full latch test before you load the bed.
